Using Bitrix24 CRM forms, you can collect user consents, such as for processing personal data, receiving marketing campaigns, and more. This helps companies comply with the law while protecting customer interests. Without such consents, storing contacts in the CRM or sending advertisements is not allowed.
You can add various agreements to the form to inform customers about delivery terms, promotion rules, and other important details. Once the customer reads the text and confirms their consent, this information and the form data are saved in the CRM.
In this article:
- Add and delete agreements
- Create a new agreement
- Edit an agreement
- View the list of received consents
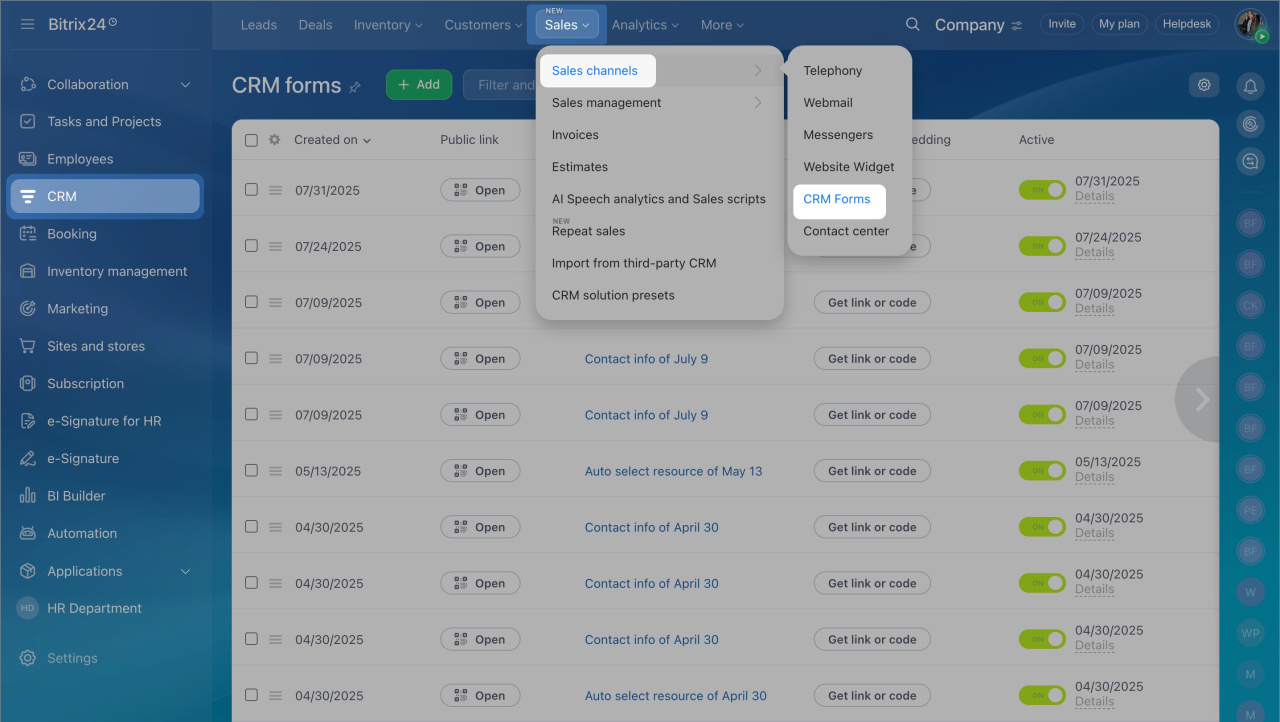
- Go to the CRM section > Sales > Sales Channels > CRM Forms.
- Open the required form or create a new one.
Create and configure CRM forms
Add and delete agreements
By default, all forms include a checkbox for consent to process personal data. You can edit the standard agreement, create your own, or add additional checkboxes to the form.
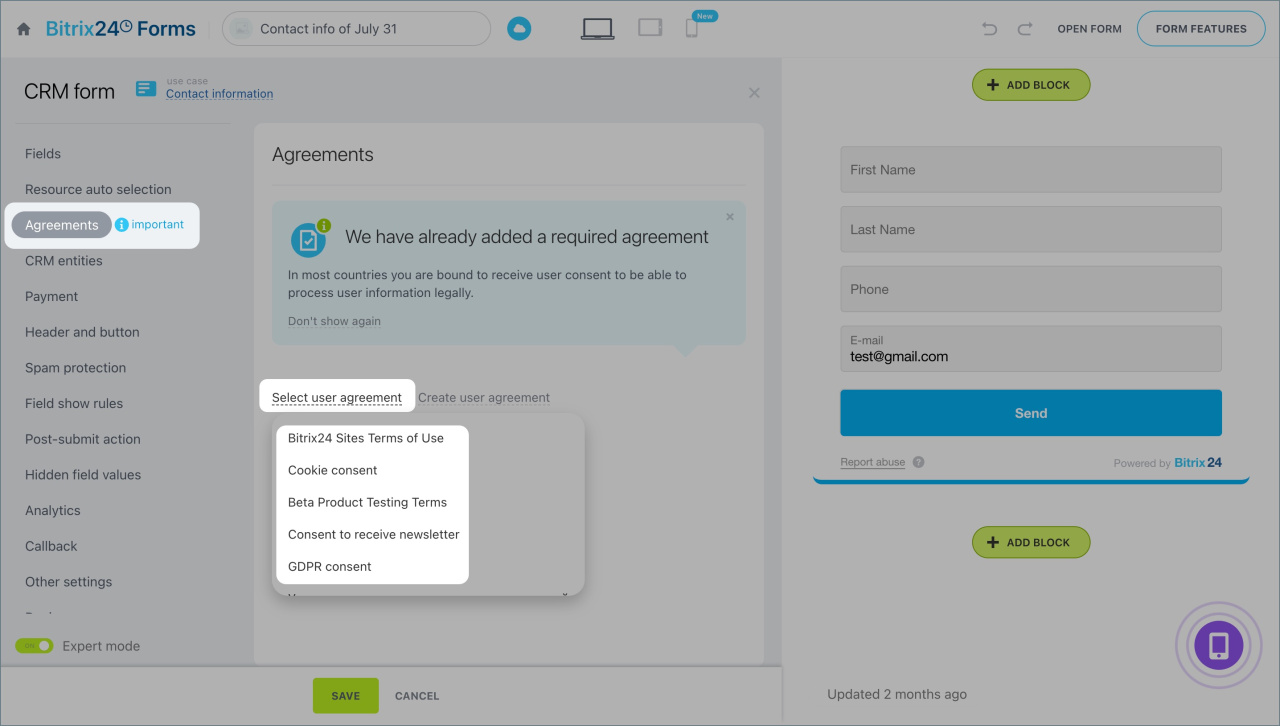
- Go to the Agreements tab.
- Click Select user agreement and choose the required one from the list.
- To delete an agreement from the form, click the cross icon.
- Save the changes.
Create an agreement
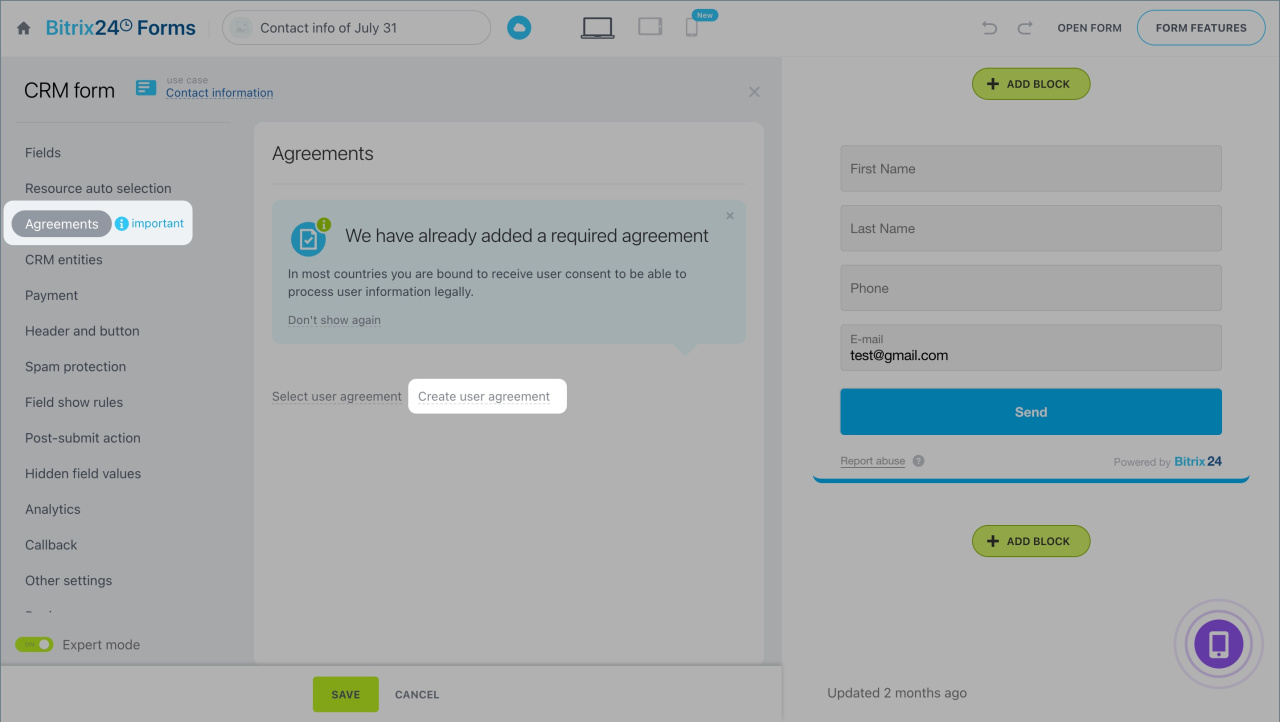
You can use a ready-made agreement template or create one from scratch. Click Create user agreement and fill in the sections.
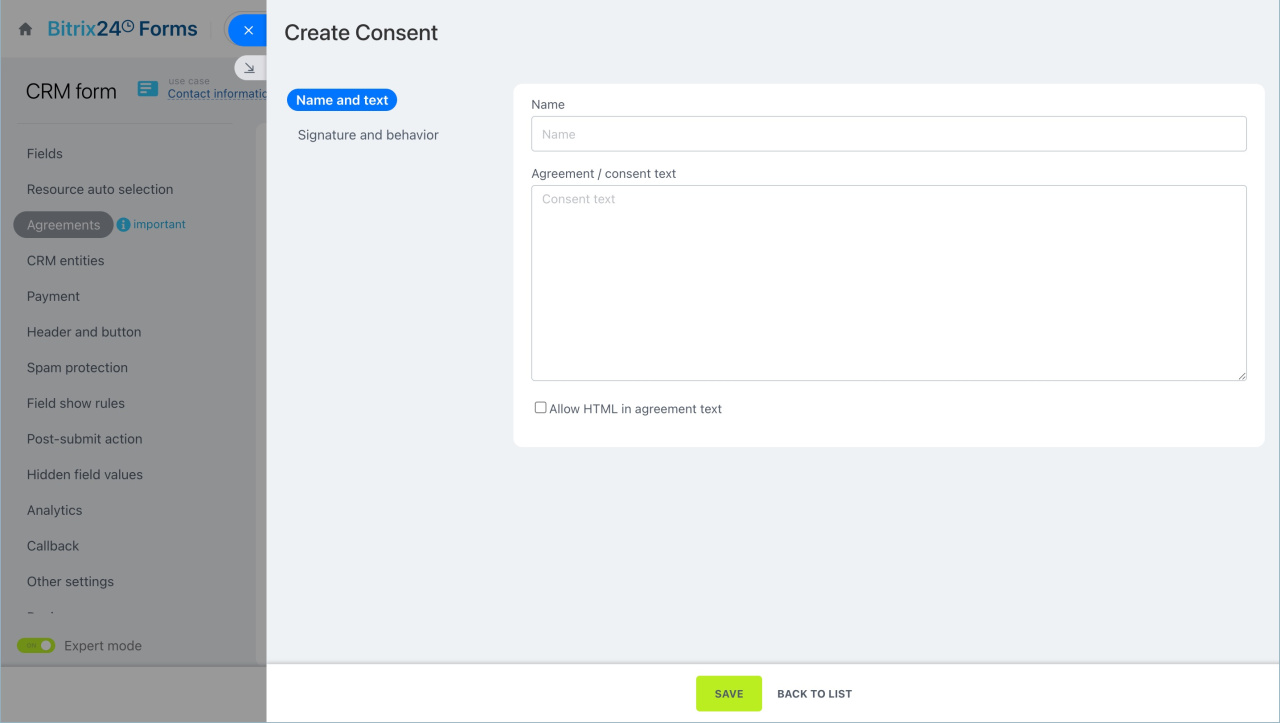
Agreement text
Fill in the fields:
Name. Specify a name that makes it easy to find the agreement in the list. For example, include the type of consent and the company name.
Type. Choose from the list: custom or standard. This determines the available configuration fields and whether the text can be edited.
Custom agreement can be created from scratch and formatted using HTML code: highlight headings, add links, and more. To ensure the text with tags displays correctly, check the Agreement text in HTML format option.
Standard agreement for processing personal data. Select the template and click View.
Add your company details to the agreement for processing the data.
In the Data source field, select My company details in CRM. If you have multiple companies, the primary company details will be used.
If you haven’t added details to the company form, click Configure > Menu (≡) > Edit and enter the information.
If you are creating agreements for several companies, you can manually enter the details. In the Data source field, select Manually specified and fill in the Company name and Company registration address fields.
Signature and behavior
The fields available in this section depend on the agreement type.
Custom. You can change the text next to the checkbox and configure redirection, for example, to a page with full promotion terms. Check the By clicking a submission button, I agree to Consent option and add the URL.
Standard. In the agreement settings, specify:
- The purposes for processing personal data based on your company’s processes. These may differ from those in the standard agreement text — describe them in detail. For example, for providing services, evaluating service quality, or participating in a loyalty program. Specify storage and processing periods.
- The companies to which you transfer customer personal data. For example, third-party services for order delivery. Provide the full company name, tax ID, and address.
- An email address where customers can send complaints or requests to withdraw consent and delete personal information.
Click Save — the agreement will be added to the form.
Edit an agreement
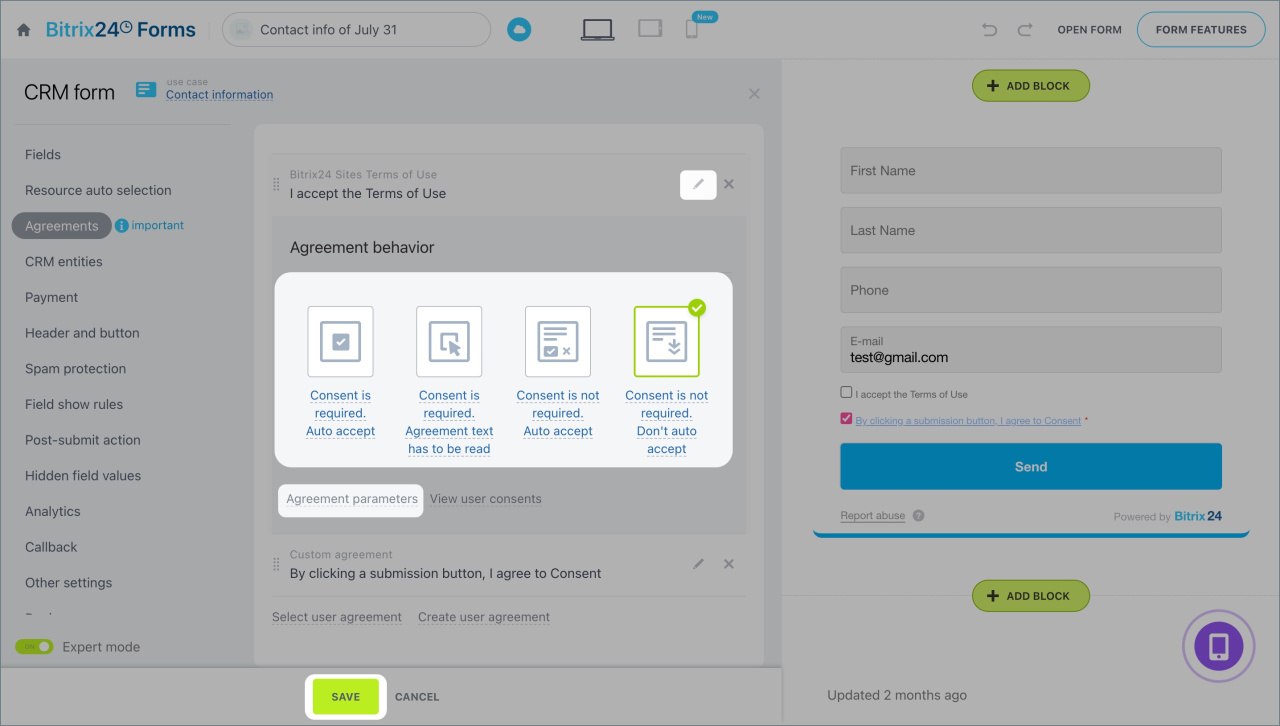
You can configure how the checkbox works, change the text, signature, and agreement parameters. Click the pencil icon to access the settings.
In the Agreement behavior section, choose how the customer can confirm their consent:
- Consent is required. Auto accept. The checkbox is pre-selected. If the customer unchecks it, they cannot submit the form.
- Consent is required. Agreement text has to be read. To submit the form, the customer must check the box. Clicking the checkbox opens the agreement text — they need to read it and click Accept.
- Consent is not required. Auto accept.The checkbox is pre-selected by default, but the customer can uncheck it and submit the form.
- Consent is not required. Don't auto accept. The customer can accept or decline the agreement. Clicking the checkbox opens the full agreement text.
To edit the text, signature, and other agreement parameters, click Configure agreement. Save the changes.
View the list of received consents
When a customer gives their consent, such as for processing personal data or receiving marketing campaigns, this information is saved in the CRM. Each consent from the form creates a separate entry in the list.
You can access the list in the CRM form settings.
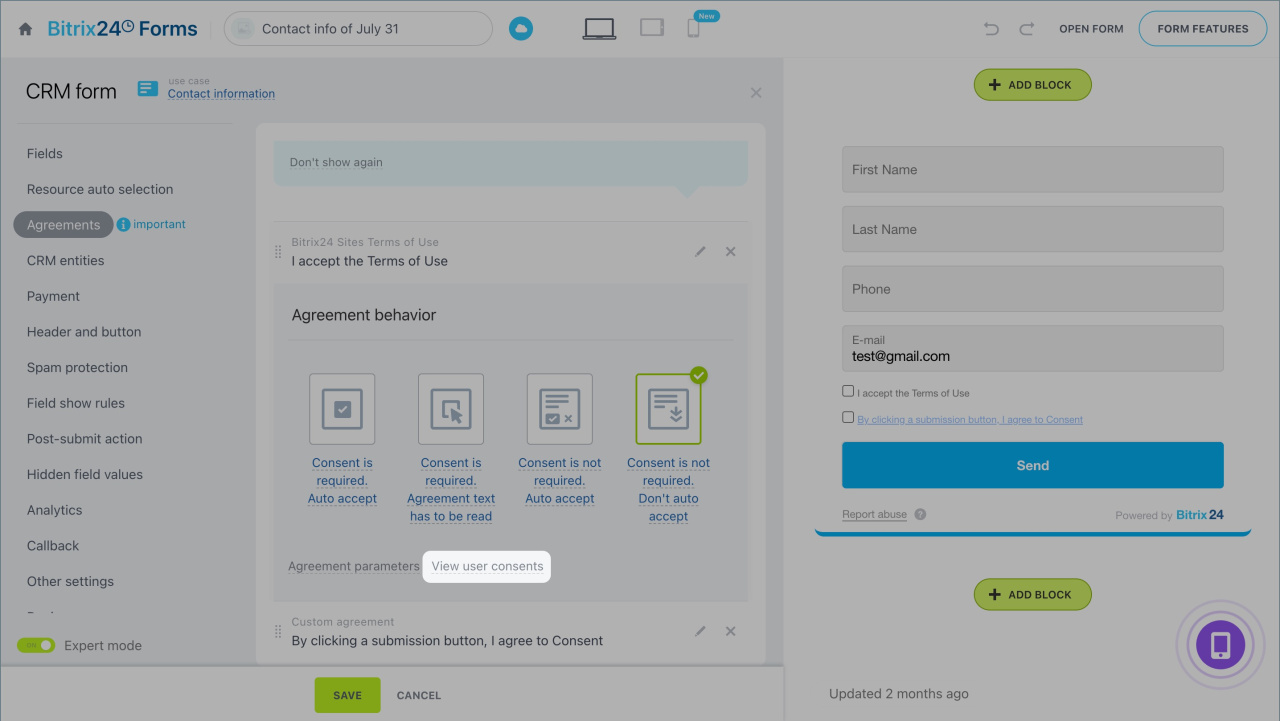
- Go to the Agreements tab and click the pencil icon.
- Click View user consents.
The list includes key information about the consents:
- Date — when the customer confirmed their consent.
- User — filled in if the consent was confirmed by a Bitrix24 employee, collab member, or an authorized customer of a Bitrix24 online store.
- Customer’s IP address.
- Data source for the accepted consent: CRM item, site, etc.
- Page address where the customer confirmed their consent.
You can sort consents by specific parameters. For example, view all consents for processing personal data received over the past week.
- Click Filter and specify the required agreement in the Agreements field.
- In the Date field, select Last 7 days and click Search.
- To view customer data, open the CRM item listed in the Source column.
In brief
- Bitrix24 CRM forms allow you to collect user consents for processing personal data, receiving campaigns, participating in promotions, and more. This helps companies comply with the law while protecting customer interests.
- You can use a ready-made template for personal data processing consent or create any agreement from scratch, configure its behavior, and edit the text and name.
- Customer consents are stored in the CRM in a separate list.
- To view the list of accepted consents, open the CRM form. Go to the Agreements tab, click the pencil icon, and then View user consents.
- The consent list includes the date, customer IP, source, and page where the customer confirmed their consent. This information cannot be deleted.
- Use filters to search for consents by parameters. To view customer data, click the CRM item in the Source field in the consent list.

