Moving tasks to Bitrix24 from any other service is simple. Just save the task information as a CSV file and upload it.
To start the task list import,
-
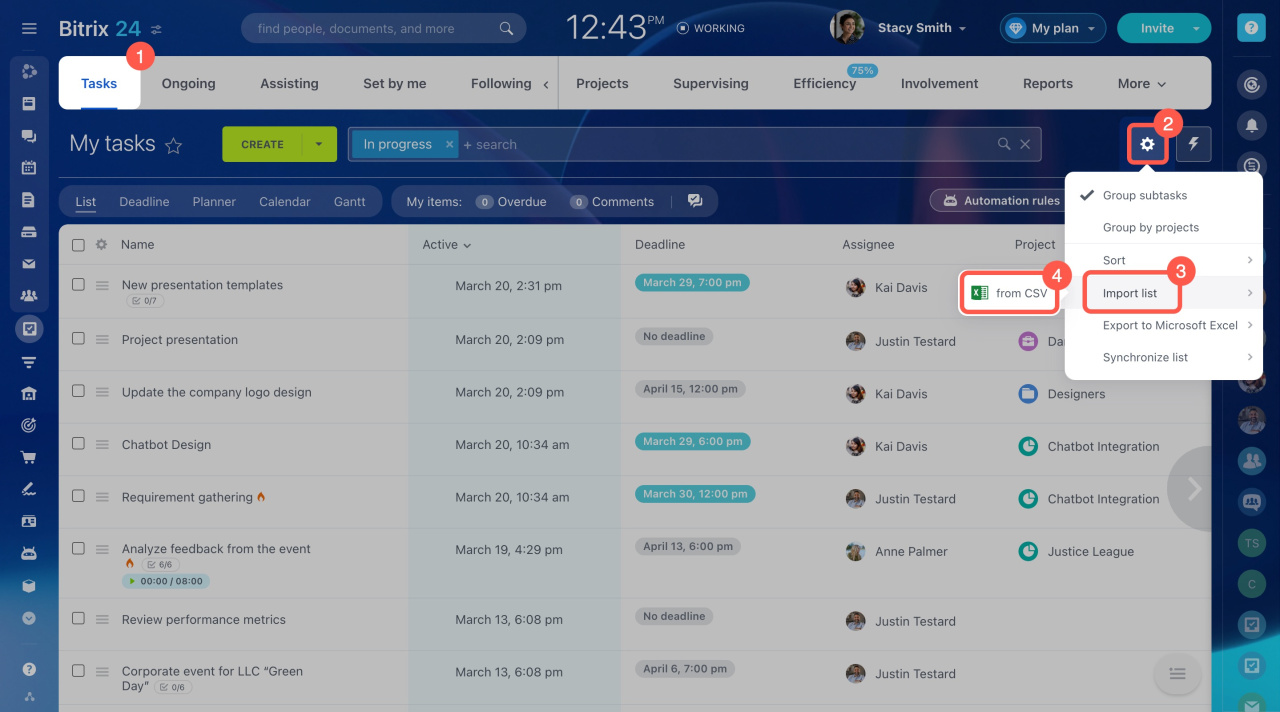
Open the Tasks and Projects section and select Tasks.
-
Click the gear button on the right.
-
Select Import list from the drop-down menu.
-
Then click from CSV.
The Import Tasks section will appear. To make the process easier, scroll down the page and download the file template.
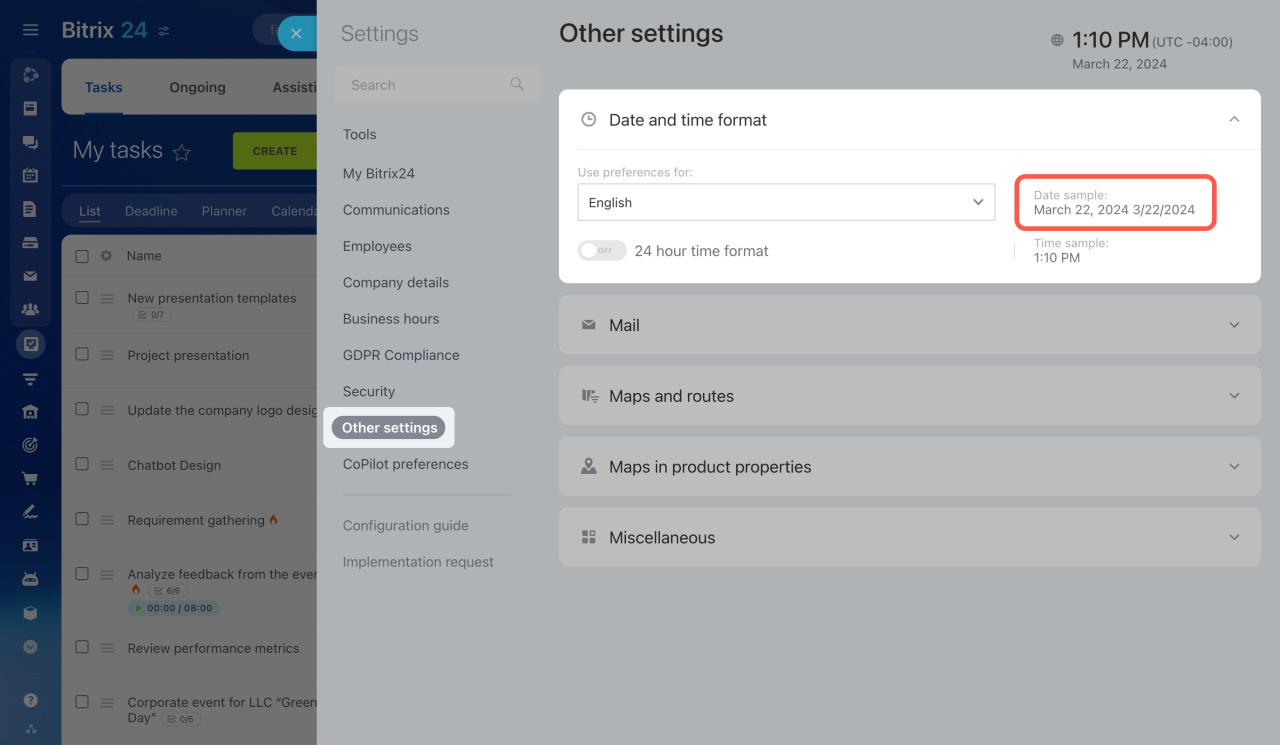
Make sure to enter dates in your CSV file in the same format as used in your Bitrix24. Check the date format under Account settings > Other settings > Date format.
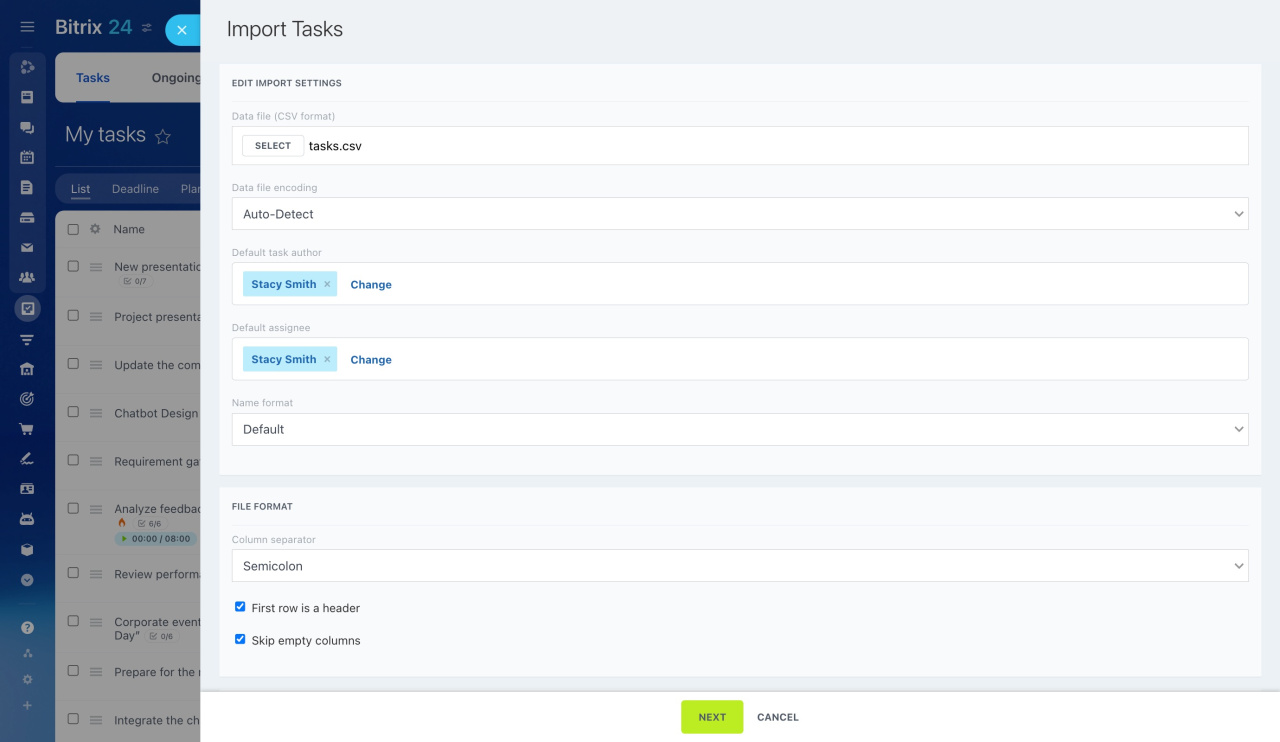
When your CSV file is ready, select it in the Data file (CSV format) field and edit the import settings.
-
Data file encoding: Pick the right encoding for your data file. If you are not sure which one to use, the Auto-Detect option lets Bitrix24 choose the best encoding for you.
-
Default task author: Decide who will be listed as the creator of the tasks.
-
Default assignee: Specify who will be in charge of the imported tasks.
-
Name format: Select the format for displaying names.
-
Column separator: Choose the separator used in your file.
: Define if the first row in your file serves as a header.
: Specify if you want to ignore any empty columns in your file.
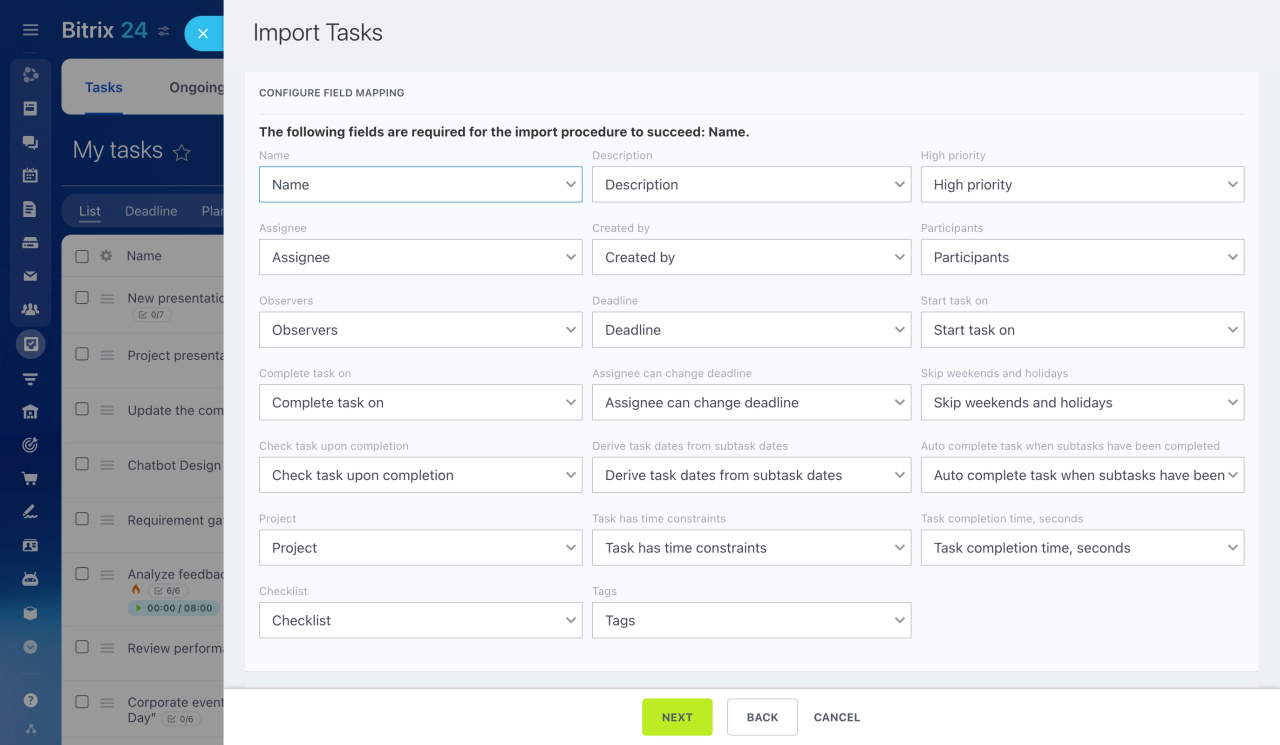
Then click Next and configure field mapping.
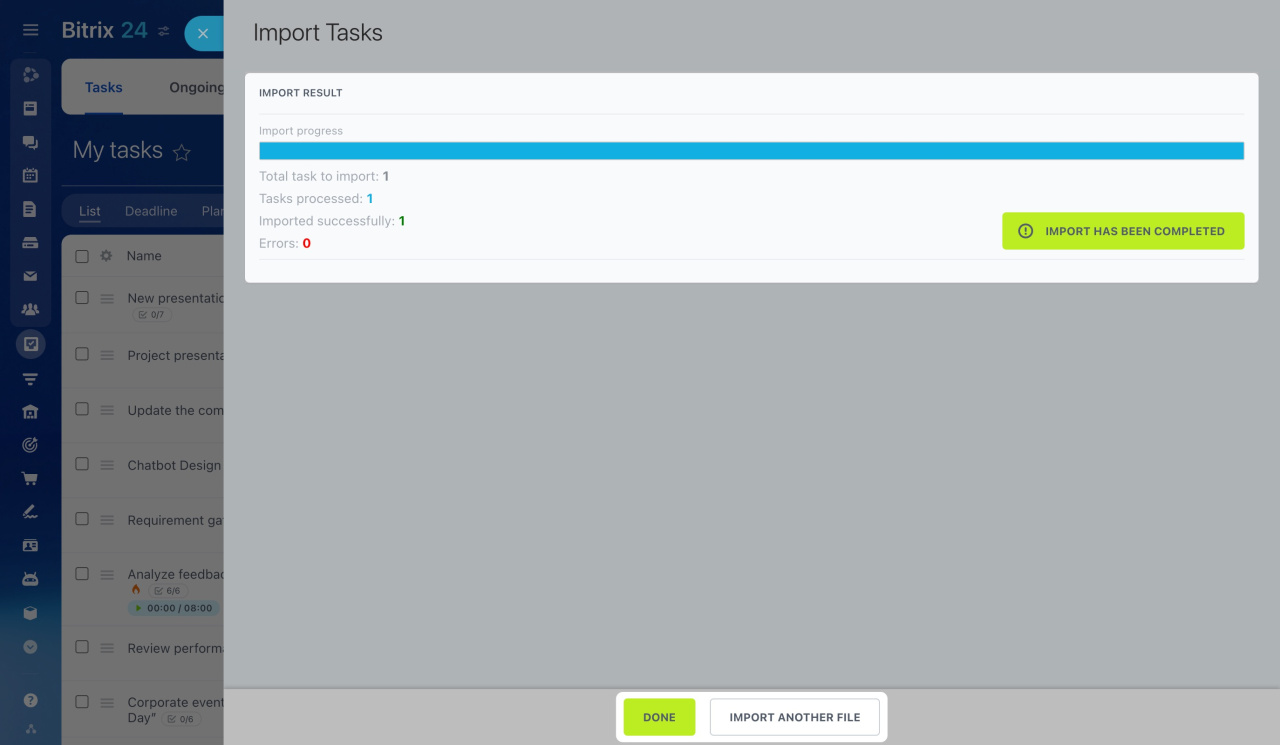
Finally, review the import results. If there are no errors, click Done.
And that's it! Your task list is now in Bitrix24.

