Bitrix24 Telephony provides a high-quality connection and many useful options, including inbound and outbound calls, call recordings, and CRM integration. To start working with calls in Bitrix24, you need to connect a phone number. In this article, you can find information about all available telephony connection options.
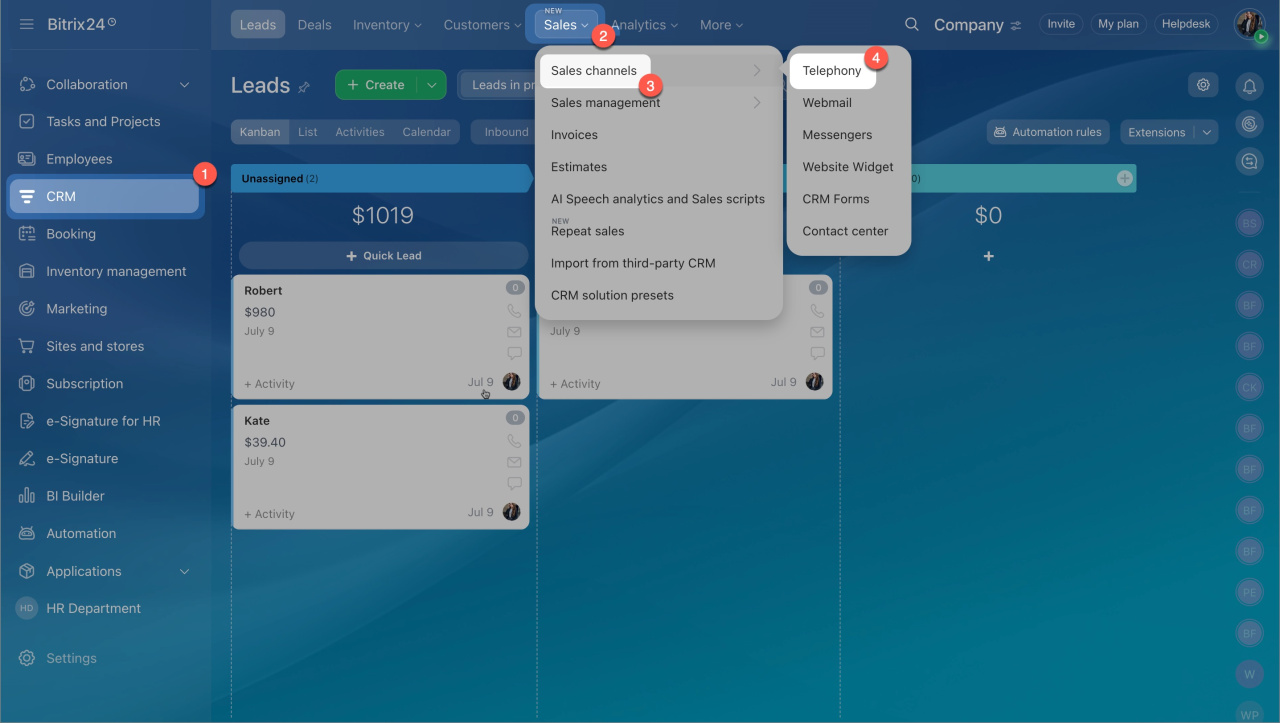
Go to the CRM section > Sales > Sales channels > Telephony.
Available telephony connection options
Rent a number. This option allows you to rent a virtual phone number for your business from our telephony provider.
Connect SIP PBX using SIP connector.This option allows you to connect your office or cloud PBX using a special software module of Bitrix24.
Connect SIP PBX using REST API. This option allows you to connect your office or cloud PBX using an application from the Market.
If you don't have a business number, rent a virtual one in Bitrix24. If you already use a business number, connect it to Bitrix24 using SIP connector or REST API.
It is possible to use all the mentioned telephony connection options in the same account. However, we do not recommend using the application and SIP connection from one provider at the same time, since it may cause errors.
Rent a number
- Go to the CRM section > Sales > Sales channels >Telephony.
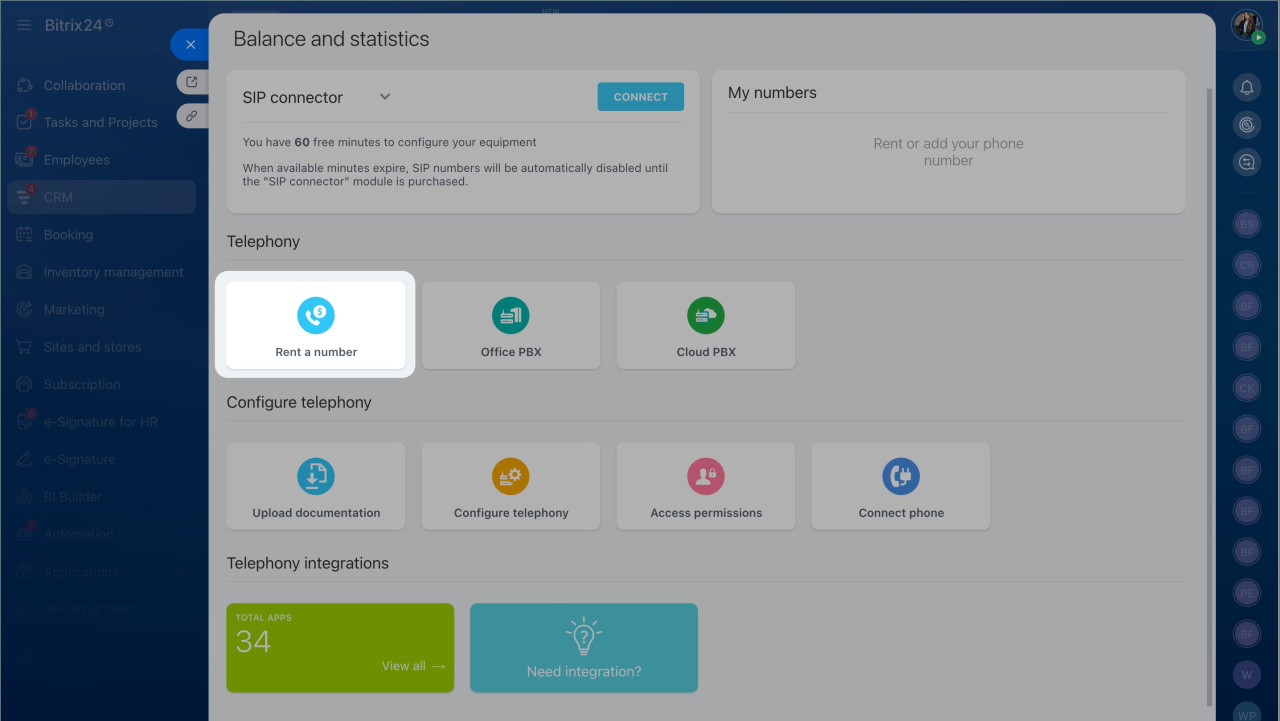
- Choose a phone number
Click Rent a number. Select the country, region, and one of the number types offered. Our telephony provider will assign a phone number automatically according to these criteria.
- Upload documentation
The system may request that you upload additional documents (e.g., proof of address, passport, or ID copy) for some regions or countries. You can upload them to the special form after choosing a number. Submitted documents are usually processed by Voximplant Inc. within two business days.
Connect SIP PBX using SIP connector
If you use the number from another provider, connect it to Bitrix24 as a cloud or office PBX. Make sure that the SIP PBX that you want to connect to Bitrix24 supports the SIP protocol.
To connect your SIP PBX for calls in Bitrix24, do the following:
- Go to the CRM section > Sales > Sales channels >Telephony.
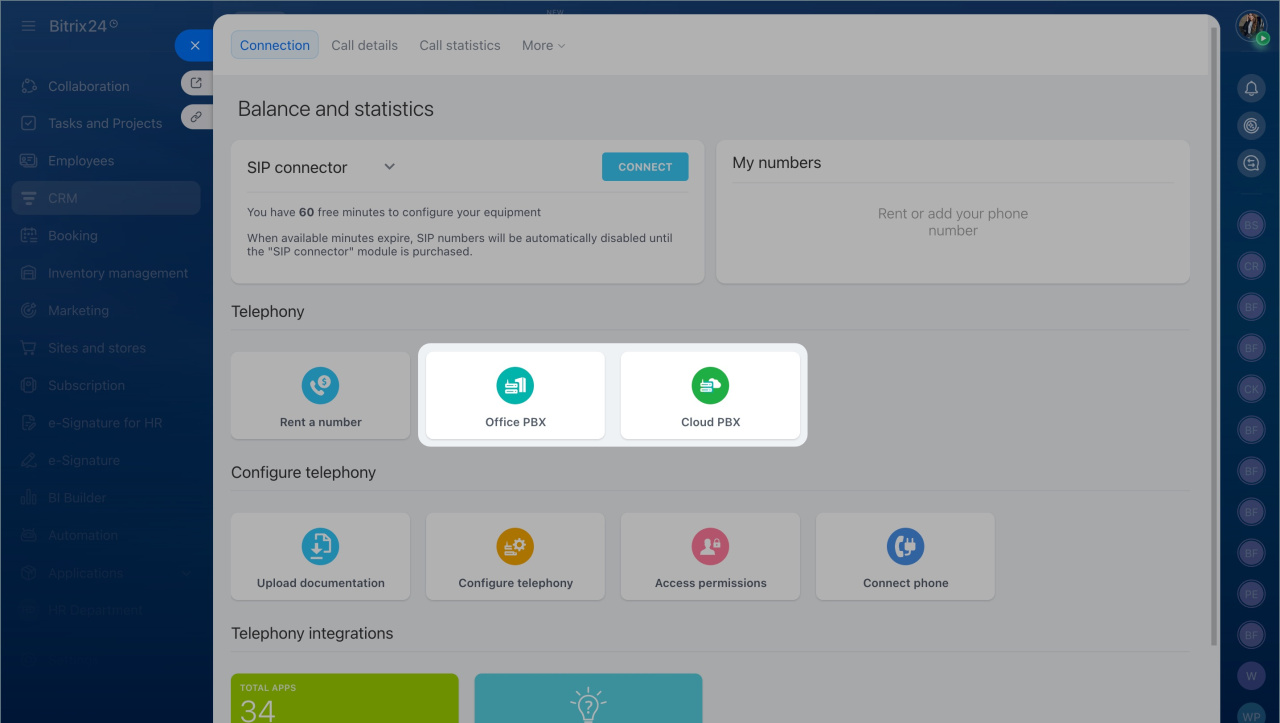
- Select Cloud PBX or Office PBX, depending on your PBX type.
- Provide your server address, login, and password. You can request this data from your SIP PBX's support team.
Your telephony provider charges you for outbound and inbound calls. You don't need to top up your telephony balance in Bitrix24 in this case.
You have 60 free minutes to test and configure the outbound calls of your SIP PBX. After the free minutes are over, you need to purchase the SIP connector to continue working with outbound calls.
Connect SIP PBX using REST API
- Go to the CRM section > Sales > Sales channels >Telephony.
- Scroll down to the Telephony integrations section, and click on the Total apps block.
- Select an application at Catalog > Communication channels > Telephony.
Call routing and voice traffic are managed on your SIP PBX side and cannot be transferred to Bitrix24. It helps reduce the time when a connection is established and improves the quality of communication in comparison with the SIP connector.
When using a REST application, you cannot call from a browser, Bitrix24 Messenger, or mobile app. You should use a separate softphone app or a SIP phone to make calls.


