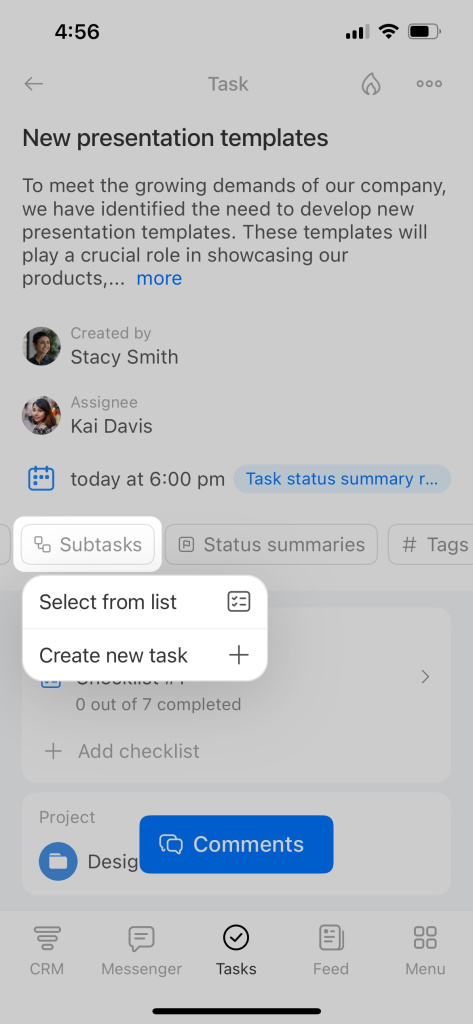
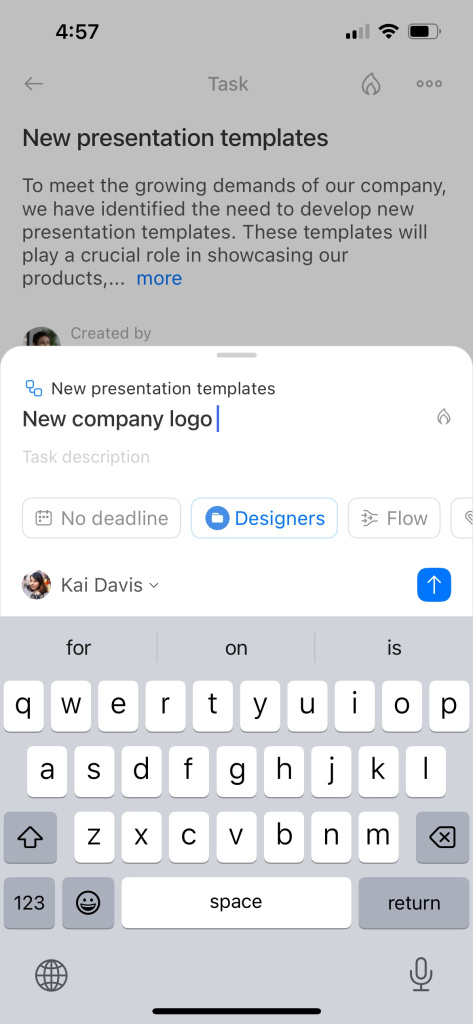
Subtasks are useful when you need to keep a close eye on complex tasks. You can break them down into simpler tasks and assign them to different users, making the whole process more flexible and effective.
Here are some ways you can add a subtask:
-
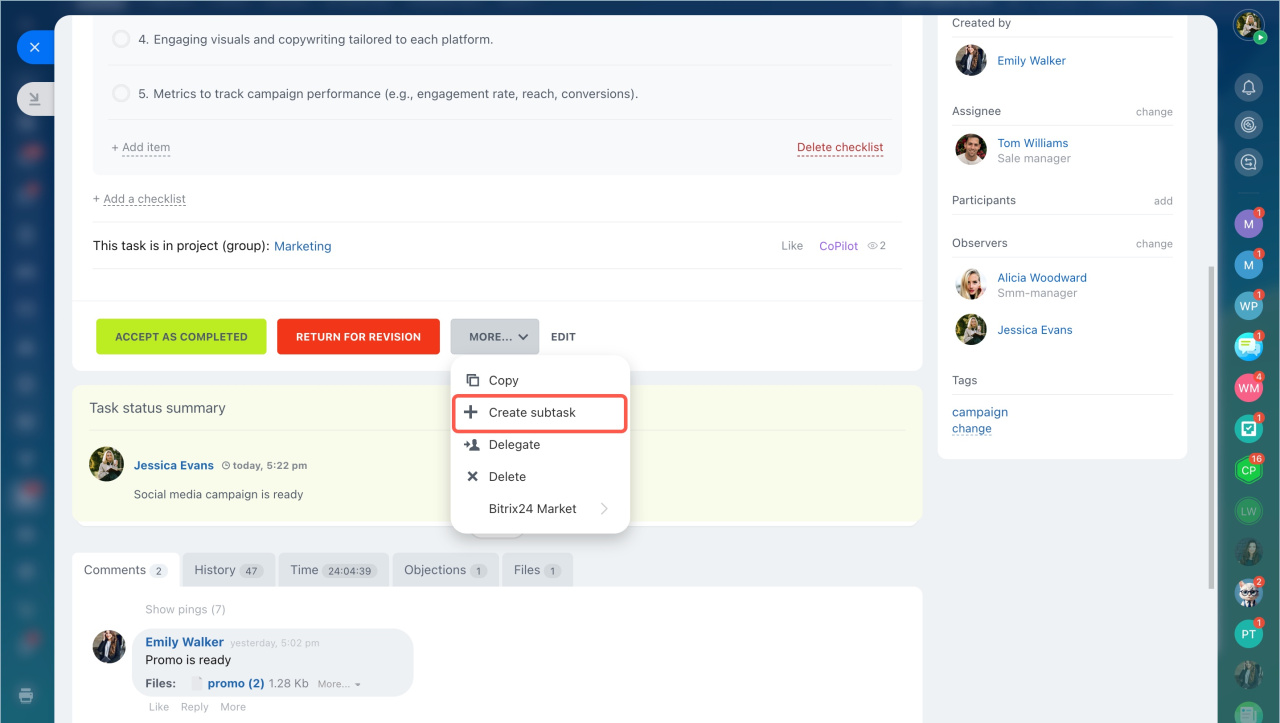
When viewing a task, click on More and select Create subtask.
-
Or, click Add in the top right corner and choose Create subtask.
-
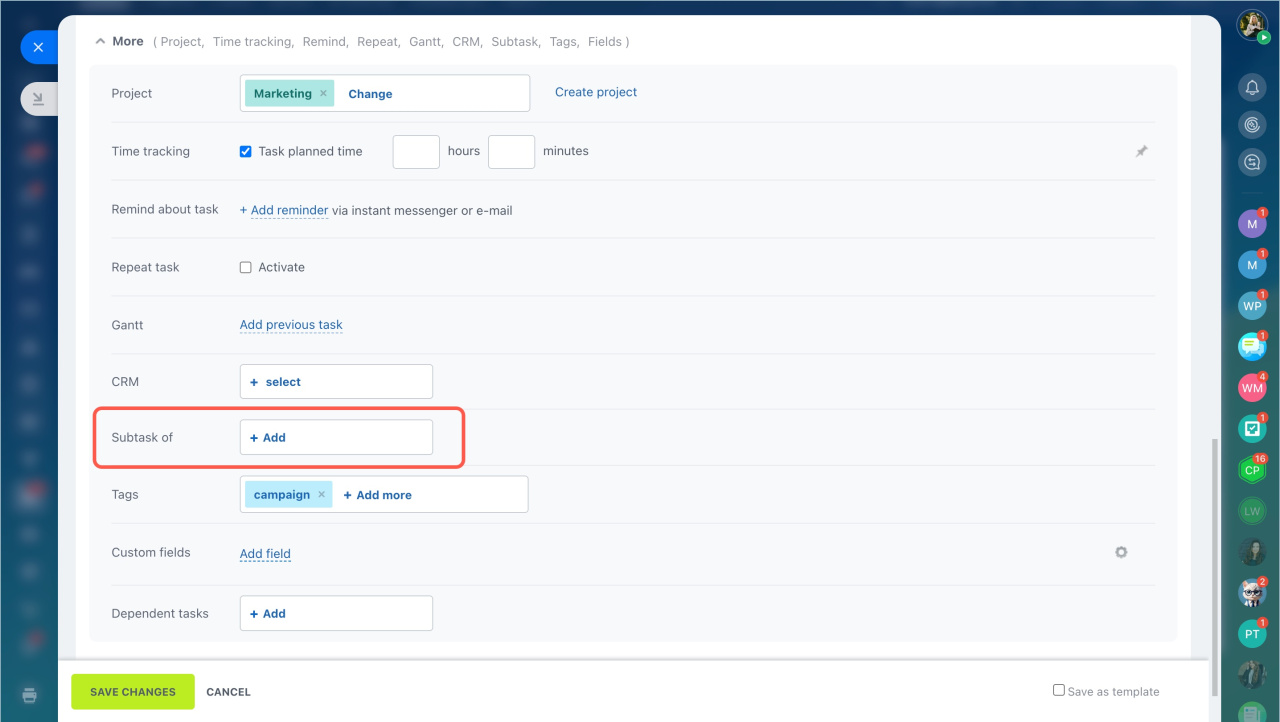
When creating or editing a task, click More and find Subtask of section. Then click Add and select the main task that this will be a subtask of.
-
In the task list, click the menu button (≡) and select Create subtask.
-
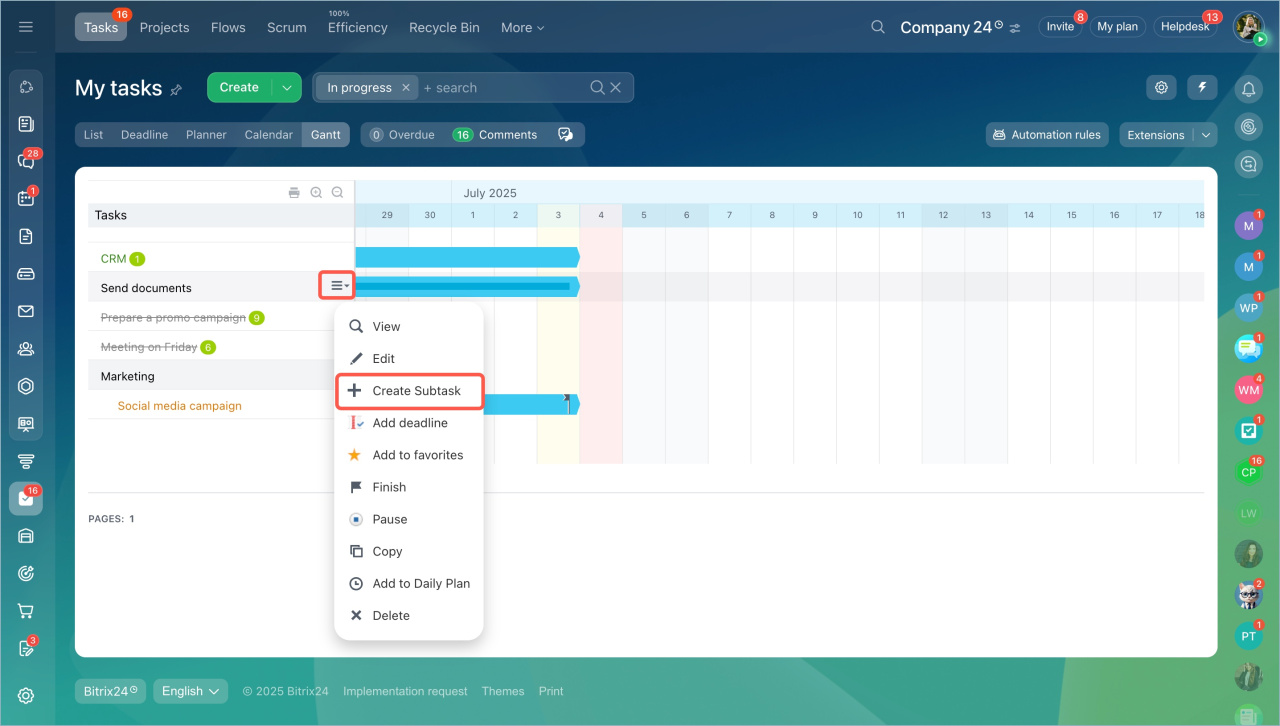
If you're using the Gantt chart, open the task menu and click Create subtask.
There are two additional features you can use when working with subtasks.
-
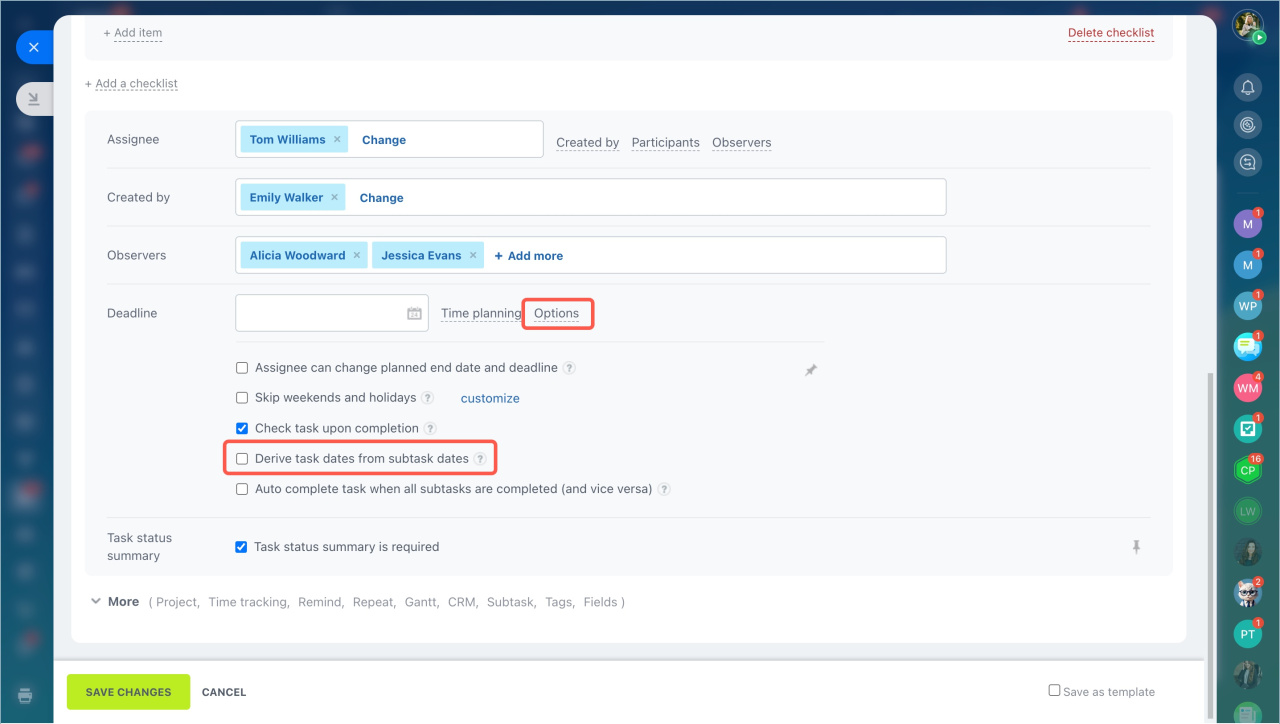
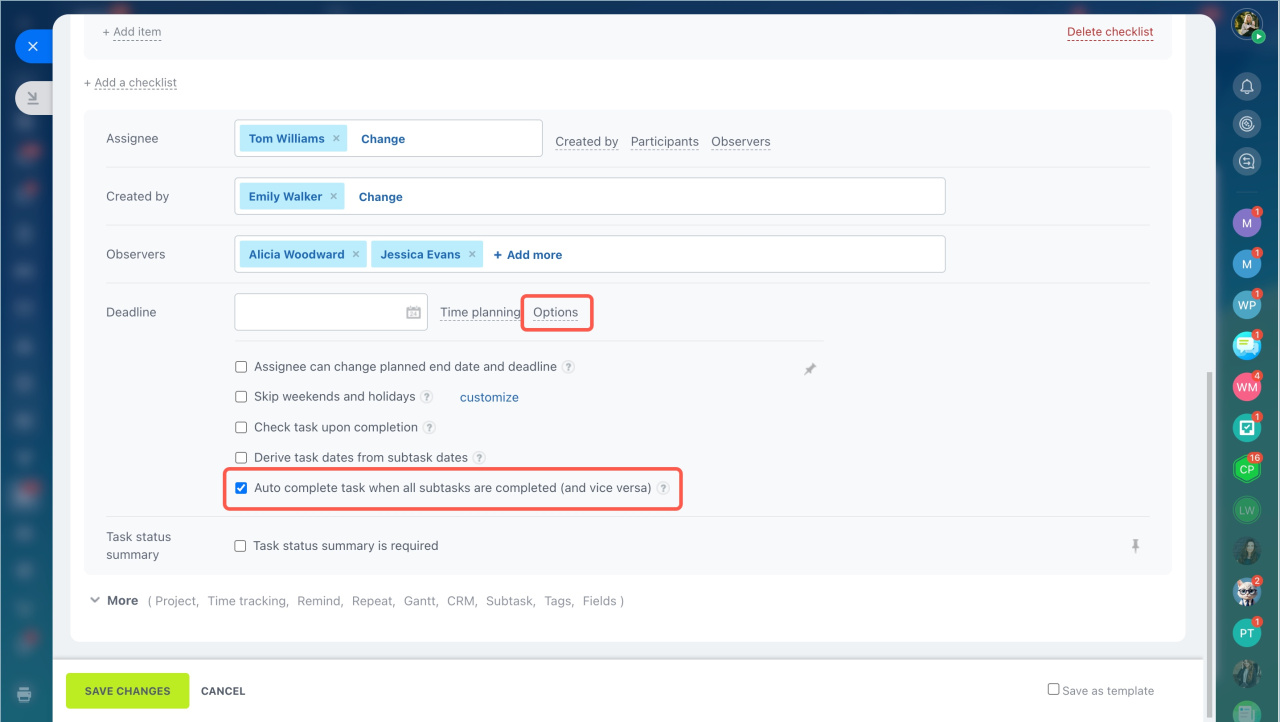
Sometimes, it might be helpful to set the start and end dates for the main task based on the subtasks' dates. To do this, while creating or editing a task, click Options and enable the option. This means the main task will start on the earliest date out of all the subtasks and end on the latest date out of all the subtasks.
-
You might want the main task to automatically be marked as complete when all its subtasks are done. To do this, while creating or editing a task, click Options and enable the option.

