You can configure different CRM element forms' views and define which employee or department will have a specific CRM element form's view.
For example, you have a call center, where the basic info about the clients is collected. After the data are collected, your call center agents move the lead to the next status. For the call center agents, the lead form should look like:
Next, the Sales Department managers start their work on the lead. They schedule a meeting with a client, make a presentation of a product, etc. So it's necessary for the lead form to look in another way:
To sum up, different views make the employees' work easier as they know which information they need to add to a CRM element form.
What's the difference with a Common form view
The Common form view is the best for the companies using the same CRM element form, no matter the employee's role in the sales process. Employees work with the same fields.
Adding different views for different employees/departments is useful, for example, when you have employees working with the same deal pipeline, but their role in the sales process is different. Different views apply only to those employees that are selected for it.
How to add a new view
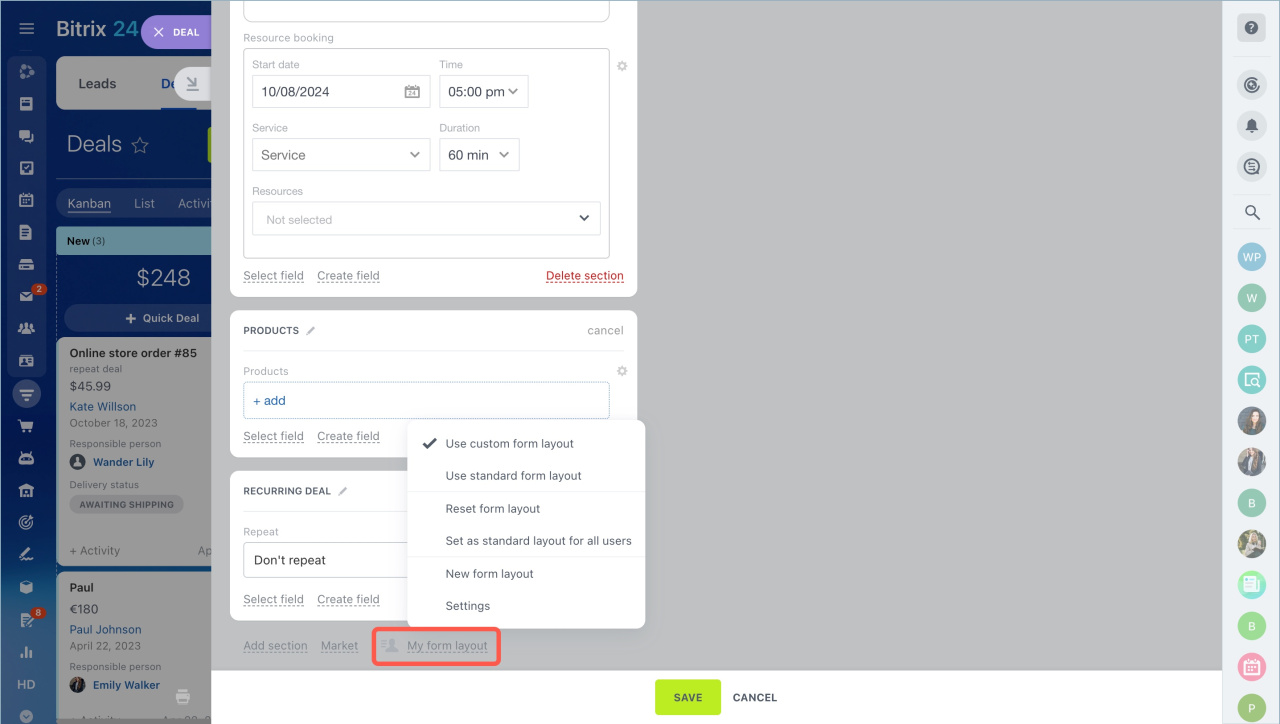
You can add new views for leads, deals, contacts and companies. Go to the bottom of the CRM element form > click the current view > New view.
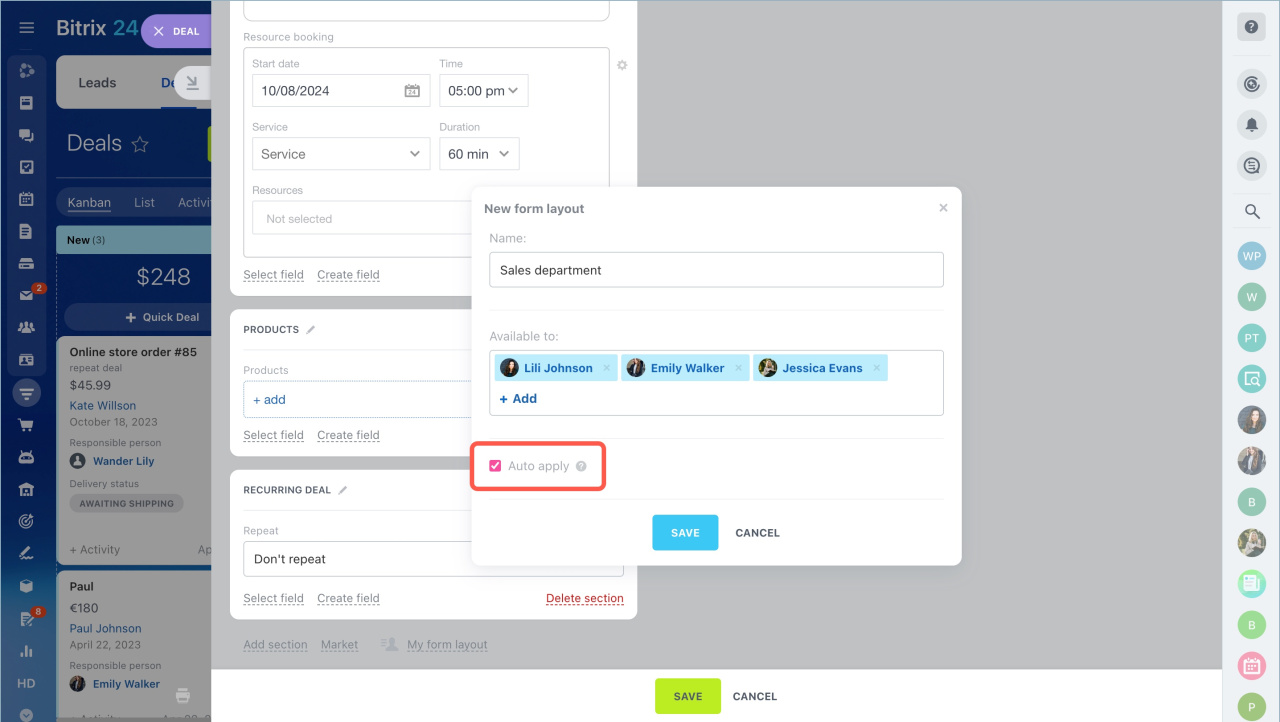
Specify the view name > select employees that will have this view > click Save.
After that, the selected employees will have the same set of fields as you had when created the view.
How to edit or delete a view
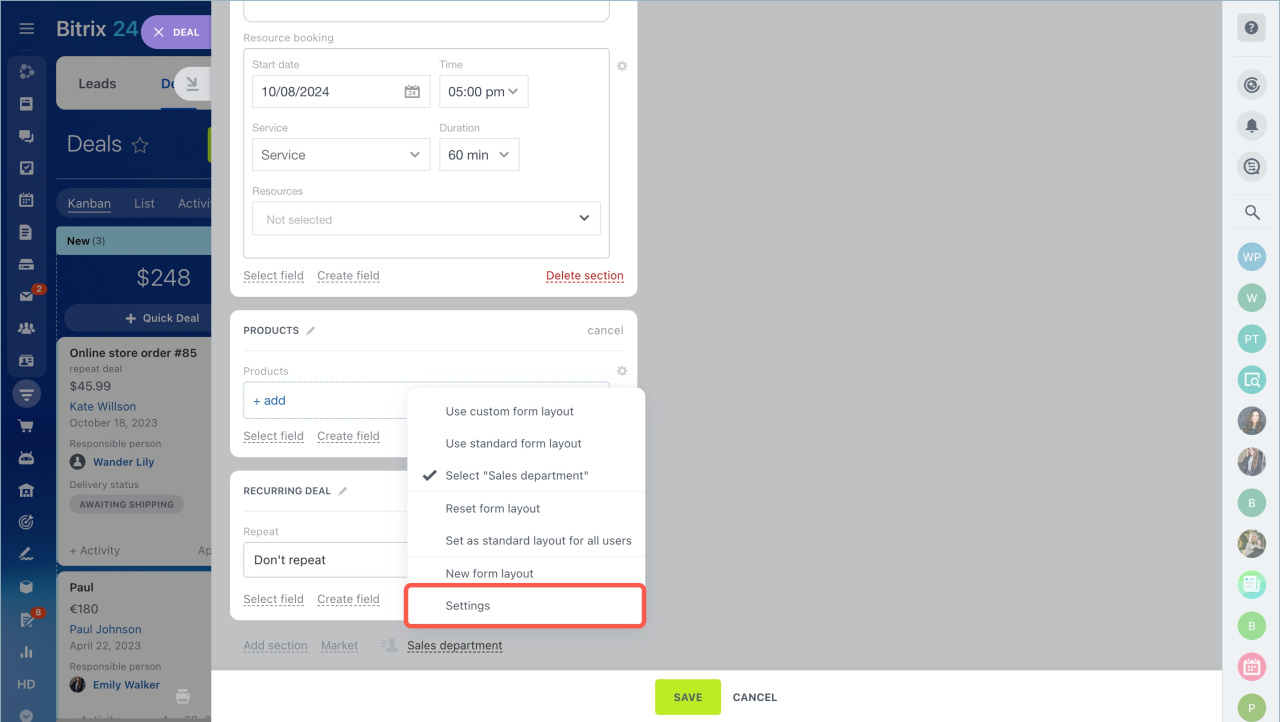
At the bottom of the CRM element form, click the current view > Edit/delete view.
There will be a list of all views available for the selected CRM element form and users belonging to each view.
To assign a new user to the view, click the + button. To delete the view, select it > click Delete.