Workgroups and projects in Bitrix24 help your team organize collaborative work. They make it easy to communicate, share files, assign tasks, and keep track of deadlines.
A workgroup is great for ongoing teamwork, like department discussions, general topics, or sharing knowledge. For example, a Marketing workgroup can be used to share reports, discuss ad campaigns, and store creative materials.
A project is best for short-term initiatives where you need to track progress and results. For instance, if you're launching a new product, you can create a Product Launch project. From there, you can assign responsibilities, set deadlines, upload specifications, and track each stage until completion.
Workgroups and projects can be customized to fit any business need—from everyday department tasks to large-scale team projects.
Select a type
- Go to the Workgroups and projects section.
- Click Create.
- Select the type — Project.
- Click Next.
Configure project settings
In the Features tab, select a design theme, specify the project name, parameters, and add tools.
About project.
- Specify a project name and add a description.
- Select a visual theme, a project icon or upload your own one.
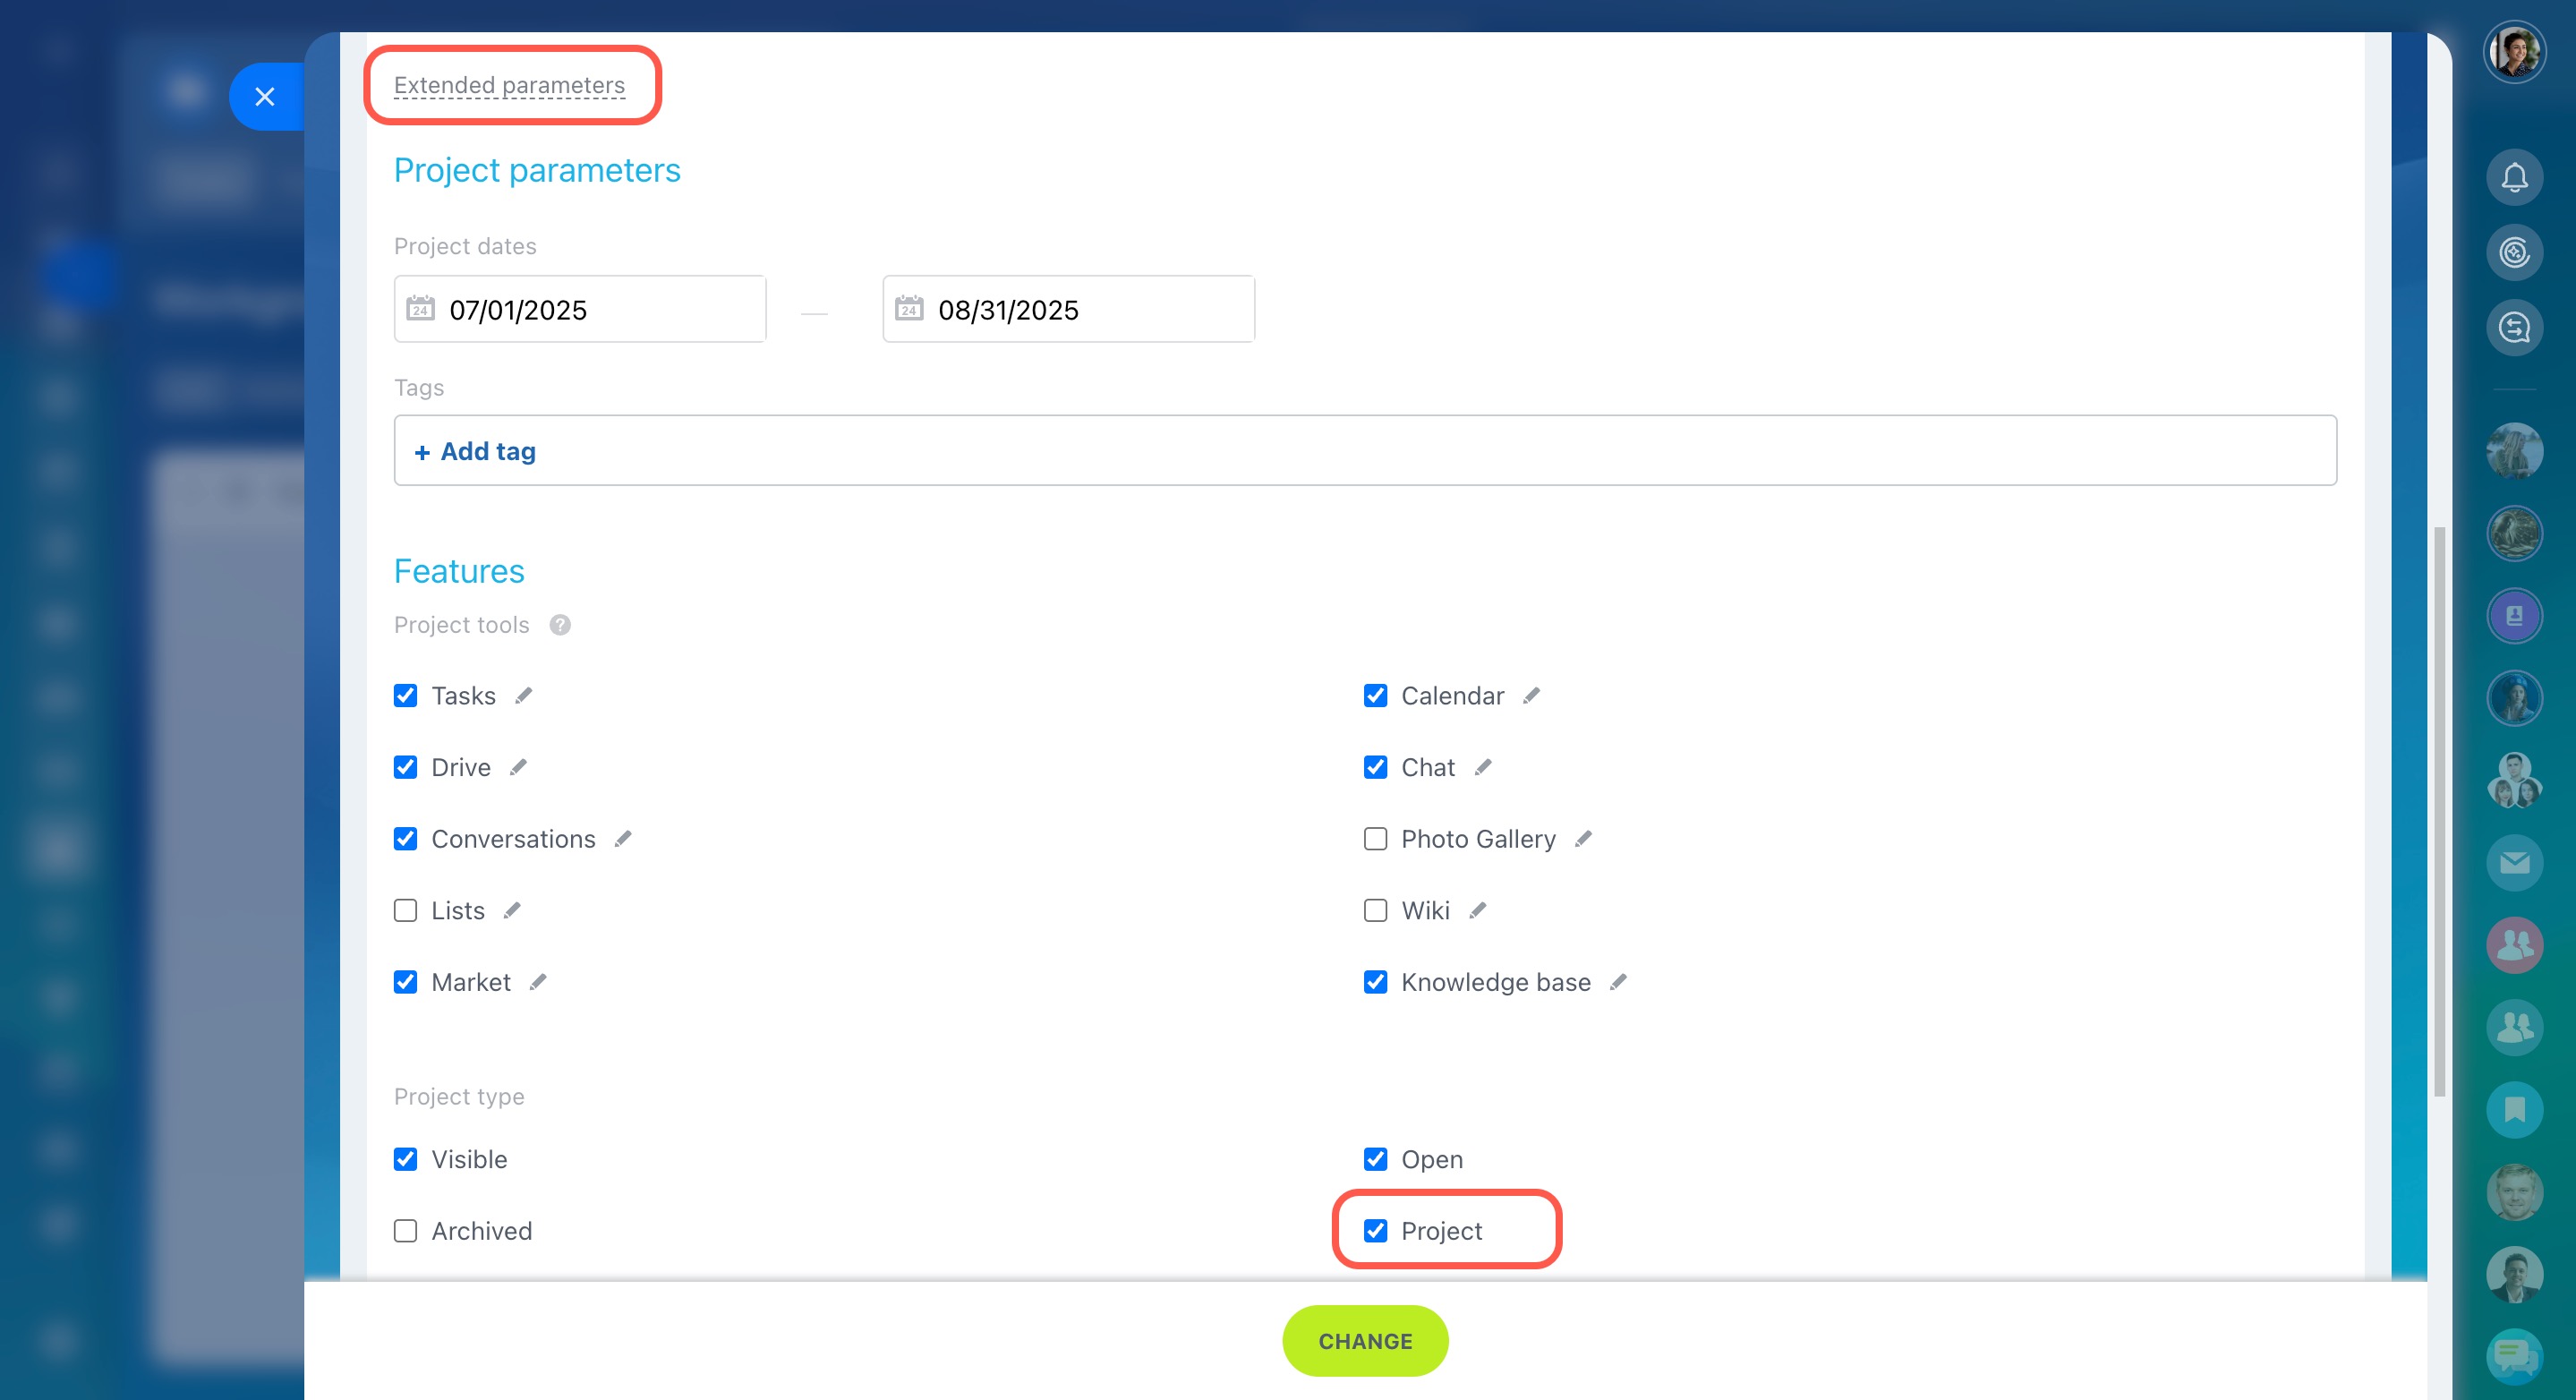
- Click Extended parameters to select project tools and configure parameters.
Project parameters.
- Project dates — specify the time period in which the project needs to be completed.
- Tags — specify tags to filter and search projects by them.
Tags in tasks and projects
Features.
- Project tools — check the boxes next to Bitrix24 tools that are needed for the project.
- Project type — select Publishing on Bitrix24 Sites to post project news on your website and in Bitrix24 knowledge bases.
Select privacy type
There are three levels of project privacy:
Public — The project is visible in the list, and any employee can join. Example: A company organizes a sports marathon open to all employees.
Private — The project is visible in the list, but employees must request to join. Example: A company is preparing a corporate event, and only involved employees participate.
Hidden — The project is not visible in the list and requires an invitation to join. Example: A company creates a project to compile a department KPI report, and only invited employees can access it.
Then click Next.
Assign admin permissions
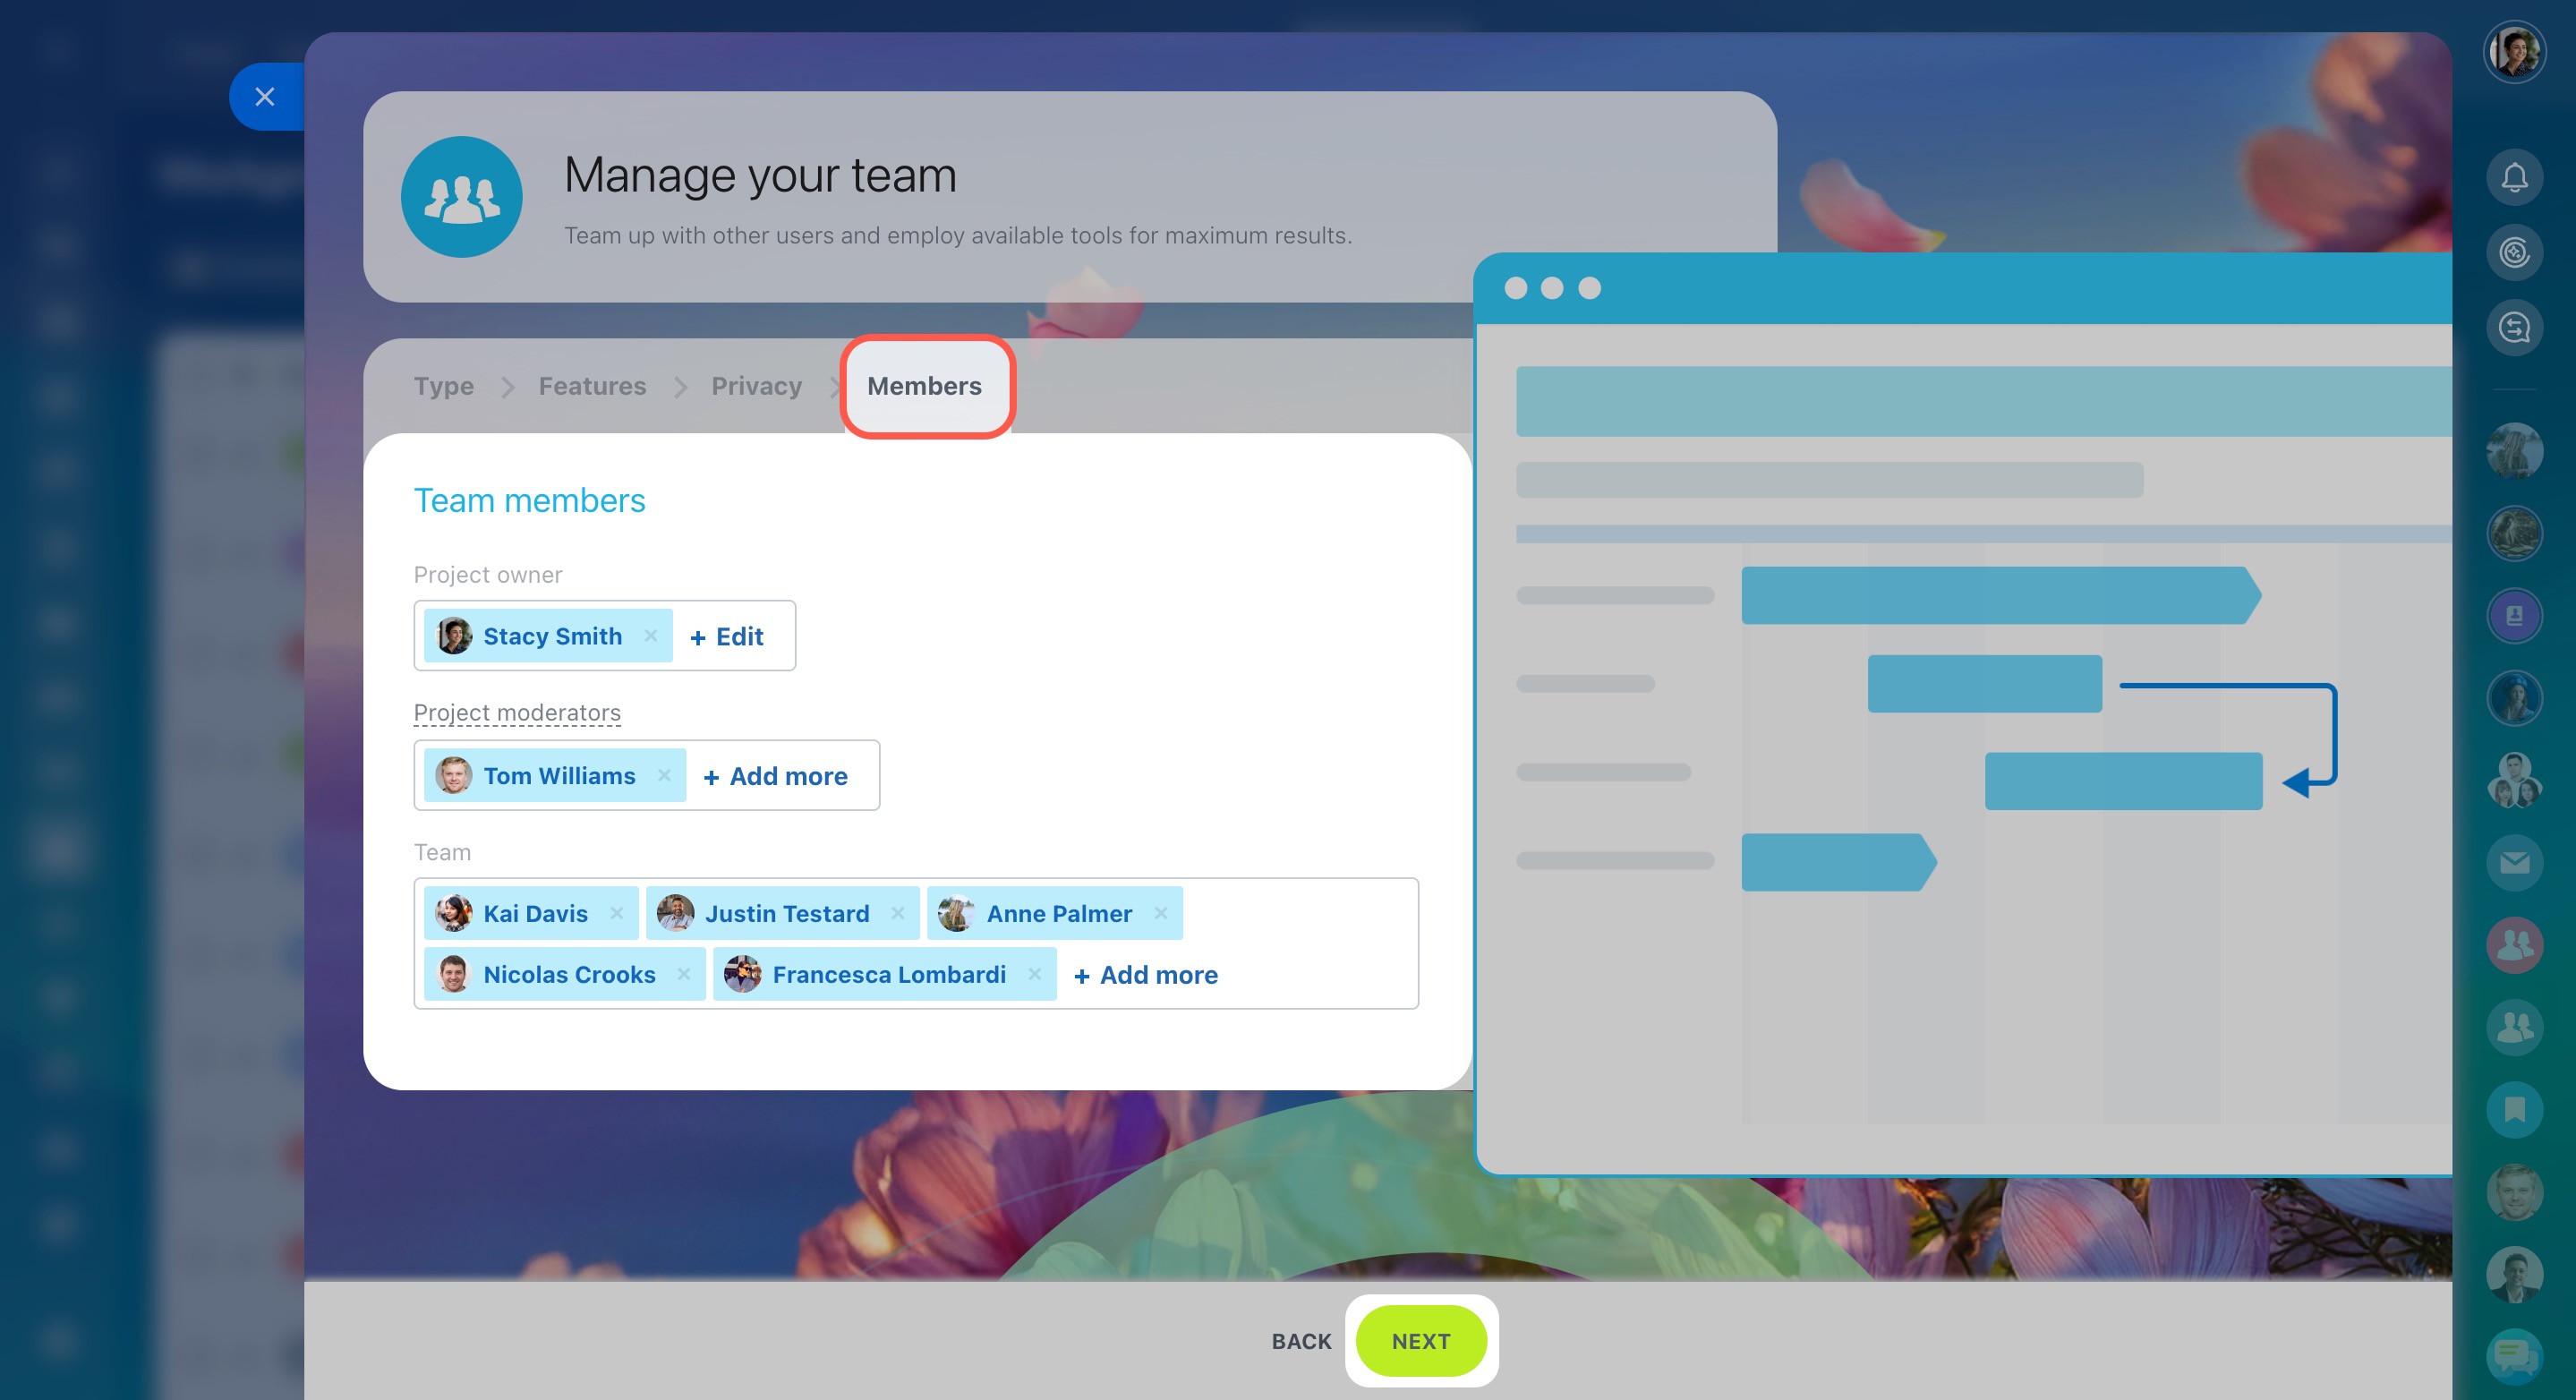
Add project members
- Project owner — specify the responsible person for the project. By default, this is the project creator.
- Project moderators — select one or more employees.
- Team — Add coworkers who are working on the project.
Then click Next.
Edit project
You can edit a project. Click the menu icon and select Edit.
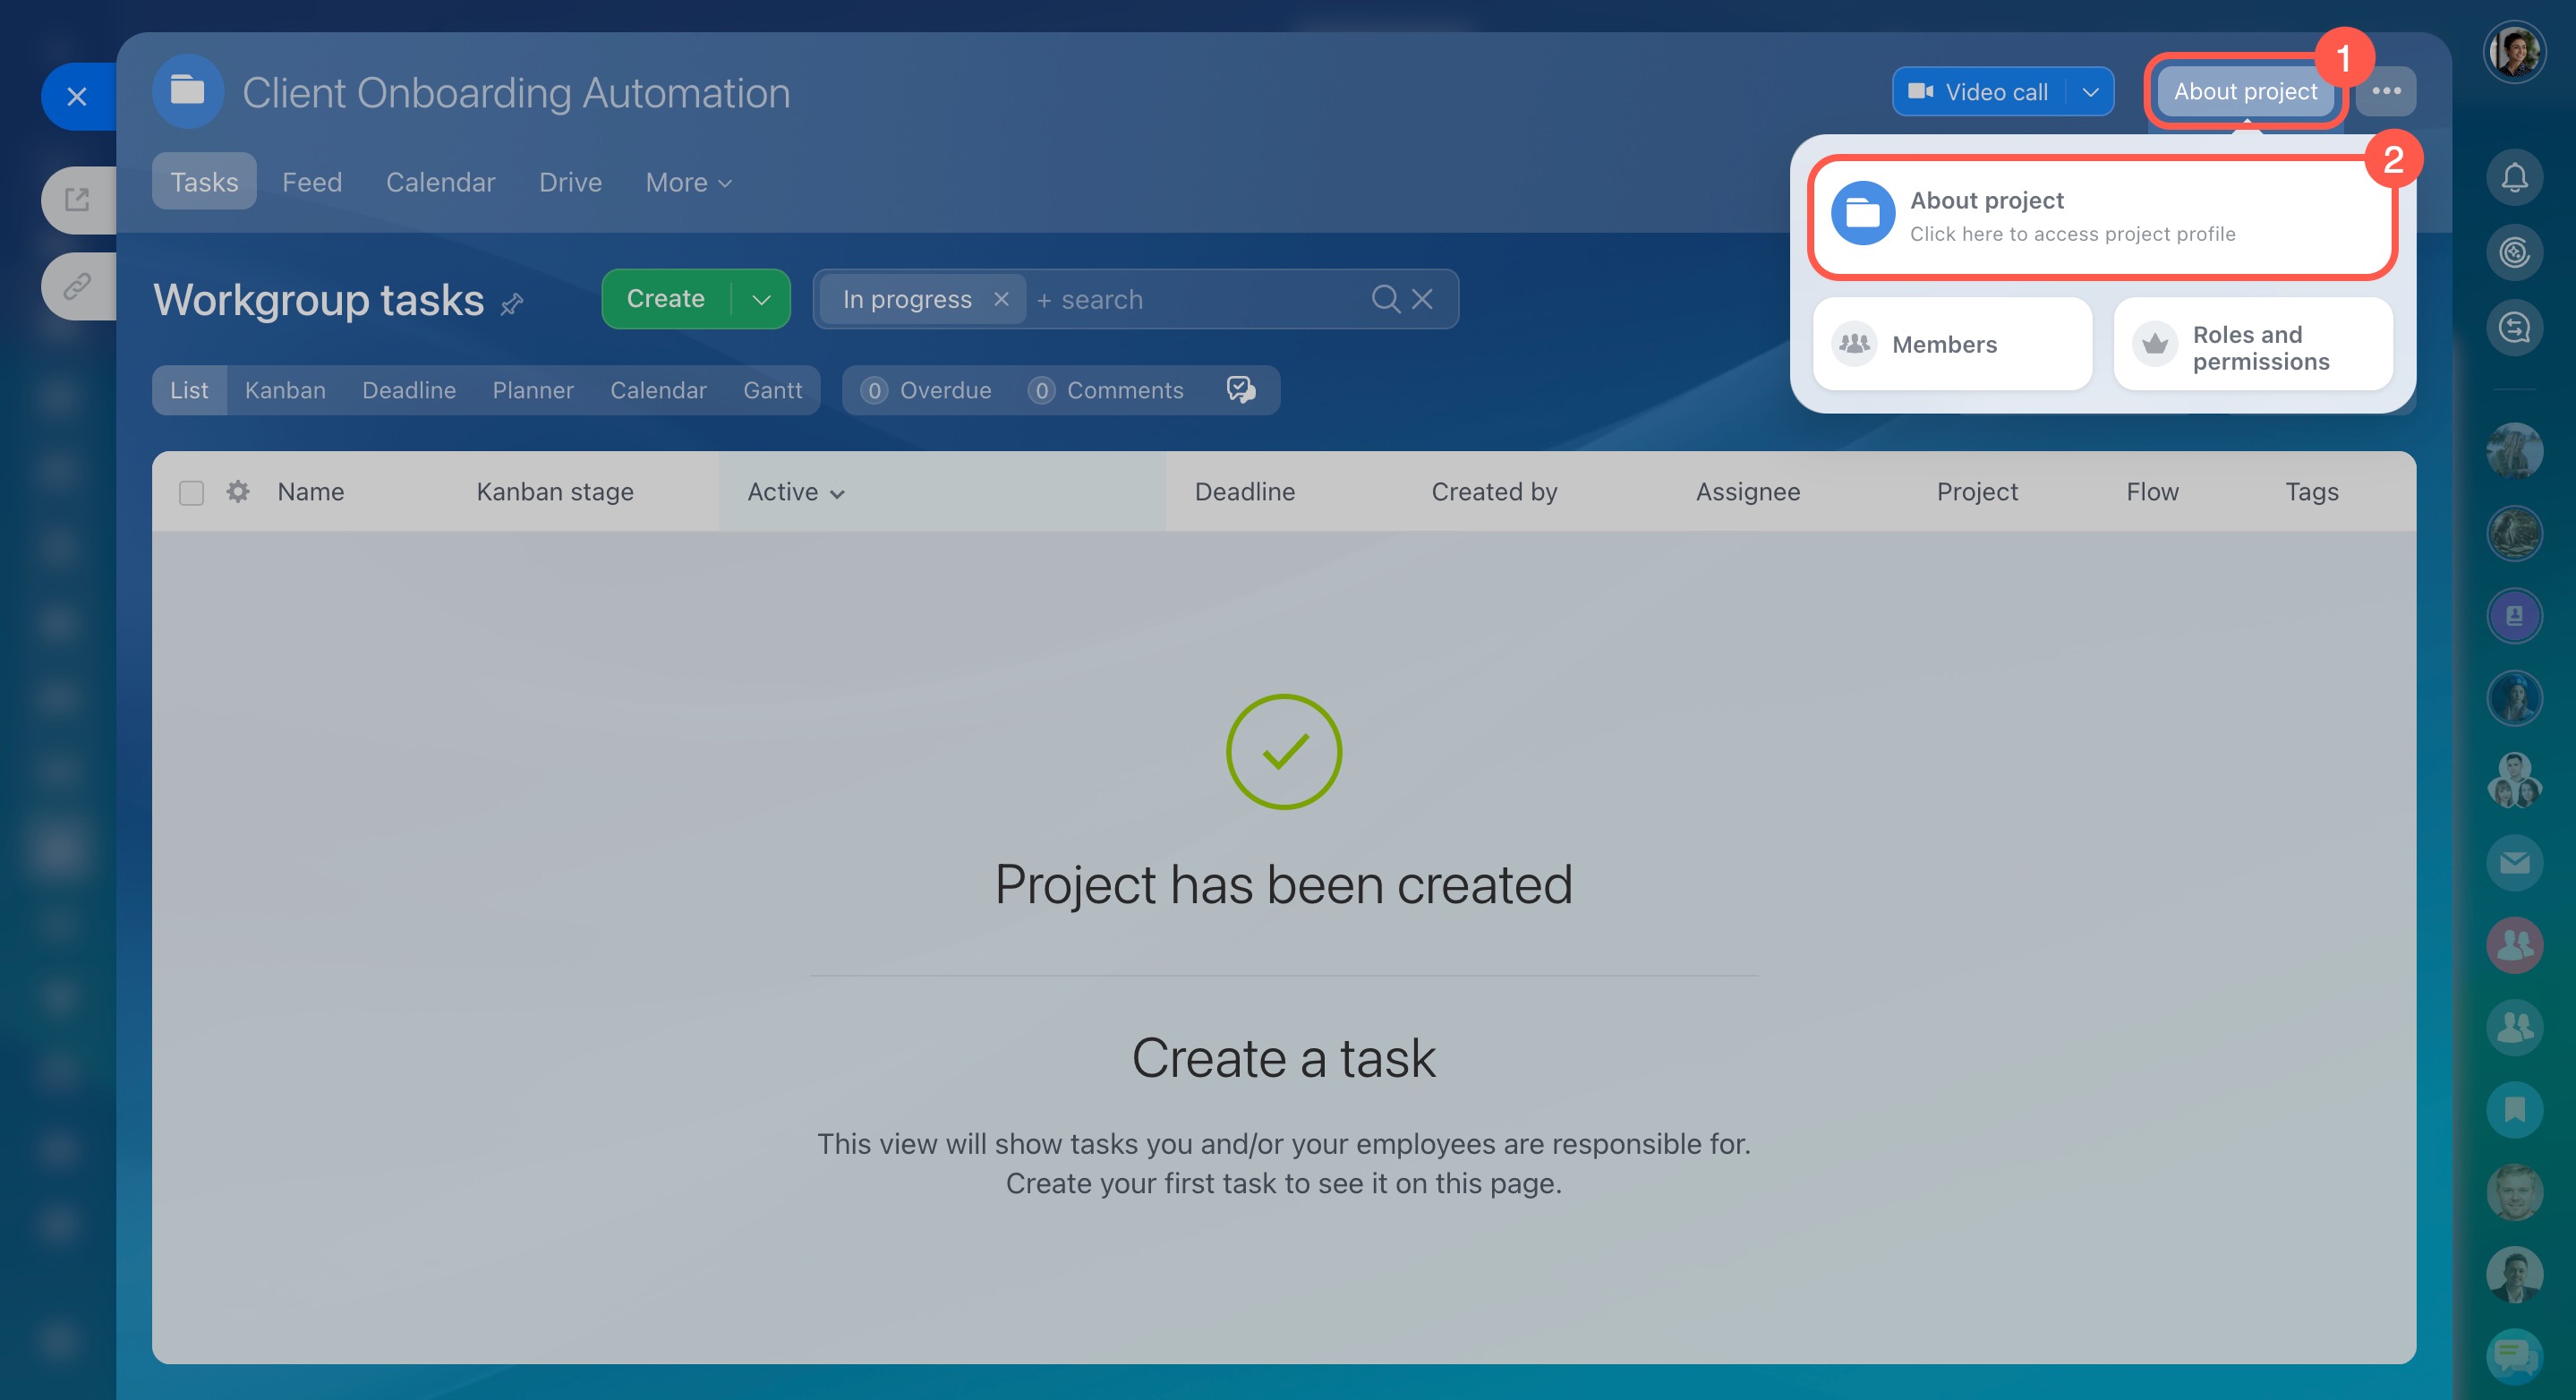
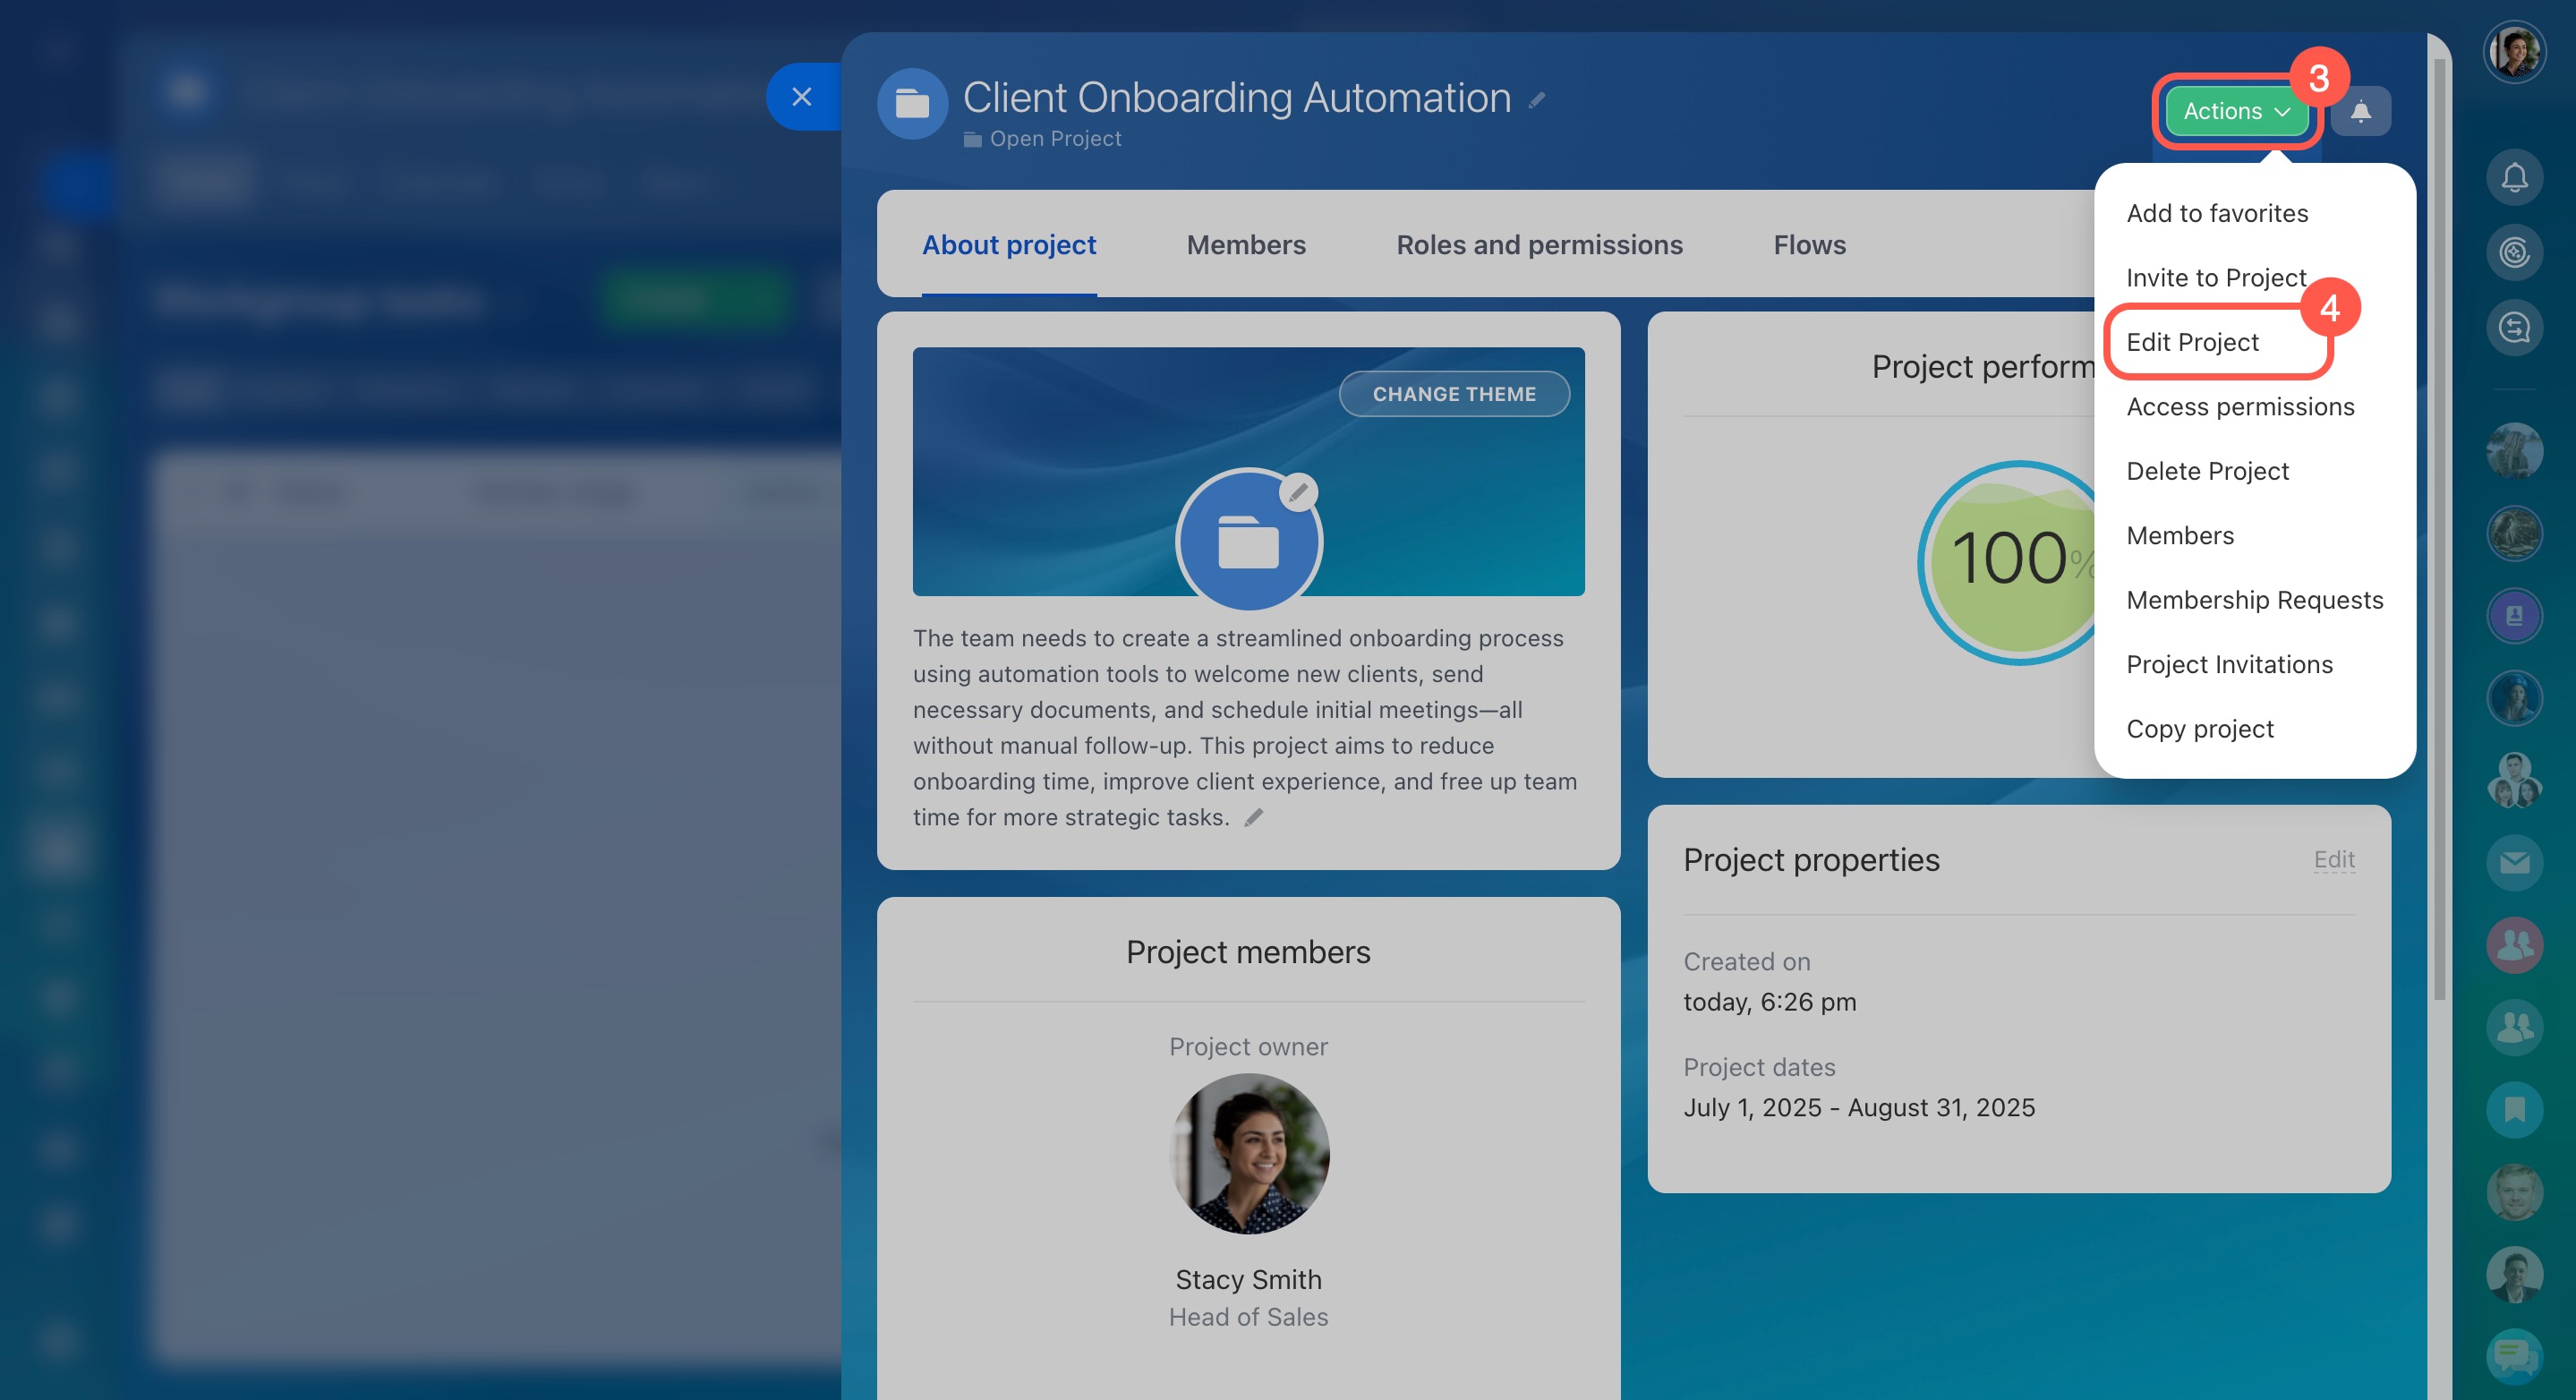
In the project form.
1–2. Open the form and select About project.
3–4. Click Actions - Edit Project.
Change the type—from a project to a workgroup
Go to the Extended parameters. Check or uncheck the Project box to change the type.
Then click Change.
In brief
- Bitrix24 has workgroups and projects - public, private and hidden.
- The main difference between them is the ability to set deadlines.
- When you create a workgroup or a project, you need to define the privacy level, add participants, and select tools.
- You can edit workgroups and projects, change the type.


