If you're an avid Jira Service Management user and would like to have an eye on your issues while working in Bitrix, this integration might be just the right fit for you.
Jira’s service desk empowers teams to deliver great service experiences and ensures your employees and customers can get help quickly. The integration app lets you see your Jira issues from contacts and workgroups without leaving your favorite platform. You can coordinate your team right from a workgroup or contact slider by creating, viewing and editing all of the Jira Issues' details in a dedicated Jira integration tab.
If you are still unsure whether integrating Jira Service Management into your Bitrix24 might be effective, feel free to check free trial options provided by Atlassian Jira to test it.
To see a list of your Jira Issues associated with a contact, click on the Jira Issues tab in the Contact card. If you don't see it at first, it might as well be hidden in the More section. You can drag the tab to a place of your choice configuring the CRM form menu for Contact cards as you wish.
As you may have noticed, we have added a second email address to the Contact card. This mailbox is owned by a Jira user working with the client. This step is crucial to let issues' data be fetched accordingly.
Titles, assignees, statuses, and other important information gets pulled from your Jira account. By clicking unto an issue's name (Summary field's value) you can quickly switch to Jira, see detailed context and manage issues in a native manner.
You can also search for specific issues and filter them using in-built Filter and search widget. You'll also be able to create contact-related issues anytime.
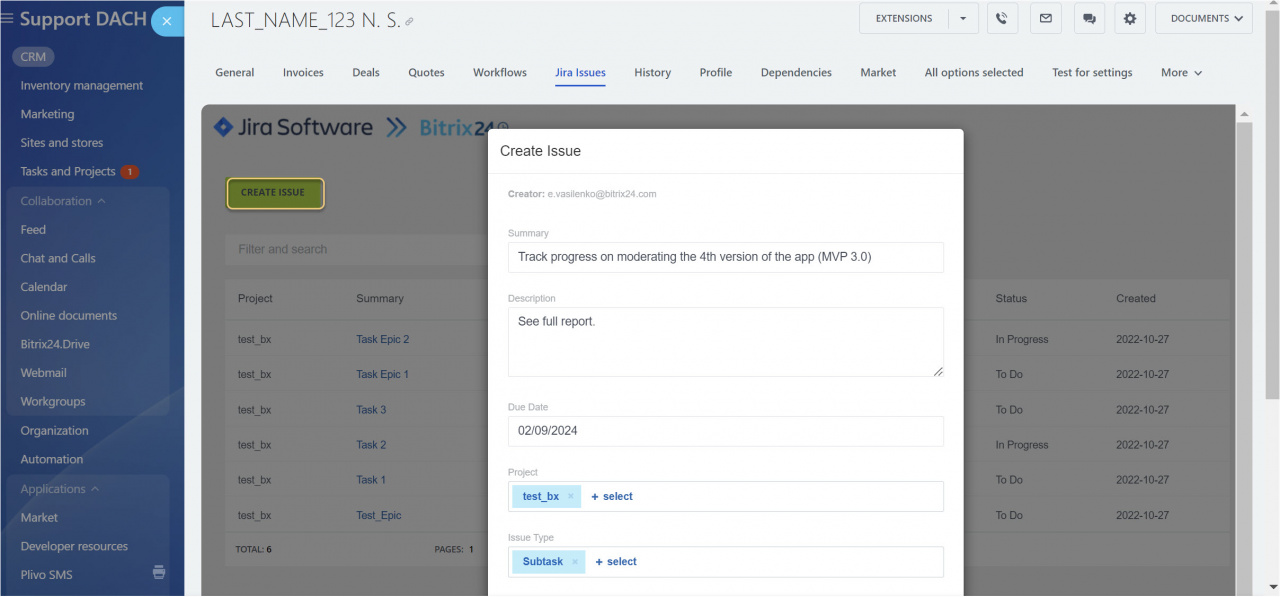
Issues are created in just a few clicks: use the Create issue button, define a proper issue name, its brief description and select desired values for the proposed options. Once that is settled, click unto the Add button in the bottom part of this form for the issue to appear both in Jira and Bitrix24.
Use Filter & search to find specific issues by name and pre-defined values in other fields and sort them by filter presets.
Embedded search fields are the most commonly used ones for Jira Service Management: Summary, Assignee, Creator, Type, Priority, Status and the Created field.
Searching by a title is often sufficient, but filtering by specific fields might come in handy in large-scale projects.
If the email is specified but the button is still greyed out, check whether:
- The employee (whose Jira email is specified in the contact card) has created or was responsible for at least one issue in your Jira desk;
- The user opening the Jira Issues tab is set as Responsible in the Contact card.
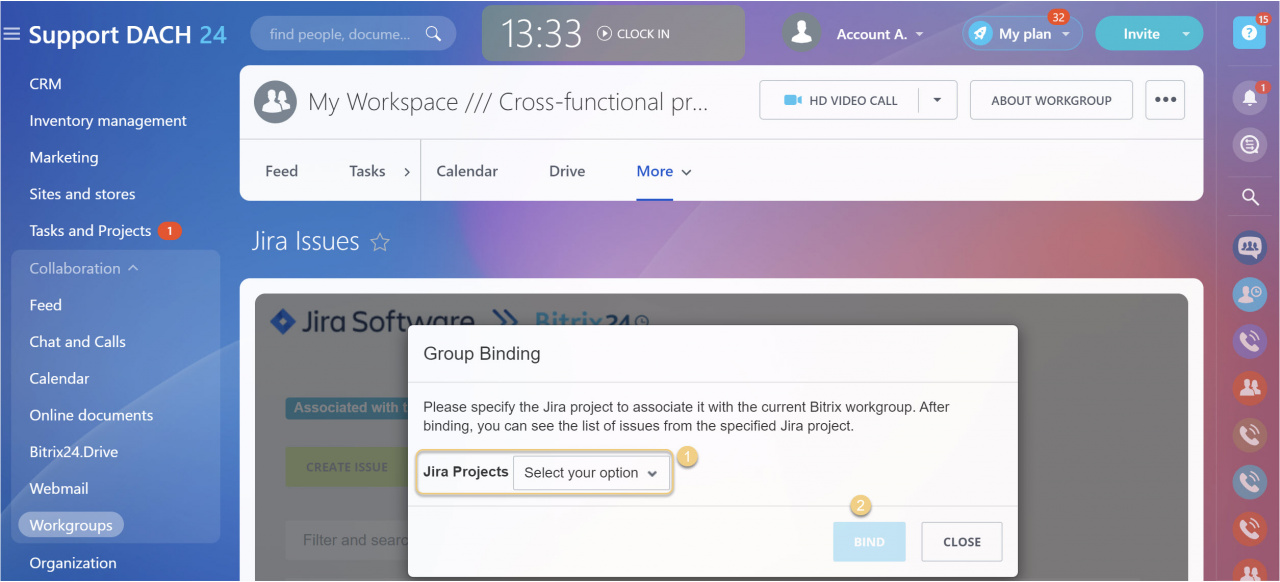
When creating an issue from a workgroup for the first time, you'll have to bind a Jira project to the workgroup.
Multiple Bitrix24 workgroups can be associated with a single Jira project. However, if your guidelines require to differentiate between Jira projects while working with tickets, the app will help you to sort this out. It’s just as easy to unbind a Jira project from a workgroup later on.
FAQ
Q: Why do other users besides me have a greyed out Create Issues button in a workgroup?
A: Current version of the app allows only workgroup owners to create Jira issues. Feel free to report your case, and we'll raise a priority of the development request.
Q: Does the integration work with Jira self-managed solutions (Jira Data Center)?
A: The app supports Jira Cloud accounts only. We did in fact plan to implement such a feature, however we had to pause it due to Jira Migration Program.
Q: Why am I getting the Error: Field 'duedate' cannot be set? It is not on the appropriate screen, or unknown notification when trying to create a ticket?
A: The Due Date is a mandatory field when creating a ticket from the Bitrix interface. If it's not on your Create issue screen for the selected Issue type, there will be nowhere for the data to save. The same applies to similar errors with other fields specified (field 'XXX' cannot be set where XXX is the symbolic code containing field's name).
To fix it:
- Go to Jira settings > Issues
- Go to "Issue type screen schemes" > Click on the name of the "issue type screen scheme" for the selected project.
- Click on the screen scheme of the selected issue type.
- Click on the screen of the "Create issue" type of operation.
- Add the "Due date" field.

.jpg)
.jpg)

.jpg)
.jpg)

