Let’s say you want to upload a new version of a sample agreement to the Company Drive or Workgroup Drive. This new sample agreement will be used by your employees for entering into contracts with new clients, suppliers, etc. Because agreements and contracts are very sensitive documents, you need to make sure that everything is flawless with the wording and structure of the new version of the sample agreement.
You want this new version to be approved by the Legal Department and/or the Executives before it is published on your Bitrix24. Same counts for the documents that had already been uploaded but need to be approved on every modification.
You can create a Business Process (BP) template for document approval from scratch and configure it according to your needs. Let's consider the following example to better understand the process of document approval.
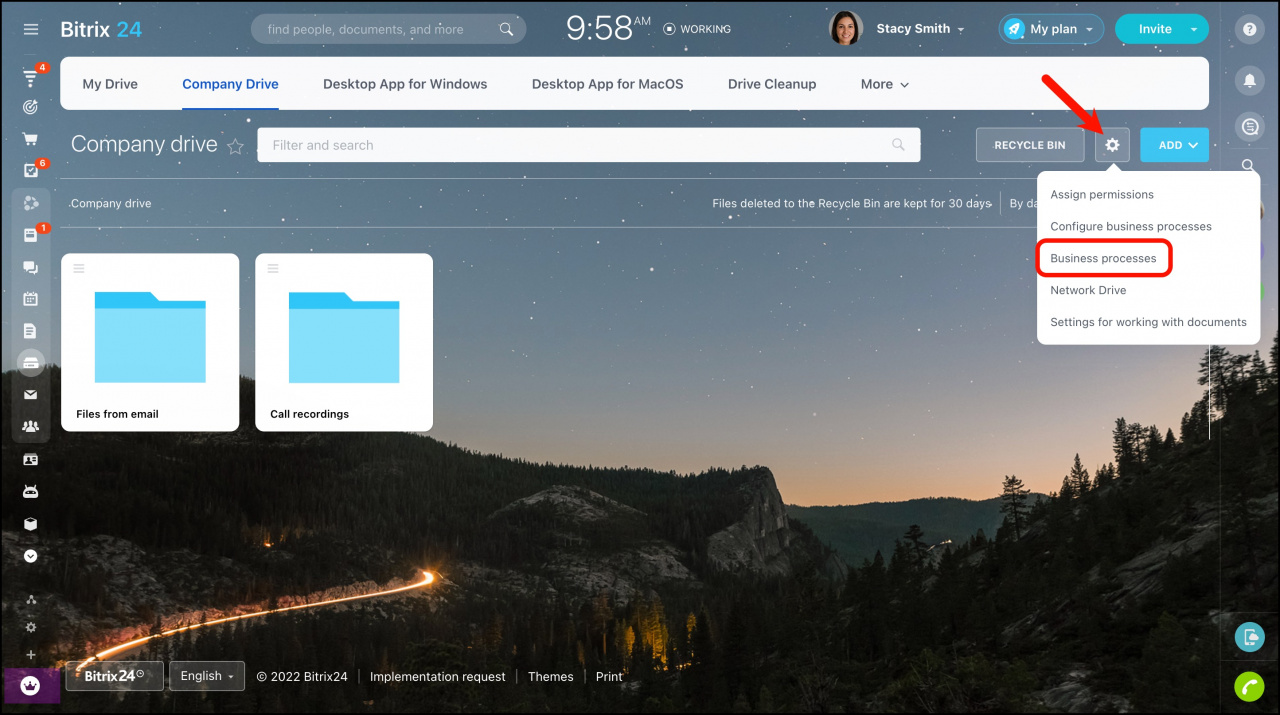
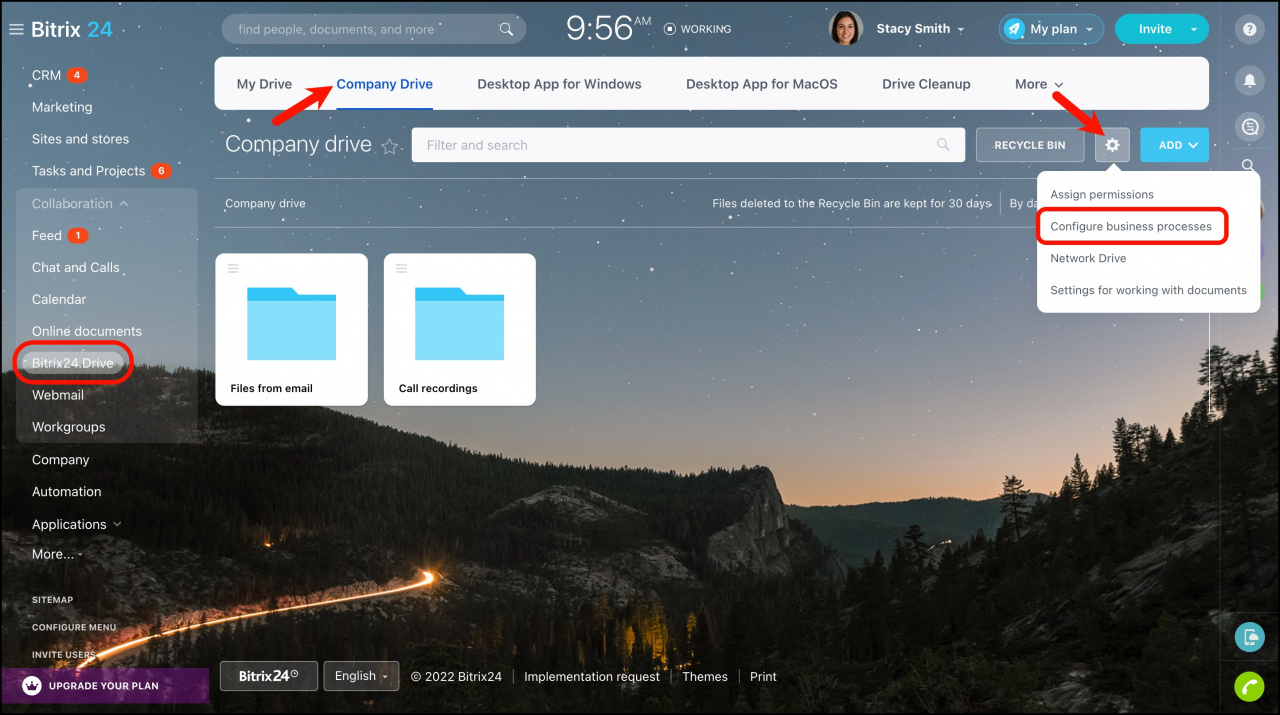
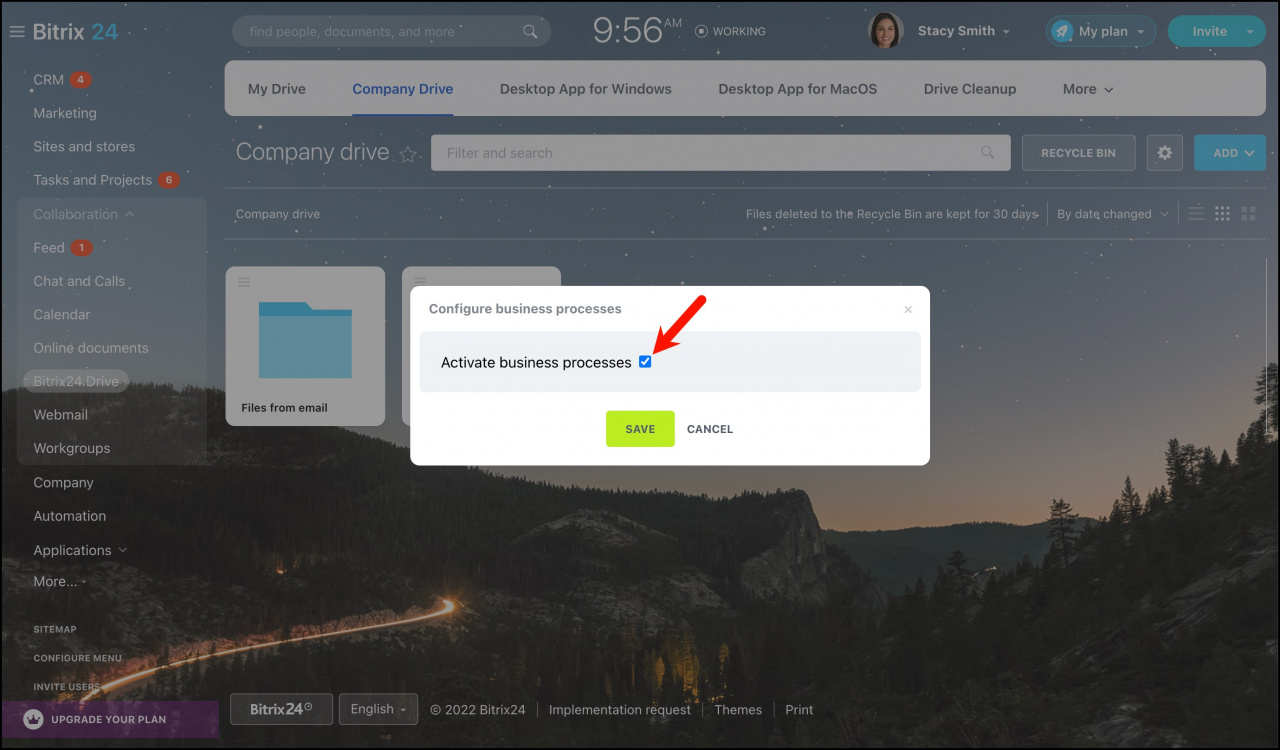
Go to Bitrix24.Drive > Company Drive click the gear button > Business processes.
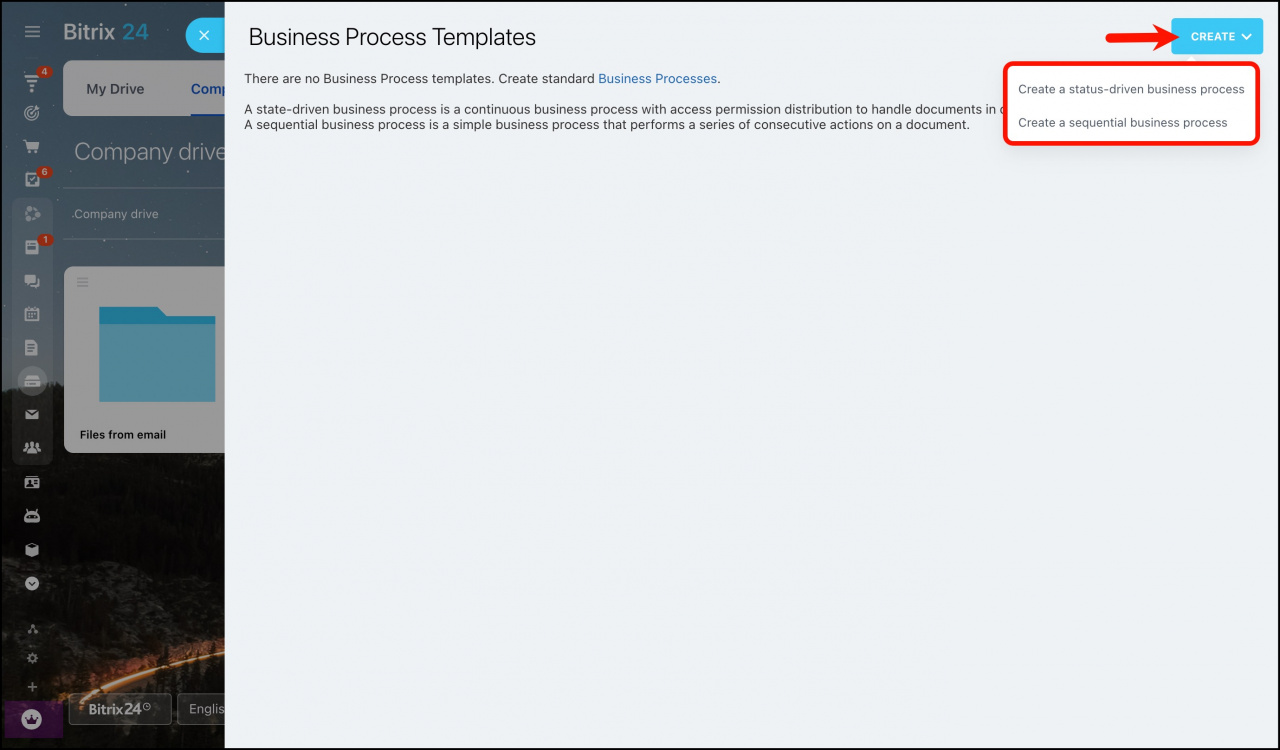
First, we need to select a business process type for our future BP structure. What we need for our new Document Approval BP template is a sequential process. A sequential business process is generally used for processes having a limited and predefined lifecycle. A typical example of this is the creation and approval of a text document (i.e. uploaded --> submitted for approval --> approved --> published). Click Create > Create a sequential business process:
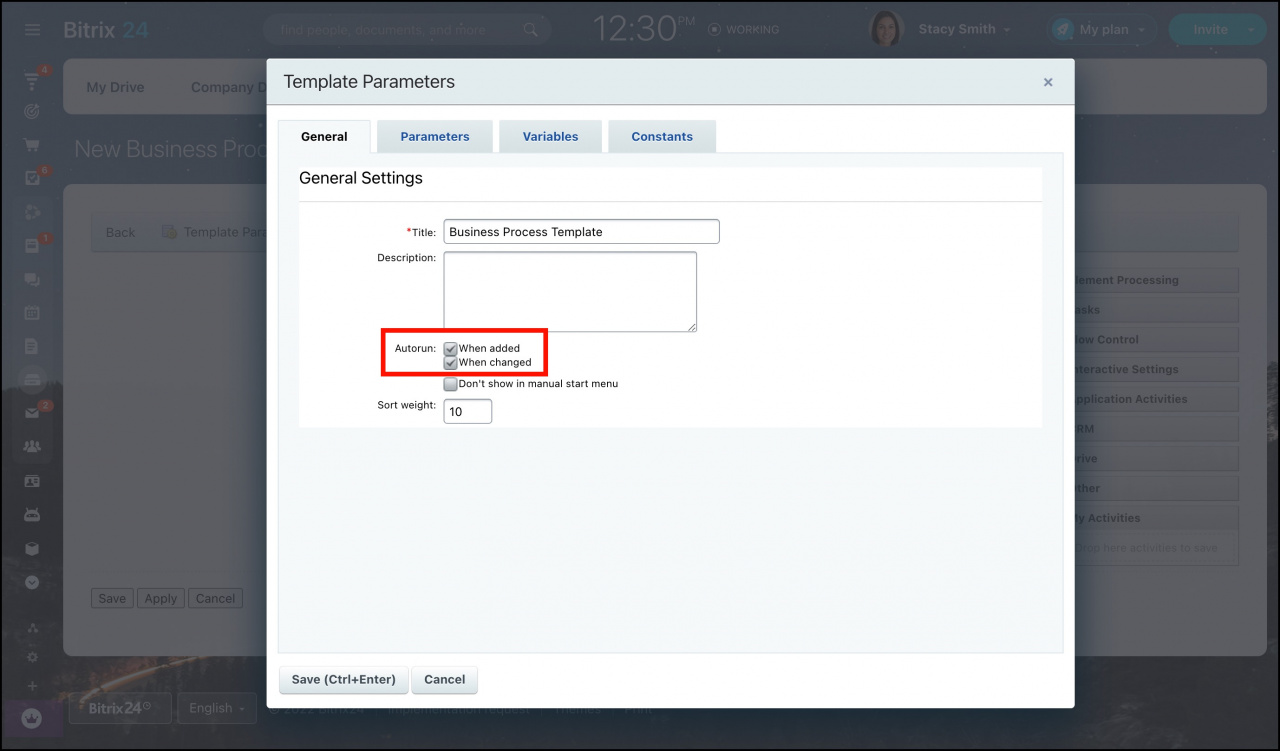
We should make sure to select the appropriate Autorun options for our business process. When added – BP will be carried out every time a document is uploaded to your Company Drive. When changed – BP will be run every time an existing document modified. In this example, we need both.
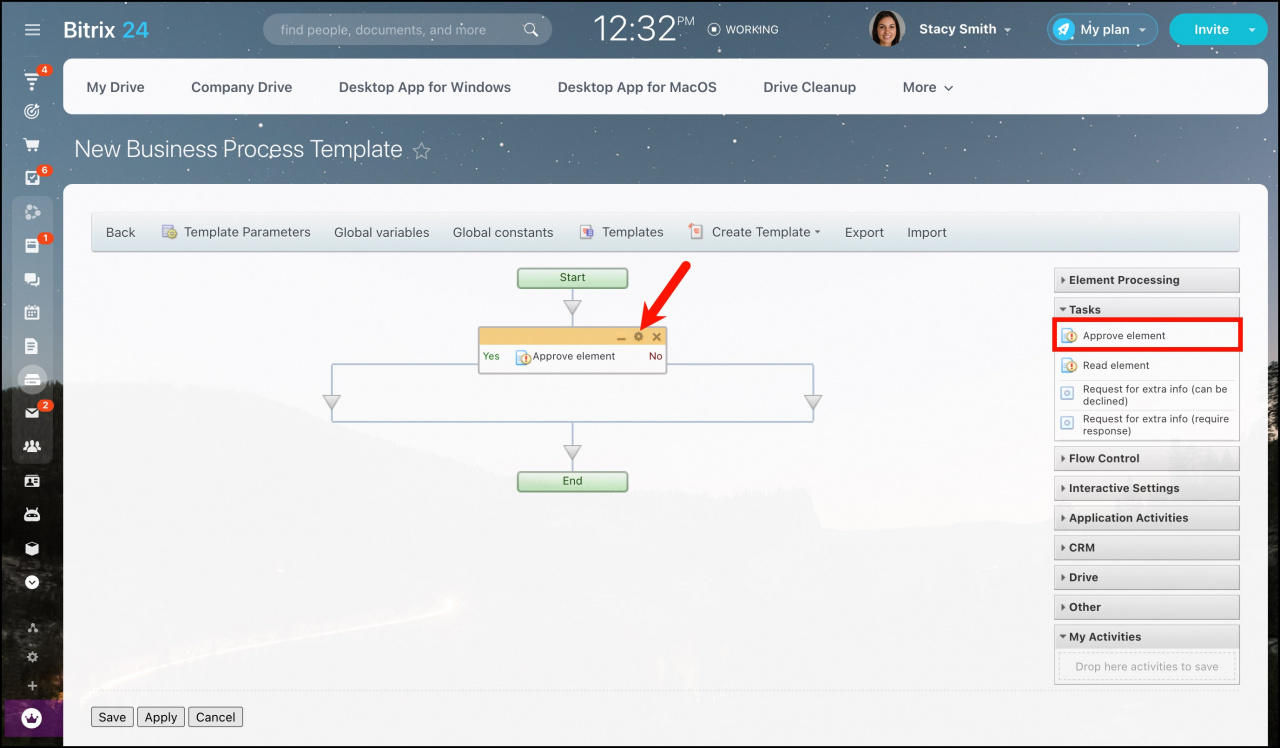
When we are done with the BP template description, a new window is opened. Here we can use the Business Process Editor. BP Editor is a simple flowchart creator into which (pre-made) function blocks can be dragged and dropped. Each function block has settings which are configured according to the needs of the process. We need just a few of them. Let’s start with the Approve Element function block.
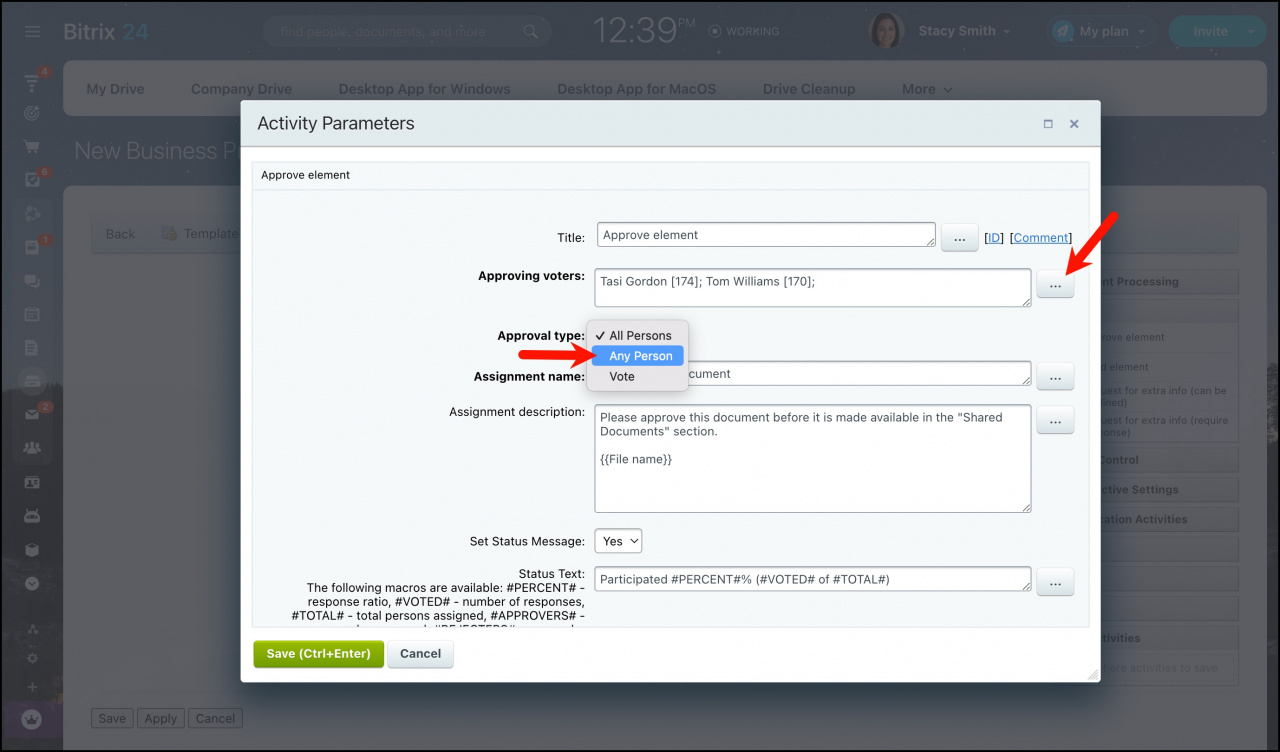
When dropped into the structure, we can click the cogwheel button placed in the top-right corner of the function block, and access the function block settings. Here we select persons who should approve the submitted document, choose whether or not all of them should approve the document or one vote/decision will be enough, and add text for the message that will appear in the BP log, etc. To select data that is relevant to the document (who created, when created, file name, etc.) we can use buttons with three dots next to data fields.
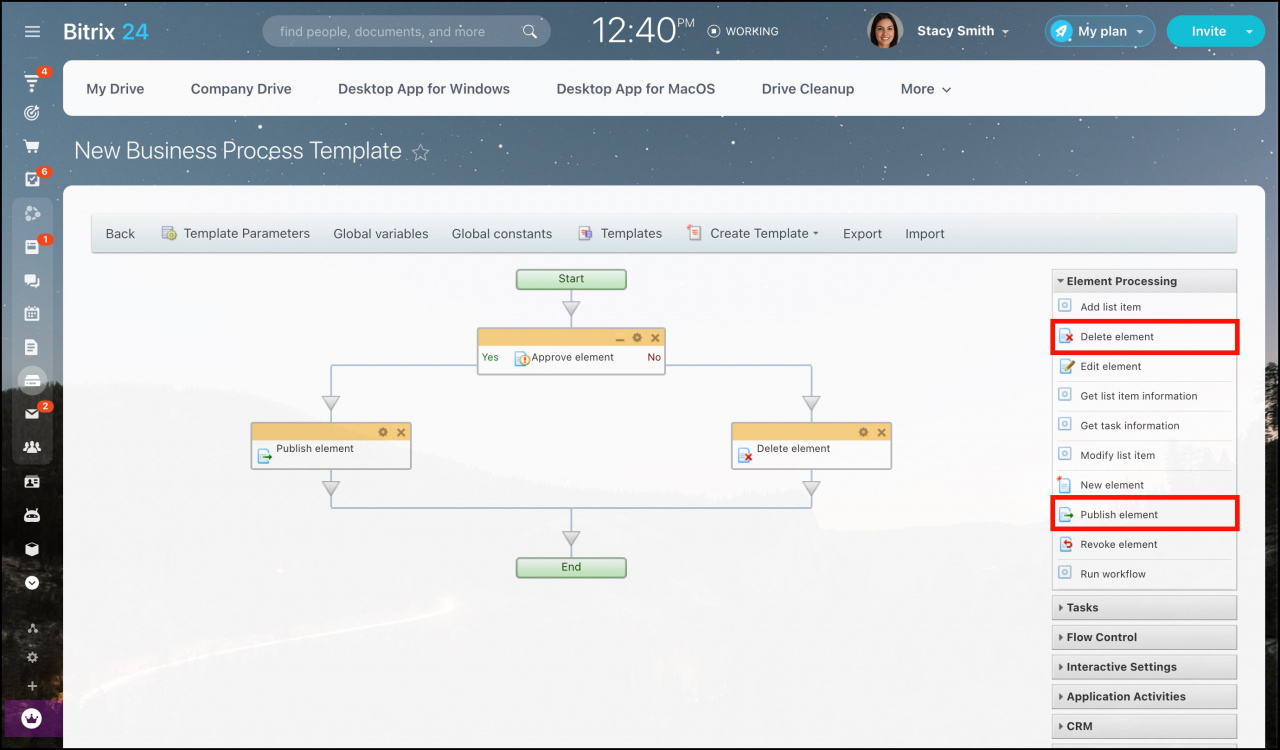
Ok, we’re done with the Approve Element function block, now we see that there are two paths our document can go through depending on the decision made by the persons approving it. If approved, we want our document to be published in the Drive, if rejected, we don’t want this document to be available for others. For these actions, let’s drag and drop two more function blocks into our BP structure: Publish Element and Delete Element. The names of the blocks correspond to the actions they carry out.
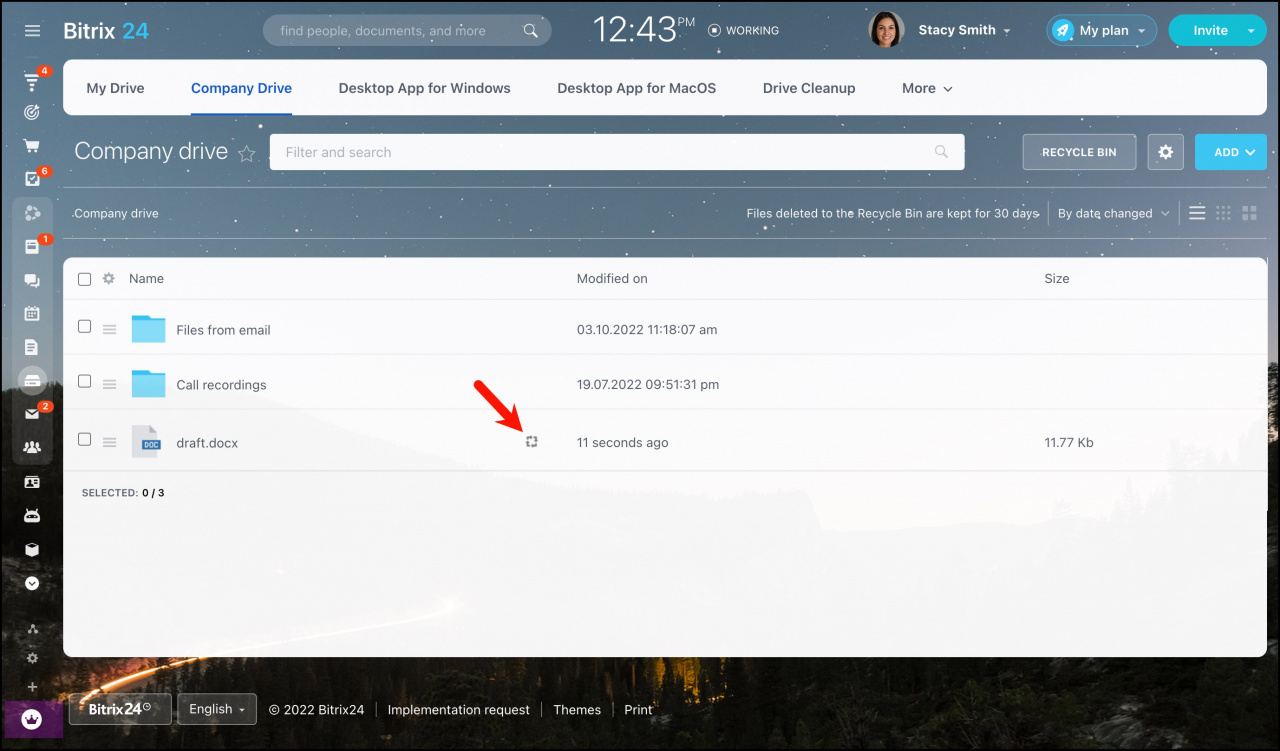
We’re pretty much done with the BP structure for now. We can click the Save button and return to the Company Drive. Let’s upload a new document called draft.docx. As you see, the circling arrows appeared next to the document name, indicating that the BP is in process.
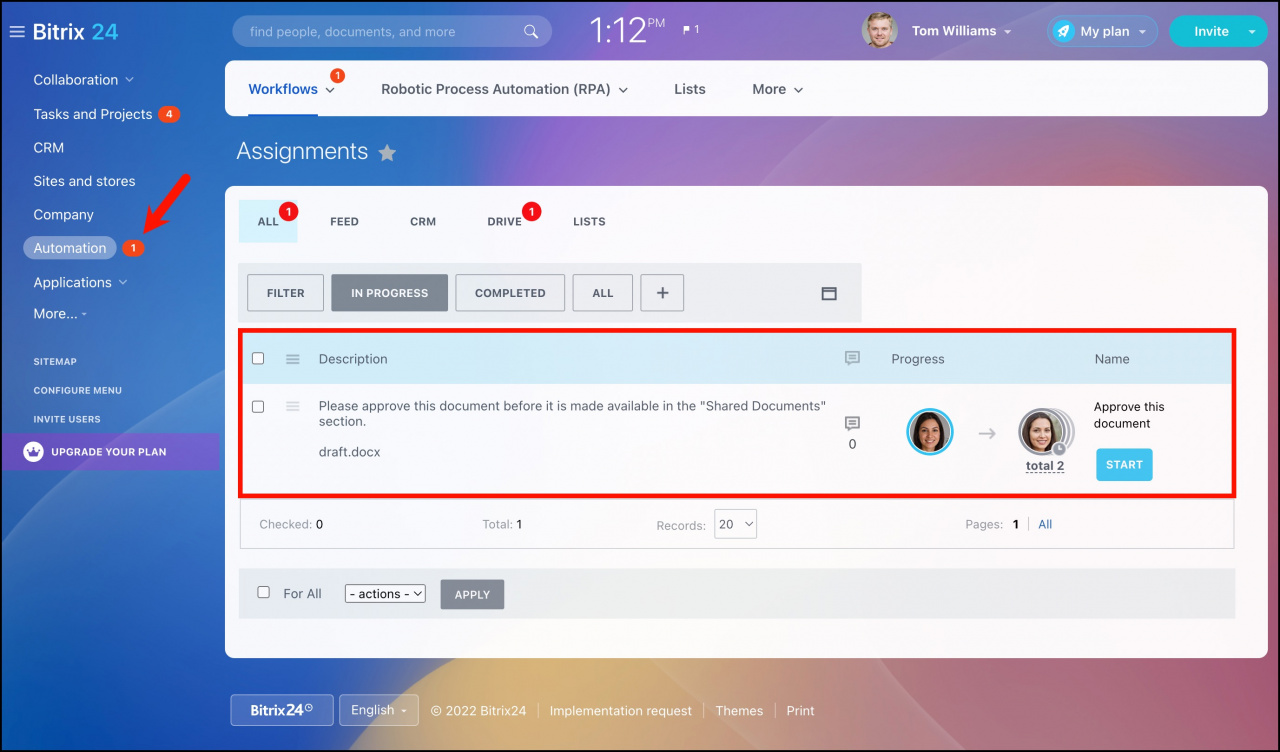
The responsible person (the one who needs to approve this document) will see the red counter in the Automation section in the left menu.
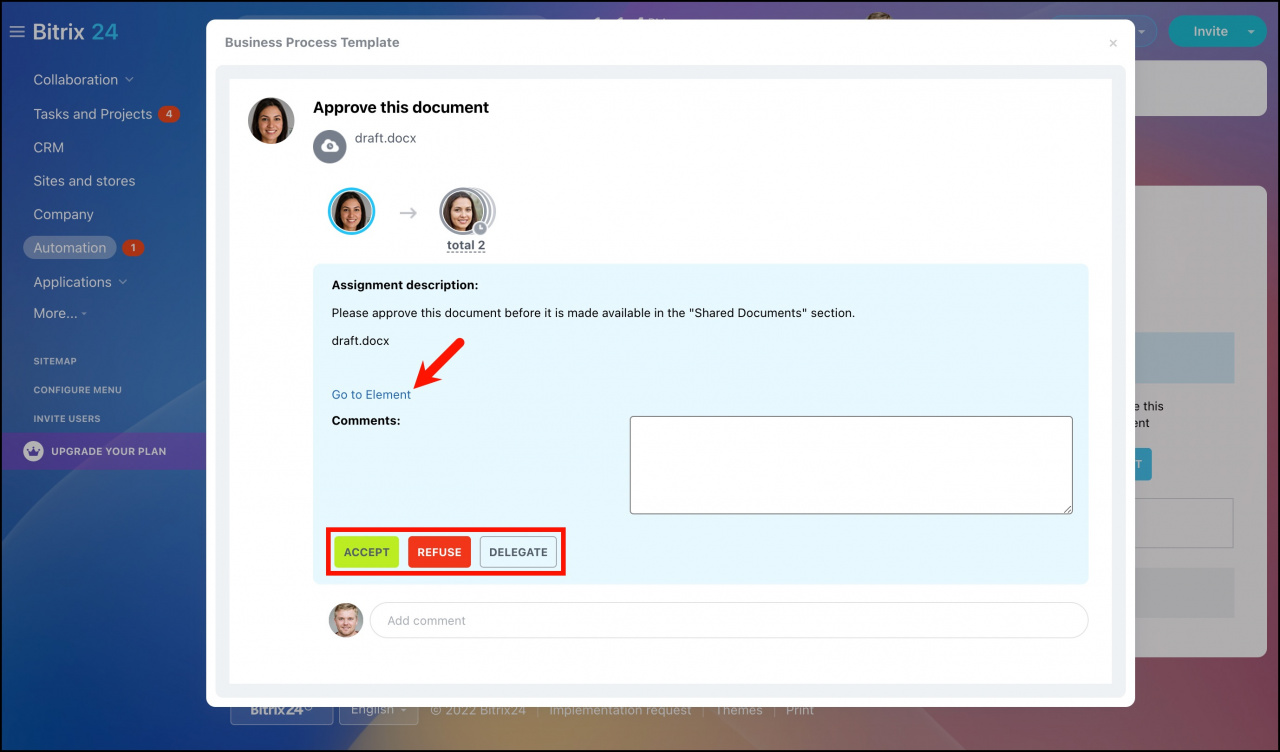
We can now start the Workflow - a new workflow details window will be opened - here we can Accept, Refuse the new document, or Delegate approving to subordinates (before that we can also share comments or open the document) . Let’s click Accept and see what happens next.
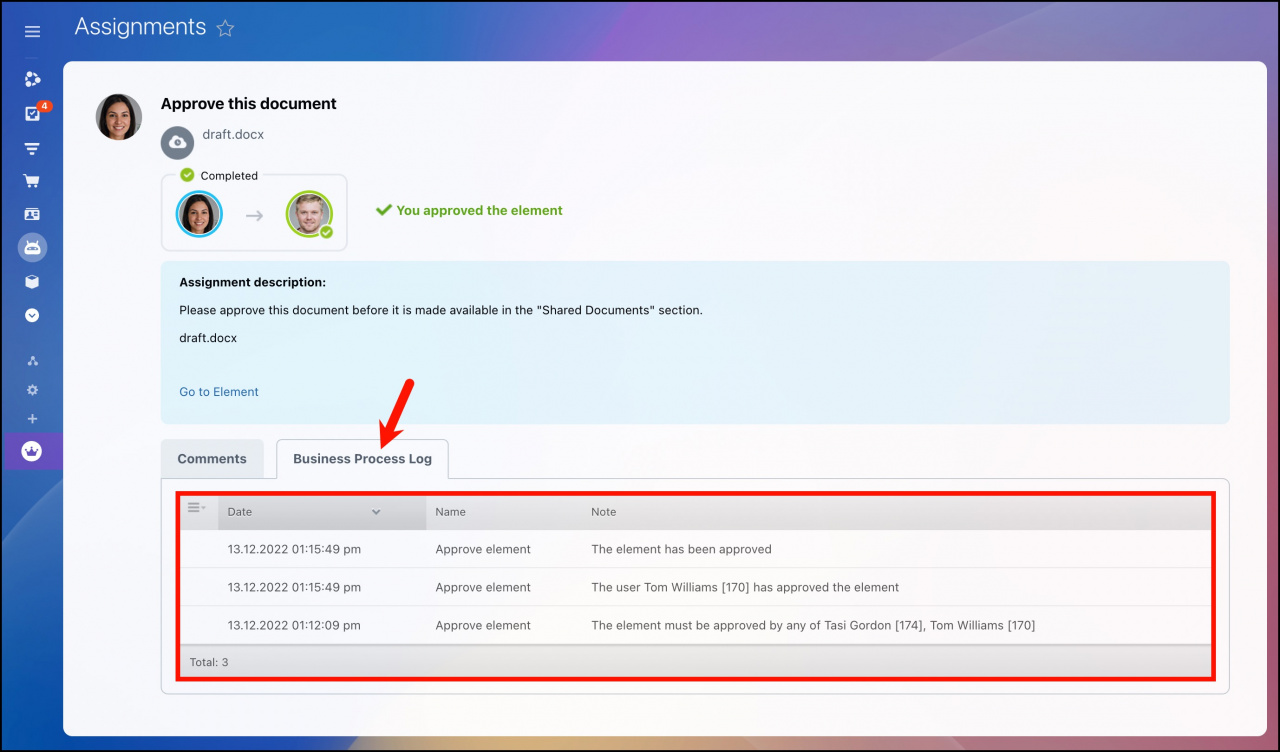
Each document (or file) that has been put through one or more business processes, has its own BP Log, which can be found in Automation > Workflows > Drive > Completed > Details:
Then click Business Process Log:
All right, everything is fine with our document: it’s been approved and now published in the Document Library. If you click the circling arrows button, you’ll see a pop-up with the Completed status.
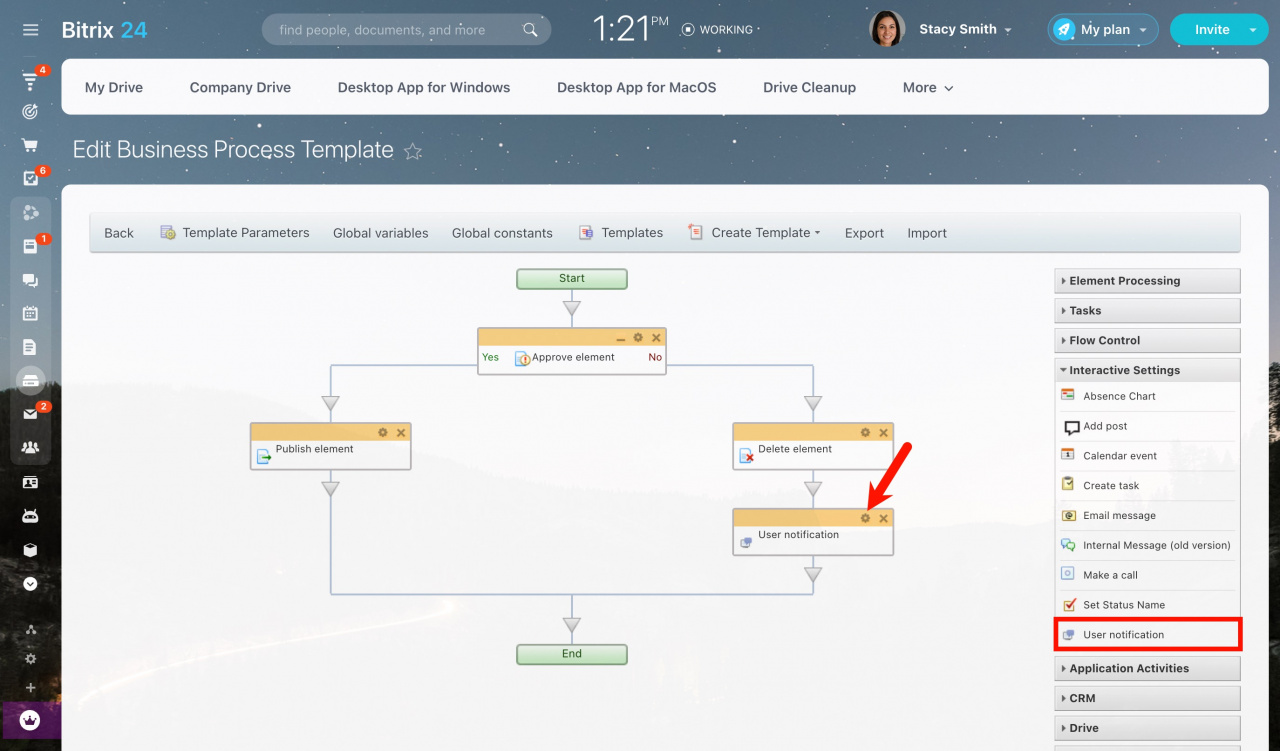
Let’s upgrade our BP structure a little bit. In case a document is not approved, we want the person who’s submitted the document to receive a corresponding notification. We need to go back to the Company Drive > gear button > Business processes > [BP name]. Now we should drag-and-drop the User Notification function block somewhere in the path that’s used for rejected documents.
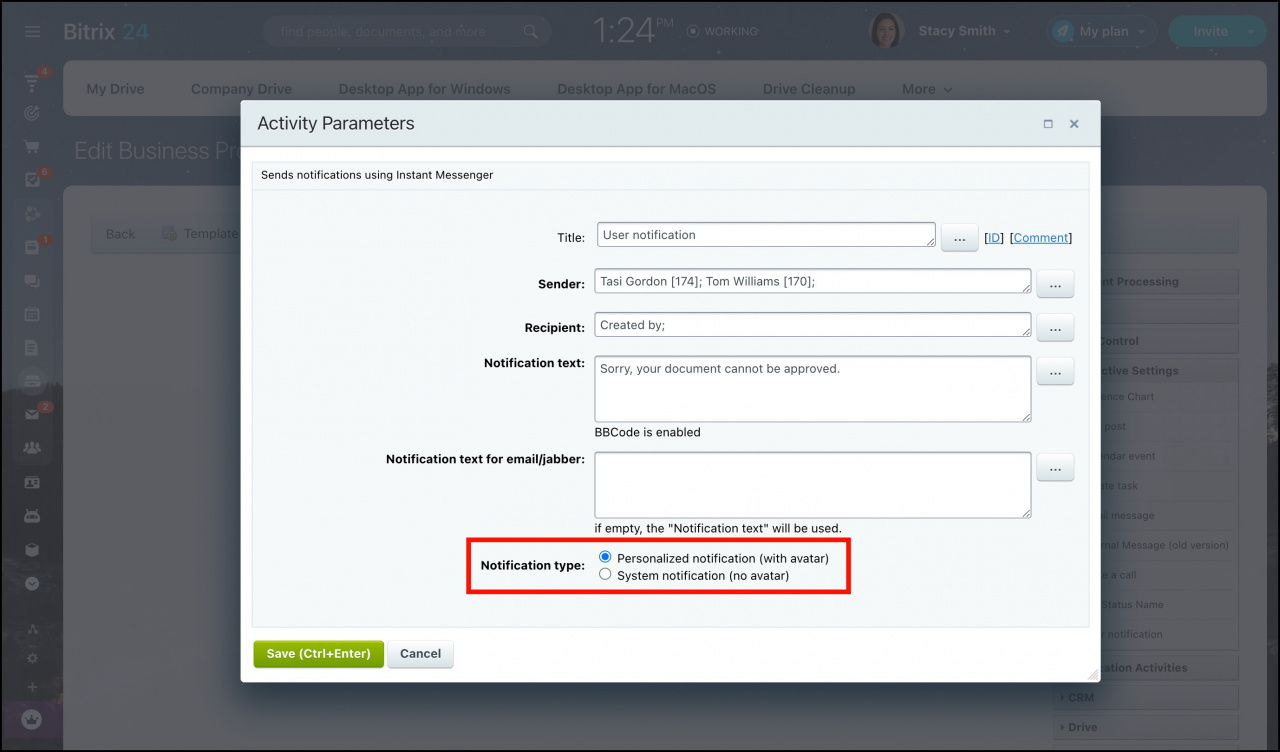
To change the settings and add a notification text, we need to click the cogwheel button. This brings us to the function block settings where we can select sender(s) and recipient(s), as well as whatever text is desired. For the recipient field, we are going to use the three dots button to select the user who has submitted the document. The submitter can be found in the Users category and will be represented as Created by. We can also choose a notification type - personalized or system notification. Now we can save the function block properties.
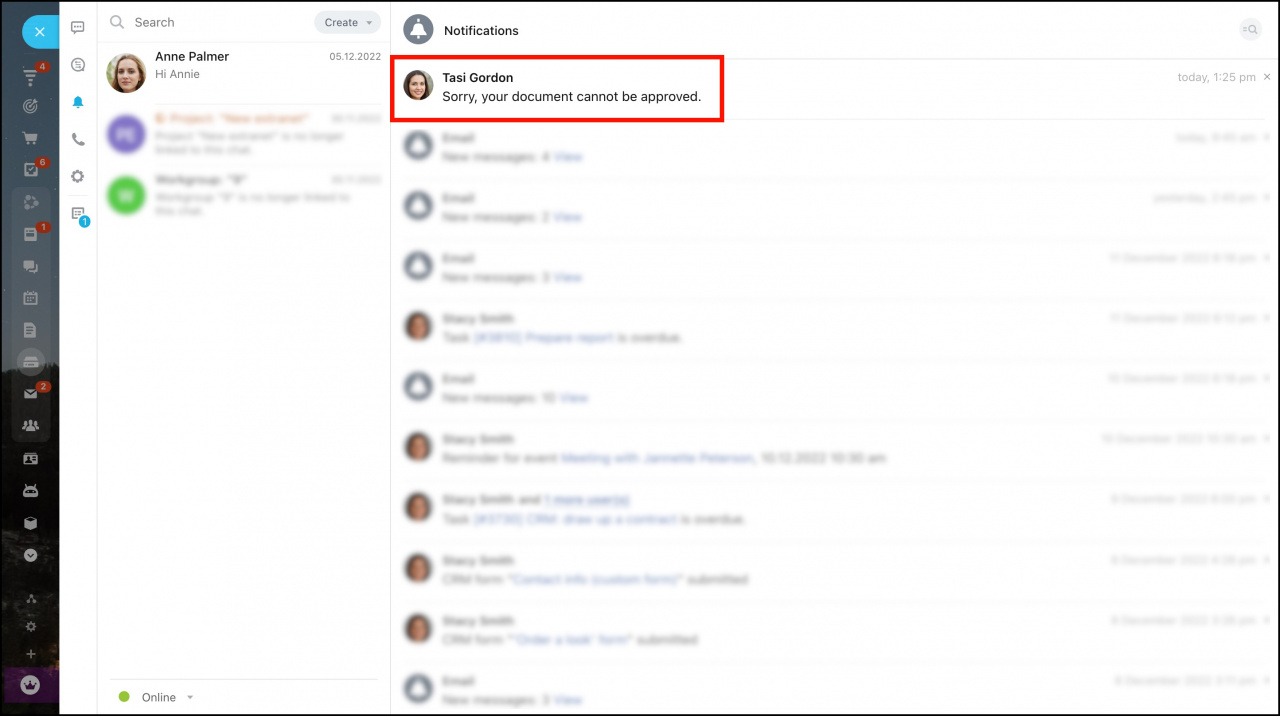
Now let’s upload a new document and reject it. We see that the submitter received a notification saying that the document could not be approved. Also, we see that this document did not appear in the Company Drive (it was deleted).

