Closing a deal is an important part of the sales process. Upon completion (whether successful or not), you may need to perform various actions. Use workflow activities to easily automate them.
Consider the following scenario and explore the automated actions that will be launched after the deal stage change:
-
A new workgroup is created when a deal with a specific type is closed as won.
-
The supervisor gets notifications each time a deal is closed successfully.
-
Emails are sent to the supervisor when any deal is closed as lost.
Bitrix24 pricing page
To add a new workflow template for leads,
-
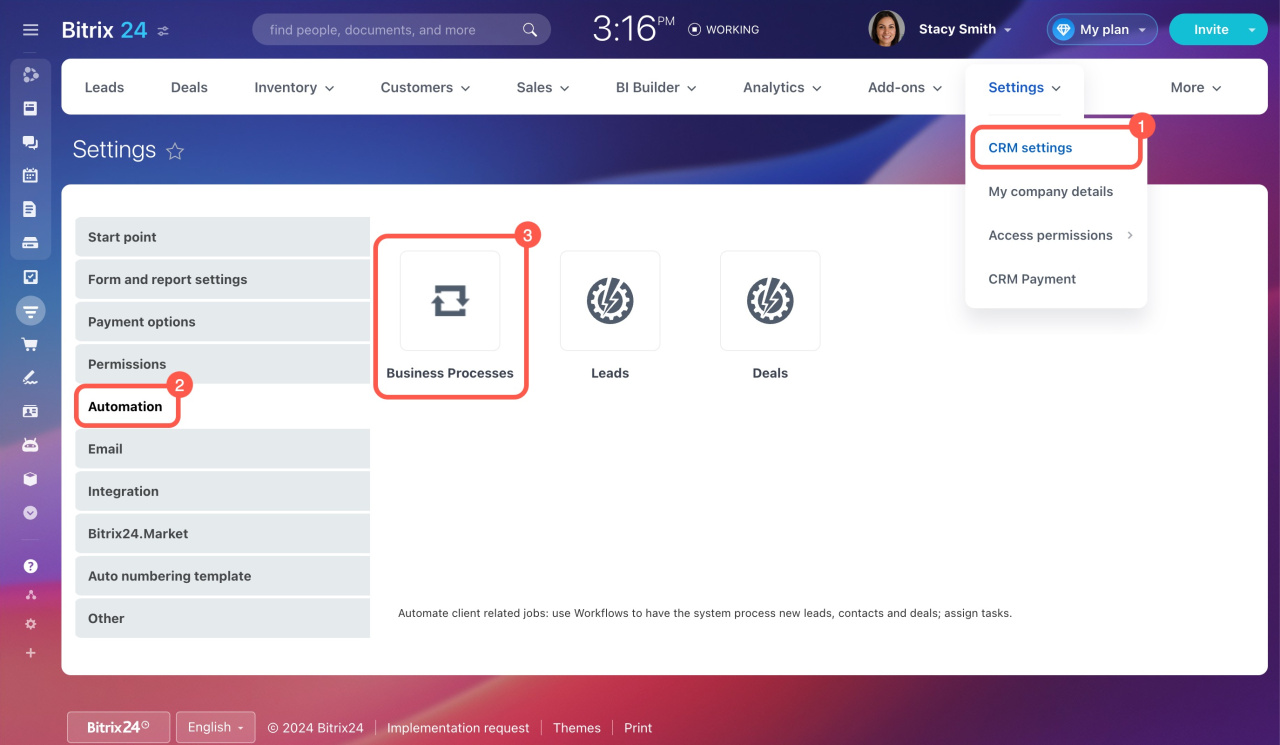
Go to CRM > Settings > CRM settings.
-
Open the Automation tab and select the Business Processes block.
-
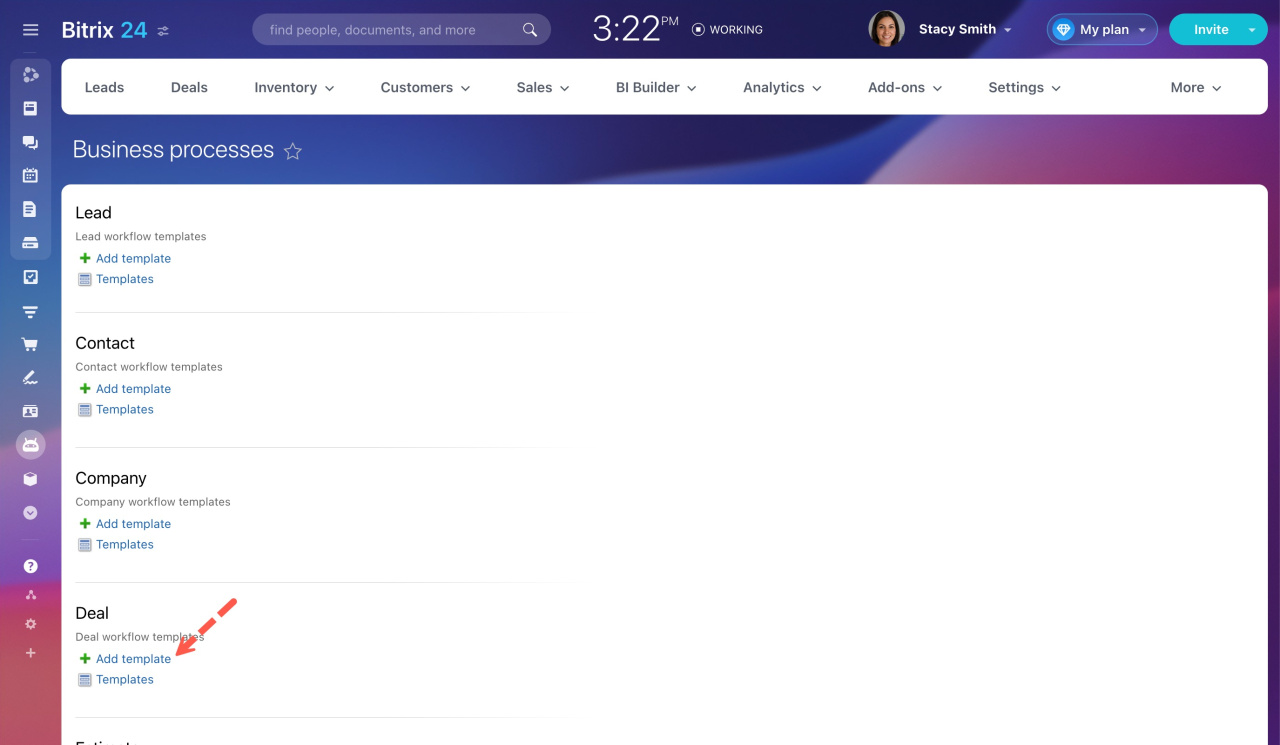
Click Add template under Deal.
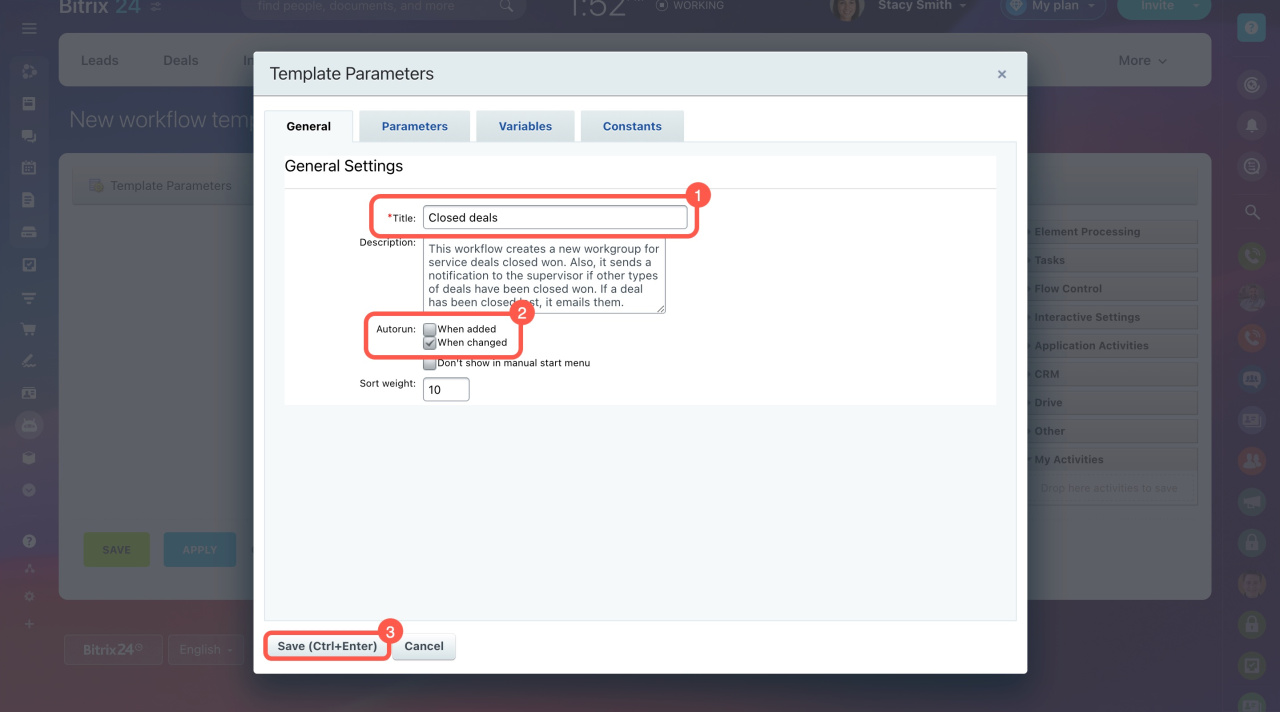
The workflow designer opens, and the pop-up window with template parameters appears. Specify the template name, pick the option to run it when changed, and click Save.
Now, you can create a flowchart and configure it according to your needs.
Step 1. Add conditions
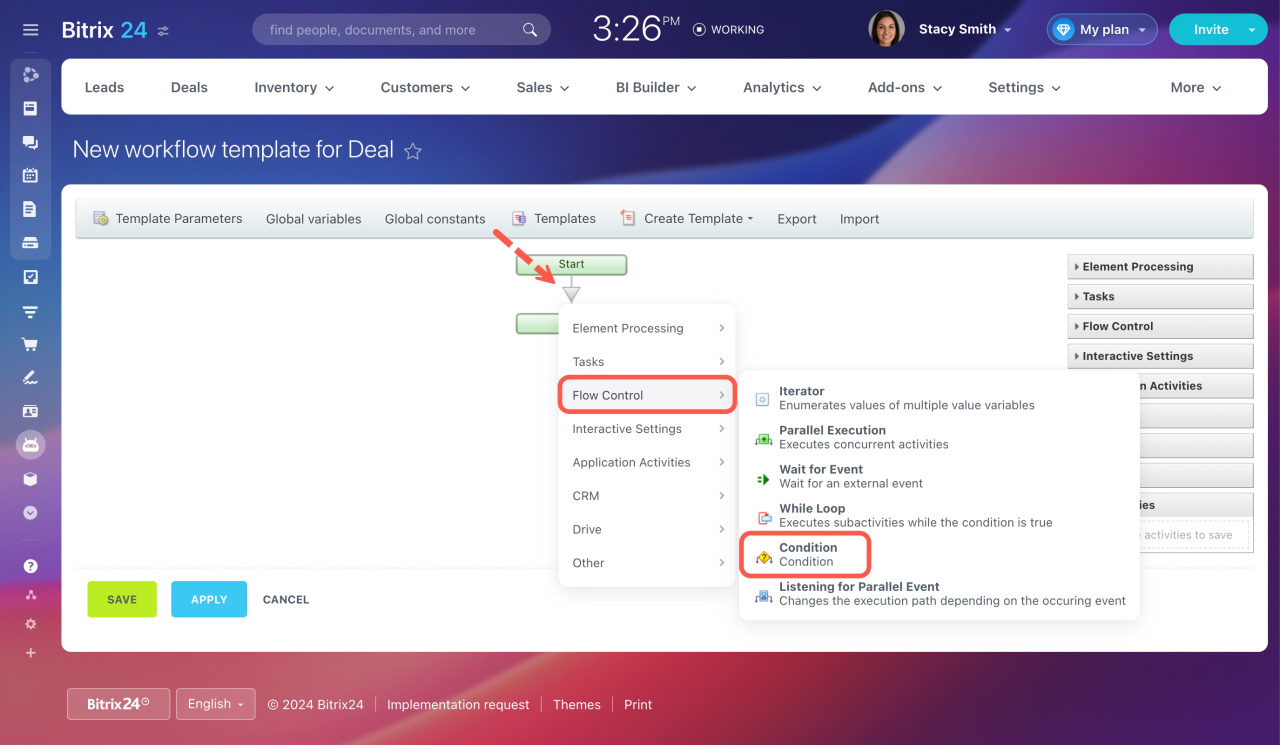
First, add the Condition activity to the flow. It will filter all deals for those that have been closed as lost or won.
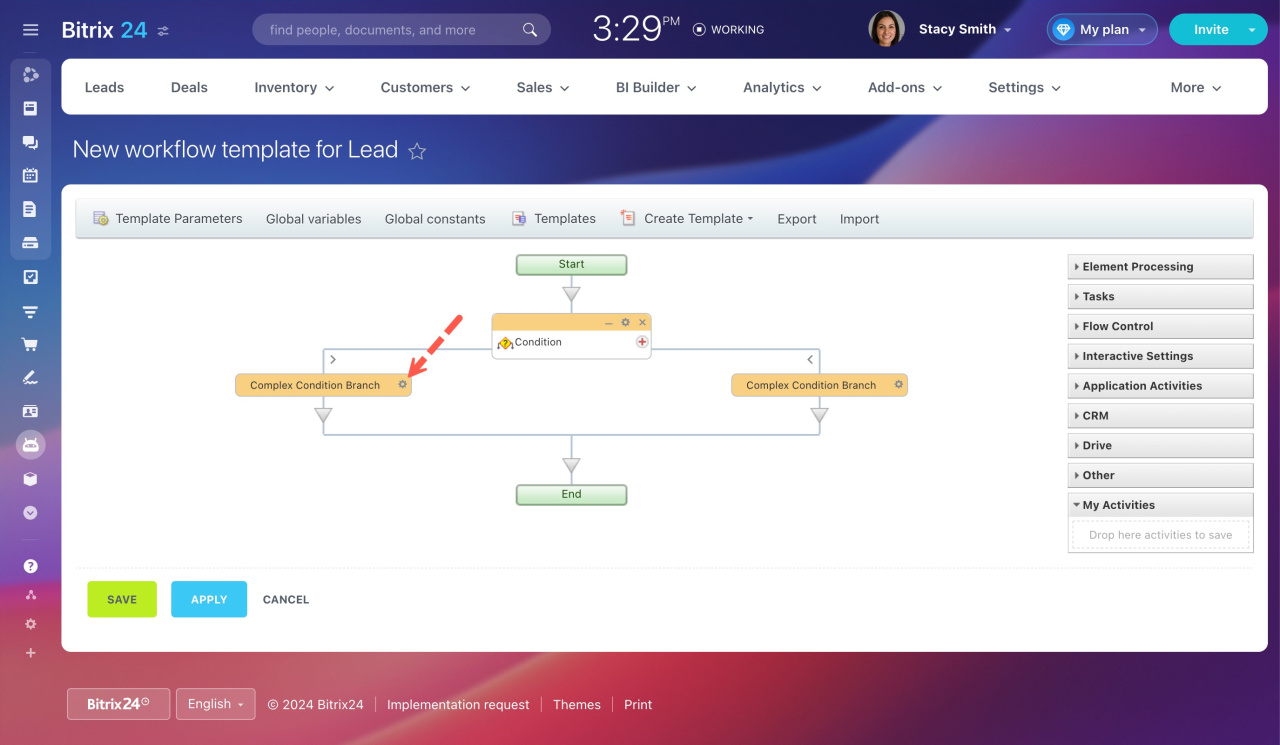
To set up a condition, click the gear on the right of the Complex Condition Branch block.
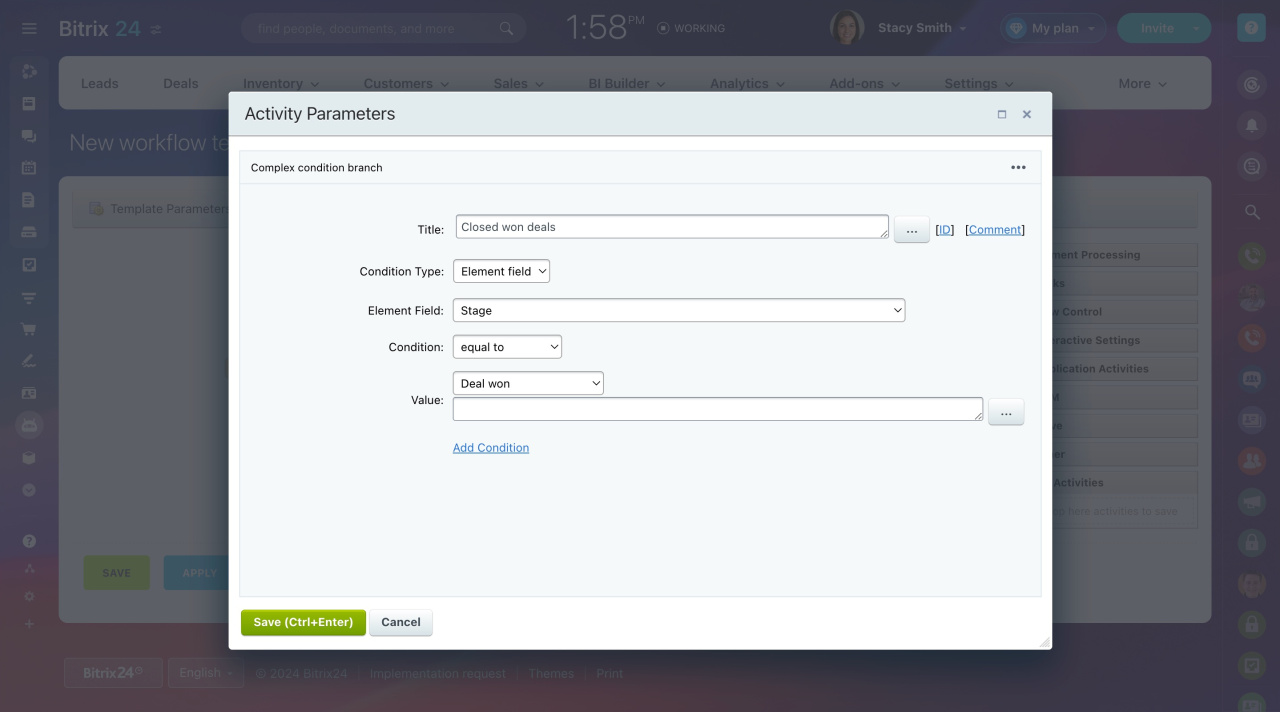
Our condition should filter all deals by their final stage. A pop-up window appears, and you can adjust the activity parameters.
-
Title: Rename the activity if needed.
-
Condition Type: Select Element field to use lead fields further.
-
Element Field: Choose a deal field whose value you need to know. In our case, it is Stage.
-
Condition: Select an appropriate condition from the drop-down list. To specify the exact value, we use equal to.
-
Value: Select the value required for comparison. In our condition branches, we'll use Deal won and Deal lost.
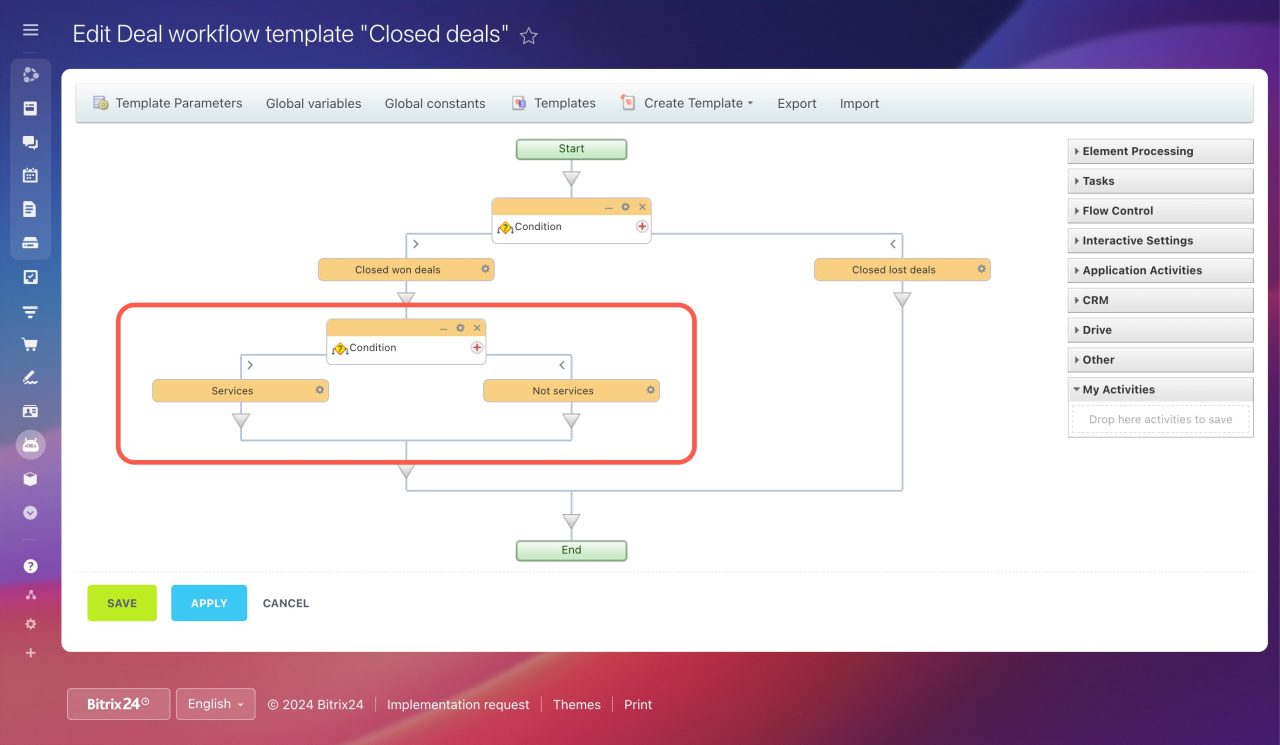
Divide closed-won deals into two groups to construct different types of activities for them. Add another condition block under Deal won. Rename the complex condition branches of this condition into Services and Not services.
Configure the Services condition branch parameters. In the element field, choose the Type field and set the value equal to Services. In the same way, configure another condition branch. The only difference is to choose not equal to as a condition.
Statuses and dropdowns
Step 2. Set the automatic group creation
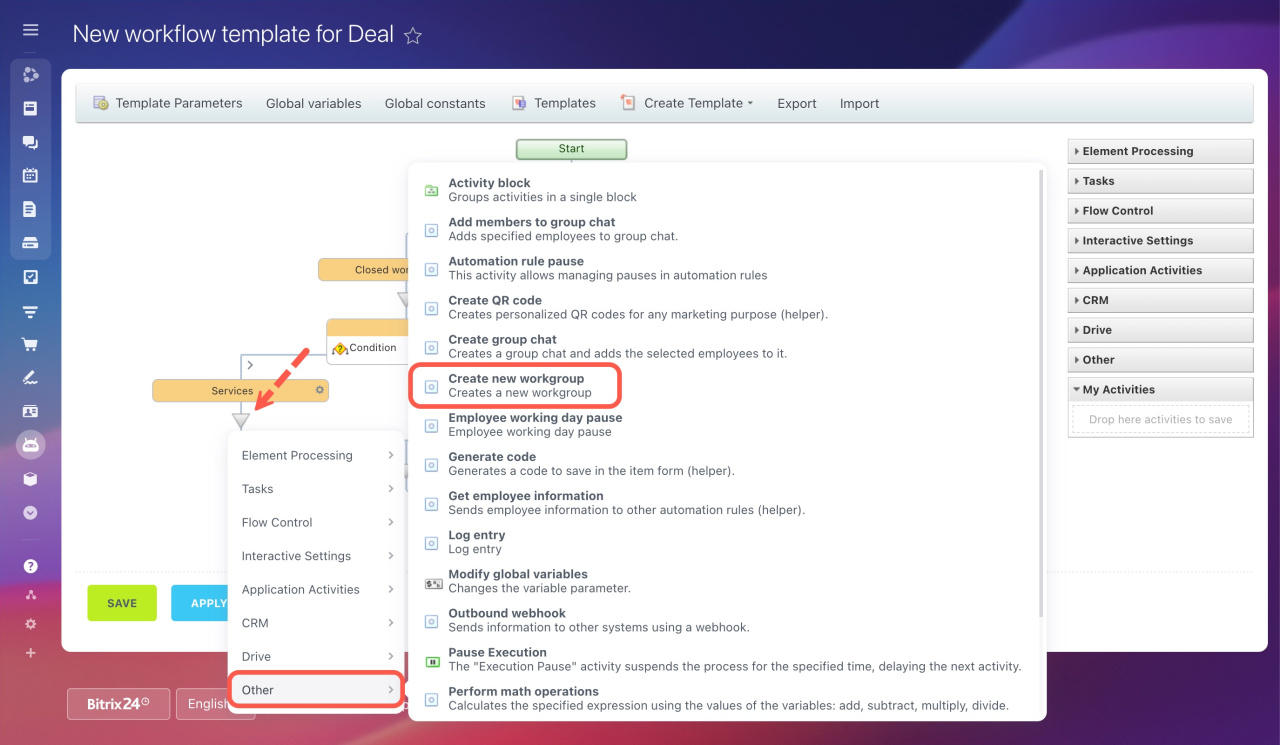
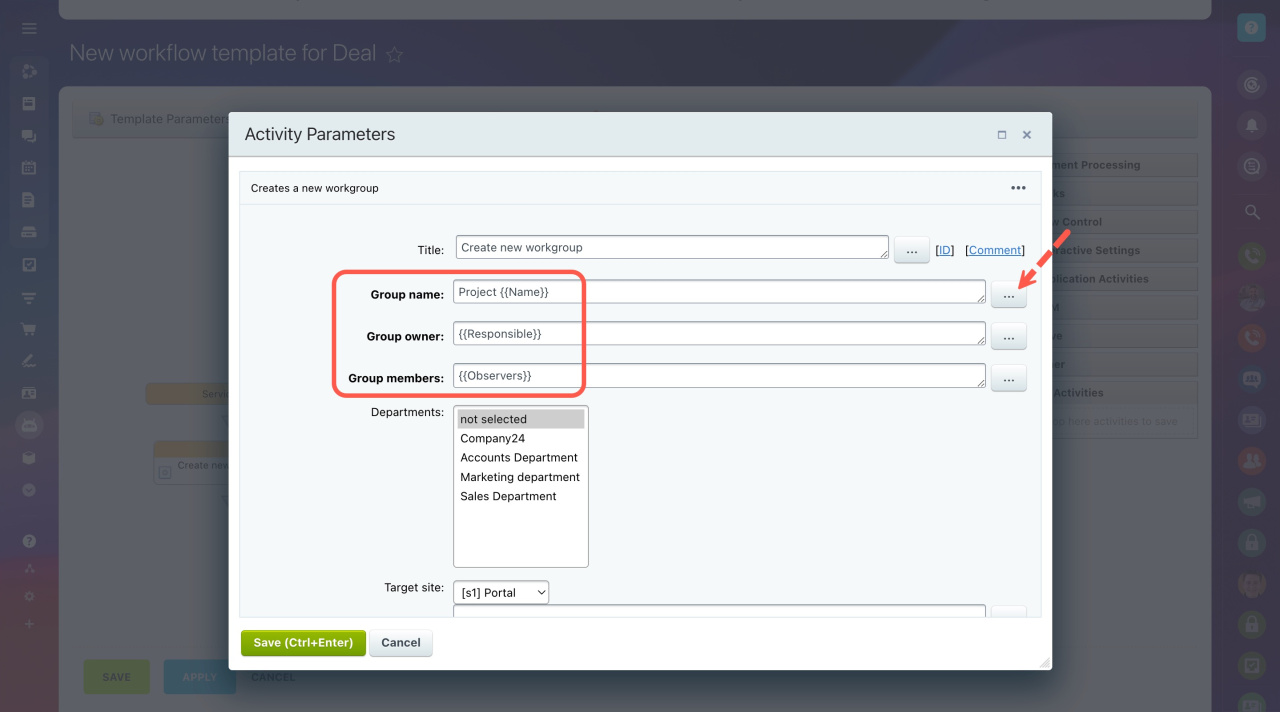
After sorting won deals with the services type, let's set the process to automatically create a new workgroup for such deals. Add the Create new workgroup activity.
Configure the new workgroup activity parameters.
-
Group name: Set the group name. For example, you can add the deal name to the workgroup name.
-
Group owner: Select a user who will manage the group. For example, assign the deal responsible manager as an owner.
-
Group members: Select involved users as the workgroup members.
Step 3. Configure user notifications
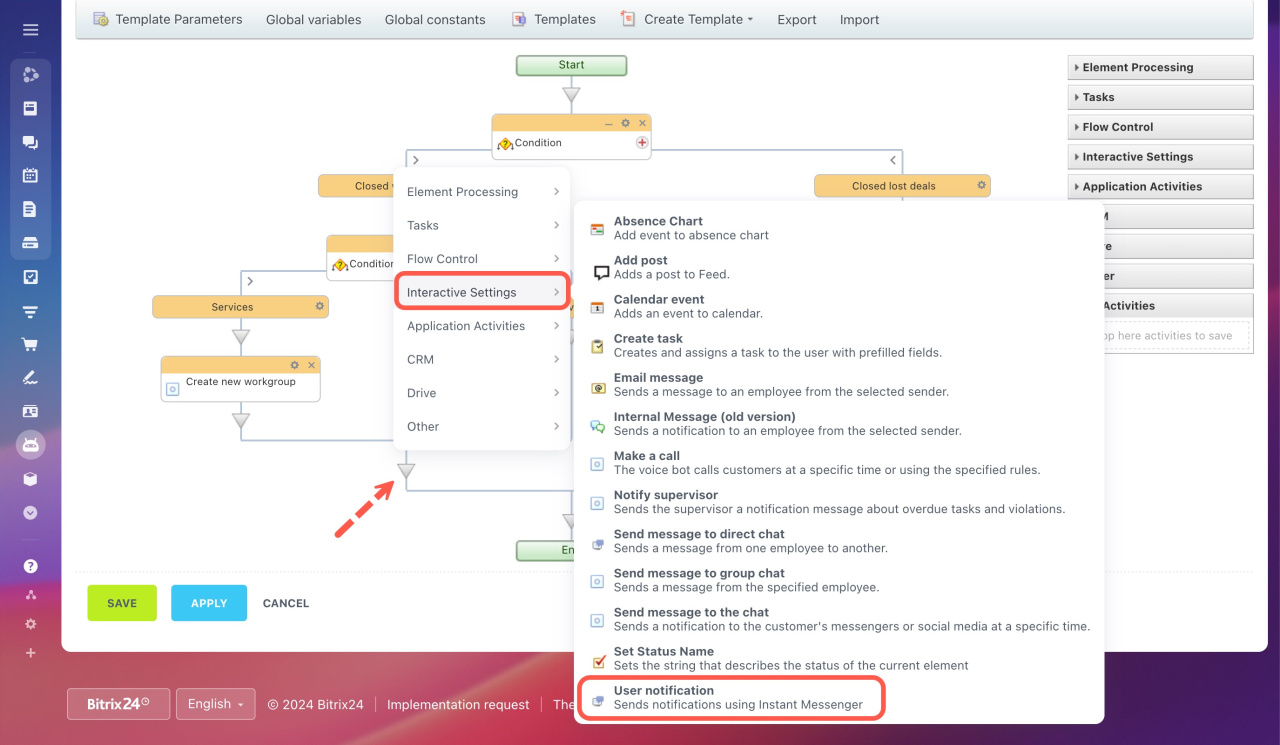
Suppose that the supervisor would like to receive notifications about all closed won deals. For this, add the User notification activity to the flow.
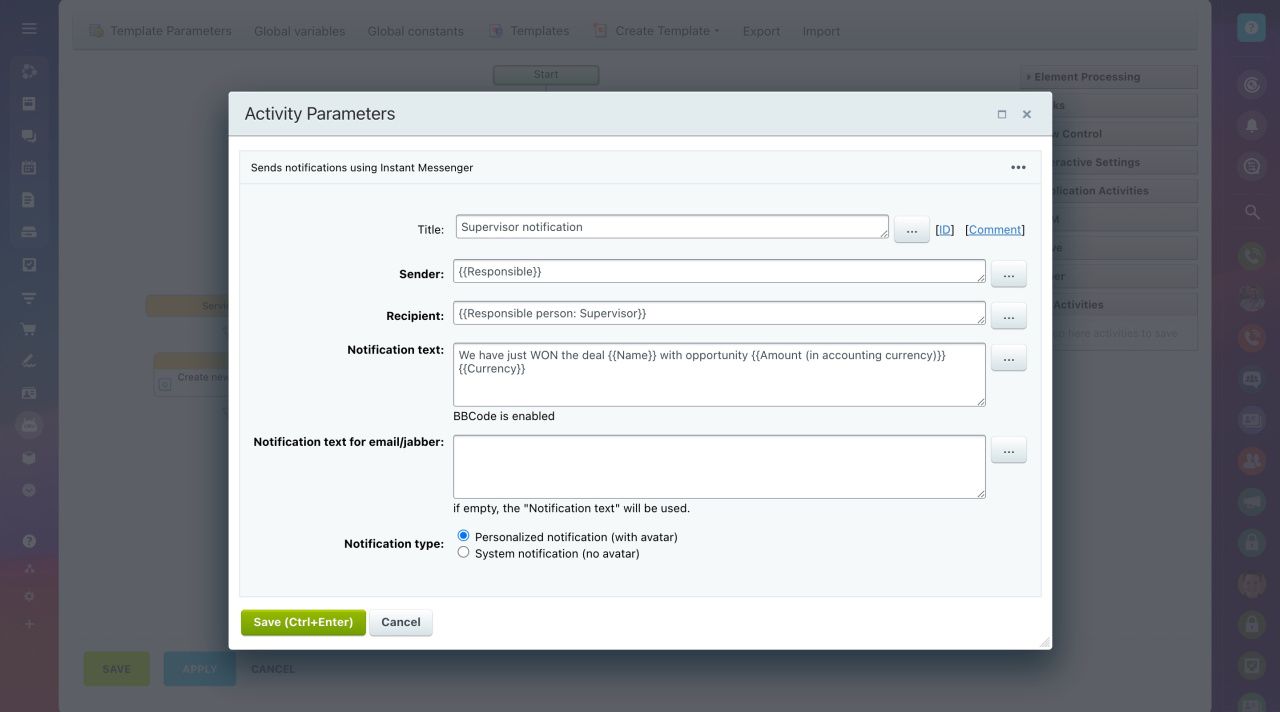
Configure the notification activity parameters:
-
Title: Rename the activity if needed.
-
Sender: Select a particular employee or deal responsible user.
-
Recipient: Use the special macros to select the responsible person's supervisor.
-
Notification text: Enter your text and add deal details to the message, such as deal name, opportunity, currency, etc.
-
Type: Decide if you want a notification to be personalized or not.
Step 4. Configure email message sending
It's time to return to the deals closed as lost. We indicated them in the upper condition.
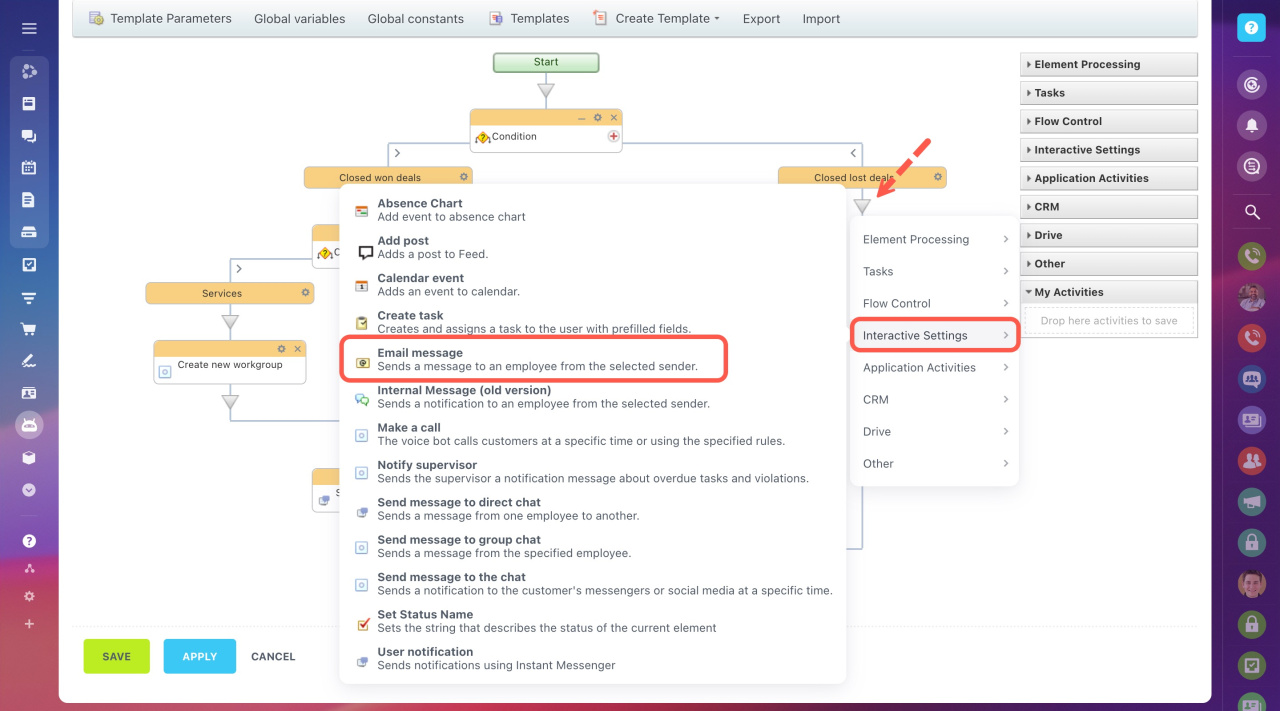
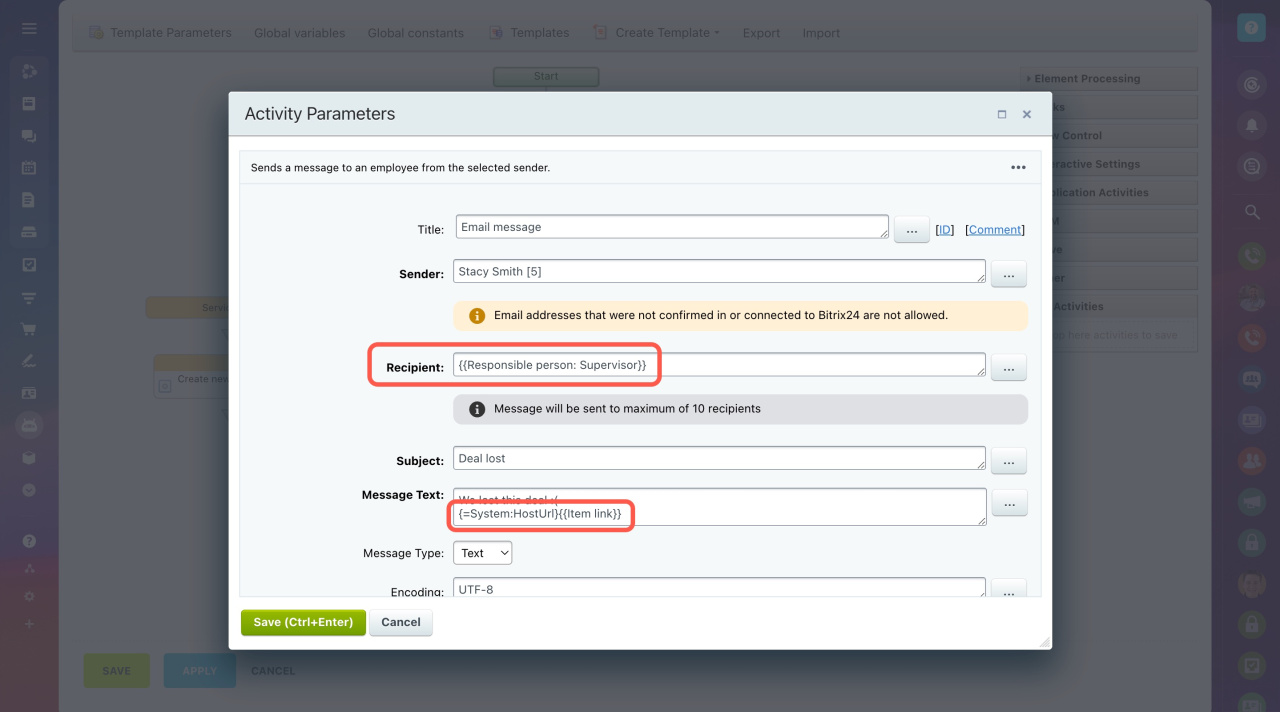
Add the activity that will email particular users. The purpose of the email is to notify them that the deal was not successful. It also contains deal details and a direct link to it. For that, add the Email message activity under the Closed lost deals condition branch.
Configure the activity parameters:
-
Title: Rename the activity if needed.
-
Sender: Select a particular employee or user responsible for the deal.
-
Recipient: Use the special macros to select the responsible person's supervisor.
-
Email subject: You can add the deal name or other details to the subject.
-
Email message text: Enter your text and add deal details to the message. To add the direct link to it, use this combination of macros:
{=System:HostUrl}{{Item link}}
{=System:HostUrl} is replaced with your Bitrix24 account URL. {{Item link}} leads to the CRM entity for which the workflow is run.
Find other examples of using macros
Then save your workflow template. As a result, you'll get a flowchart that includes all the actions according to the planned scenario.

