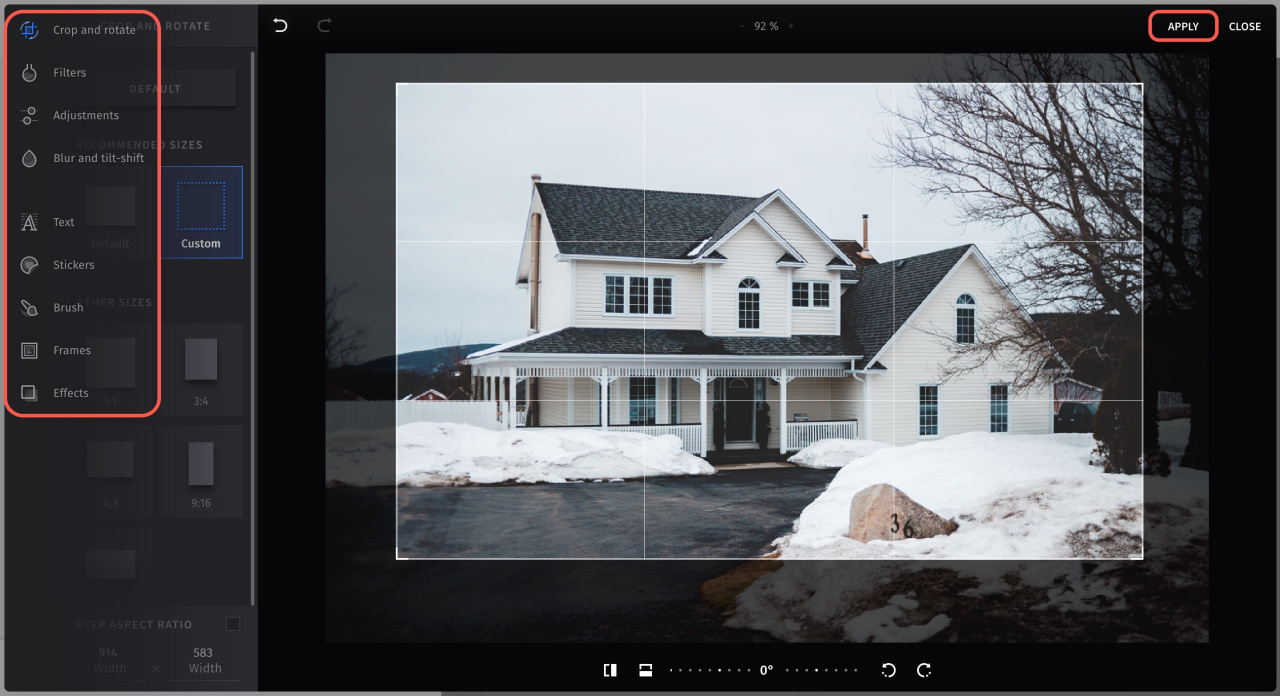
In Bitrix24 Sites, you can use the built-in graphics editor to crop your images, edit them, apply filters, and add effects.
To open the editor:
- Click on the image in the block.
- Upload your image to replace the default one.
- Click Edit.
On the left, you'll find a navigation menu with different tabs:
Crop and rotate. Adjust the image size or orientation using preset or custom settings.
Filters. Choose and apply a filter to your image. Adjust its intensity as needed.
Adjustments. Access basic and advanced settings to modify contrast, brightness, temperature, and other image parameters.
Blur and tilt-shift. Apply blur or tilt-shift effects to focus on specific areas of your image.
Text. Add and customize text on your image with various fonts, sizes, and colors.
Stickers. Insert stickers to your image for a fun and creative touch.
Brush. Use the brush tool to paint on your image with customizable brush sizes and colors.
Frames. Add a frame to your image to give it a polished look.
Effects. Apply various effects to transform the appearance of your image creatively.
After making your changes, click Apply at the top right corner.
Don't forget to save the changes in the block settings.


