Evaluate the effectiveness of advertising sources using call trackingCall tracking is a technology that links marketing channels to inbound phone calls using unique phone numbers. in Bitrix24. For example, you create ad campaigns on Google Ads, Instagram, and Facebook. With this feature, you can assign a different phone number for each source, and then analyze which platform drives more customers to your business.
Call Tracking
The call tracking settings differ for each telephony connection type:
-
Rented numbers do not require additional settings, they all support call tracking by default.
-
When using an application from the Market, additional settings may be required on the app side.
-
If you connect a SIP PBX using SIP connector, you need to apply additional settings both in Bitrix24 and on the PBX side.
This article outlines three steps to configure SIP PBX numbers to be used in call tracking.
Step 1. Configure your PBX to transmit the destination number to call tracking
To connect SIP PBX to Bitrix24, you need to have a SIP account. The data for connection is provided by your PBX: server, login, and password.
You can have one SIP account and multiple phone numbers connected to it. When clients call these numbers, all calls will come to your PBX having a single SIP account.
In Bitrix24, the server, login, and password are shown under the PBX connection parameters, but the phone number cannot be specified there. Thus, there's no way to see which number the customer called under Call Details. Using headers, you can transmit a destination number from PBX to Bitrix24 and use it in call tracking.
SIP uses special headersThe SIP header is a part of the SIP (Session Initiation Protocol) protocol that transmits call details. For example, SIP headers contain information about the caller and receiver. containing the information about the destination number:
-
The To header is the phone number dialed by a caller to reach you.
-
The Diversion header is used for call forwarding.
Not all PBXs transmit these headers by default. Contact your provider or administrator to configure your PBX.
Step 2. Check the SIP connection settings in Bitrix24
To transfer calls to Bitrix24 with different numbers, set up a PBX connection.
-
Go to CRM > Add-ons > Telephony.
-
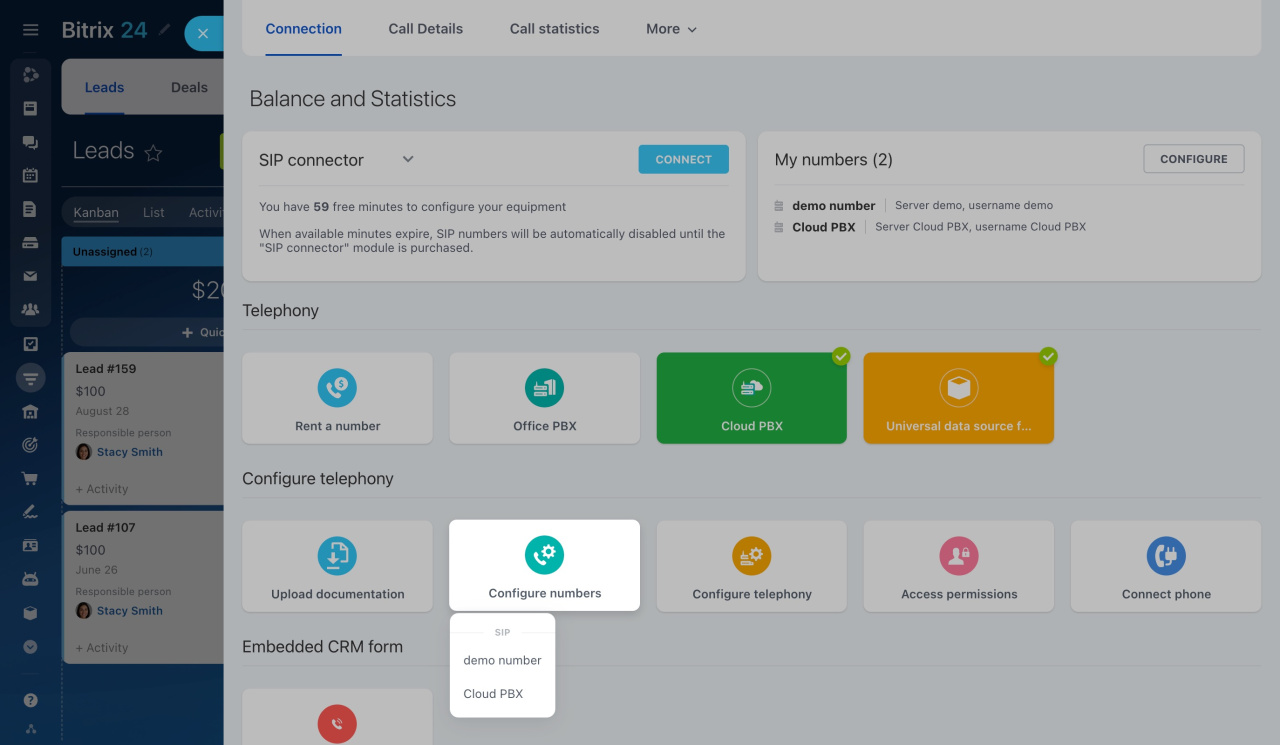
On the Connection page, click Configure numbers and select your PBX.
-
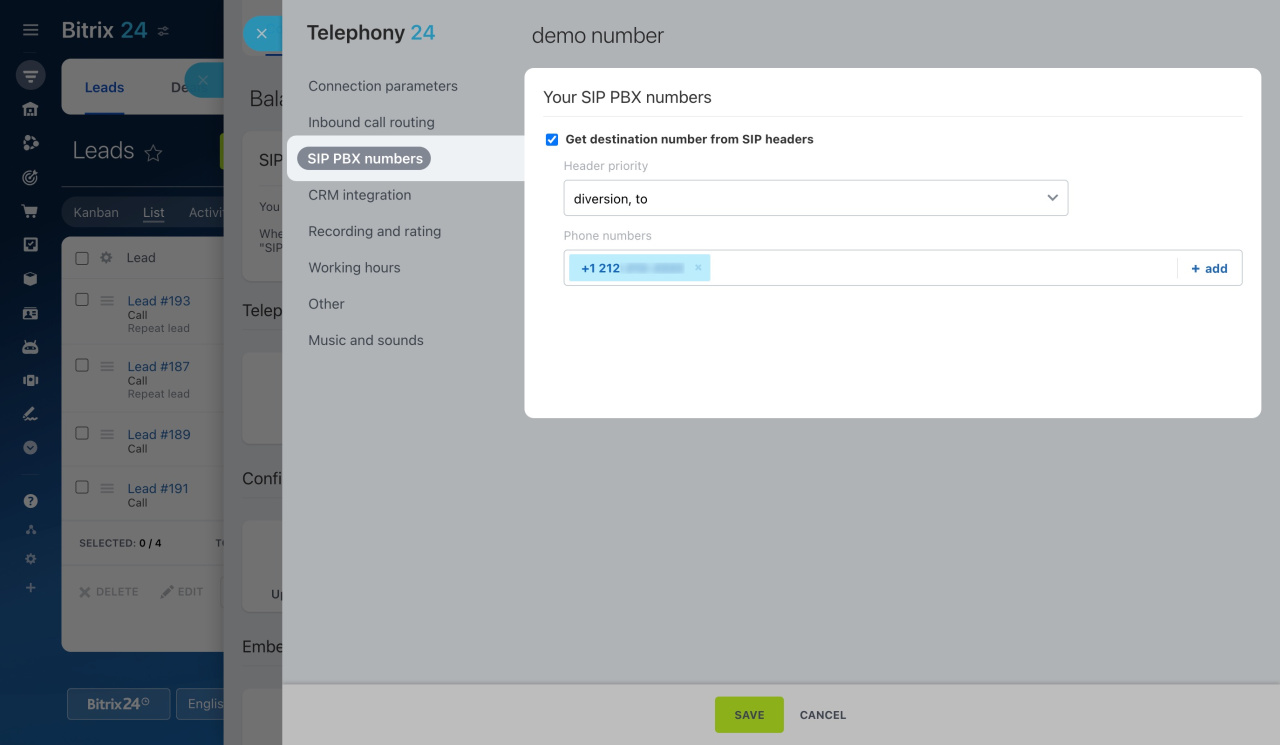
Open the SIP PBX numbers tab.
By default, only account administrators have access to these settings. You can configure access permissions to grant access to regular users as well.
Configure access permissions to Telephony -
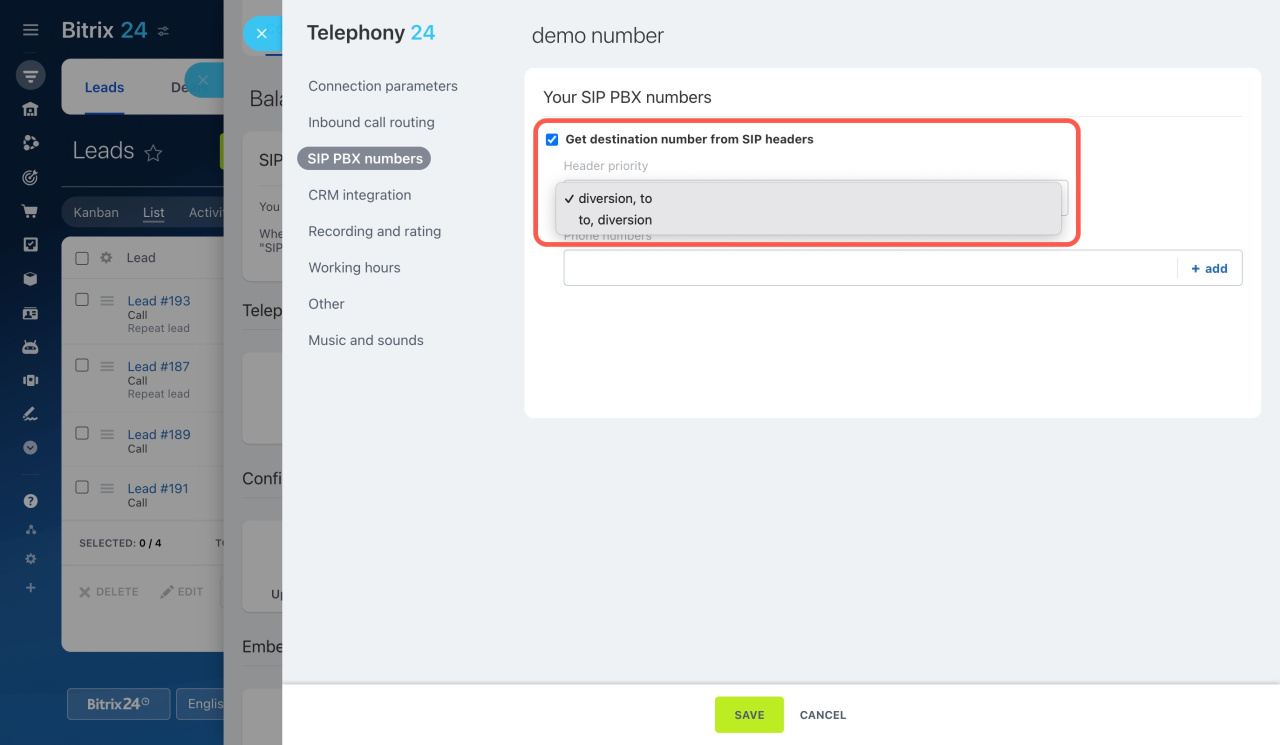
Activate the option.
The data in the headers may differ depending on the PBX settings. Information in these headers may vary depending on SIP PBX settings, so you can specify the order in which Bitrix24 will check headers under Header priority. For example, if you select diversion, to, the system will determine the number from the diversion header.
-
A client dials your SIP PBX number.
-
Once the call reaches the PBX, the system generates a special request.
-
The PBX gets the destination number on this request and puts it into the To or Diversion header.
-
After that, the call is routed from PBX to Bitrix24.
-
The call comes to Bitrix24 with your PBX number in the header. This number is defined in the call tracking system as the number to which the call was sent.
-
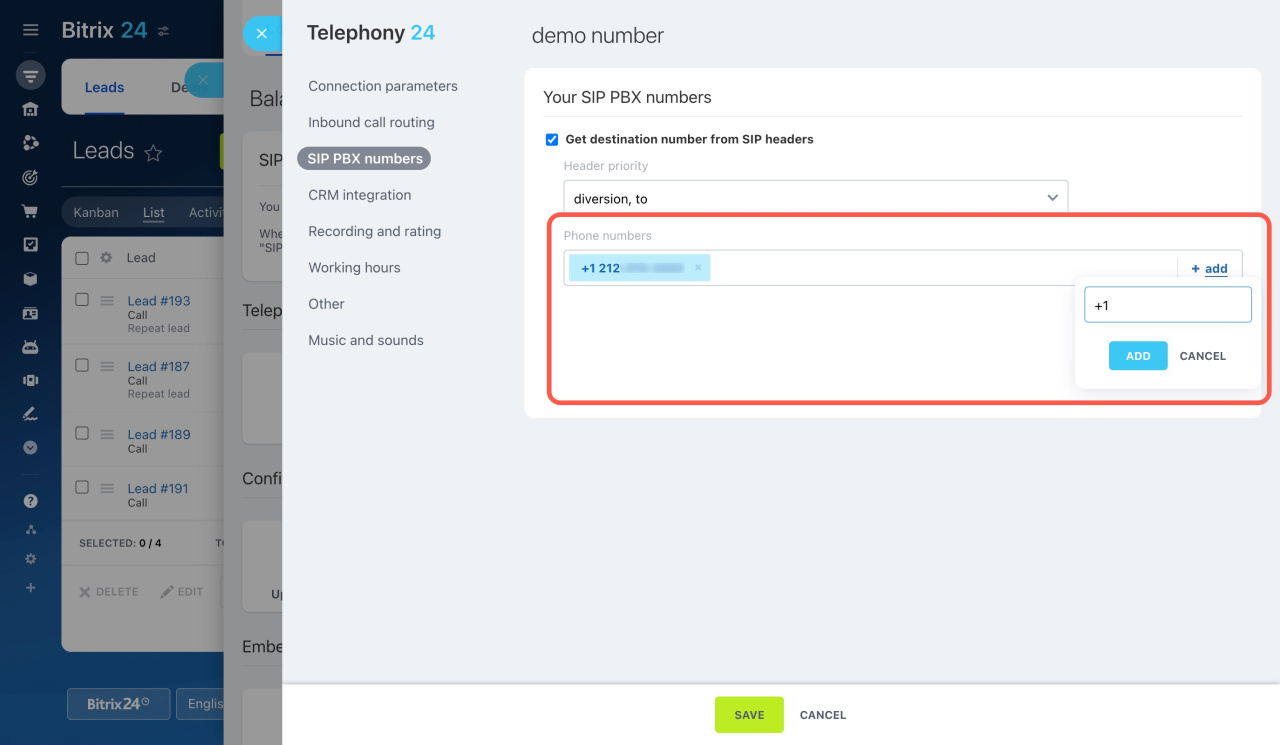
The numbers from the headers are automatically saved to the Phone numbers section. If there haven't been any inbound calls to the number yet, you can manually add it to the list. Note that you can delete such manually created numbers, but it's not possible to remove the automatically added ones.
How SIP headers are processed
Here is how it works:
To check if the headers are being transmitted, open the Call Details section. If the number is not in the diversion or to fields, that means the PBX does not transmit it.
View call logs
Step 3. Assign SIP PBX numbers to ad sources
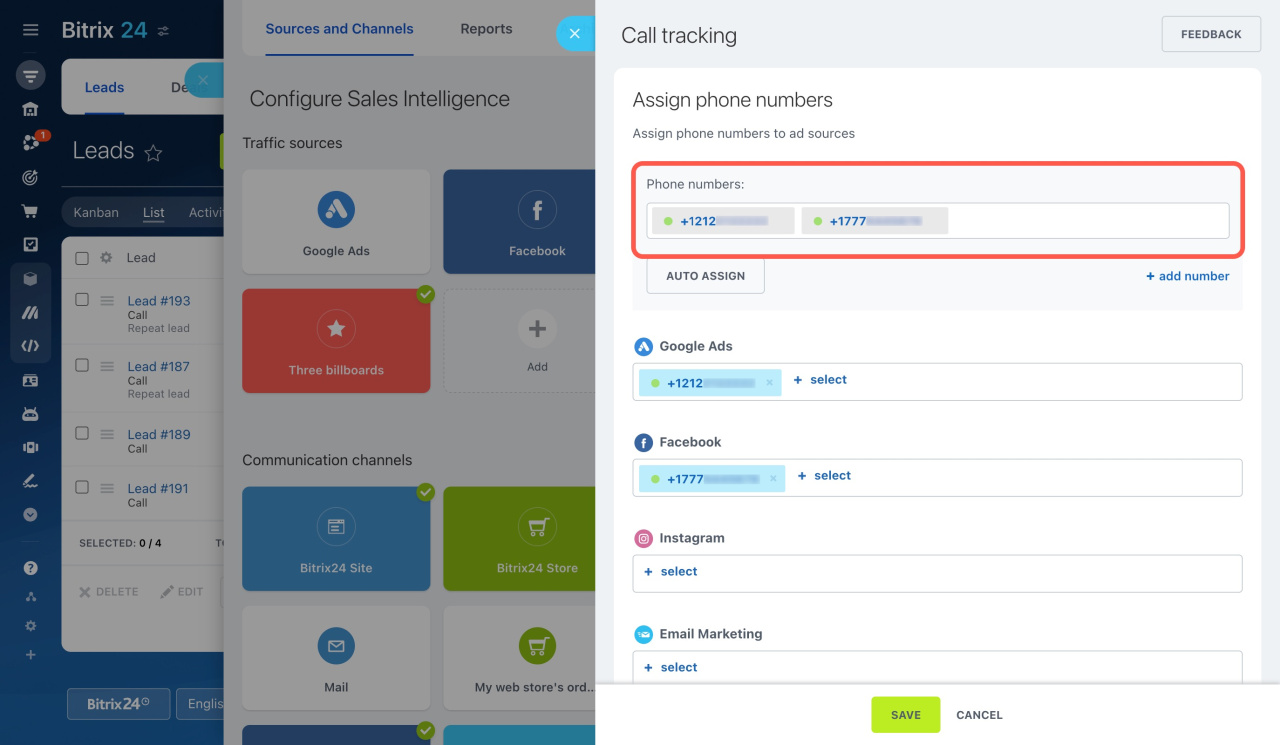
After a successful inbound call, the number will appear under CRM > Analytics > Sales Intelligence > Call Tracking > Phone numbers. Assign each number to separate ad sources and track in CRM where your customers encountered the advertisement.
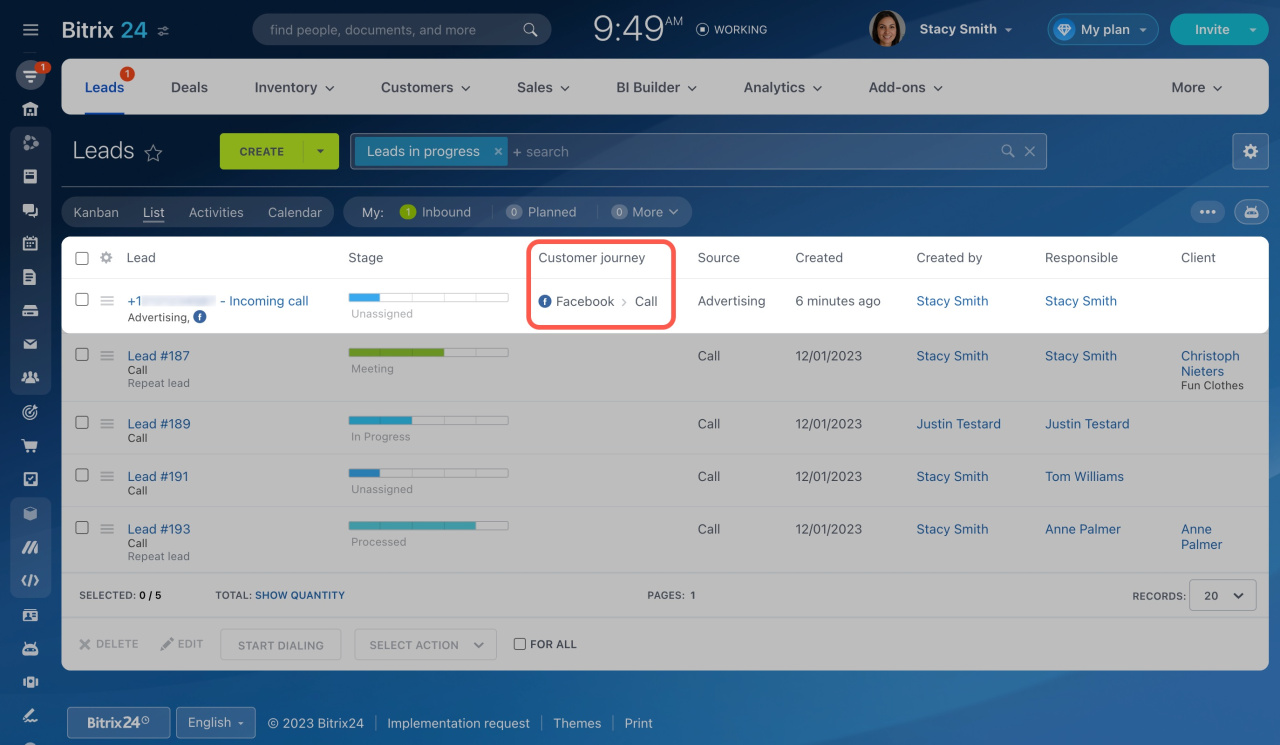
In the list of CRM items, the ad source is indicated in the Customer journey column.
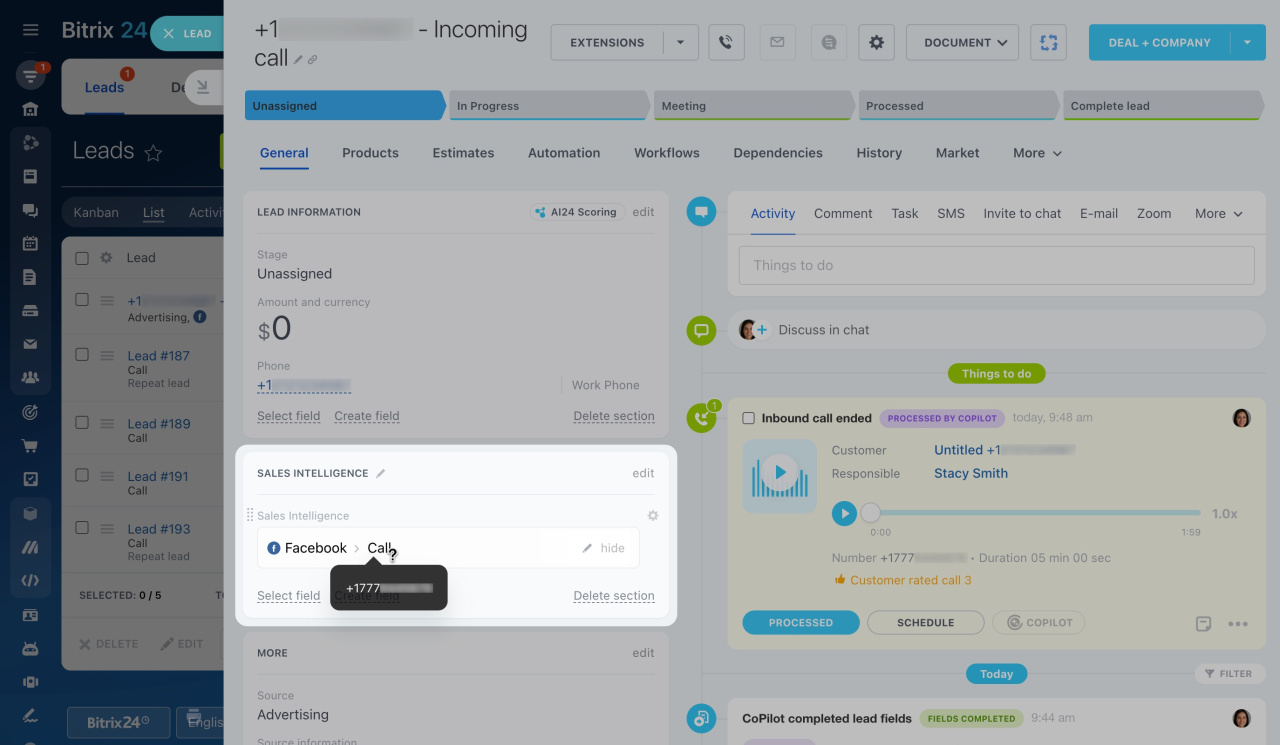
Open the CRM item form and view the ad source in the Sales Intelligence field. Hover the cursor over it to see the destination number. The Source information field displays only the name of the SIP connection that received the call.
Assign phone numbers to traffic sources
Check call tracking support
In brief
-
Use call tracking to evaluate the effectiveness of advertising sources. Get destination numbers from SIP headers to automatically detect your SIP PBX numbers and use them in call tracking.
-
SIP uses Diversion and To headers to transmit information about the destination number to Bitrix24.
-
After a successful inbound call, the number will appear under CRM > Analytics > Sales Intelligence > Call Tracking > Phone numbers.
- Assign each number to separate ad sources and track in CRM where your customers encountered the advertisement.

