Create tables for sites, stores, and knowledge bases to display various structured data.
Add a table
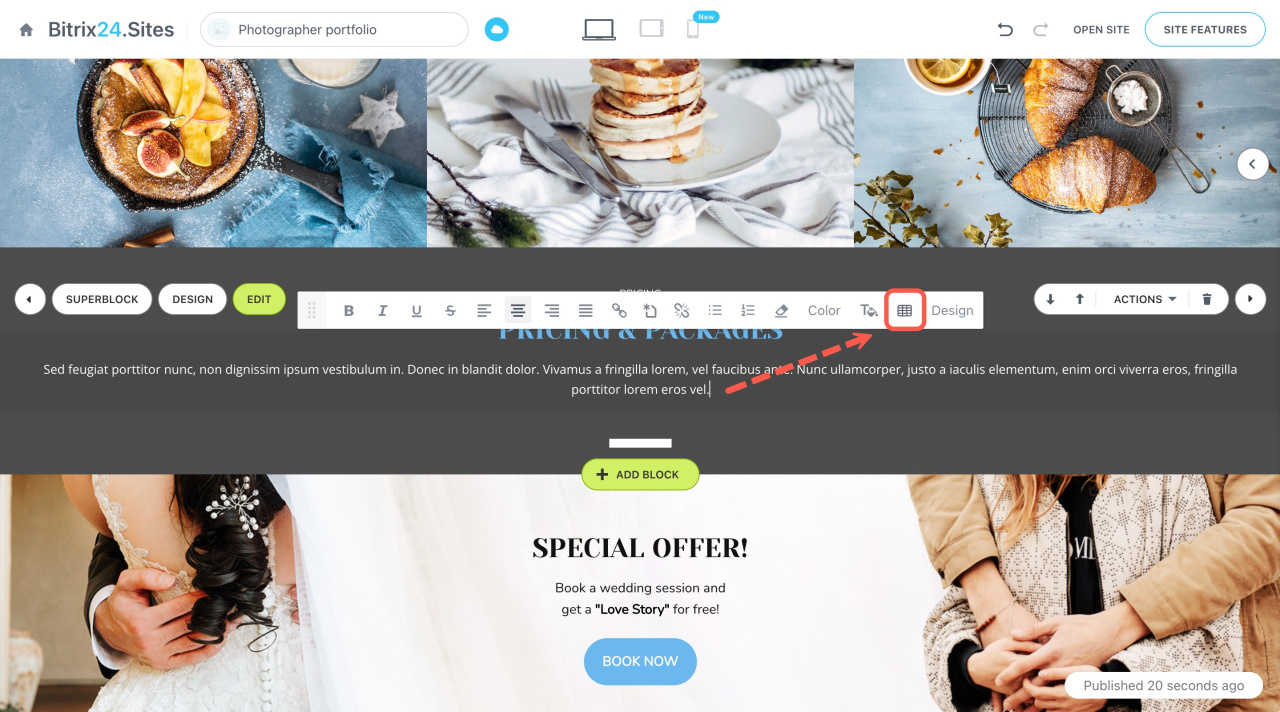
Open the site or article page in edit mode and choose where you want to put the table. In the Actions panel, click on the table icon.
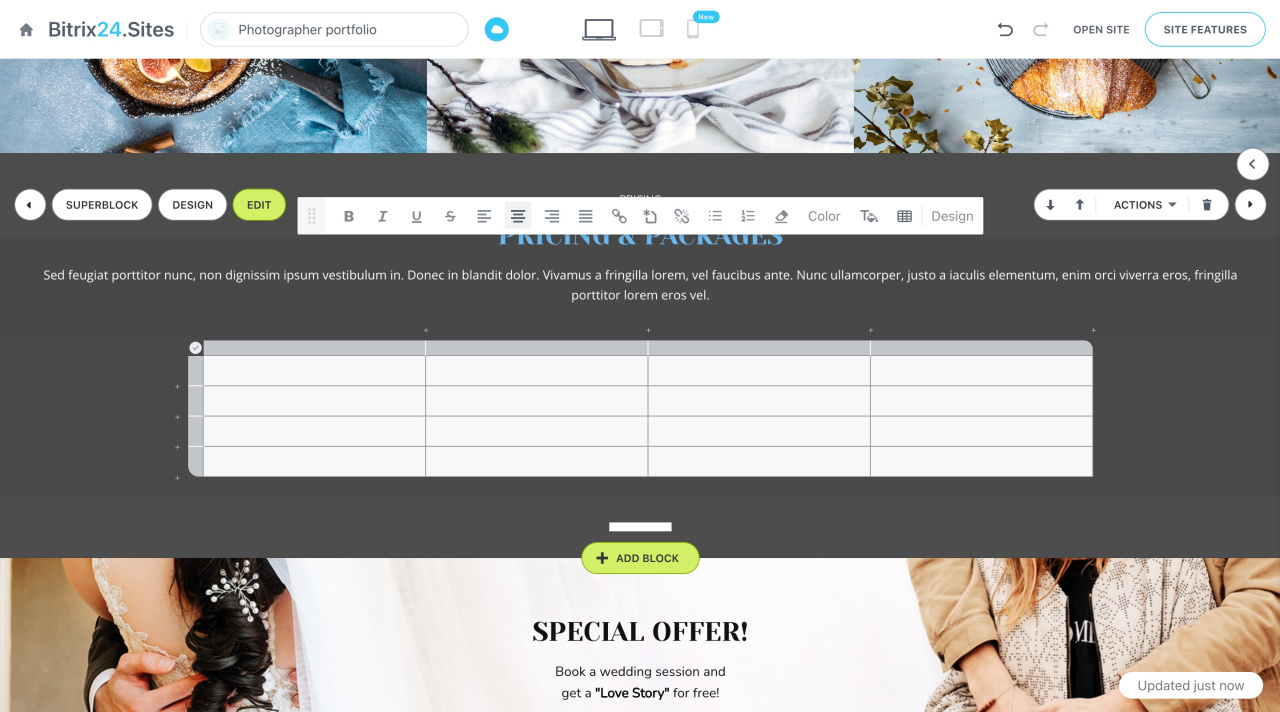
The default table consists of four columns and four rows. Customize it however you like.
Customize a table
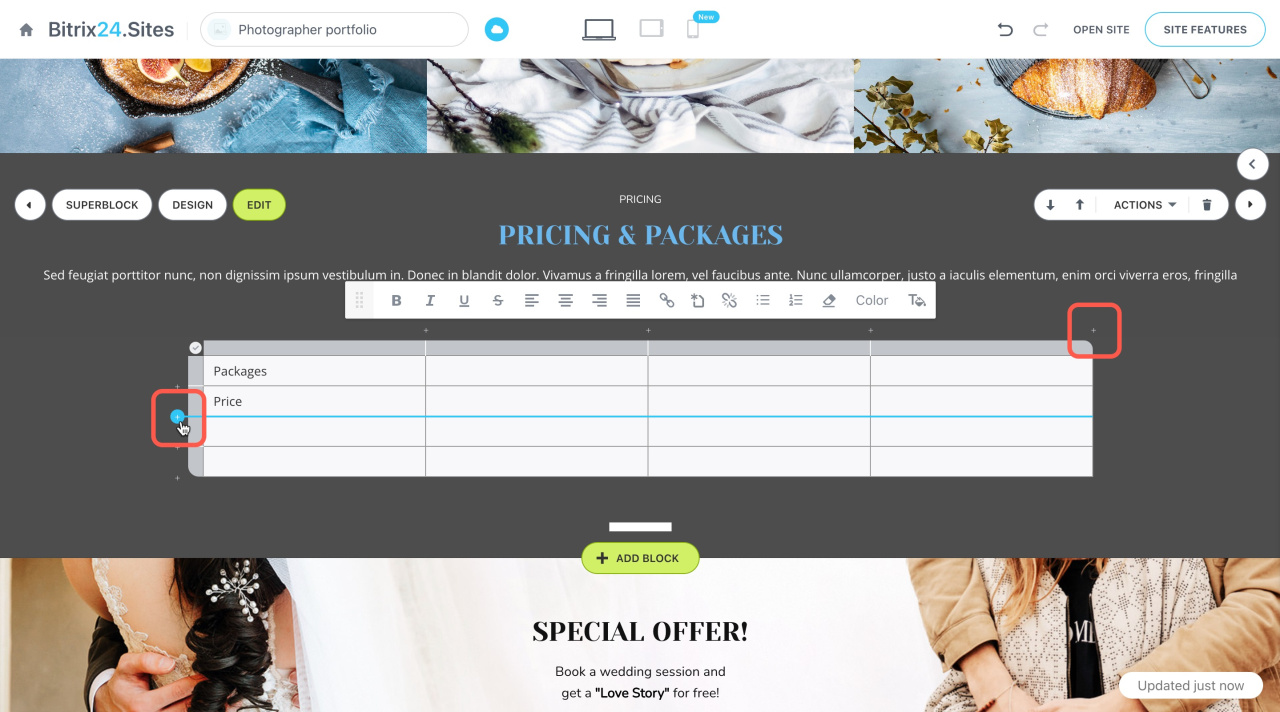
Add rows and columns. To add a row or column, click the plus (+) sign. Then adjust their size.
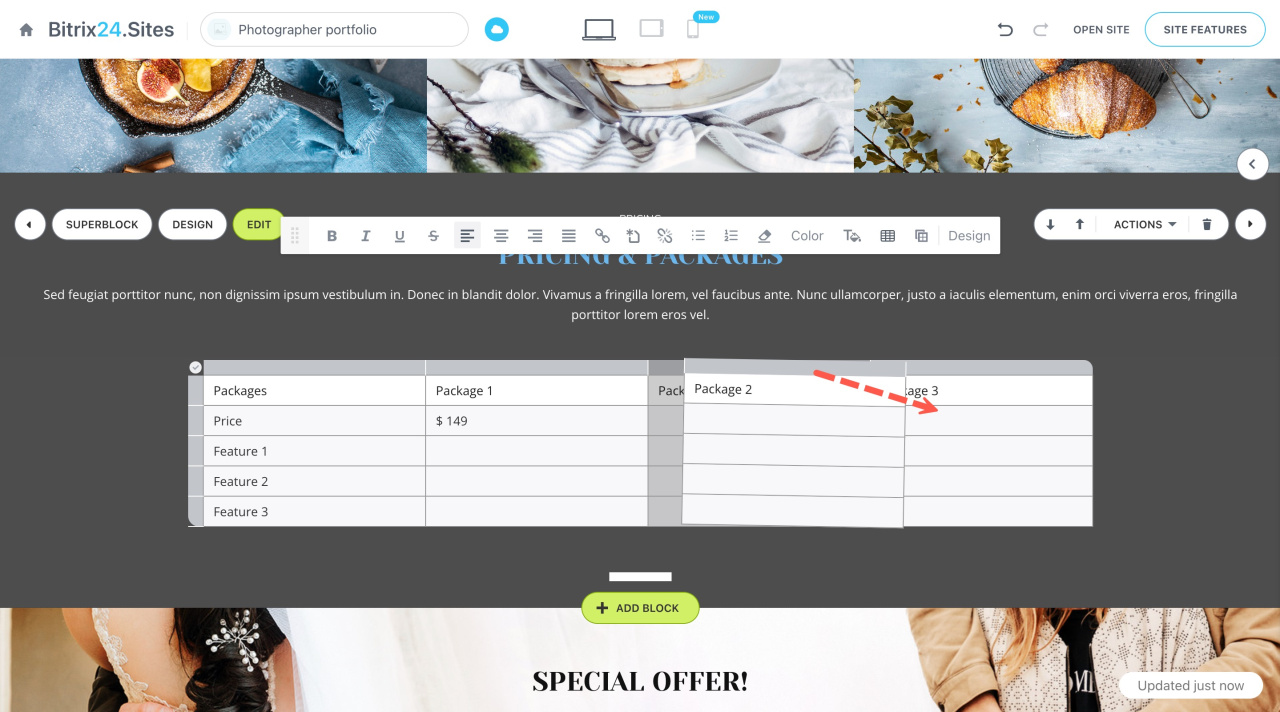
Move rows and columns. To change the position of columns and rows, drag them with the mouse to the desired place.
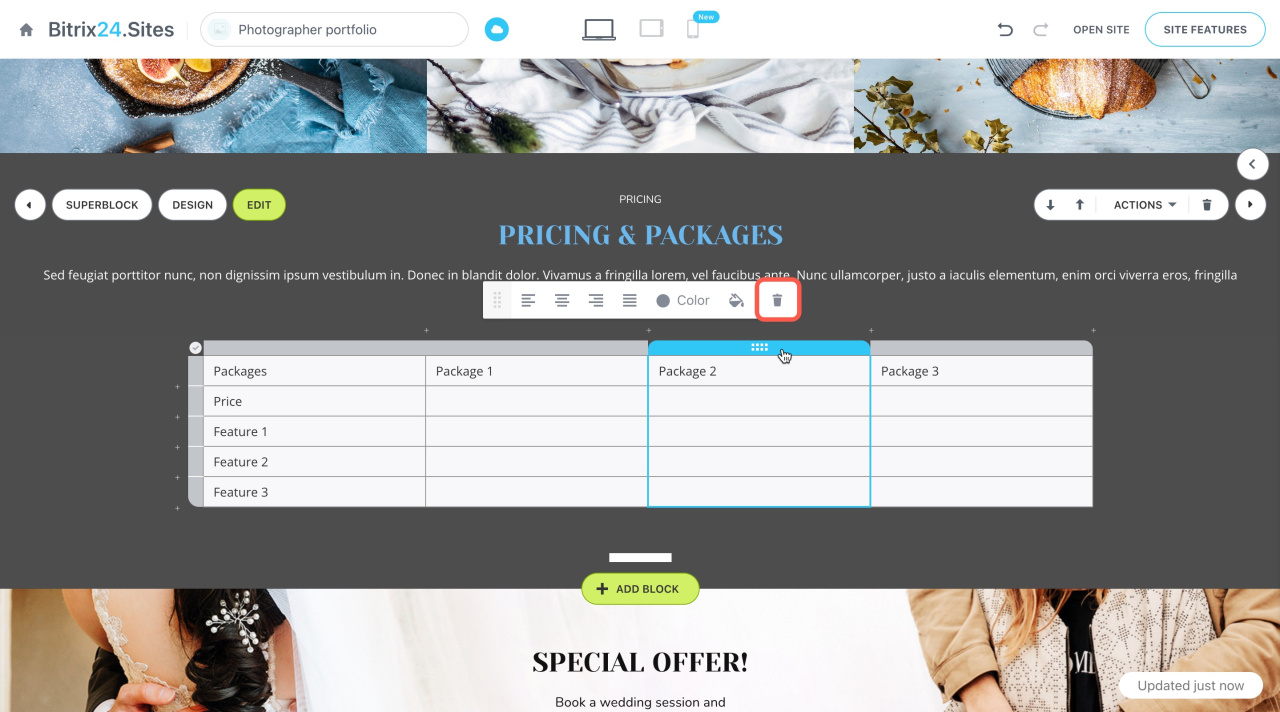
Delete rows and columns. To delete a row or column, select an item and click on the bin icon on the pop-up panel.
Change table style. Tables have several preset styles that change their appearance. You can also customize the background and text color individually.
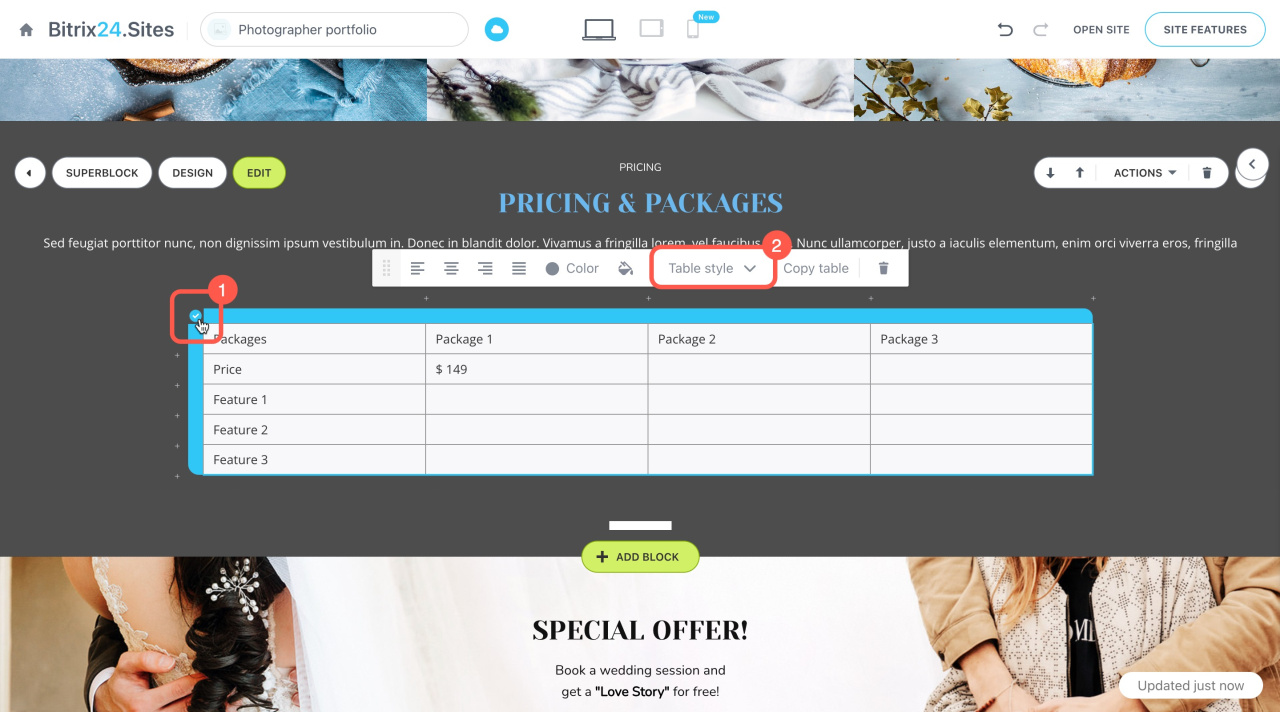
To change the style,
- Click on the tick in the corner of the table. The panel will pop up above.
- Click Table style and select the appropriate one from the drop-down list.
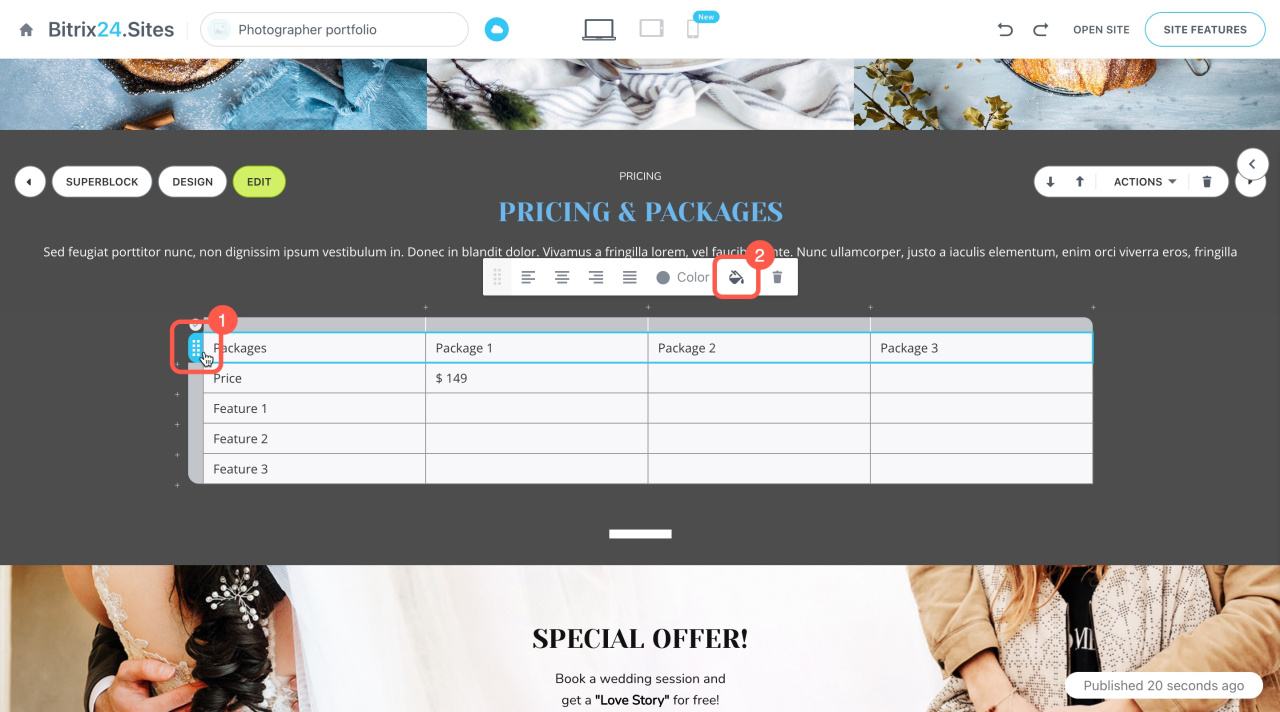
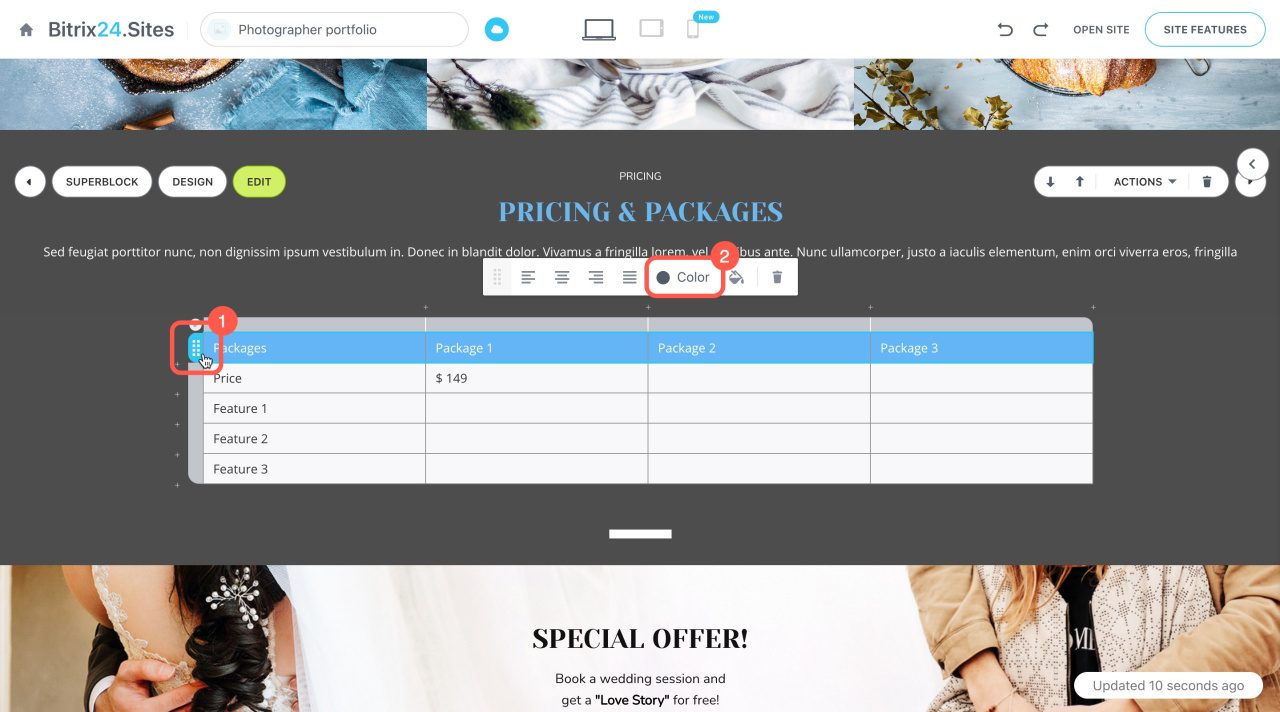
To change the color of a row or column, click on it. Then pick a color from the palette.
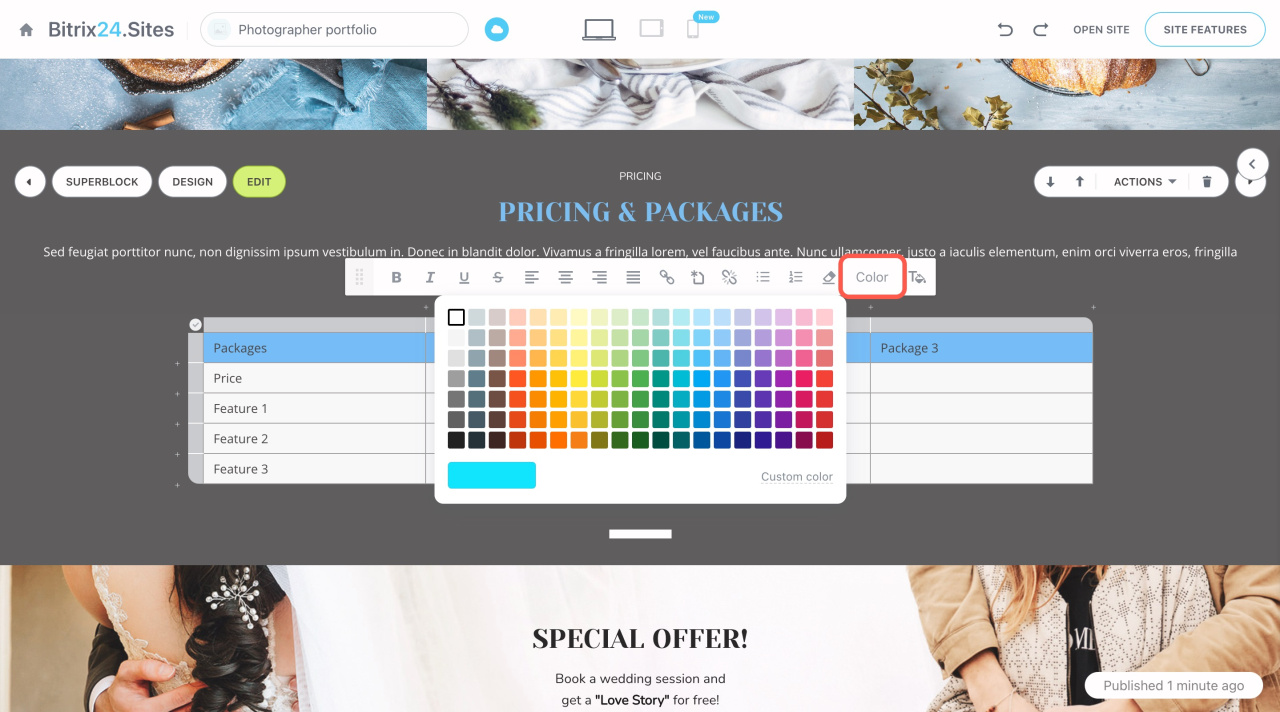
To change the text color in a particular cell, select it and click the Color button.
If you want to select a text color for the row or column, click on the row or column, select the items, and then click the Color button.
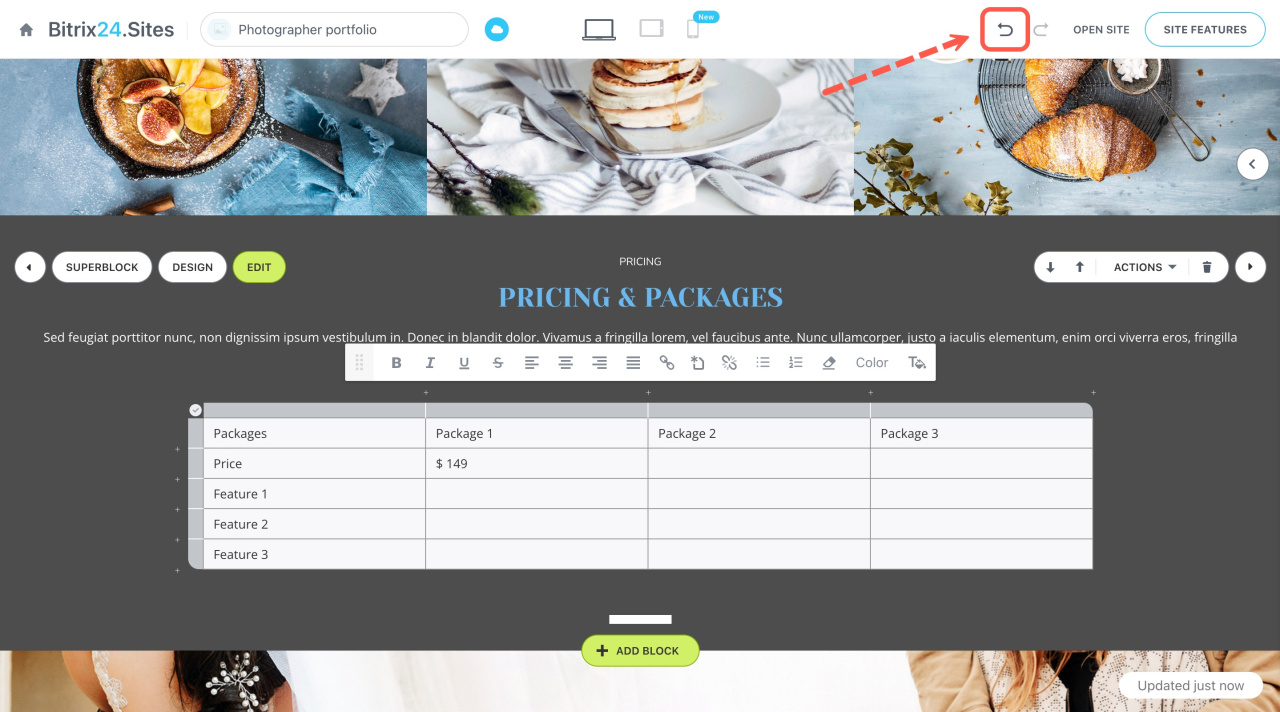
Undo changes. To reverse the last action, click on the arrow in the top-right corner of the page. Alternatively, press Ctrl/Cmd + Z on the keyboard.
Copy a table
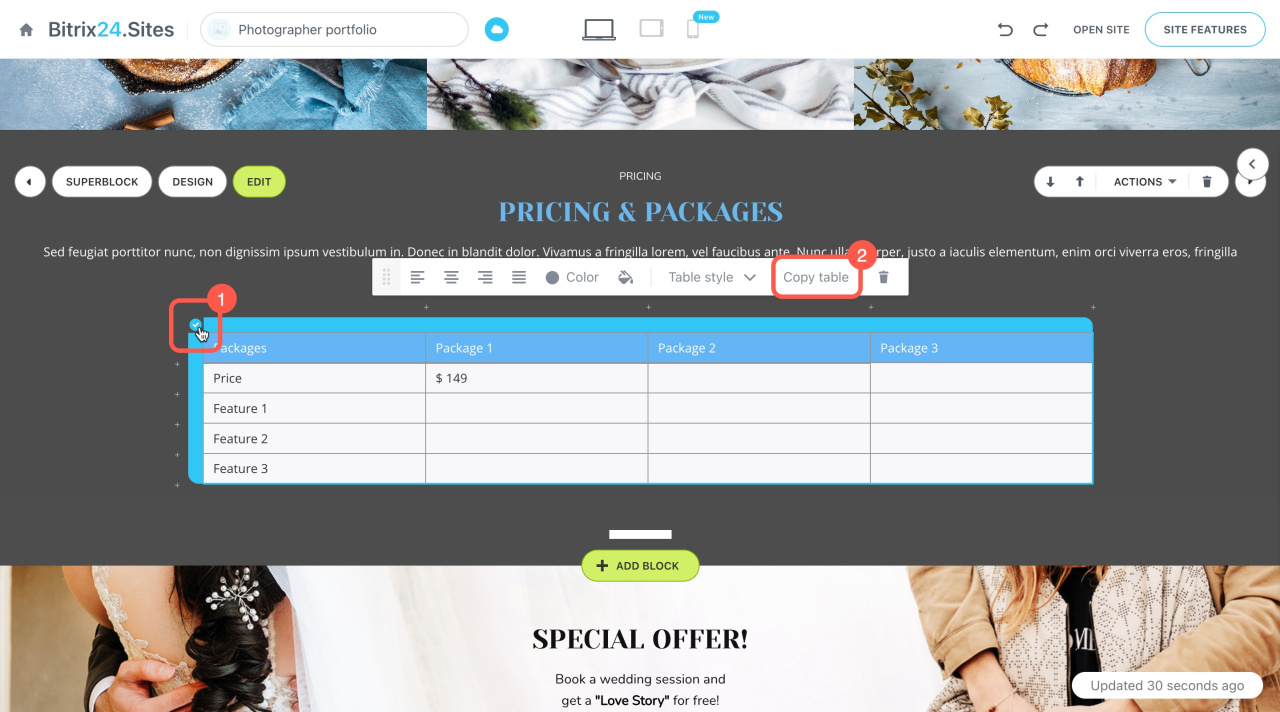
You can also copy tables to use in other blocks of your site.
- Select the entire table by clicking on the tick.
- Then click Copy table on the pop-up panel.
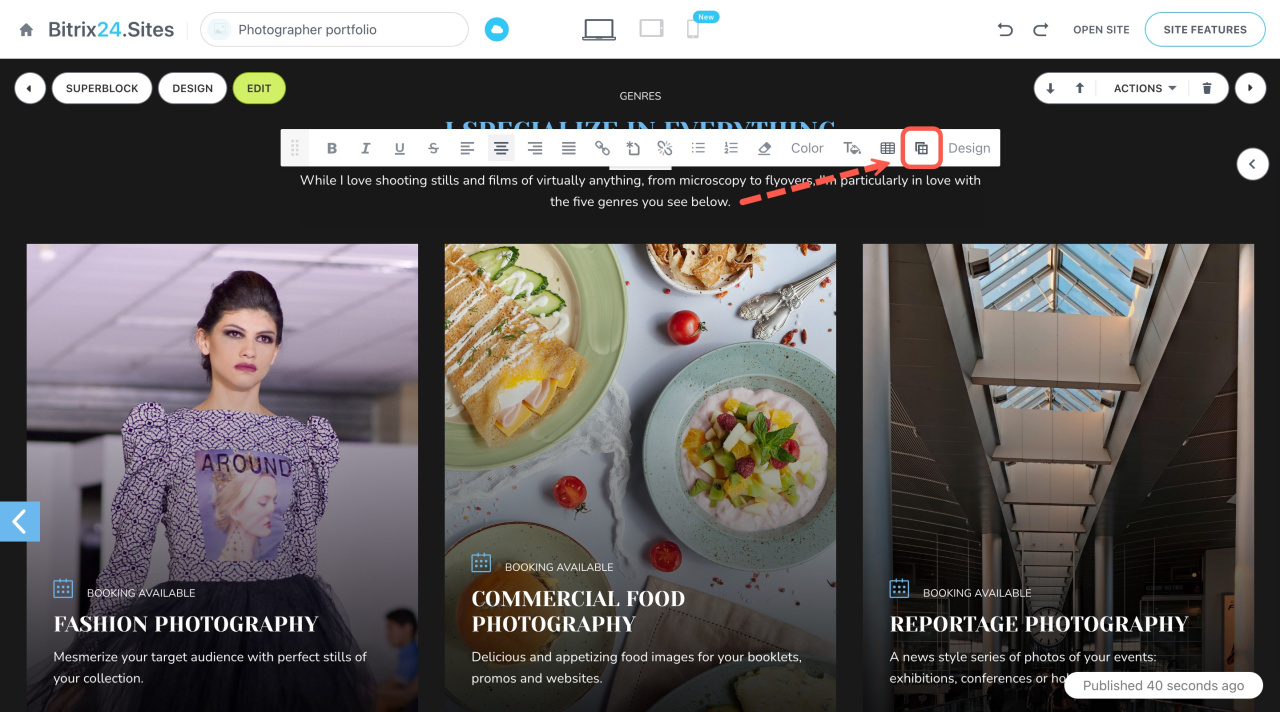
Insert the copied table into another block. Select the desired position and click the special icon on the panel.
Delete a table
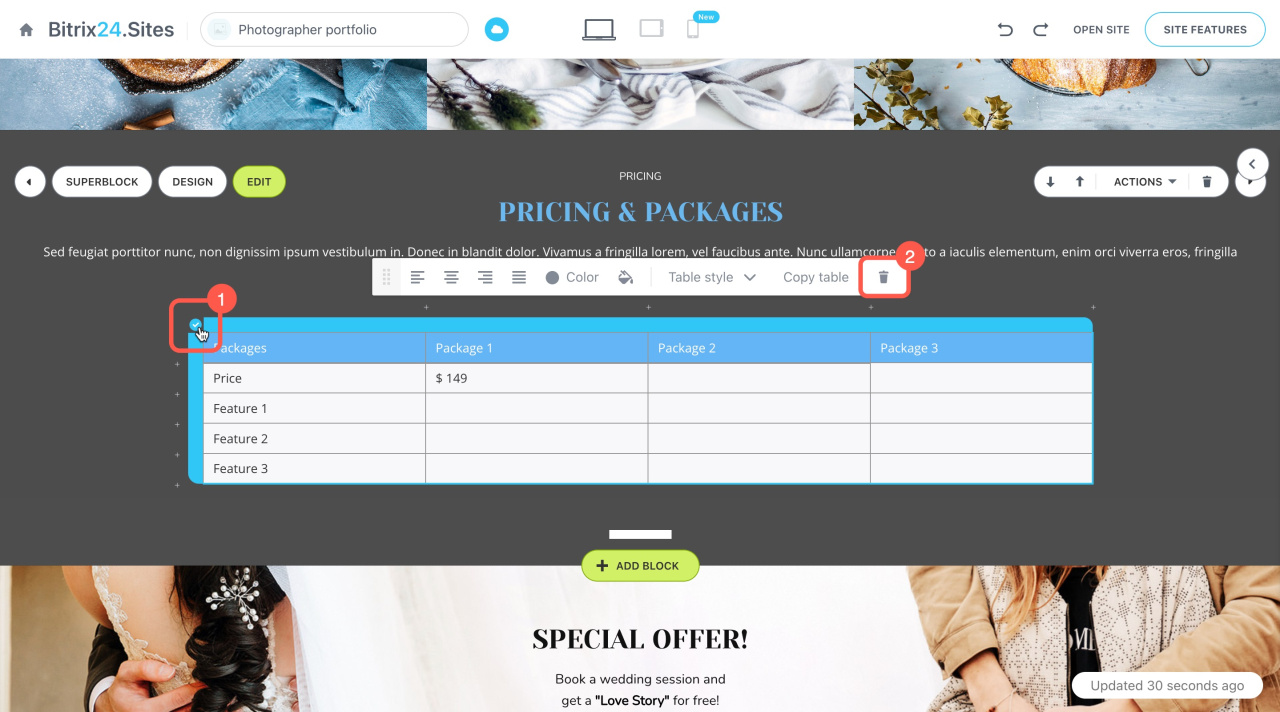
Delete a table in a couple of clicks if you don't need it anymore.
- Select the entire table by clicking on the tick.
- Then click the bin icon on the pop-up panel.

