Any product has a set of properties - color, manufacturer, material, etc. You can add new properties to the product catalog in the settings.
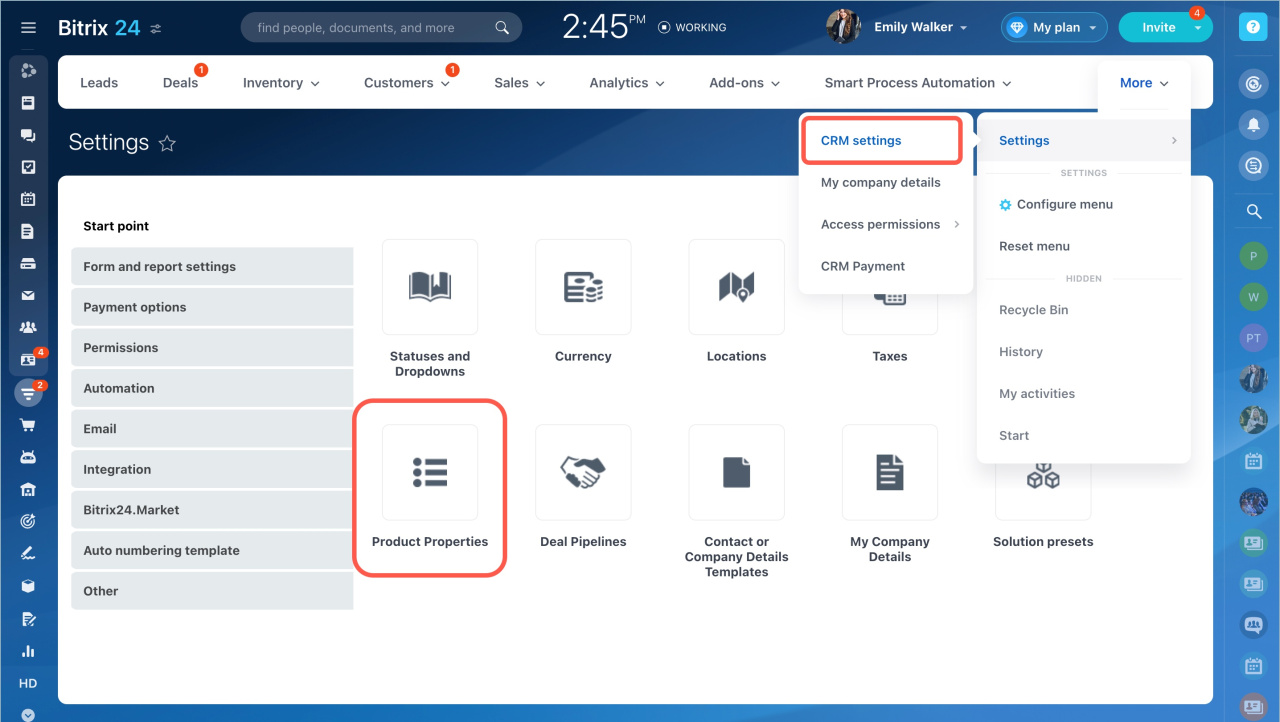
Go to the CRM section - Settings - CRM settings - Start point - Product properties.
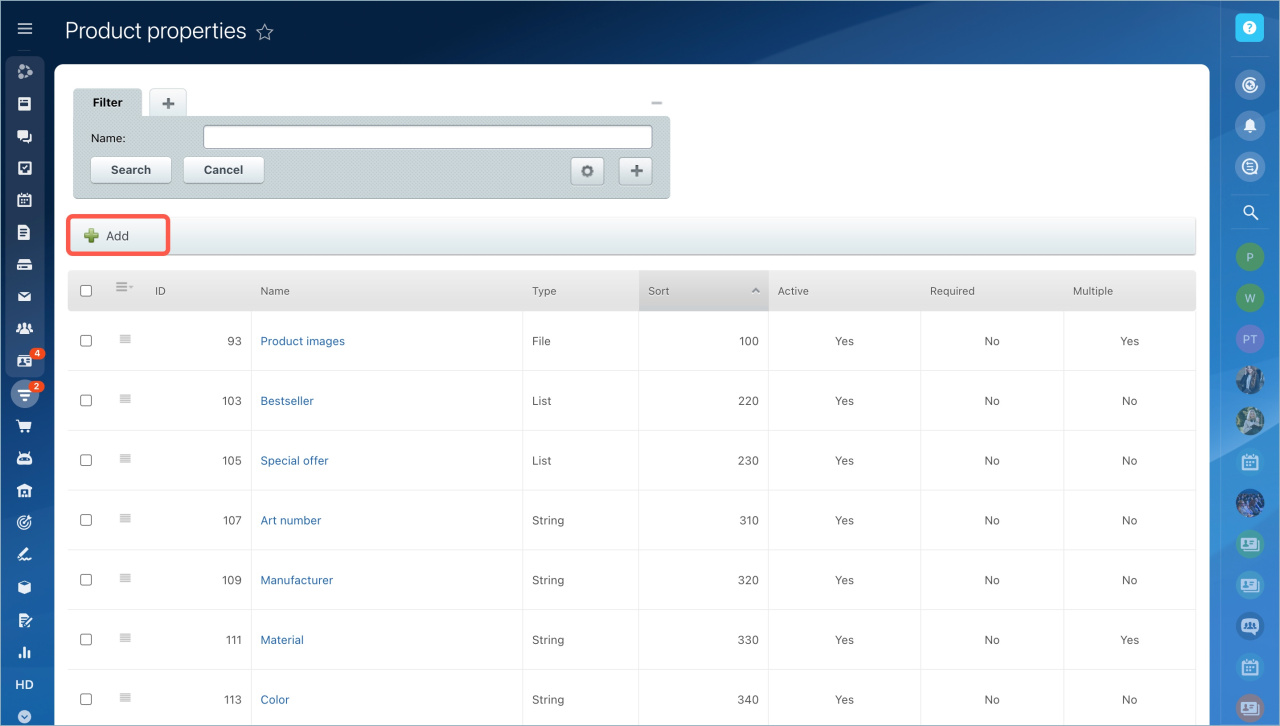
You can view a list of properties on this page. Click Add to create a new property.
Add products to the commercial catalog
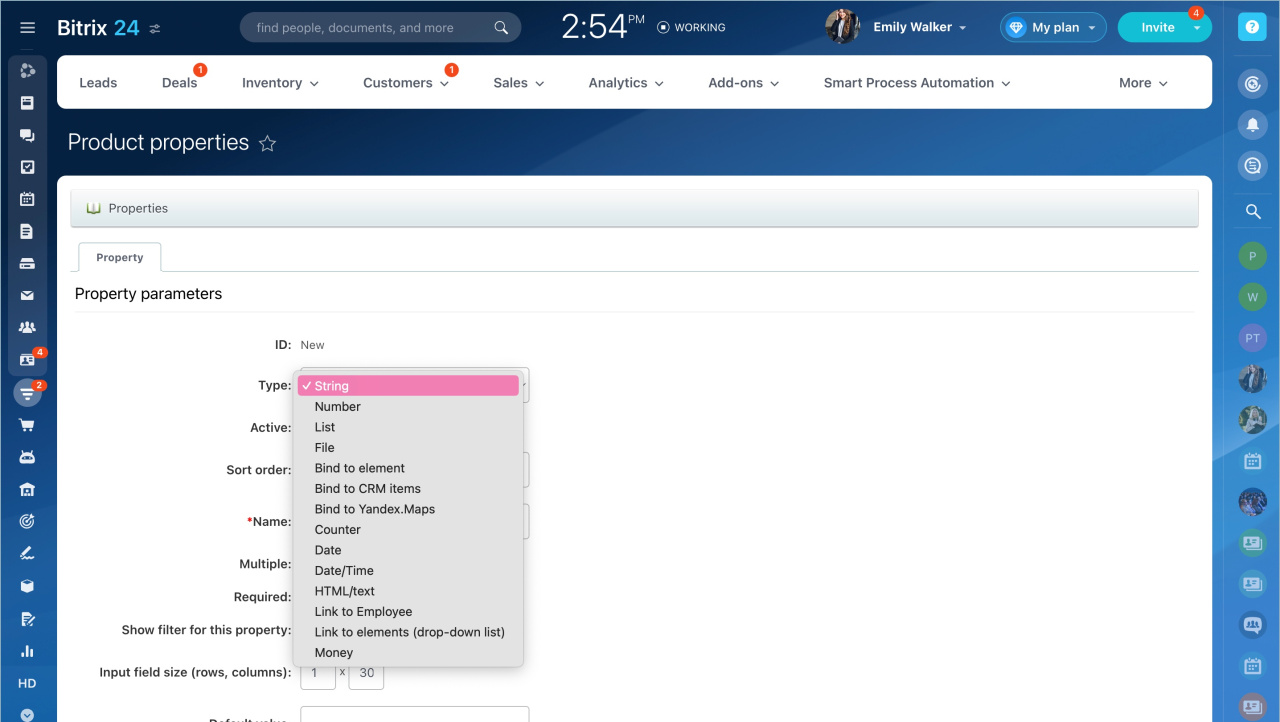
Specify the name and select the field type:
- String - text value.
- Number - any number value. For example, weight of the product.
- List - use this type to enumerate variants.
- File - use this type to attach file. For example, a conformity certificate or an image. You can specify the file type manually or select form the list.
- Bind to element - allows to select another product from the catalog. For example, to recommend another product.
- Bind to CRM items - allows to bind the product to a lead/contact/company/deal.
- Bind to Yandex.Maps - use this type to bind the product to a certain location. For example, location of the product manufacturer.
- Counter - Bitrix24 will increse the value automatically.
- Date/Time - use this type to specify "best before" date or any other date.
- HTML/text - text description with formatting feature.
- Link to Employee - use this type to link the product to an employee. For example, responsible manager.
- Money - use this type to specify prices. For example, price of the extended warranty.
Enable the Active option and add the property name.
You can make this property field required or multiple. If so, the employee will be able to select several values at the same time.
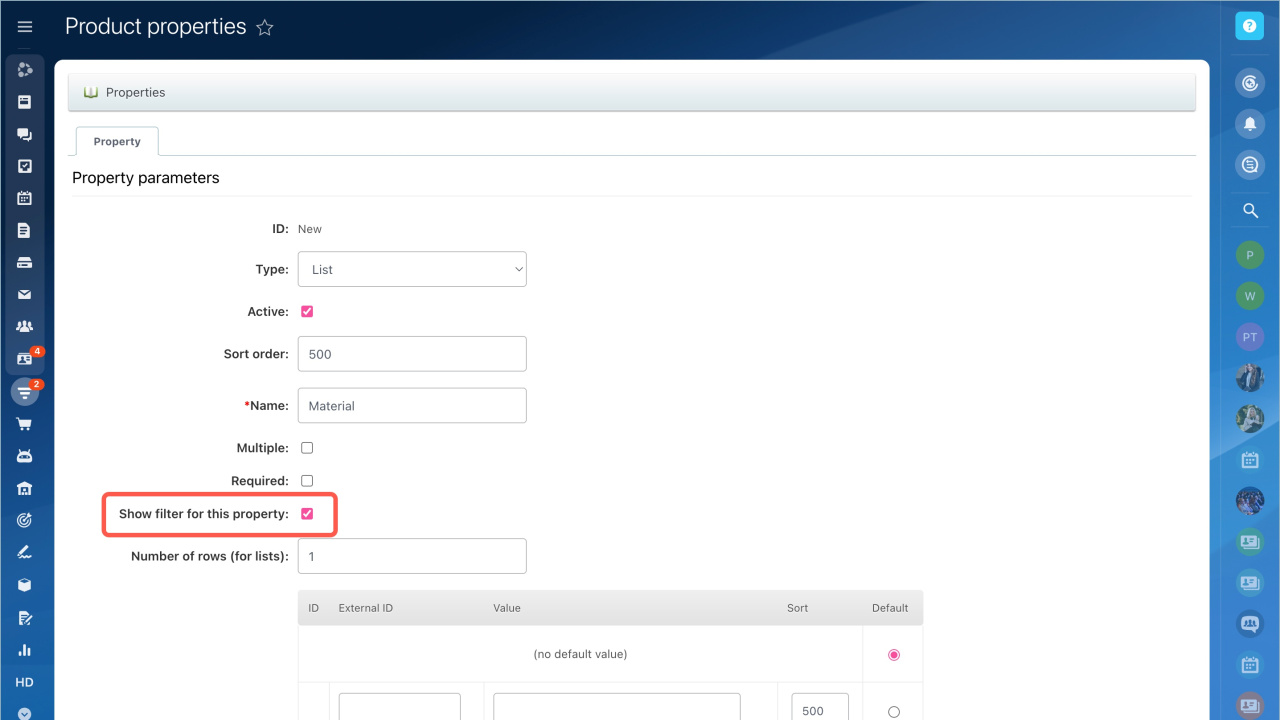
Select the Show filter for this property option, if you want this property to be in the filter on the product page.
Add list values. Specify the external ID and the value name. Then save the settings.
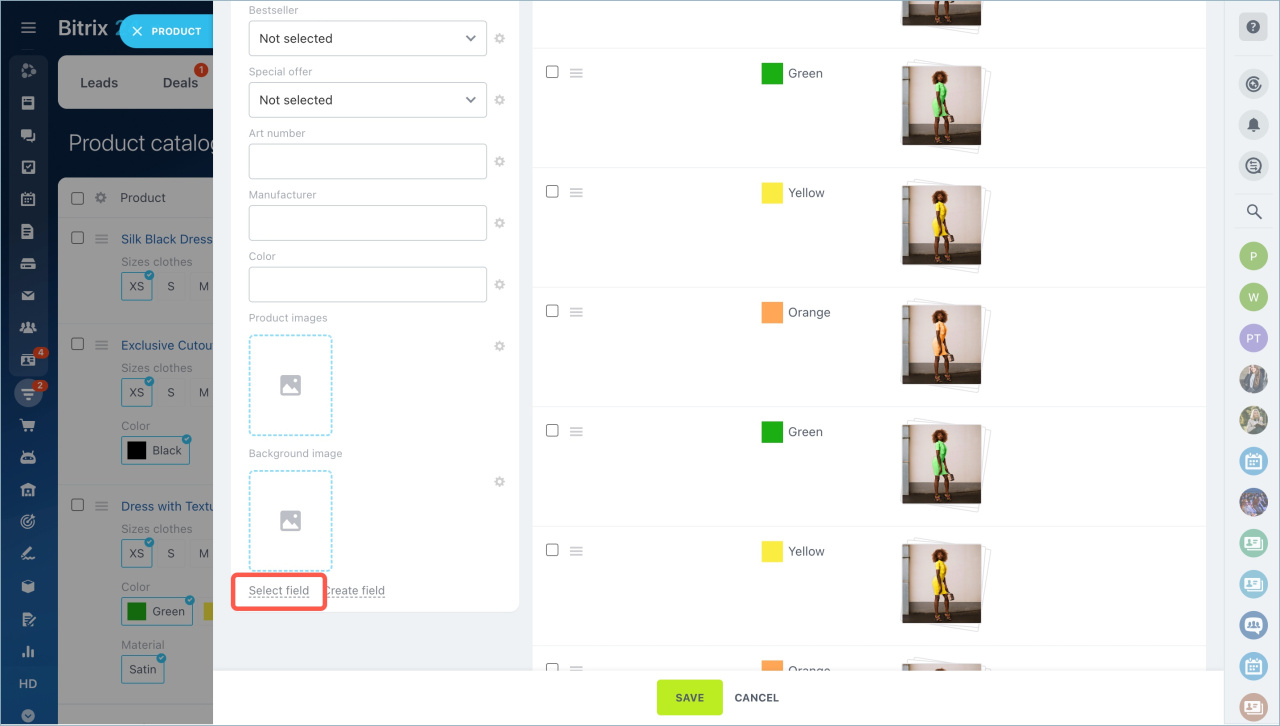
Now you can add created property to the product in the product form - click Select field.
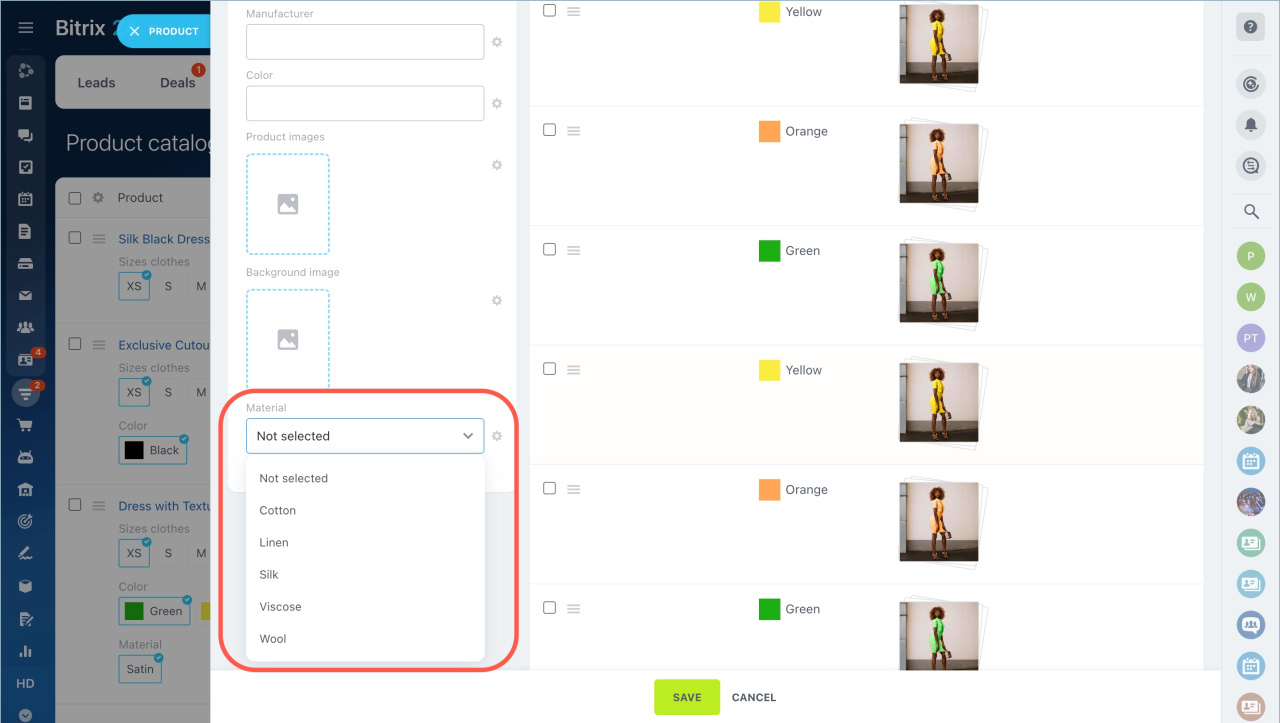
Now you can choose the type of material.
- Go to the CRM section - Settings - CRM settings - Start point - Product properties.
- Click Add to create a new property. Specify the name and select the field type. Enable the Active option.
- You can make this property field required or multiple. If so, the employee will be able to select several values at the same time.
- Select the Show filter for this property option, if you want this property to be in the filter on the product page.
- Add the field values. Specify the external ID and the value name. Then save the settings.
In brief:
Read also:

