To start a workflow, an employee needs to fill in the information in the fields. For example, specify the date, the city and the purpose of a business trip. You can configure a set of fields for each workflow.
Sequential Business Process Template
Status Driven Business Process Template
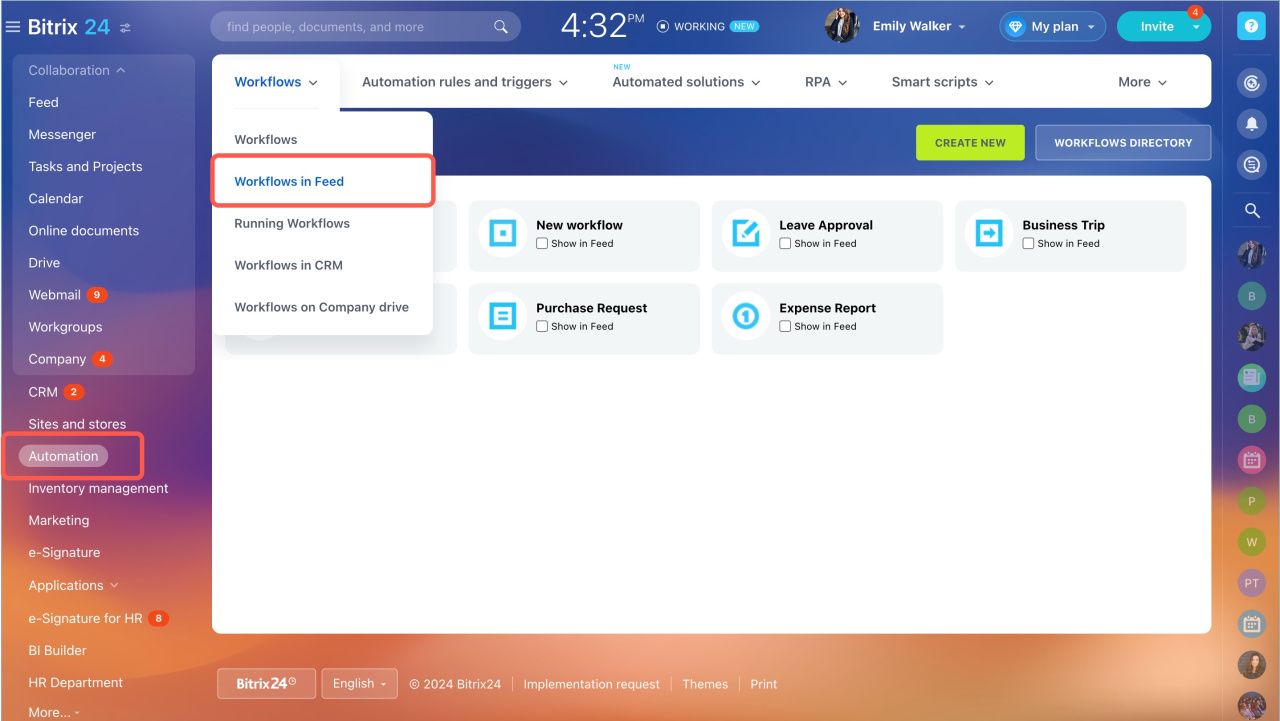
Go to the Automation section - Workflows tab - Workflows in Feed.
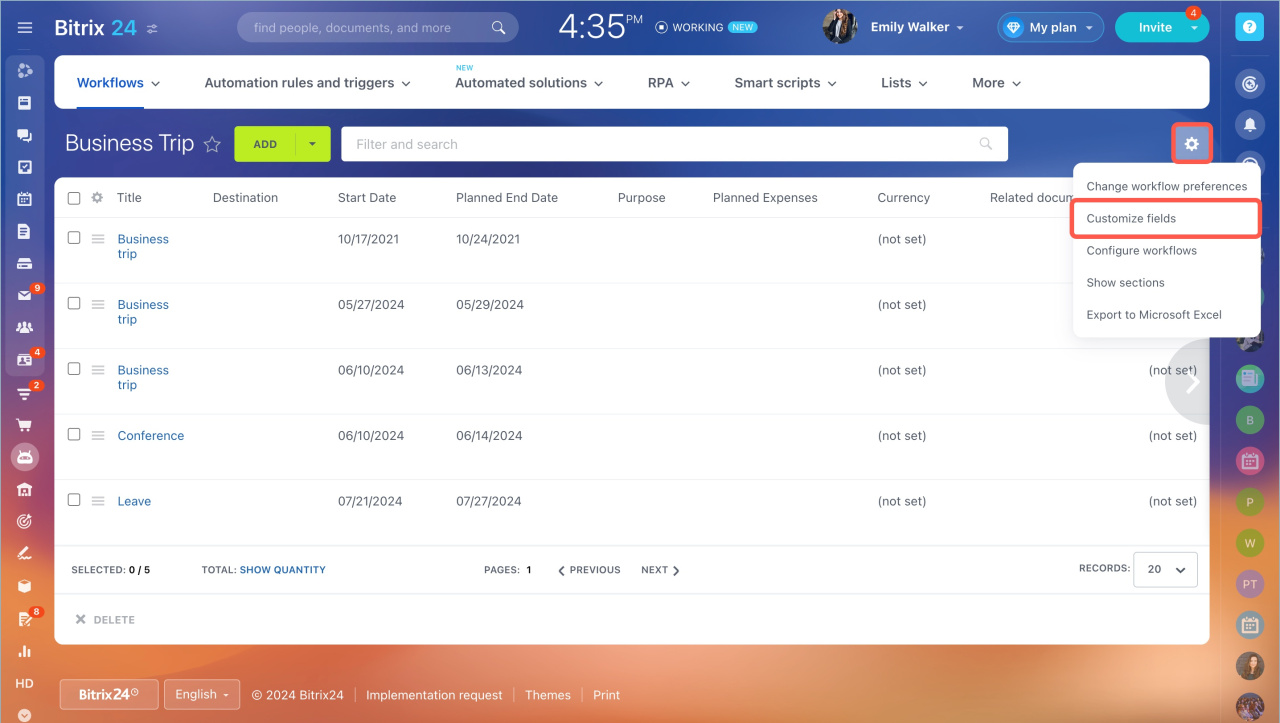
Open the workflow form and click Settings - Customize fields.
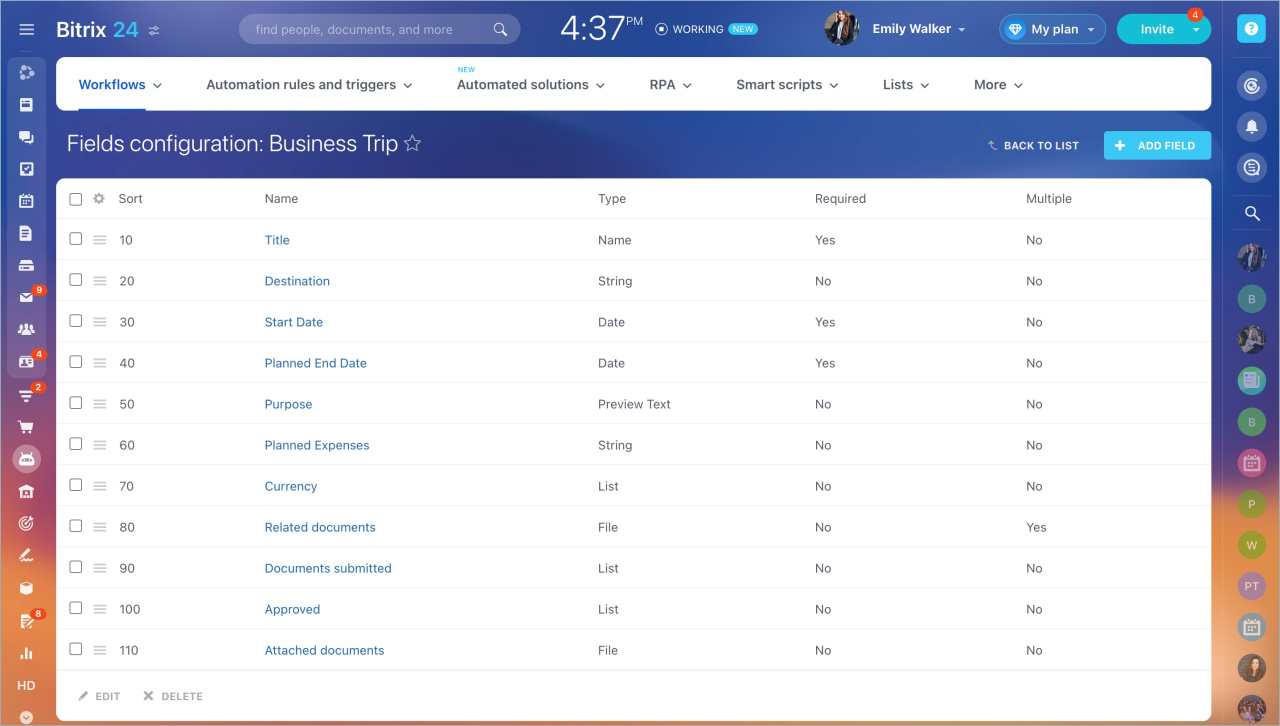
You will see all the workflow fields in the list. You can edit or delete fields, and create new ones.
Create new fields
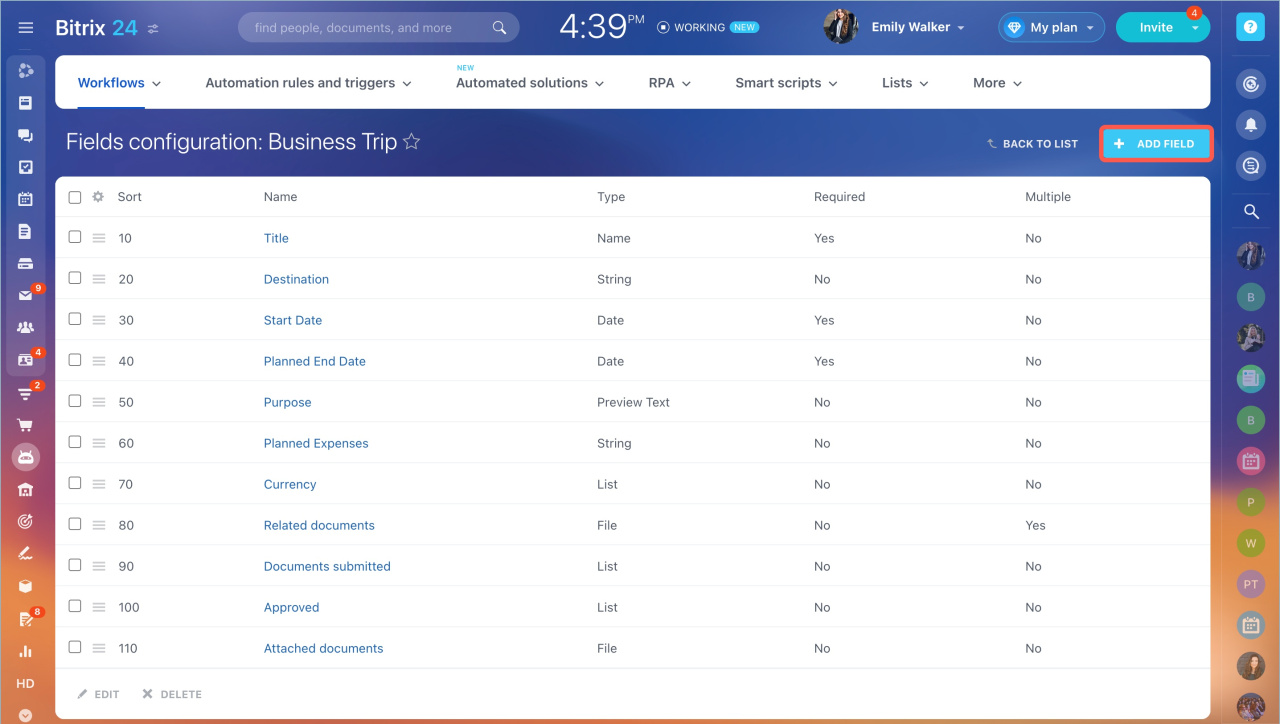
Click Add Field. The settings may differ depending on the field type.
- Name — employees will see the field name when starting the workflow.
- Required — employees will not be able to start the workflow if they do not fill in this field. For example, you cannot start the workflow for a business trip if you do not fill in the purpose of the trip.
- Multiple — multiple values can be entered into the field. For example, upload several files.
- Type — select from a list. You cannot change the type once the field is created.
- Default value — specify a value that will be automatically filled in the field. For example, the default value for the Vacation Period field is 14 days. When starting a workflow, the employee can change it.
- Sort — it affects the order in which the field is displayed in the form and in the field list. The lower the number, the higher the field is in the list.
- Show in new item form — the employee will see the field and will be able to fill it in when the workflow is started.
- Show in edit item form — the employee will see the field and will be able to edit it in the item form.
- Read-only (new item form) — the employee will see the field but will not be able to fill it in when starting a workflow.
- Read-only (item edit form) — the employee will not be able to edit the field in the item form.
- Show field when creating a list item link — the field will be visible if you send a link to the workflow item in the chat or by email.
When all parameters are filled in, click Save.
Field Types
There are different types of fields in workflows. Each type is designed to hold a specific type of data.
- Sort - a number that will affect the order in which an item is displayed in the workflows list. The lower the number, the higher the item is in the list.
- Active from — the starting date and time.
- Active until — the final date and time.
- Preview image — any image. For example, an invoice or a contract.
- Detail picture — any image.
- Detail text — any text.
- Create date — when the employee created the workflow element. The field is filled in automatically.
- Created by — the employee who created the workflow element. The field is filled in automatically.
- Modify date — when the employee changed the workflow element. The field is filled in automatically.
- Modified by— the employee who changed the workflow element. The field is filled in automatically.
- String — any text.
- Number — any number.
- List — a set of values. An employee can select one or several values from a set.
- File — any document or image.
- Bind to sections — linking of an item to a folder of another workflow.
- Bind to elements — linking of an element of one workflow to elements of another workflow.
- Date — date without time.
- Date/Time — any date and time.
- HTML/text — text with HTML tags.
- Link to elements (drop-down list) —linking an element of one workflow to elements of another workflow. You have to select an element from the list.
- Counter — an automatic counting of workflow elements. The number increases with each new element.
- File (Drive) — any file. You can select a file from your computer drive or Bitrix24 drive.
- Bind to Yandex.Map — location on the map.
- Bind to CRM items — linking of a workflow element to a CRM entity: a deal, a contact, a company.
- Link to employee — an employee of the company.
- Money — amount and currency.
Edit and delete fields
Click the menu icon next to the field in the list and select an action.
You can change any data in the field settings. For example, you can make the field multiple or required.
- To start a workflow, an employee needs to fill in the information in the fields. For example, specify the date, the city and the purpose of a business trip.
- You can configure a set of fields for each workflow.
- Go to the Automation section - Workflows tab - Workflows in Feed. Open the workflow form and click Settings - Customize fields.
- Select a field type and specify its settings.
- The settings may differ depending on the field type.
In brief:
Read also:


