Now you can create your own datasets from CSV files to add dashboards in BI Builder.
For example, if you have a CSV file with yearly sales data showing dates, products, quantities, and amounts, you can import it into BI Builder. From there, you can create charts to see which products sold the most and track monthly sales trends.
This article explains how to create a dataset from a CSV file and use it to build charts in BI Builder.
To create a dataset, follow these steps:
Also, explore an example of creating a chart.
Upload and configure a CSV file
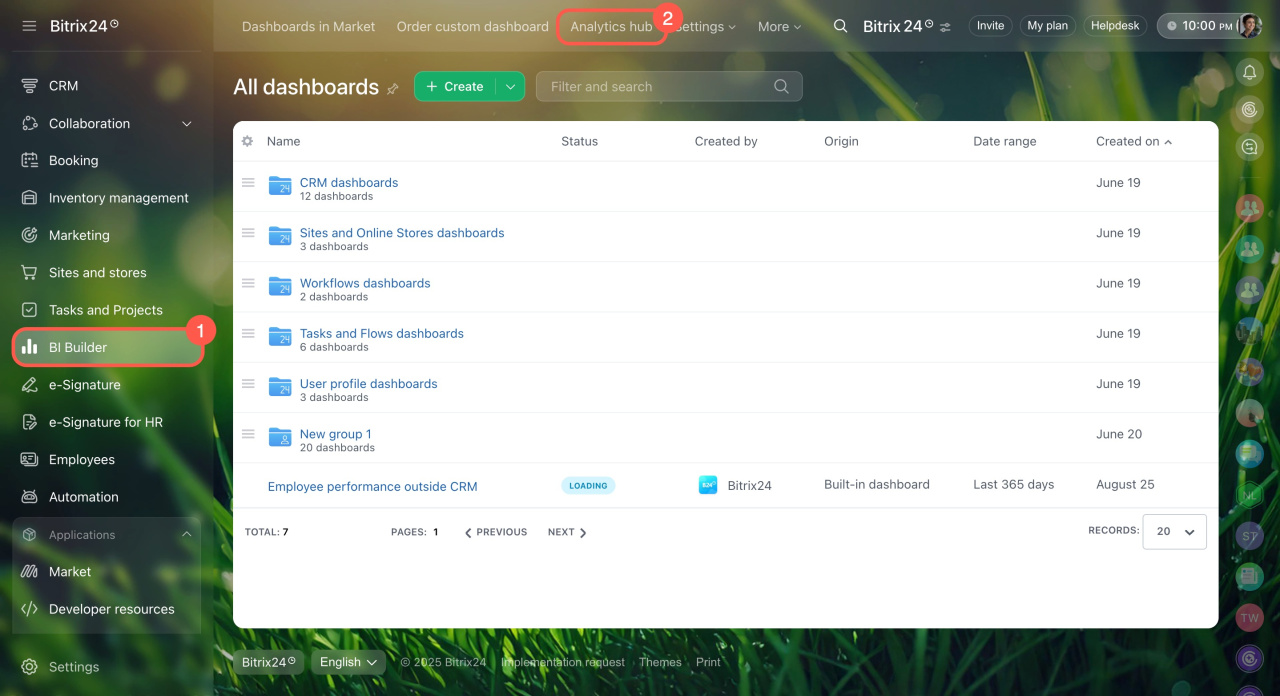
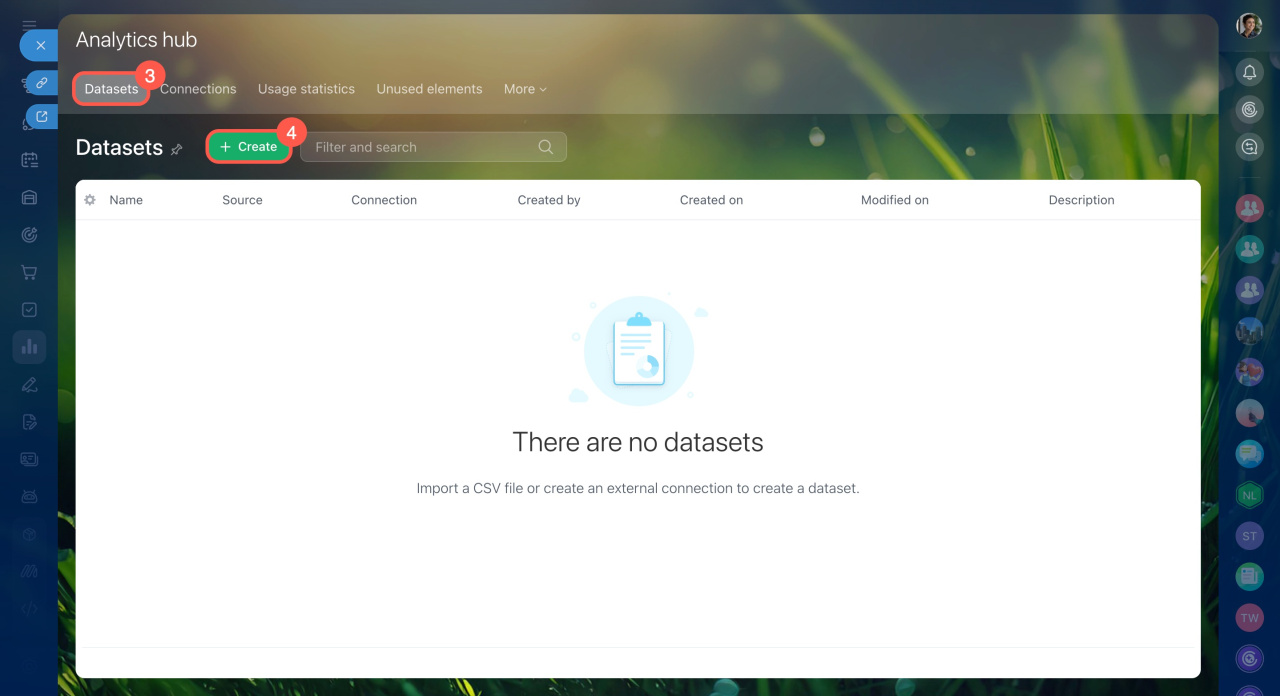
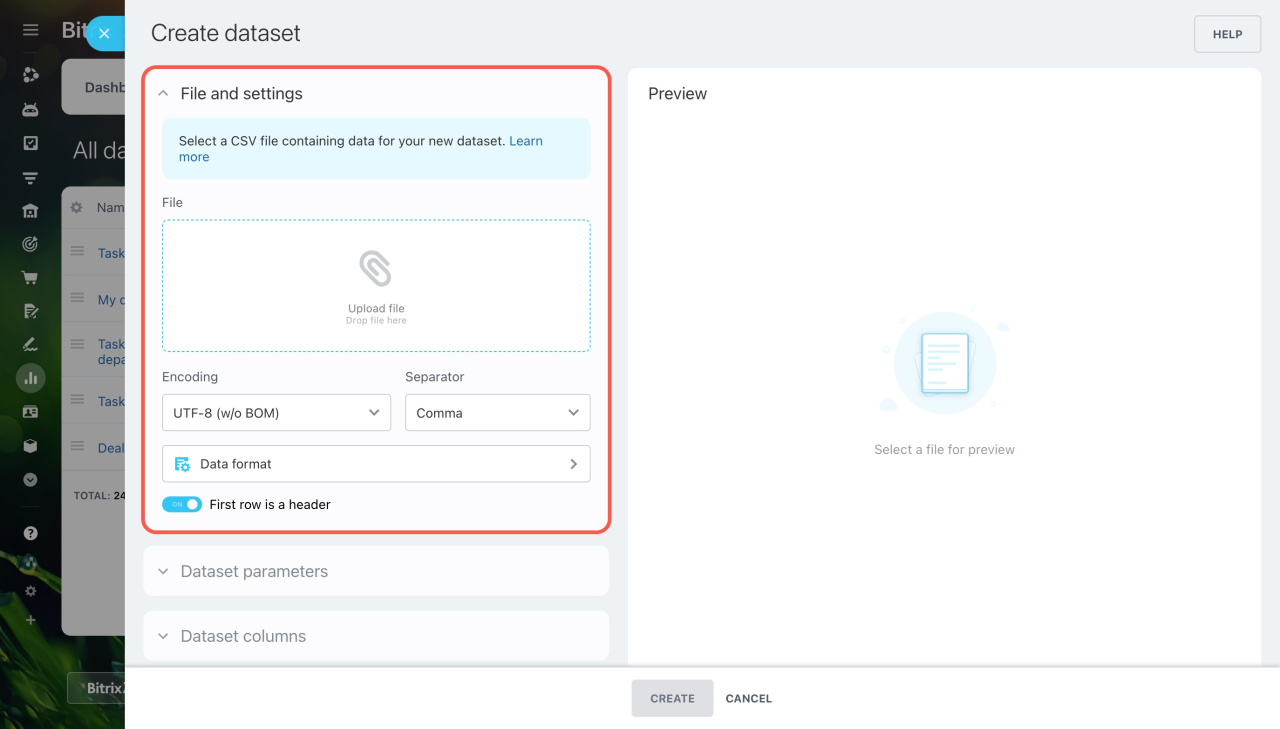
Go to BI Builder > Analytics hub > Datasets > Create. In the File and settings section, upload your CSV file and configure its settings.
File. Upload a CSV file containing your data. A CSV (comma-separated values) file is a text file that organizes data into rows, with each row as a separate record. Values are separated by commas or other characters. Only CSV format files can be imported.
Encoding. This defines how characters are represented in the text. UTF-8 or ANSI encodings are usually used in English. If you see errors or incorrect characters when uploading a file, try changing the encoding.
Separator. Select the character that separates values in your CSV file: comma, semicolon, or colon. To verify the separator, check the file in the preview section on the right or open it in a text editor. Review several rows to ensure the separator is consistent throughout the file. Look at the characters between values:
- If the row appears as
DATE,ITEM,AMOUNT, choose the comma separator. - If the row appears as
DATE;ITEM;AMOUNT, choose the semicolon separator.
Data format. Specify how dates, times, currency, and numbers are formatted in the CSV file. This ensures BI Builder correctly interprets the data. For example, if the date 01/02/2025 is read as day/month/year instead of month/day/year, it could cause errors.
Configure data formats and types for CSV file import
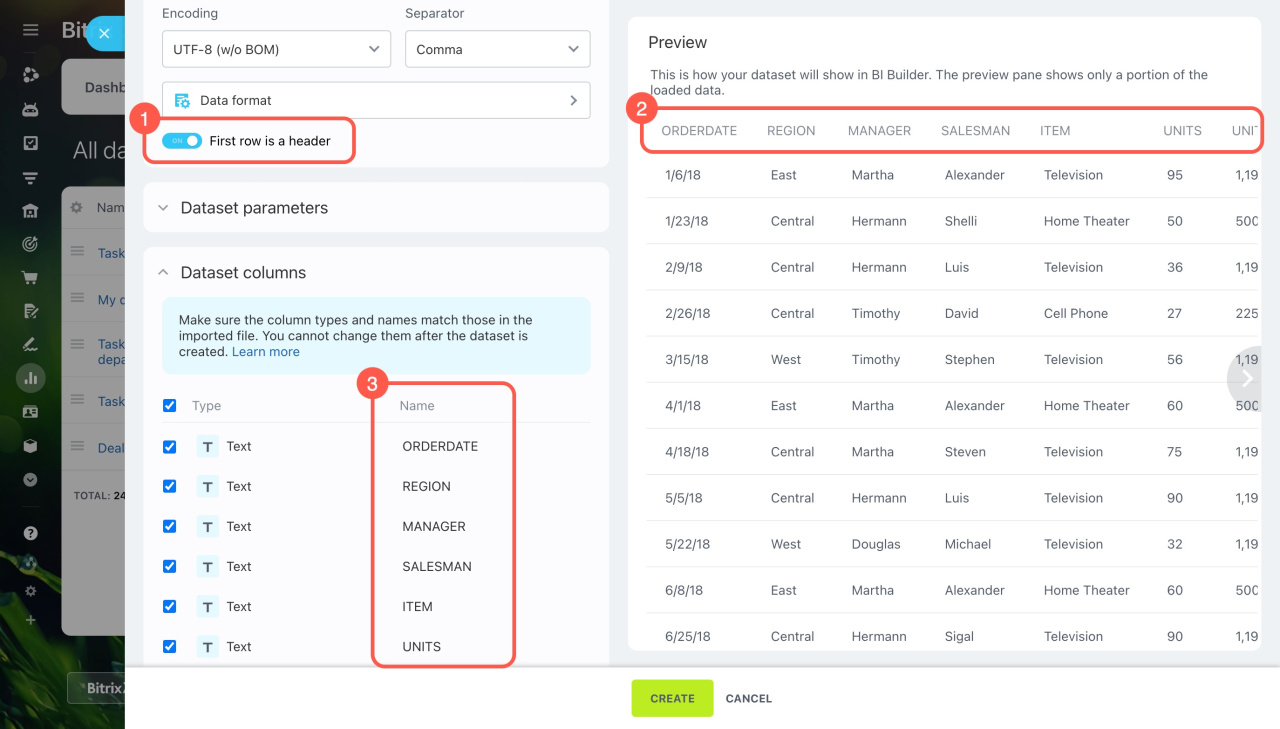
When configuring file settings, check how the dataset appears in the preview section. Review the dataset table to ensure column values are displayed correctly. If an error occurs, verify the encoding, separator, and data format settings.
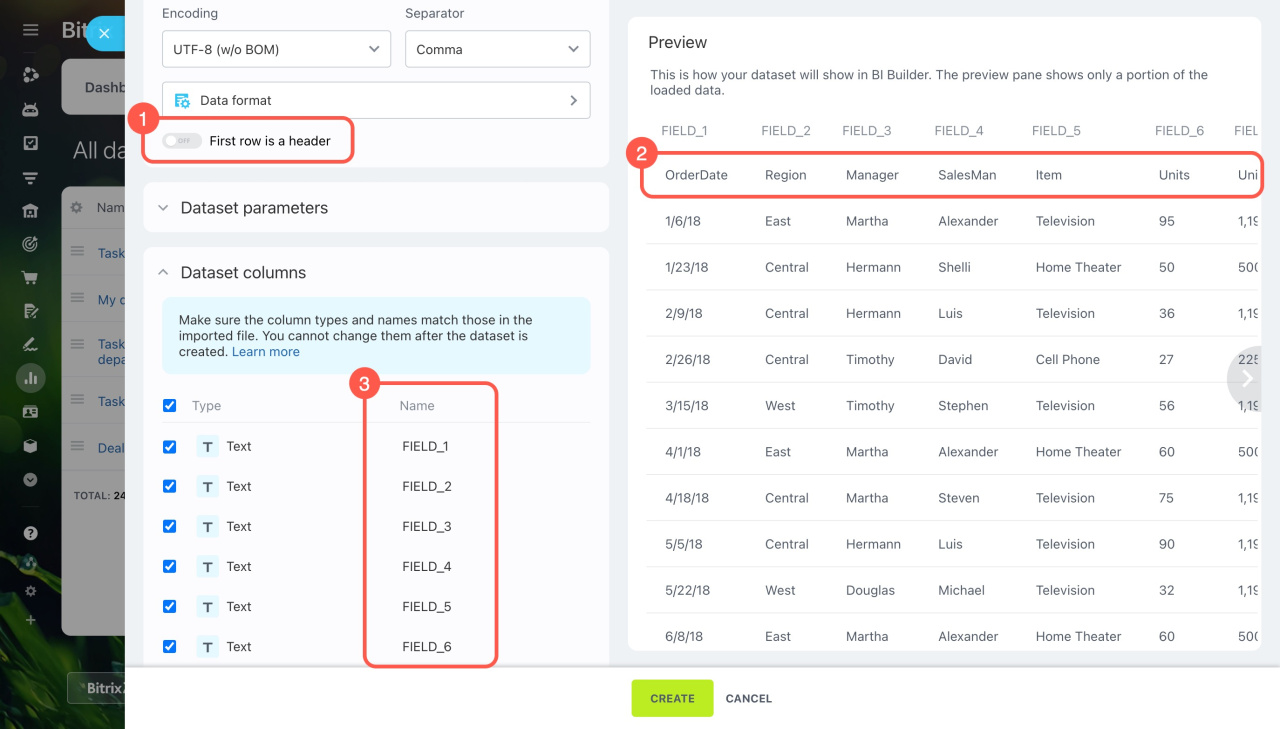
First row is a header. This option allows you to decide if the first row of your CSV file should be treated as column names or as part of the data.
If the option is enabled:
- BI Builder treats the first row as column names.
- In the preview section, you'll see the first row's headers used as column names.
- The dataset column settings automatically use the headers from the CSV file.
If the option is disabled:
- BI Builder treats the first row as part of the dataset data, not as headers.
- In the preview section, the first row appears as part of the data.
- BI Builder assigns default names to the columns, like
FIELD_1,FIELD_2and so on.
Specify dataset parameters
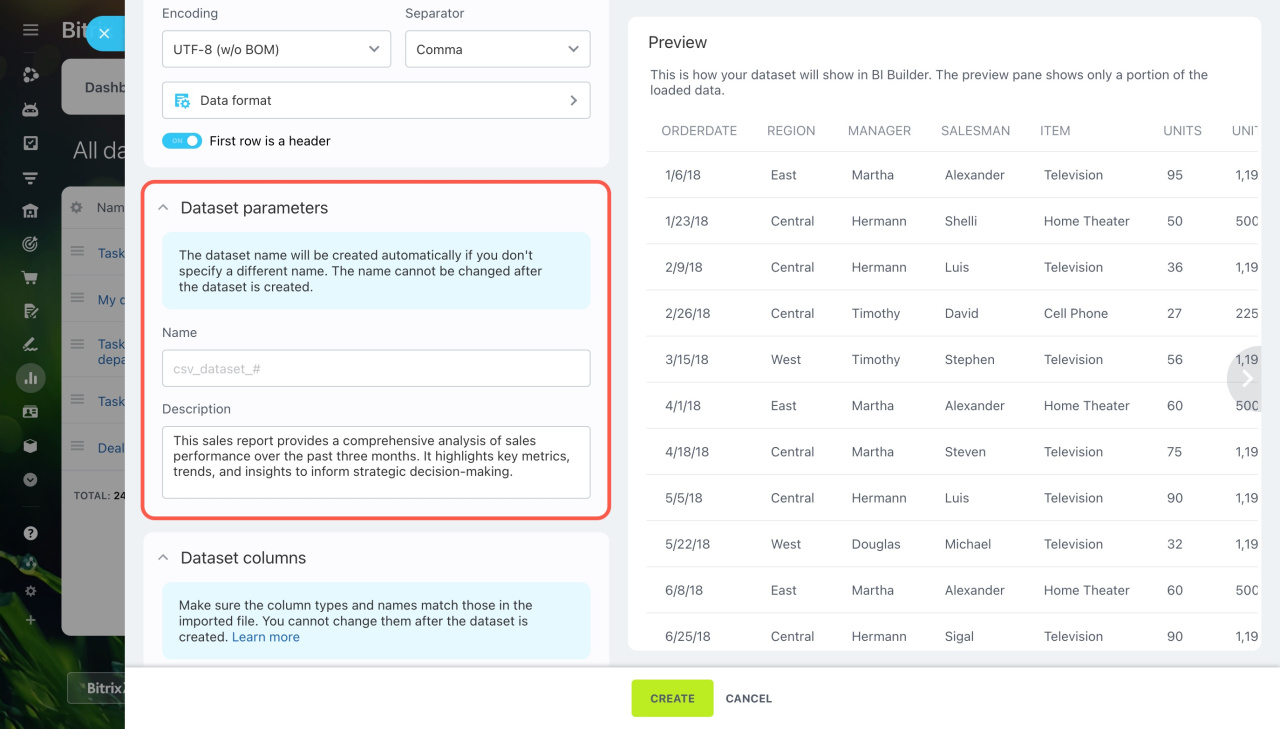
In the parameters, you can set a name and description for the new dataset to easily find it among other data.
-
Name. By default, the name is automatically generated in the format
csv_dataset_#, where#represents a unique dataset number assigned upon saving. This prevents name conflicts. You can choose your own name, but select it carefully, as it can't be changed later. -
Description. Provide a brief explanation of the dataset's contents. This will help your colleagues understand its purpose and the data it includes.
Configure dataset columns
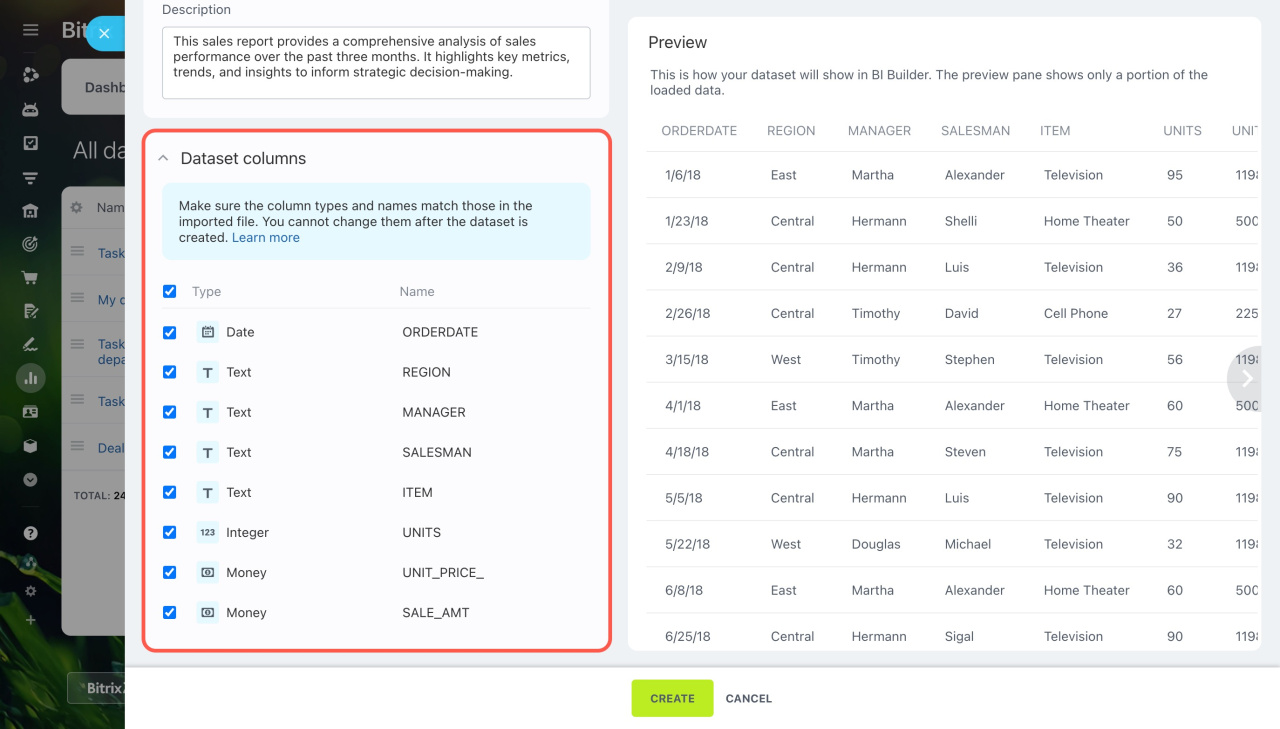
Review and set the data types and names for each column in the dataset to ensure proper processing. Once the dataset is created, you can't change the column types or names.
-
Check mark (). Use the check marks to remove unnecessary columns from the dataset. For example, if your CSV file has 10 columns, but you only need 5, uncheck the extra ones. You can update the dataset by uploading a new CSV file, which must have the same columns as the original. If you initially kept 5 out of 10 columns, you'll need to upload a CSV file with all 10 columns to update it. BI Builder depends on the original file structure to recognize data during updates. If the updated file has fewer columns or a different order, the data might not load correctly.
-
Type. Select the right data type for each column to ensure BI Builder processes the data correctly. The type should match the data format in the CSV file. For example, if the file includes sales dates, set the column type to Date for time-based plotting.
Configure data formats and types for CSV file import -
Name. Specify names for the dataset columns to quickly identify the data in each one. If the First row is a header option is enabled, BI Builder will automatically use the headers from the first line of the CSV file. If this option is disabled, default names will be assigned. Choose names carefully, as they can't be changed after the dataset is created.
Create a chart
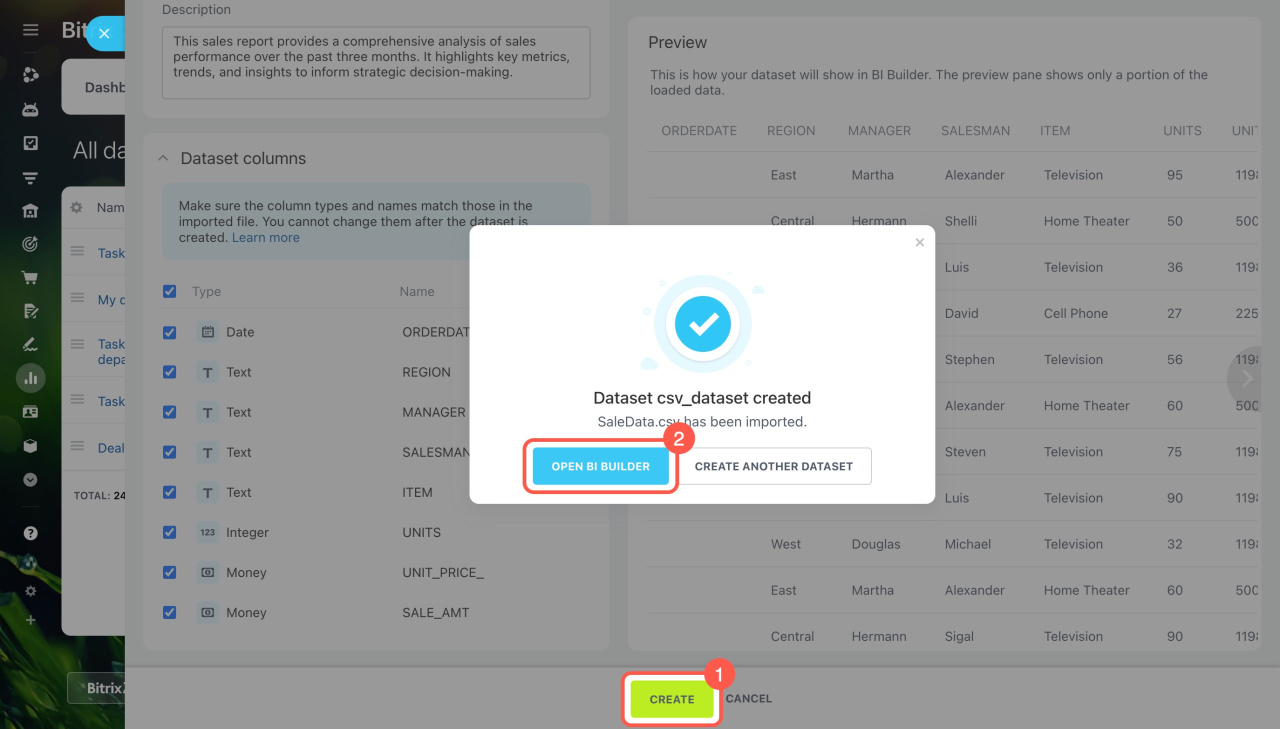
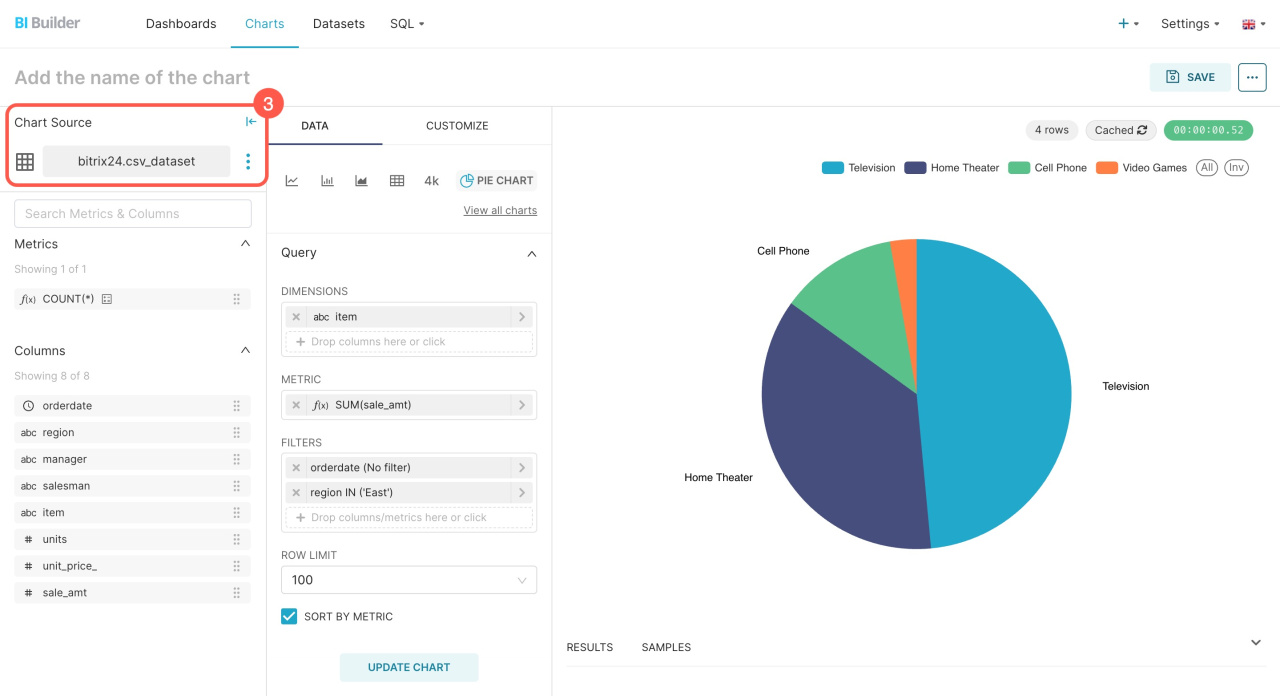
Once you've configured all the parameters and set the correct data types for the dataset columns, click Create > Open BI Builder. This will open the chart creation section in BI Builder with your new dataset selected. You can then set up indicators, create a chart, and add it to your dashboard.
Create dashboards in BI Builder
Edit dashboards in BI Builder
In brief
-
Now you can create your own datasets from CSV files to add dashboards in BI Builder.
-
To create a dataset, upload a file, configure the encoding, separator, and data formats.
-
Specify dataset parameters and configure columns by selecting data types and removing extra columns.
-
Use the preview section to ensure the data is displayed correctly.
-
Use your dataset to create charts and analyze business indicators.

