In brief
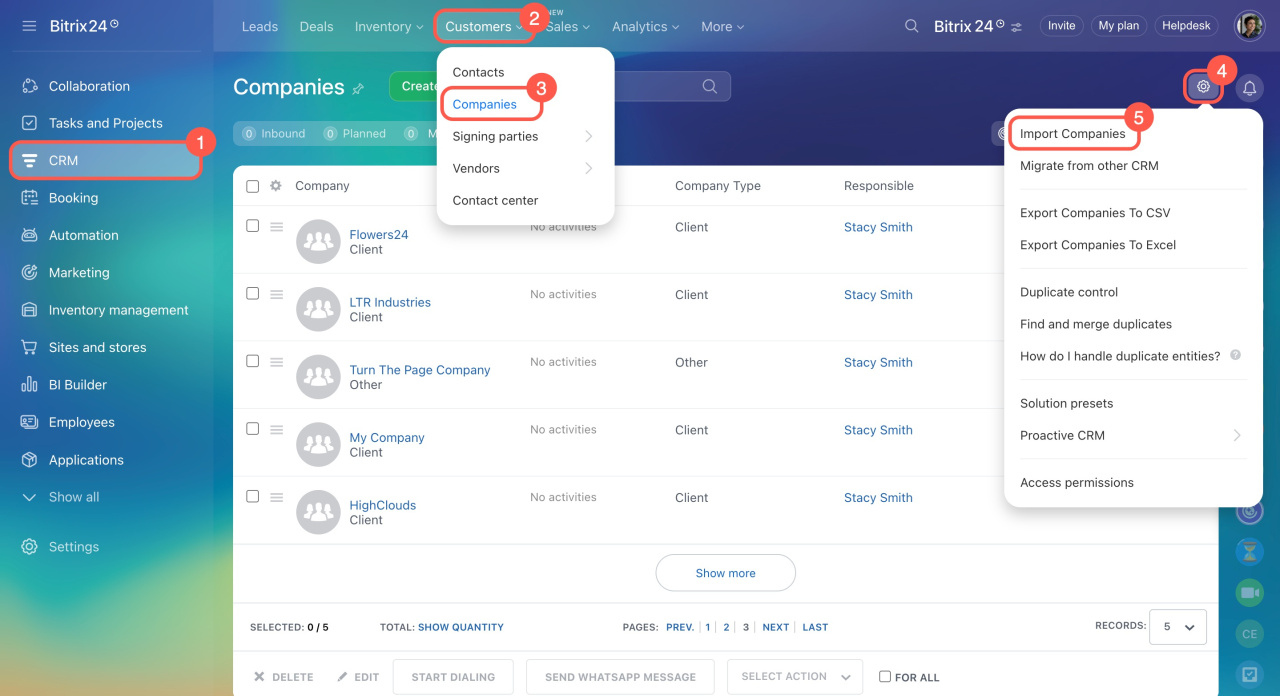
- Go to CRM.
- Click Customers and select Companies or Contacts.
- Click Settings (⚙️) and choose Import Companies or Import custom CSV.
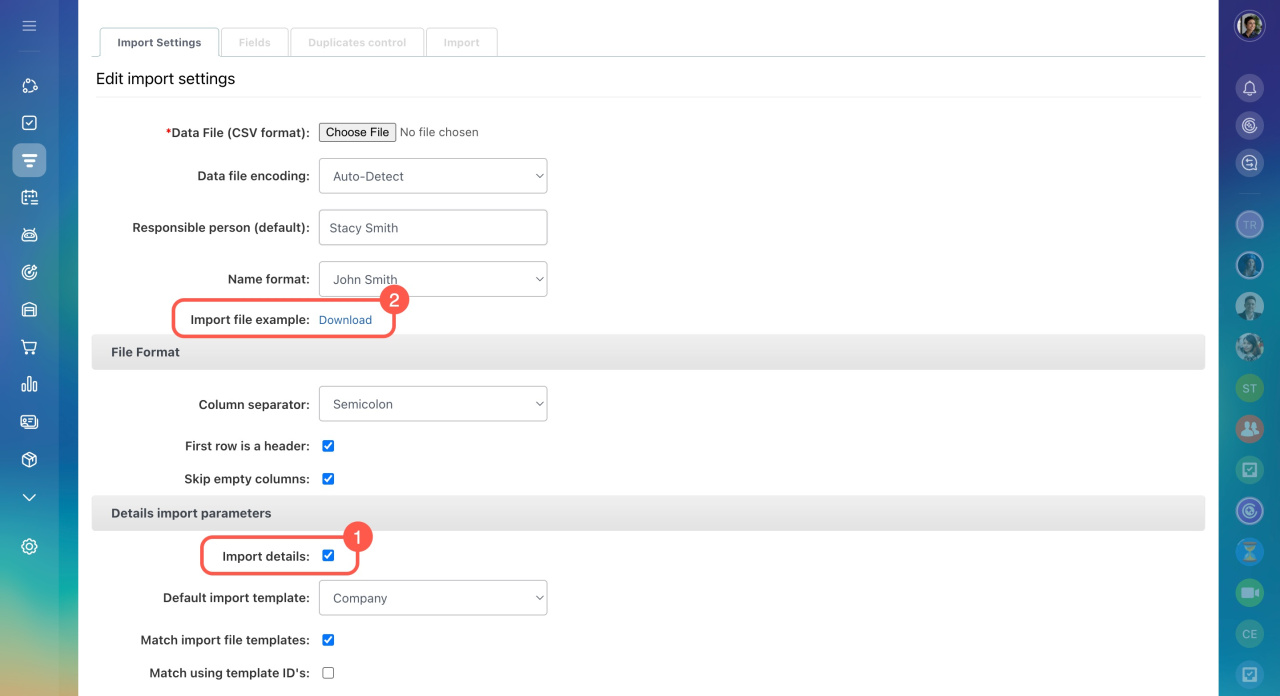
- In the Details import parameters section, enable the Import details option.
- Download the import file template and fill it out.
- Upload the completed CSV file to Bitrix24.
- Make sure the fields in your file match the corresponding fields in Bitrix24.
- Once the import is finished, click Done. To upload another file, click Import another file.
In detail
Use the import feature to upload contact and company lists with all their details to Bitrix24. This helps to:
- Build your client database when starting with Bitrix24.
- Transfer data from another CRM to avoid manual entry.
Role-based access permissions in CRM
This article explains how to import data using companies as an example.
- Go to CRM.
- Expand Customers.
- Select Companies.
- Click Settings (⚙️).
- Choose Import Companies.
To complete the import, follow these steps:
1. Download the import file example. This is a CSV file, which includes all the company form fields. To import company details, enable the Import details option before downloading.
2. Fill out the import file. Enter the data you want to import into the template. If you are importing companies from another Bitrix24, proceed to step 3.
To add multiple values to a single field, like multiple phone numbers, separate them with commas.
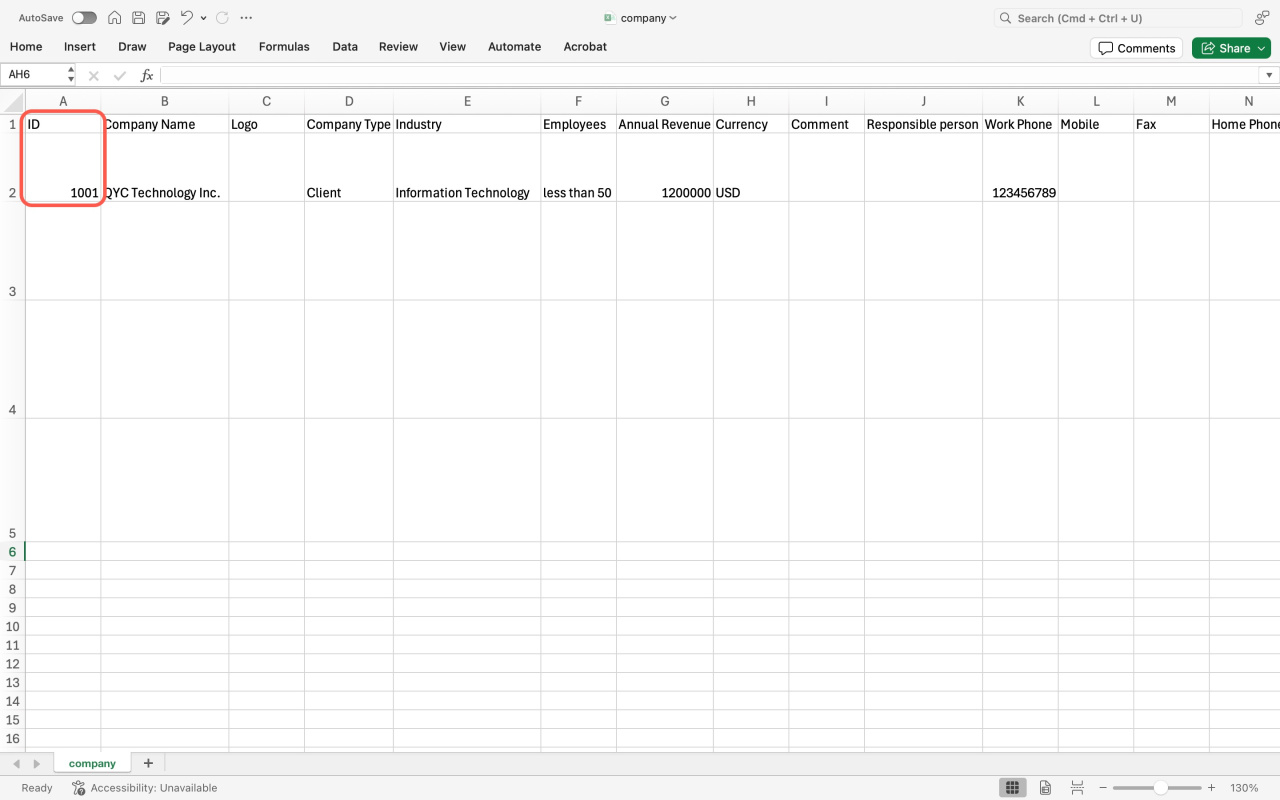
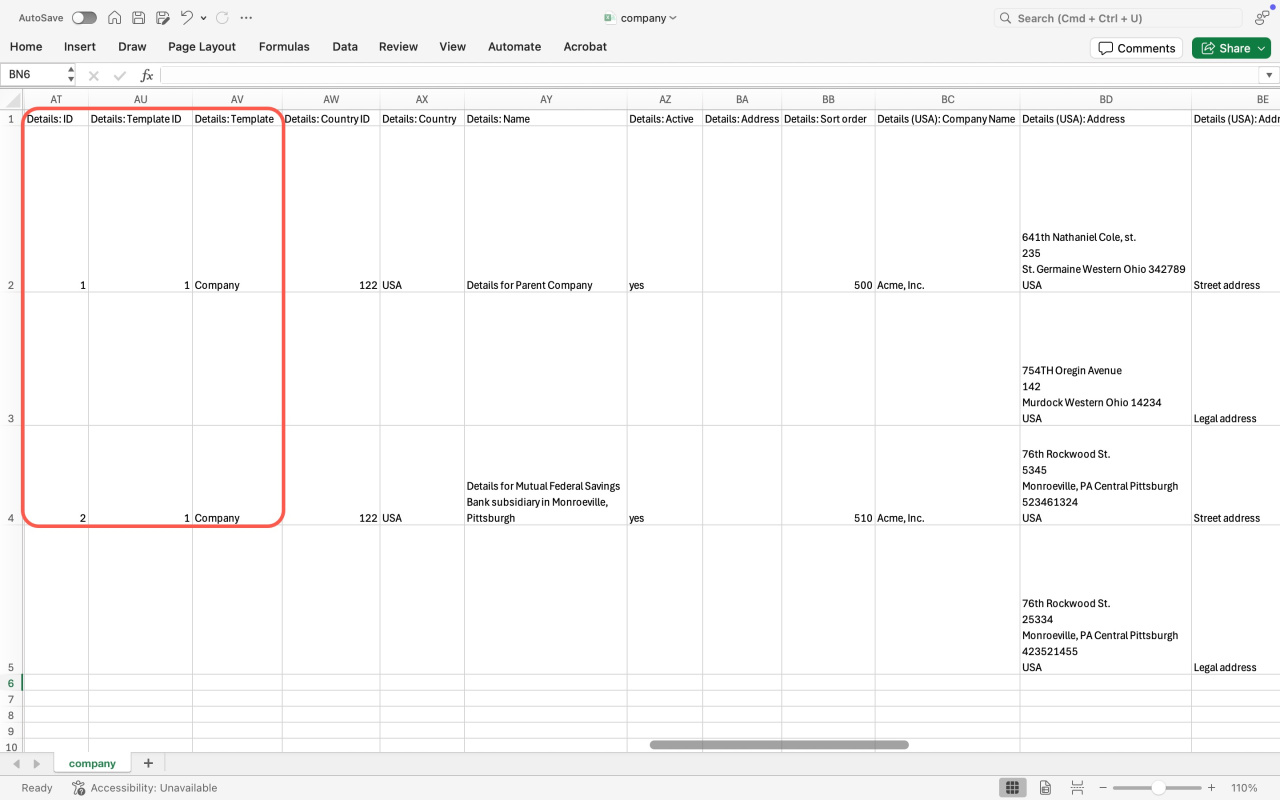
To avoid errors during import, include the following in your file:
ID. This is a unique number assigned to each company (one company = one number).
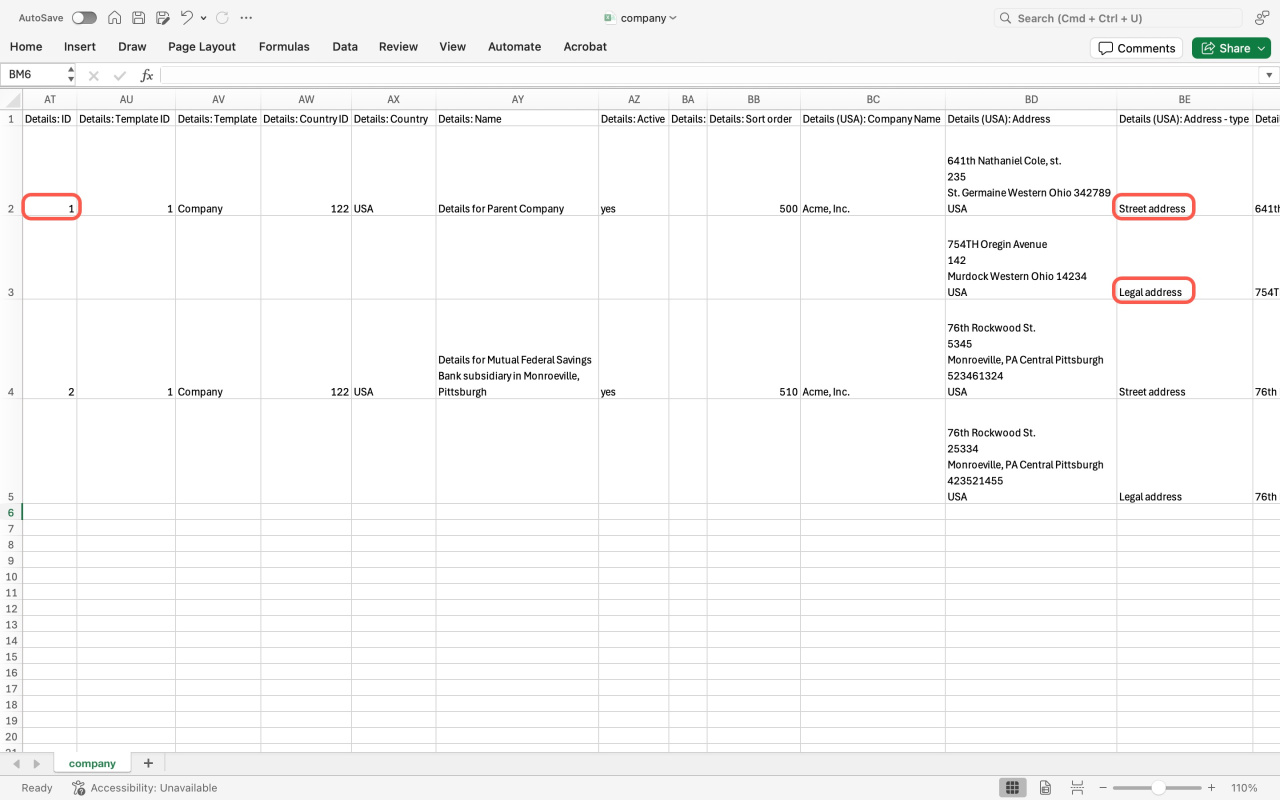
Details: ID. This is a unique number for each company's address (one address = one number). If a company has multiple addresses or banking details, use separate rows and leave the Details: ID column blank.
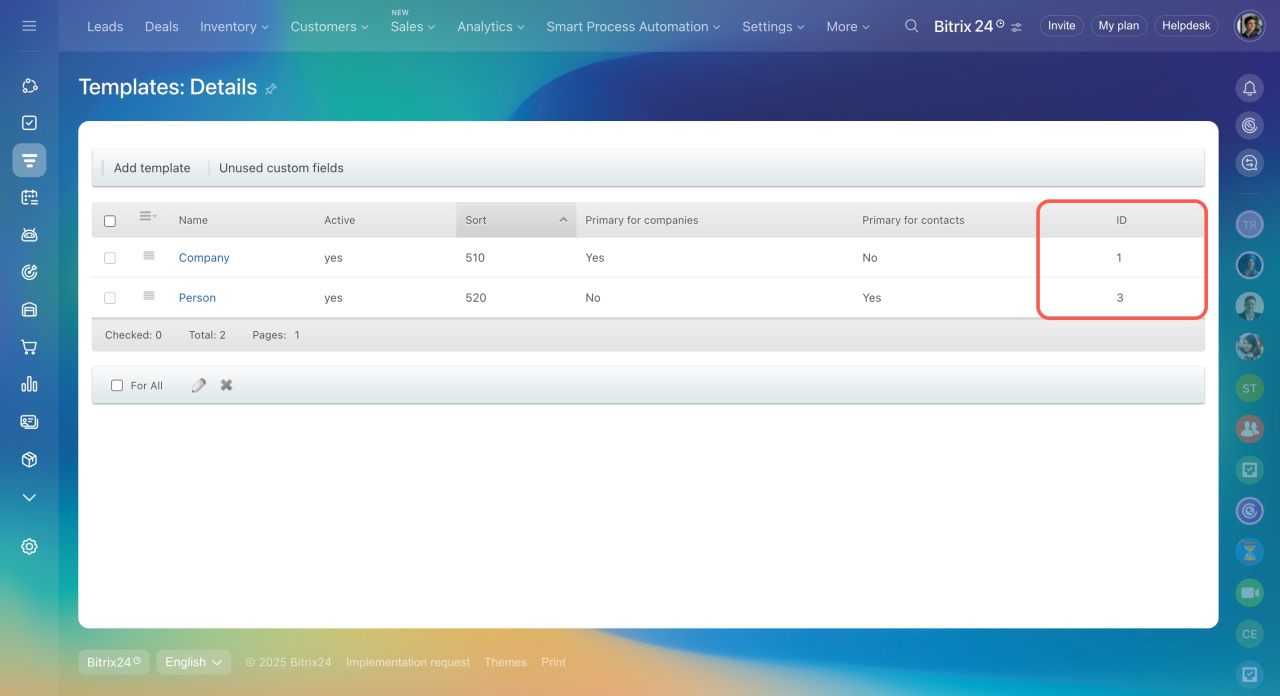
Details: Template ID. Specify the details template ID.
Contact or company details templates
Details: Country ID. For the USA, use 122.
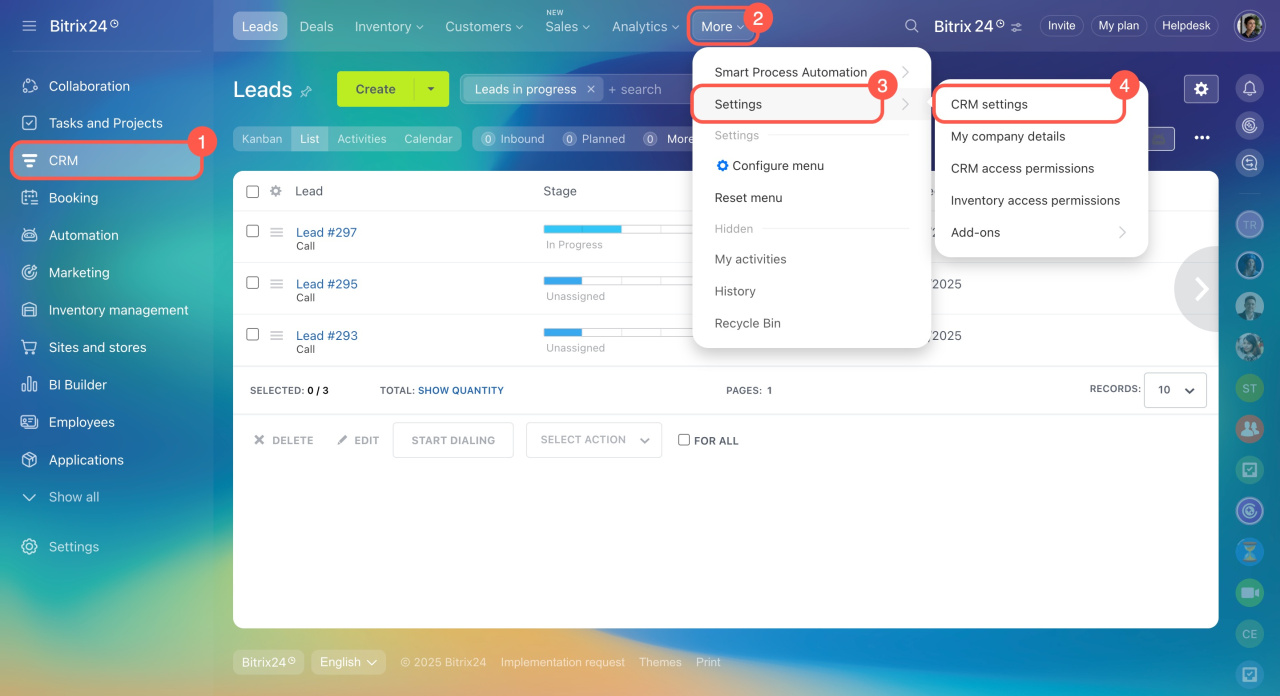
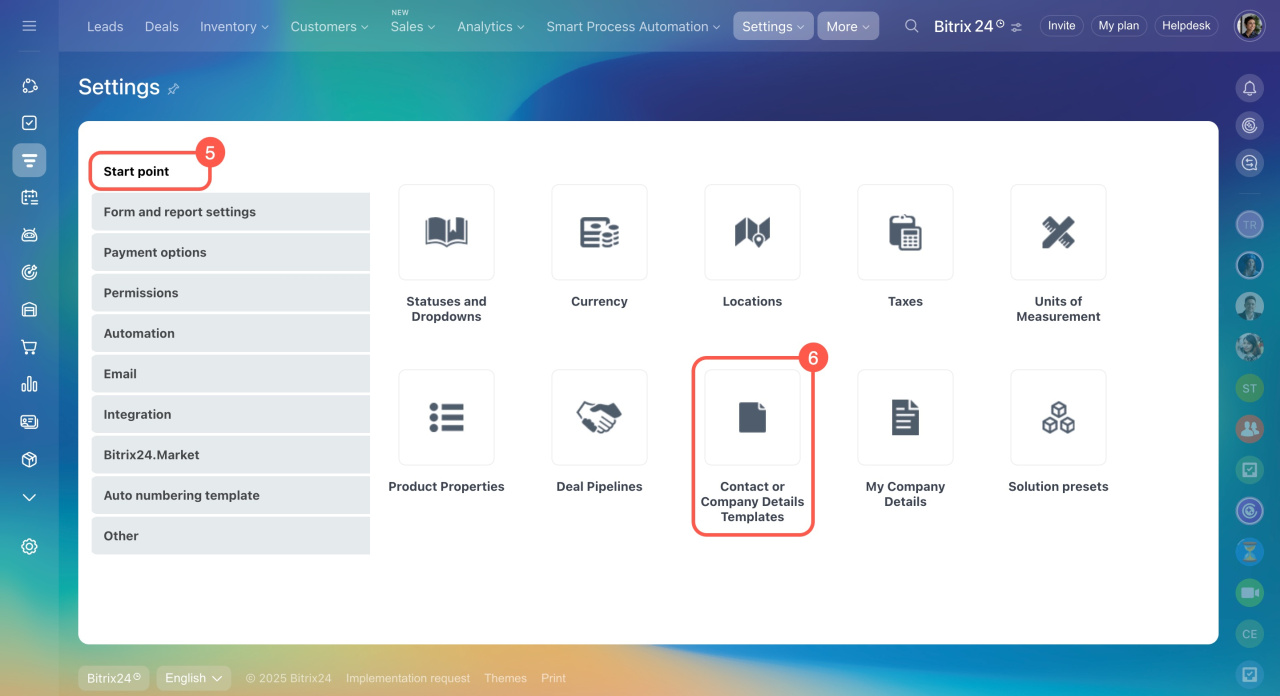
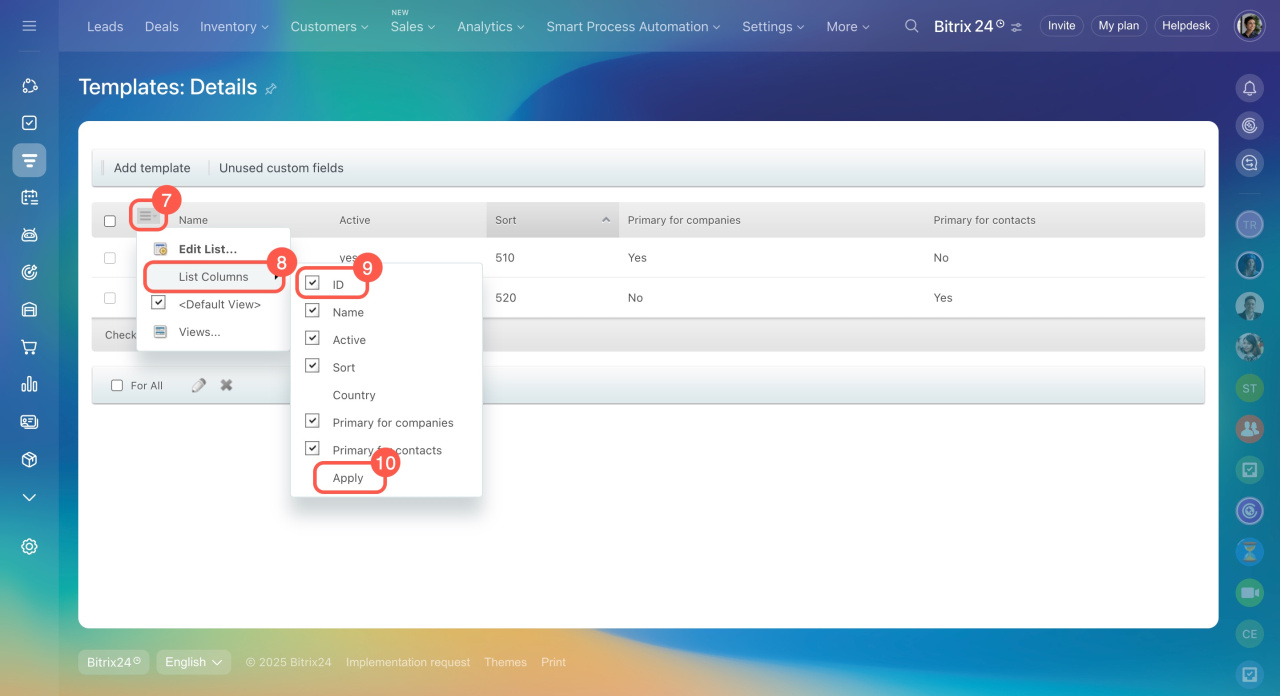
How to find the template ID
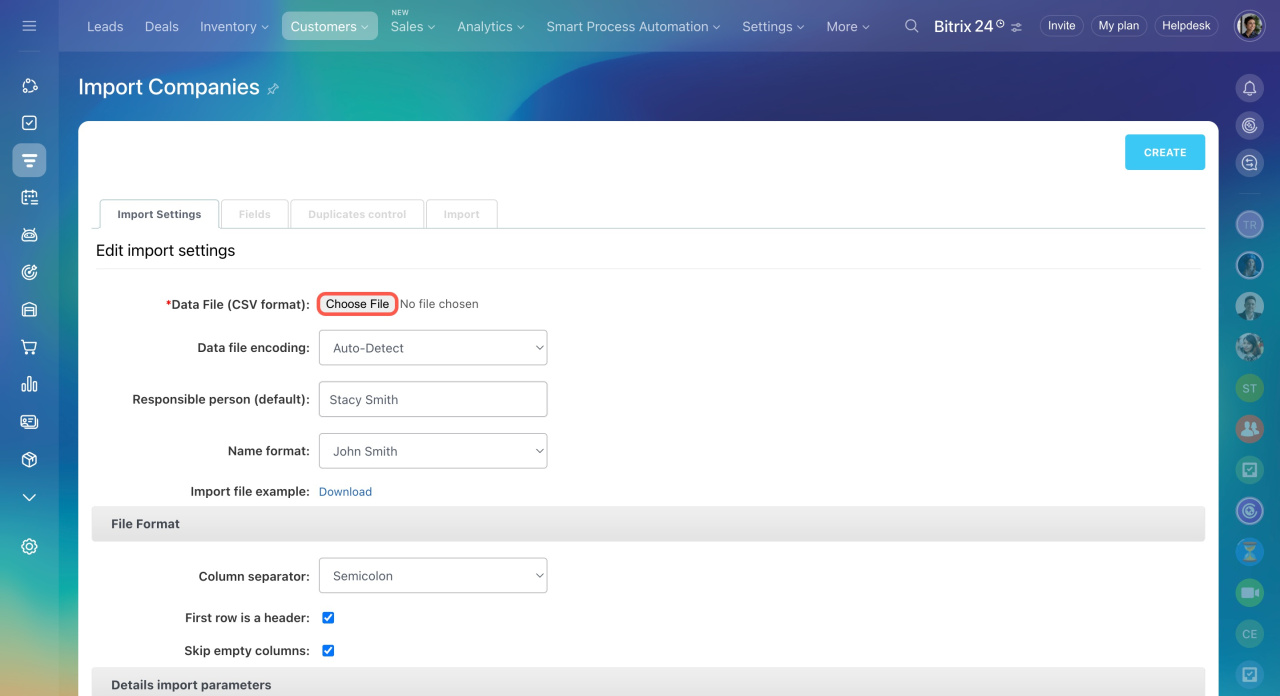
3. Upload the import file. Upload the completed file to Bitrix24. It must be in CSV format.
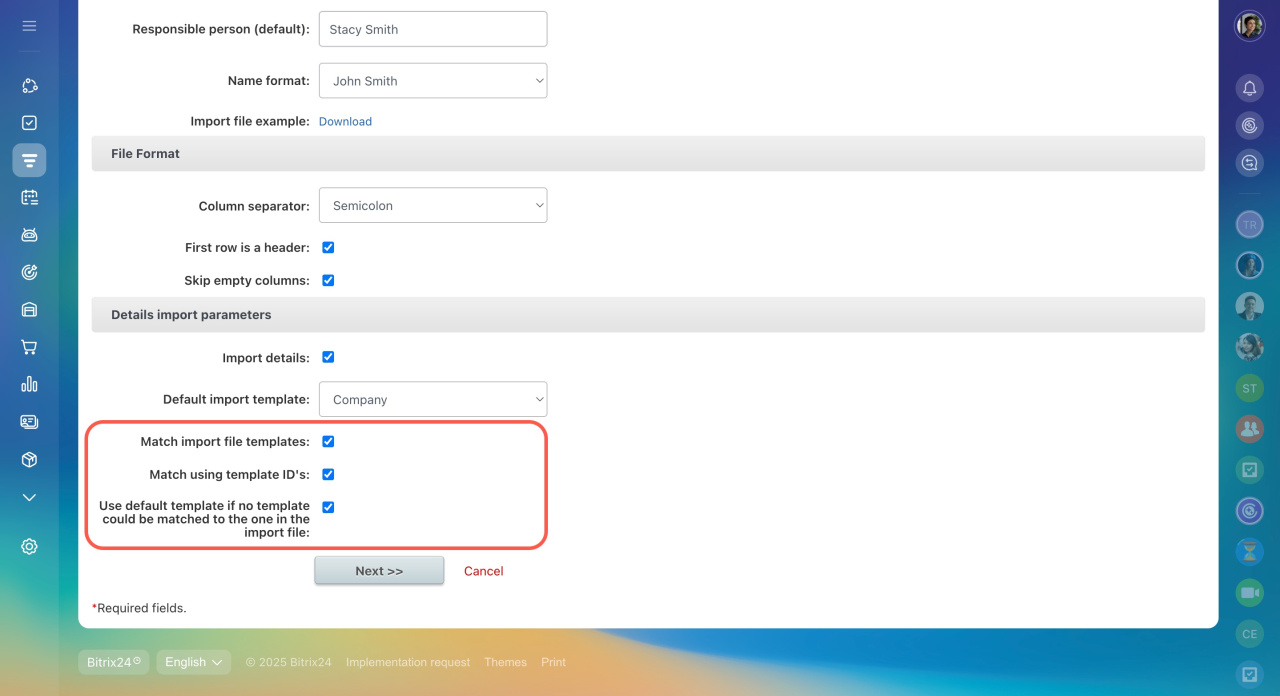
4. Configure import details settings. Enable these options to avoid errors:
Match import file templates. CRM will match data by template name and country. If the country name doesn’t match the selected template, CRM won’t match the elements. The value in the Details: Template ID column doesn’t matter.
Match using template IDs. CRM will only consider template IDs for matching.
Use default template if no template could be matched to the one in the import file. If CRM doesn’t recognize the data, it will apply the default template.
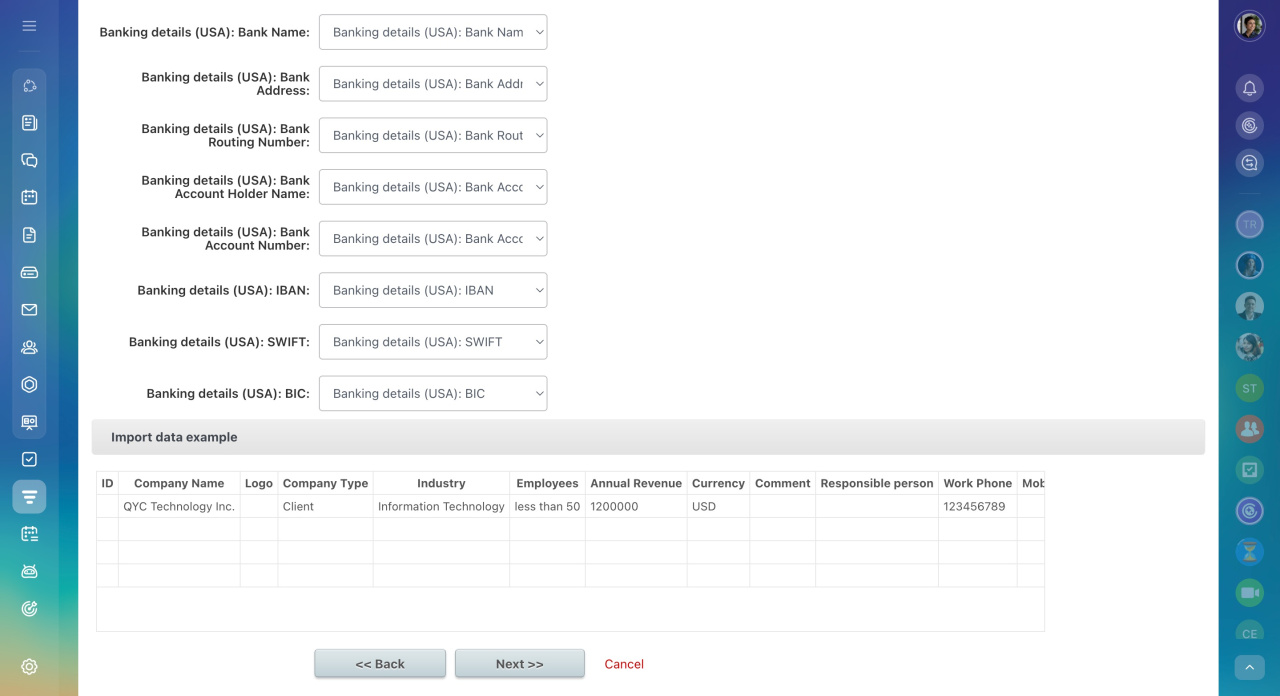
5. Check field mapping. Ensure fields in your import file match the corresponding fields in Bitrix24. For example, the Company name field in your file should map to the Company name field in Bitrix24.
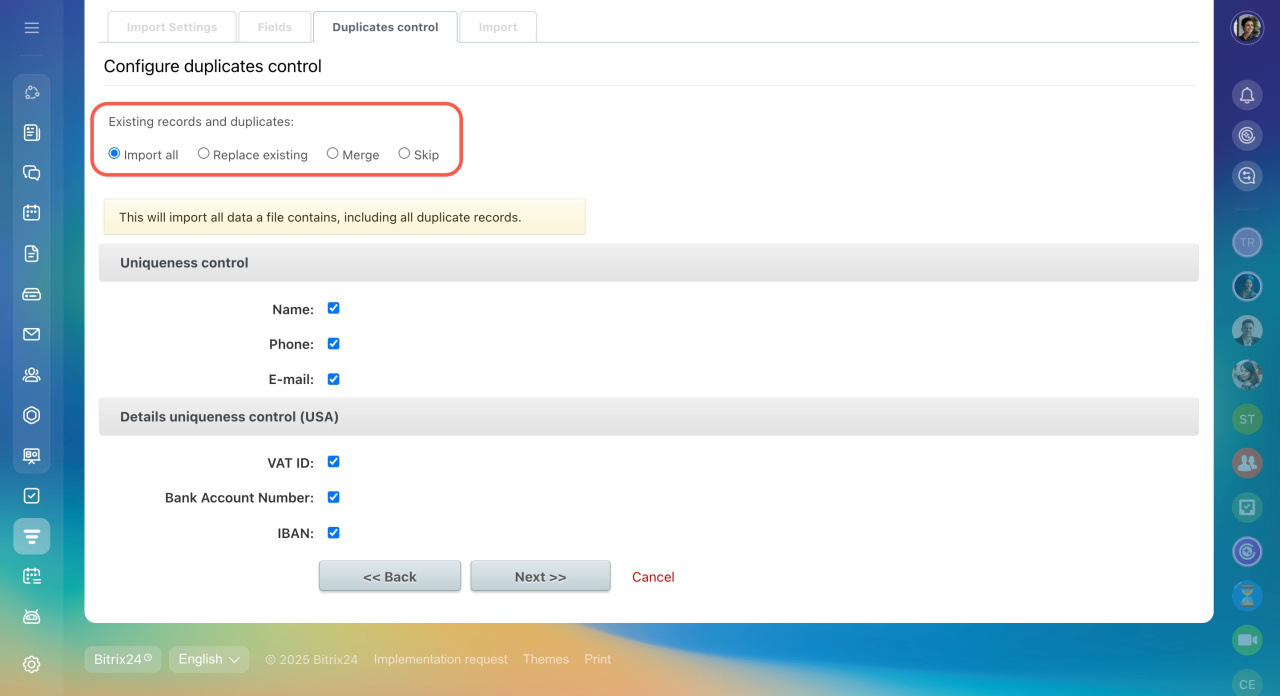
6. Choose what to do with duplicates:
- Import all: Imports all companies, even if they already exist in CRM.
- Replace existing: Updates existing records with data from the file.
- Merge: Fills only empty fields in existing records.
- Skip: Skips duplicates but allows you to download a list of them after the import.
7. Wait for the data to upload. The time required depends on the number of companies—larger imports take longer.
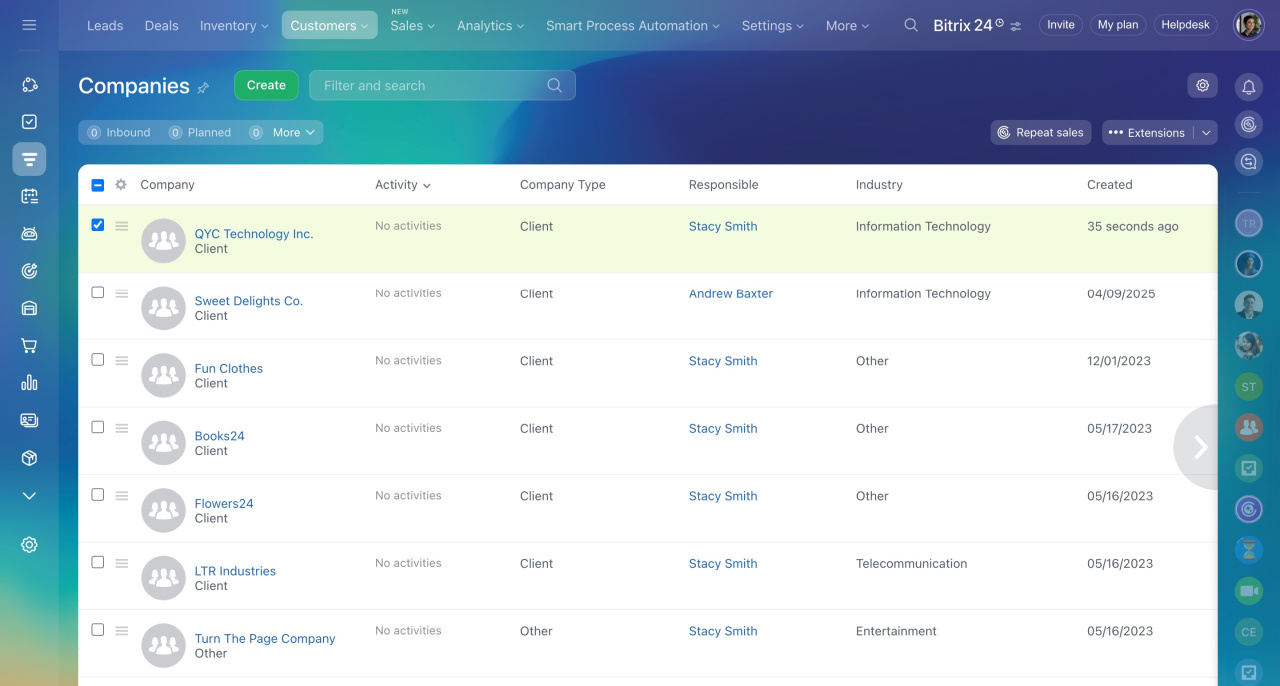
After the import is finished, check the company list in CRM.

