Booking: Getting started
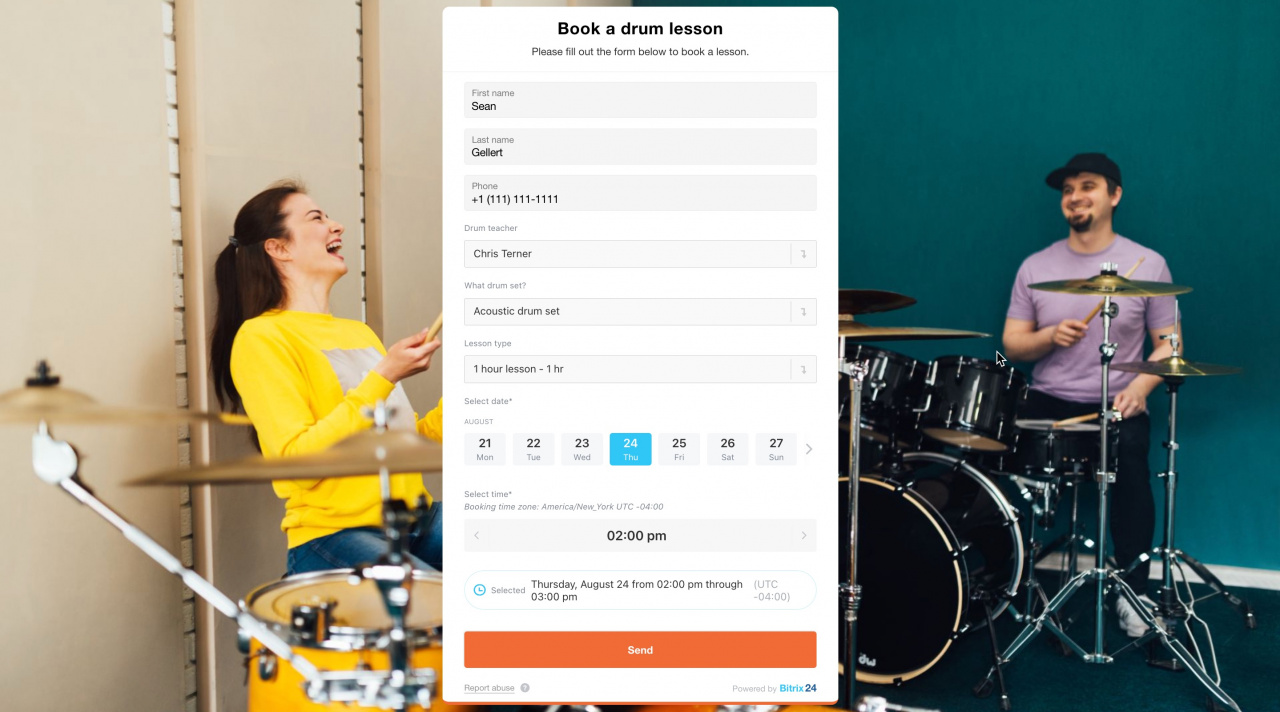
The Resource booking option in a CRM form allows your clients to reserve services online. They can provide their contact info, pick a user and a service, and select a date and time to schedule an appointment.
To use this option, you need to create a Book a resource field in CRM. Refer to this article to learn how to do that.
If you have already created such a field, see the information below to add it to the CRM form.
Add your Book a resource field to CRM form
To add the Book a resource field to a CRM form:
-
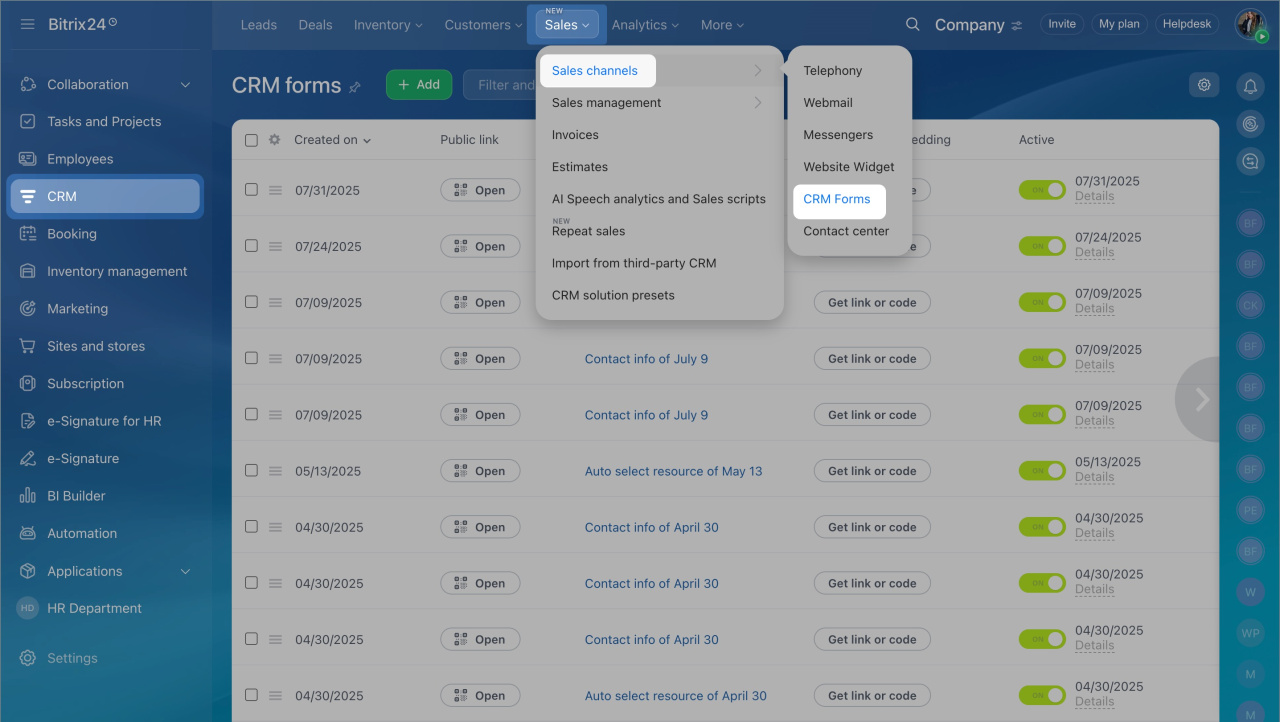
Go to CRM > Sales > Sales channels > CRM forms. Add a new form or edit an existing form.
-
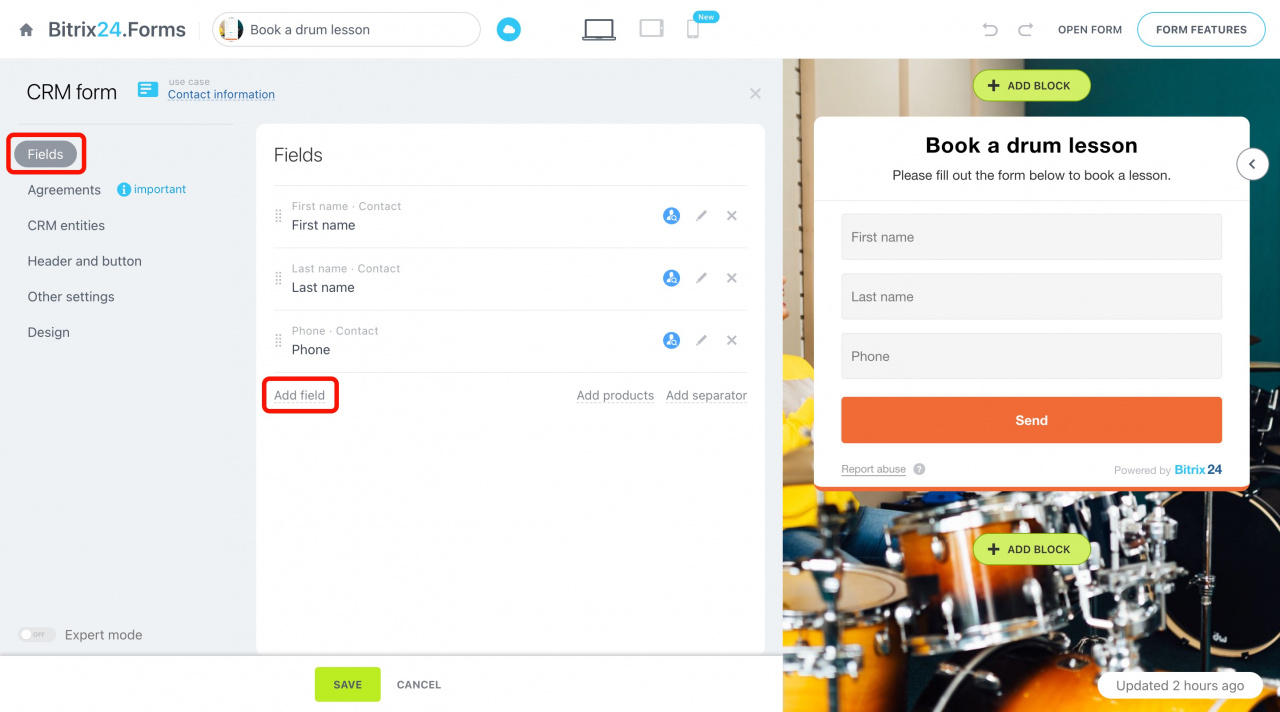
Under the Fields tab, click the Add field button.
-
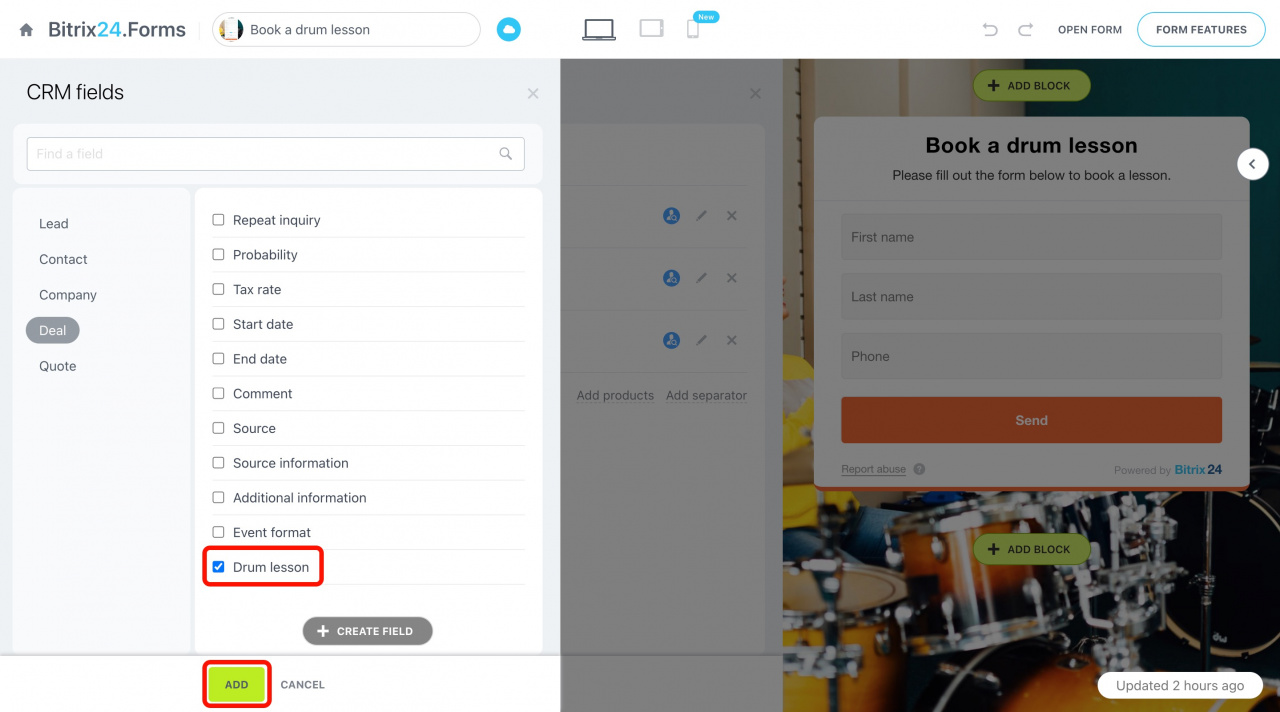
A panel will slide in on the left of the page. Find your Book a resource field, tick it, and then click Add at the bottom.
-
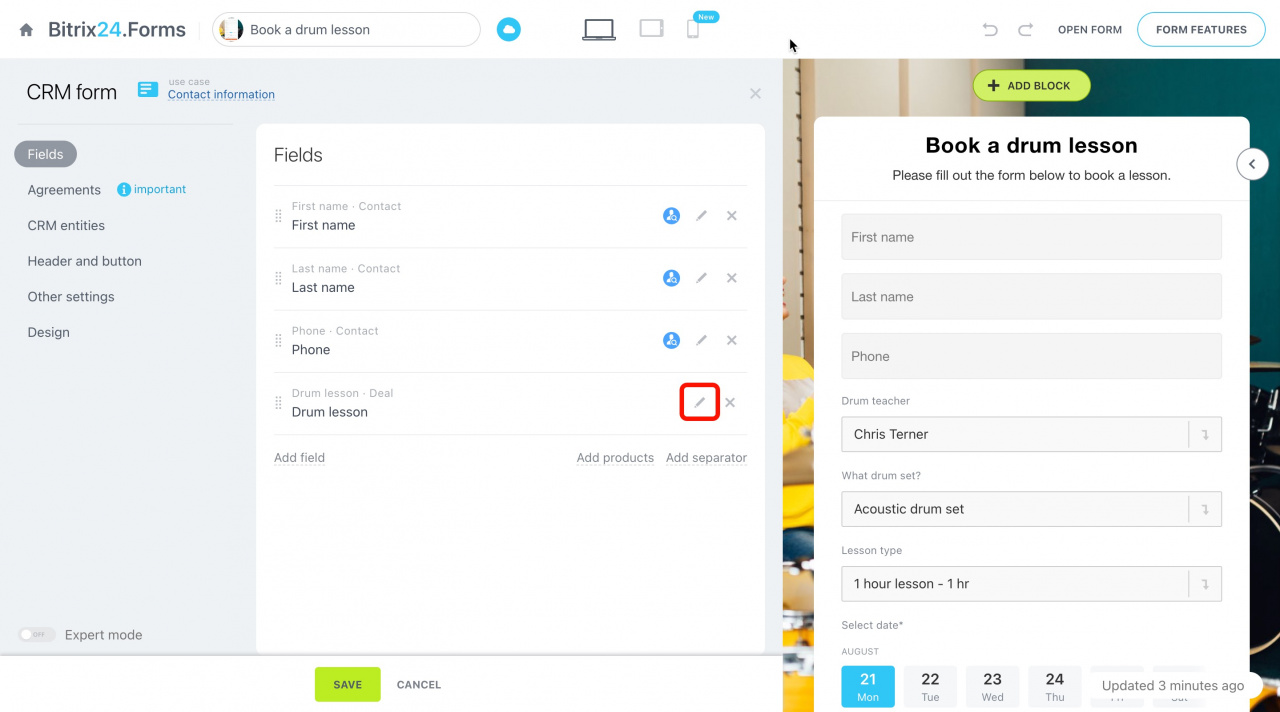
Click on the pencil icon to open the field settings.
The field settings that you make in the CRM form apply only to this form and do not affect the settings in CRM. For example, if you change the name of a field in a form, it will not change in CRM.
Customize your Book a resource field
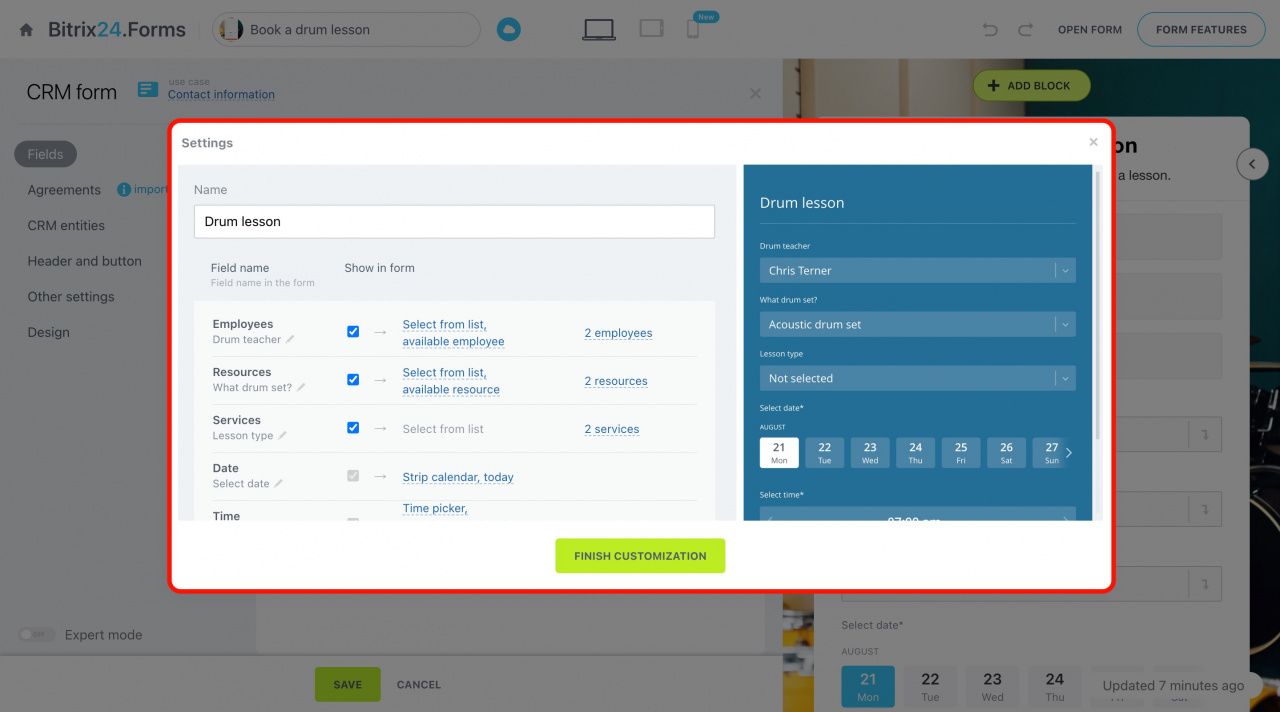
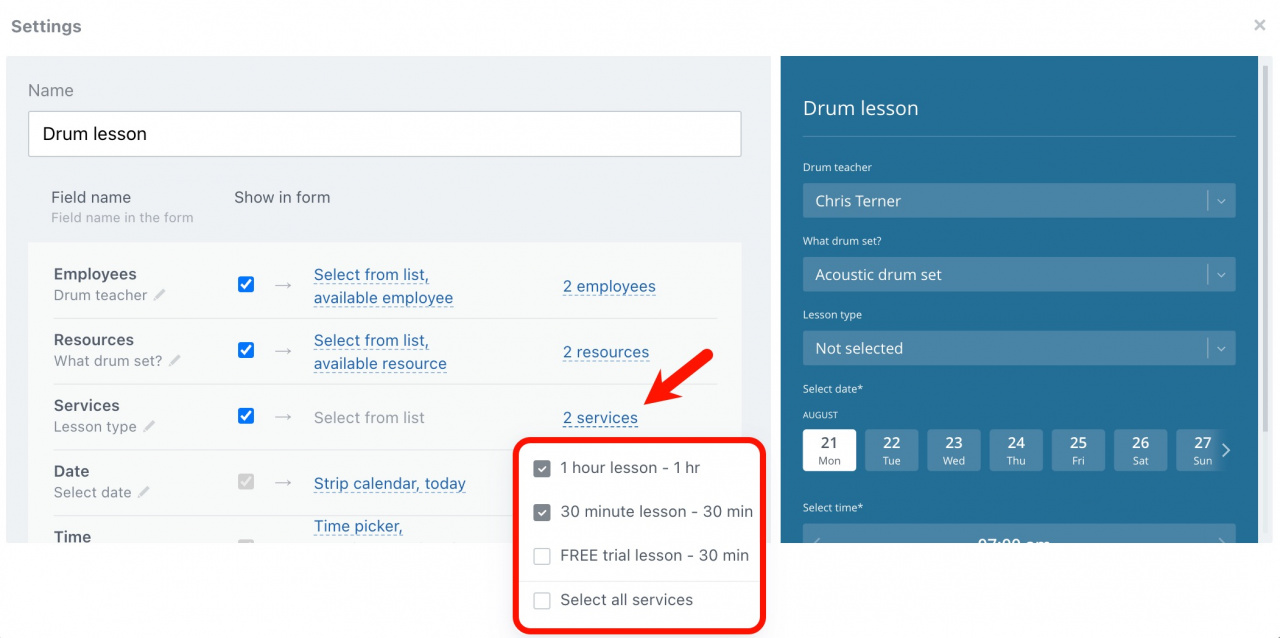
The settings window opens up in the center of the screen. It is split into two parts: the left part shows the settings of your fields' elements and the right part shows your CRM form in preview mode. Here you can customize the way the field's elements are displayed and preview the changes.
-
Field name: It is not displayed in the form, so you do not need to change the name.
-
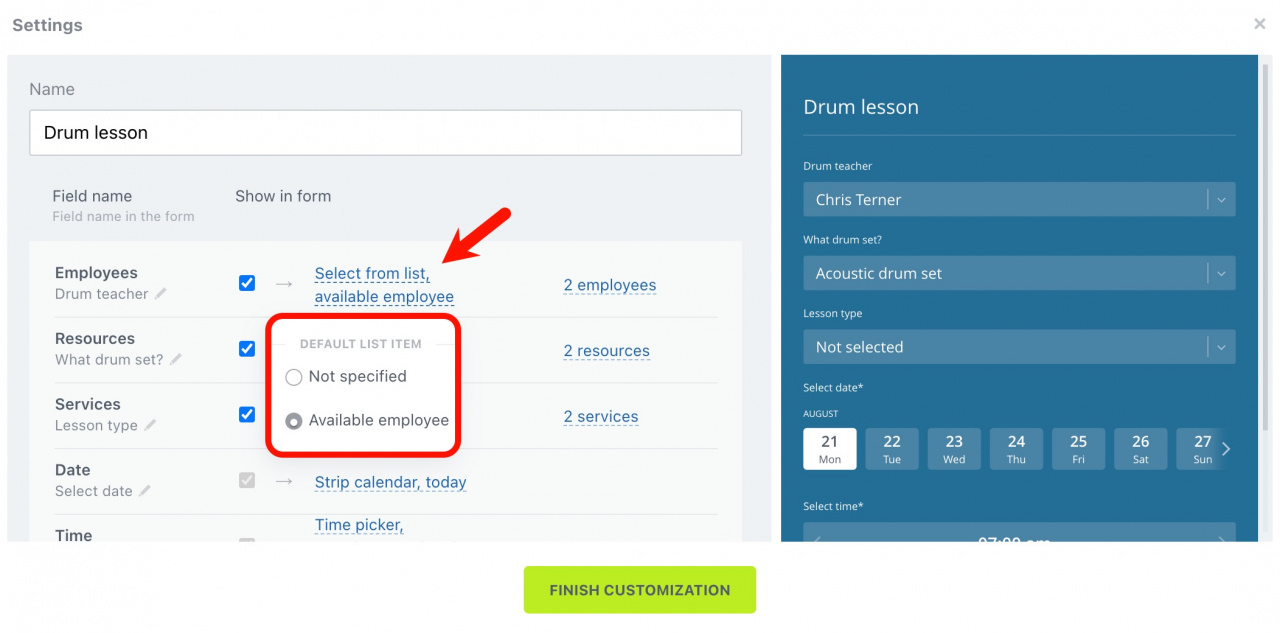
Employees: Enable this option to allow your clients to select a user who will provide a service. When it is disabled, an available user will be booked.
-
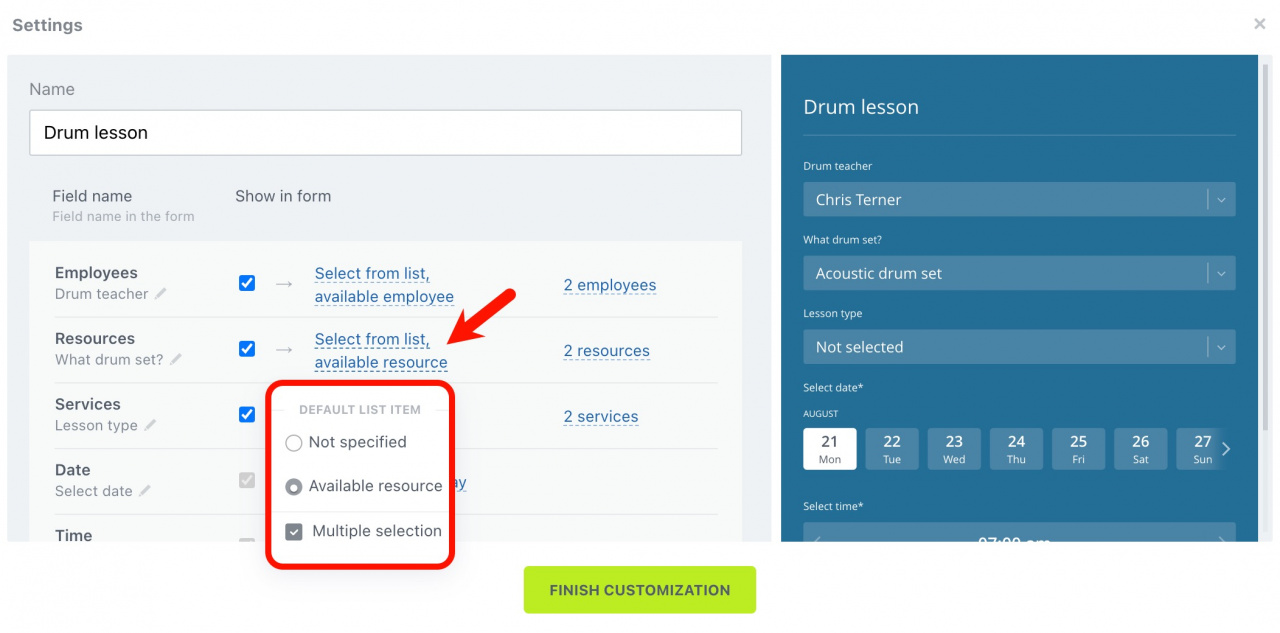
Resources: Enable this option to allow your clients to select a resource. We recommend renaming it to something more understandable to the client.
The value in the list can be Not specified or Available resource. In the first case, there will be no preset value in the field. In the second case, the first free resource will be displayed.
Also, you can activate Multiple selection to let your clients select several options at once.
If you do not want to display resources or services in the form, uncheck the box.
-
Services: Enable this option to allow your clients to pick a service. Indicate the available services and rename them, if necessary. Uncheck the box next to the services that you are not temporarily providing.
-
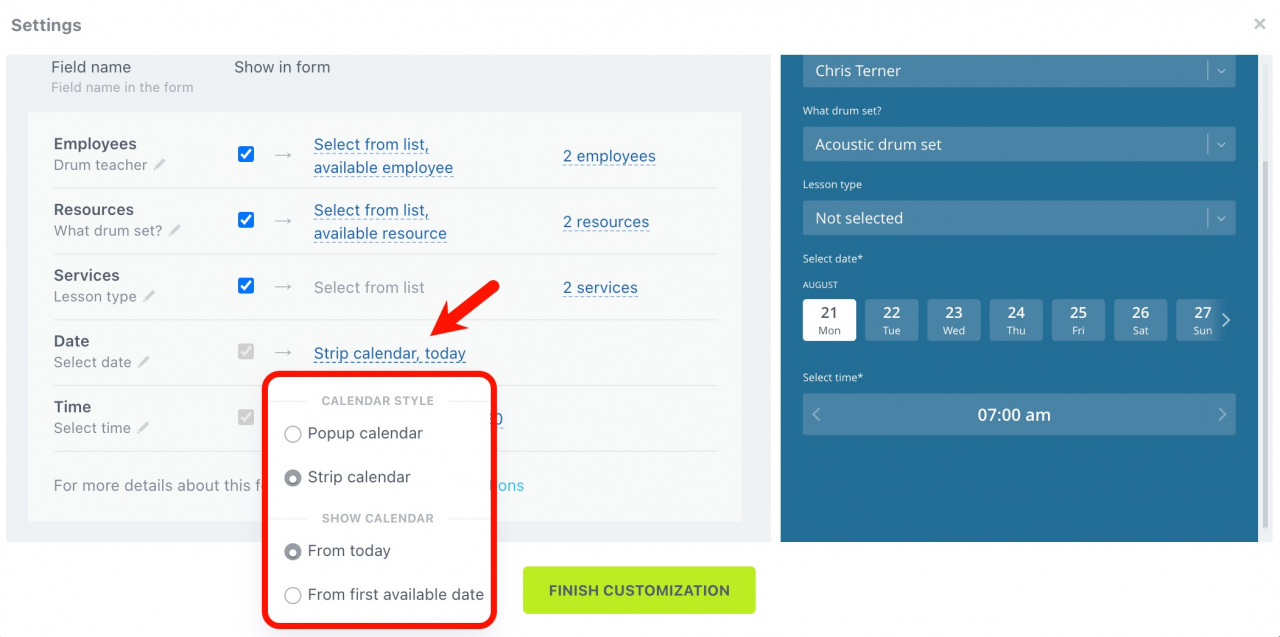
Date: This option is required; it cannot be disabled. If necessary, rename it and select the appropriate calendar display option.
Services longer than 1 day can be booked in the CRM form only if you activate the Date only option in the field settings in CRM. -
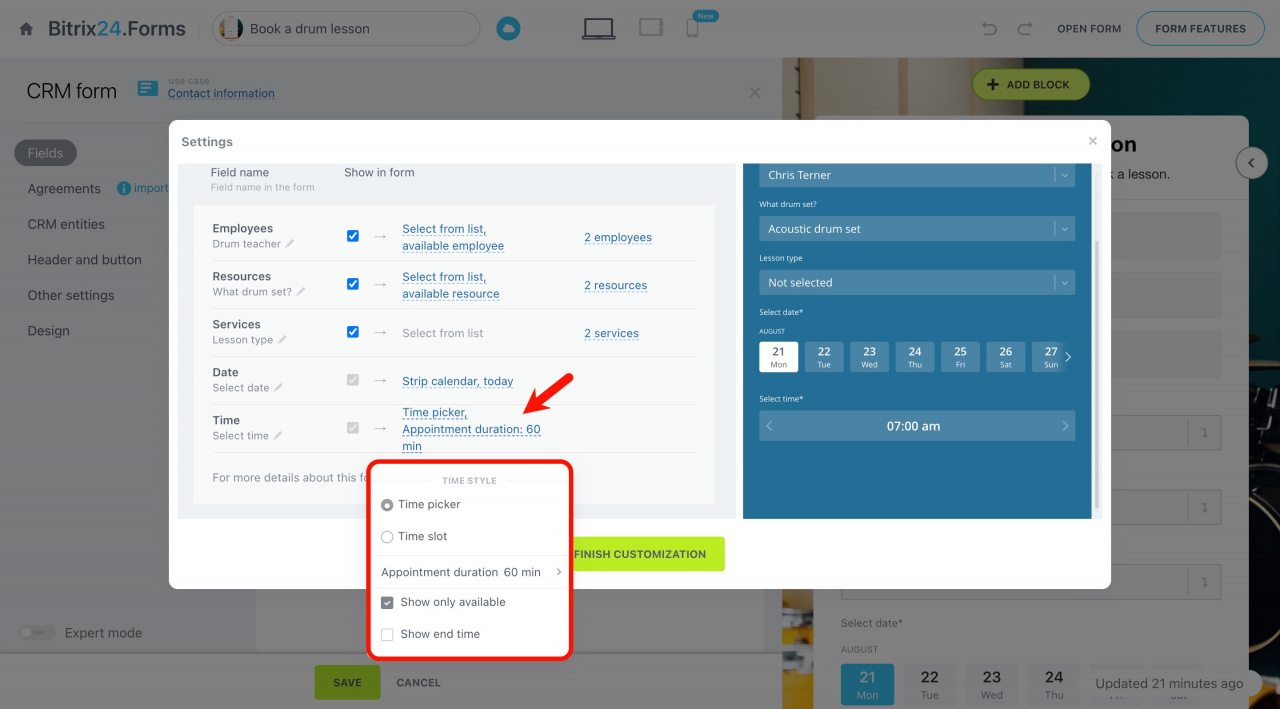
Time: This option is shown if the Date only option is disabled in the field settings in CRM. Select the time style and appointment duration.
How it works
The form can be placed on the site, sent to the client in the chat, or posted on the social networking page.
In the CRM form, the customer fills in a name and a phone number, picks a user and a service, and selects a date and time to schedule an appointment.
Once the client has filled out the form, a lead or a deal (depending on the form settings) is created in CRM. It records the client's contact information and all the information about the booking. You can contact the client later to confirm an appointment.

