Think carefully about the structure of your knowledge base. Create either a standard or nested menu to easily navigate through it.
Create a standard menu
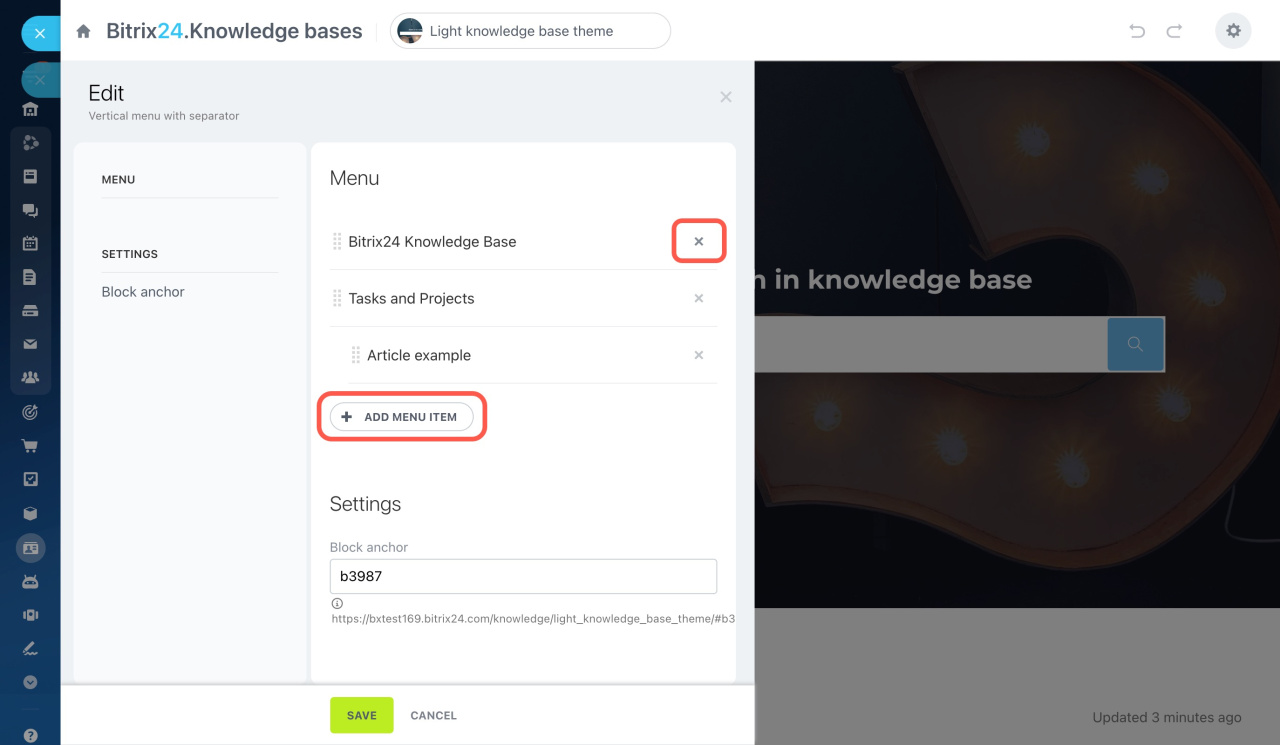
After creating a knowledge base from a template, there is a default navigation menu. Use it to set up your knowledge base structure or add another block. Click the gear button and select Edit.
Remove menu items that you don't need by clicking the cross icon next to them. To add new items, click the corresponding button below.
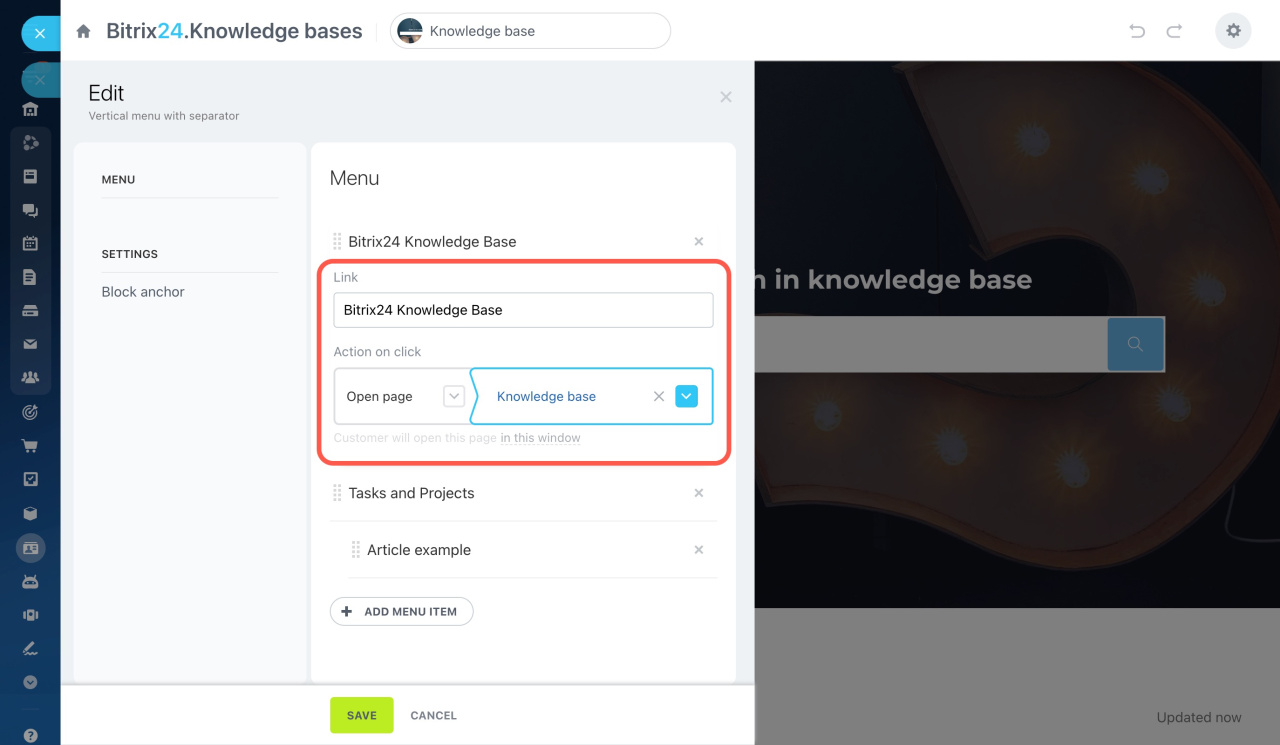
To rename a menu item, click on its name and enter the new one into the Link field.
You can also add menu items by clicking the New page button on the sidebar. But this method is suitable for creating a standard menu only. To create a nested menu, you'll have to edit the block.
Create a nested menu
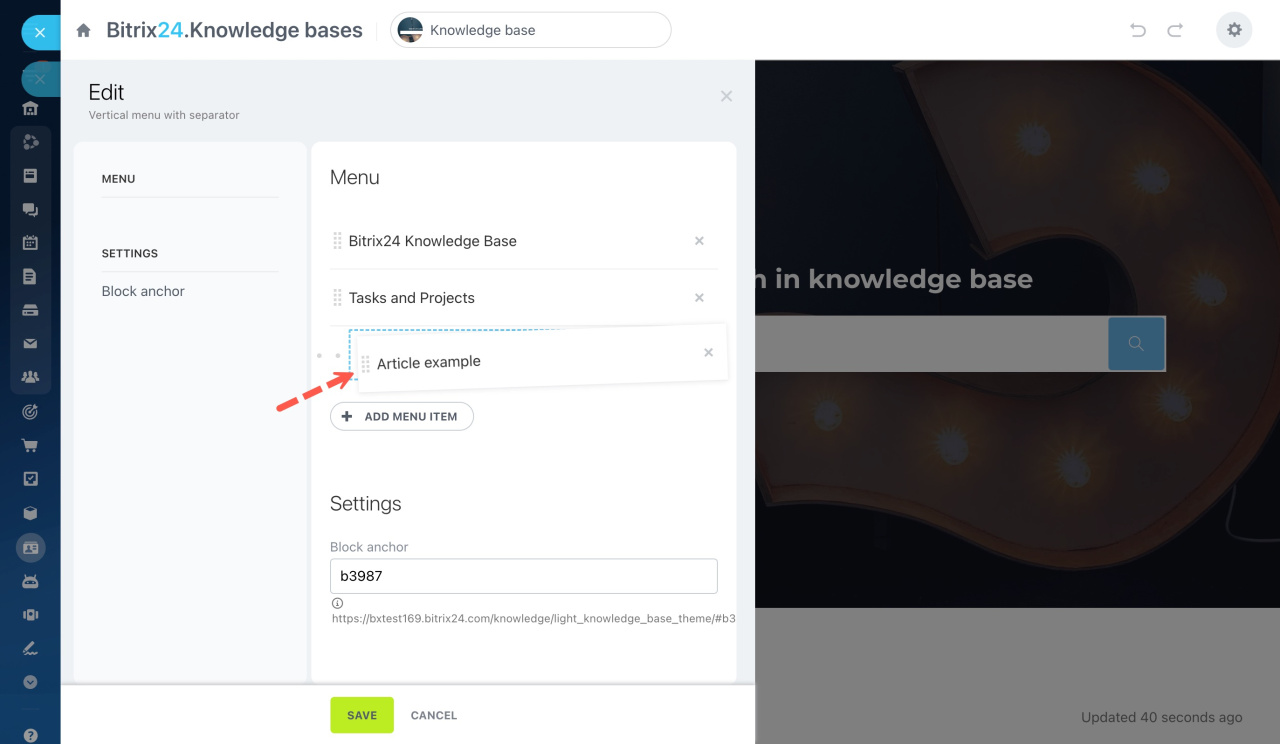
To create a nested menu, you need to create a standard menu item and drag it to the right side. Change the order of menu items in the same way.
Use a custom image in the menu header
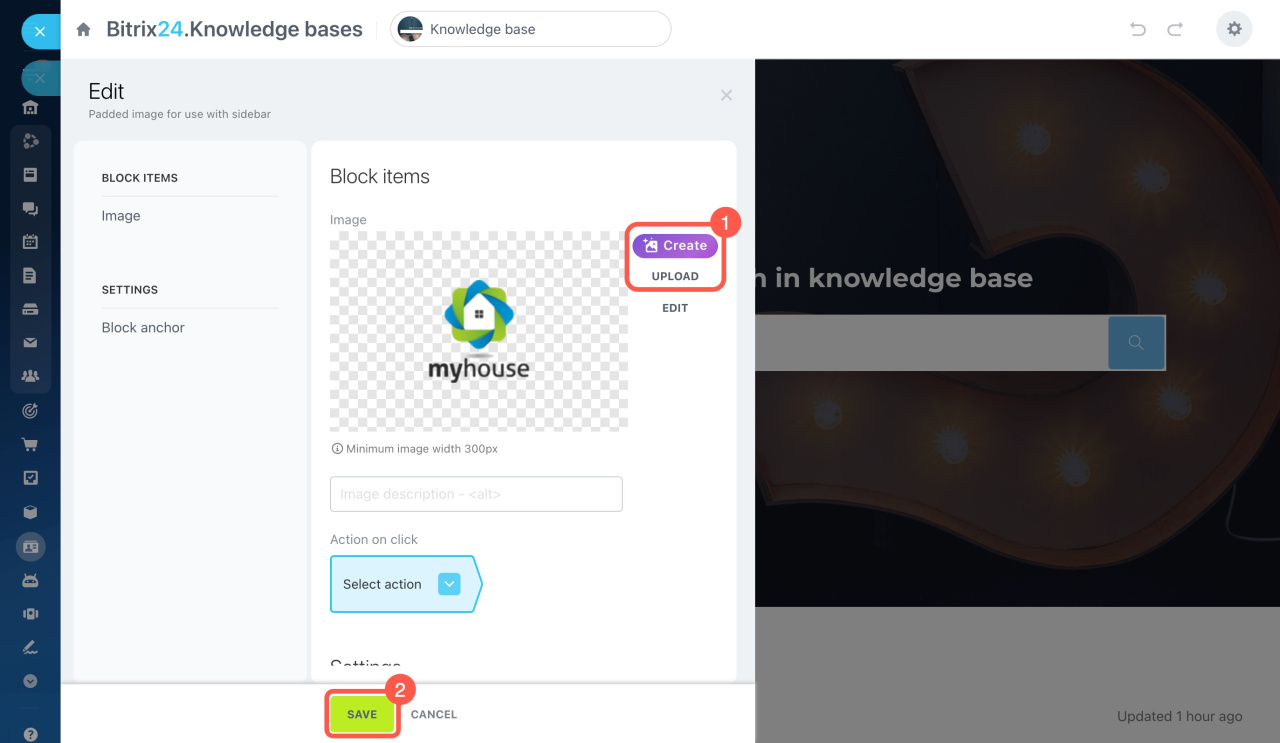
Replace the image shown in the header of the menu. Click the gear button and select Edit.
Upload a new image or create it using ImageAssistant AI. Then save the changes.
ImageAssistant AI
Done! Now, you can fill the pages of your knowledge base with various content.
Filling a knowledge base


