Read FAQ
NEW
Bitrix24 Support
Registration and Authentication
How to start
My Profile
Feed
Messenger
Start page: the Vibe
Calendar
Bitrix24 Drive
Bitrix24 Mail
Workgroups
CoPilot - AI in Bitrix24
Tasks and Projects
CRM
Contact Center
Sales Center
CRM Analytics (beta)
BI Builder
Sales Intelligence
Inventory Management
Marketing
Sites
Online Store (beta)
CRM + Online Store
CRM Store (beta)
e-Signature
e-Signature for HR
Company
Knowledge base (beta)
Automation
Workflows
Telephony
Market
Subscription
Settings
Enterprise
Desktop App
General questions
Bitrix24 On-Premise
Log In
Your Bitrix24
Authorize to enter
your company's Bitrix24.
Enter

Bitrix24Care

Add an image, stamp, or signature to your document template

In brief

Add your company stamp and signature using a text editor. To do this,

  1. Add a placeholder imageYou can use any image. It does not matter what is shown on it. Only its size and position matter. in your document where you want the stamp, signature, or logo to appear.

  2. Specify a symbolic code of the needed field in the image settings.
    Symbolic codes: what they are used for

  3. Adjust the size and position of the image as needed.

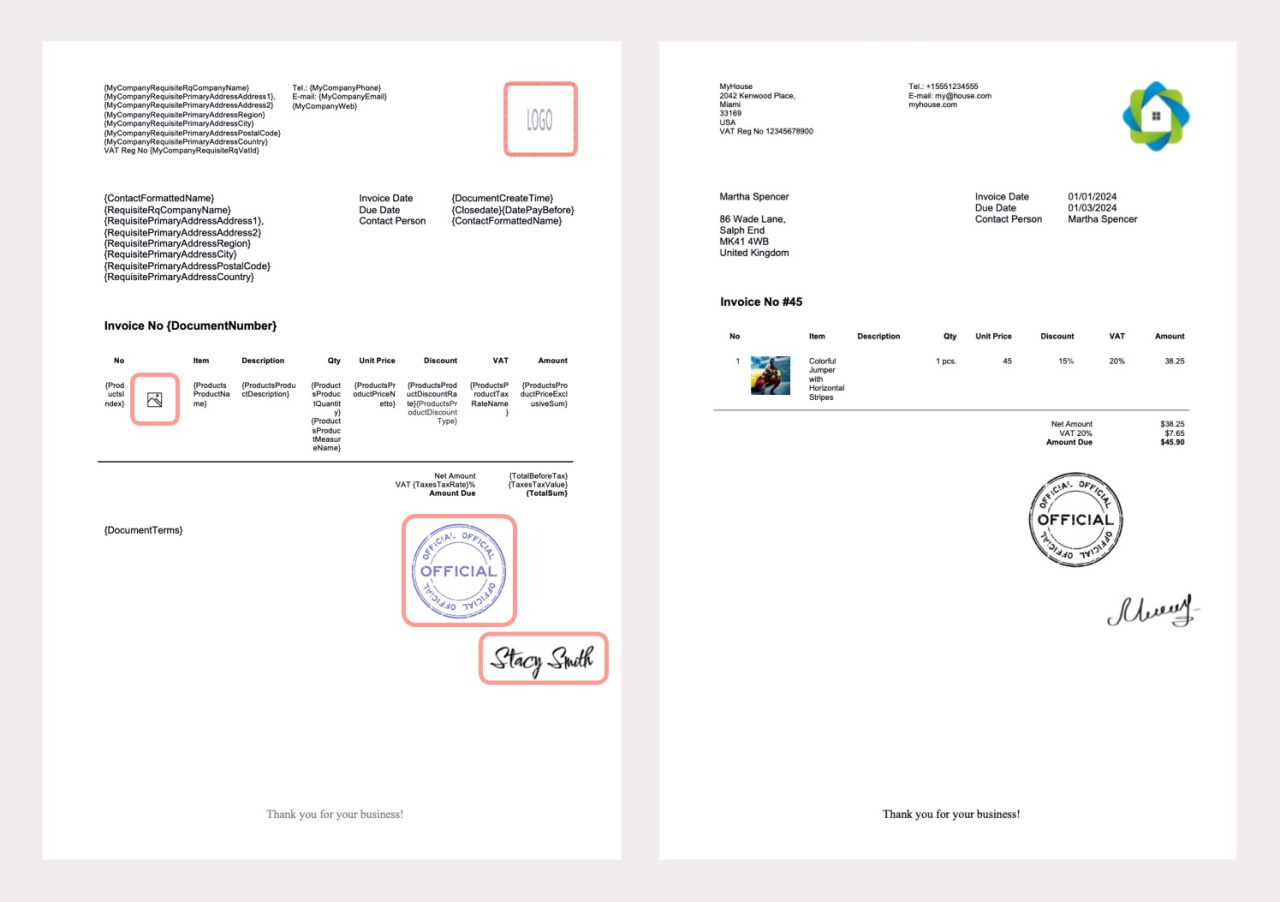
When you create a document using this template, Bitrix24 will automatically replace the placeholder image with the actual stamp, signature, or logo from your company details. This means you don't have to change the template every time you update your logo or company details.

Template and result Document template vs. generated document

In detail

To illustrate, let's add a company stamp to the document template. See the instructions for different text editors below.

Make sure to upload your company stamp to the company details first.
Learn how to add your company details.

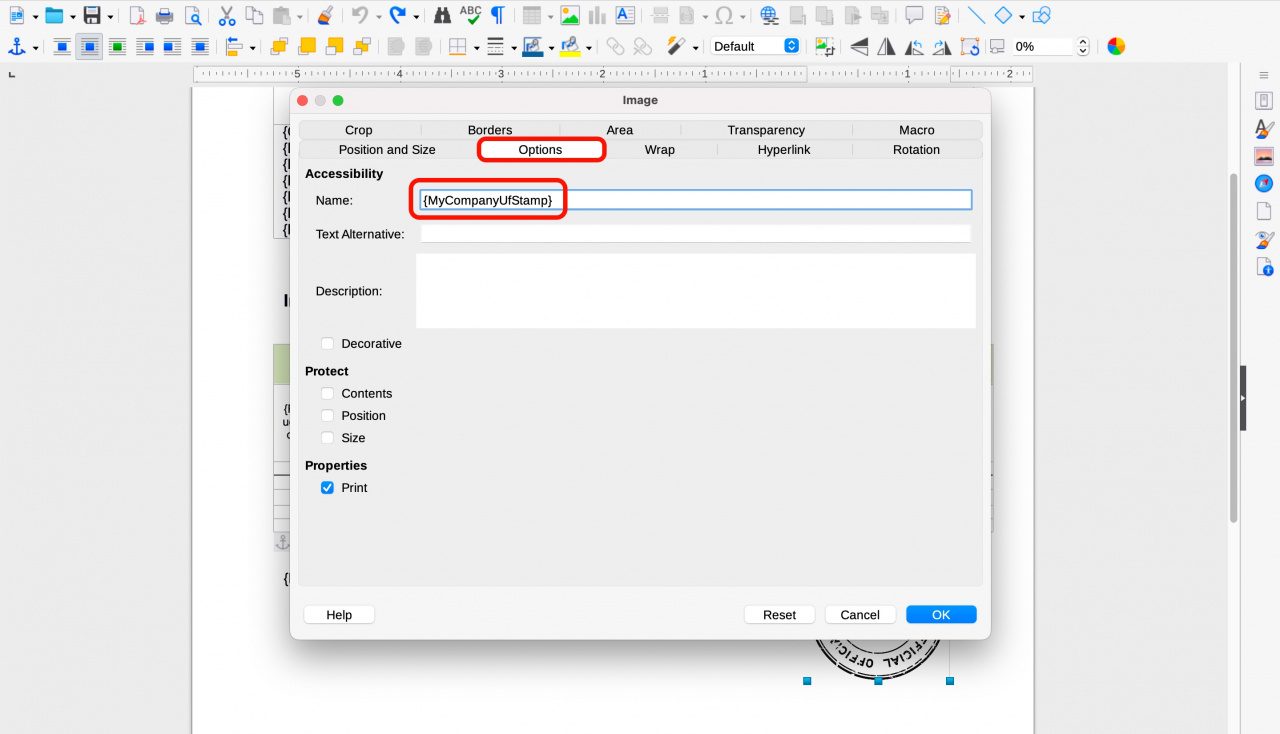
LibreOffice. Insert an image that will be replaced by the stamp and set its size and position. Then right-click the image and select Properties from the drop-down list.

Open the Options tab. Paste the needed symbolic code into the Name field.


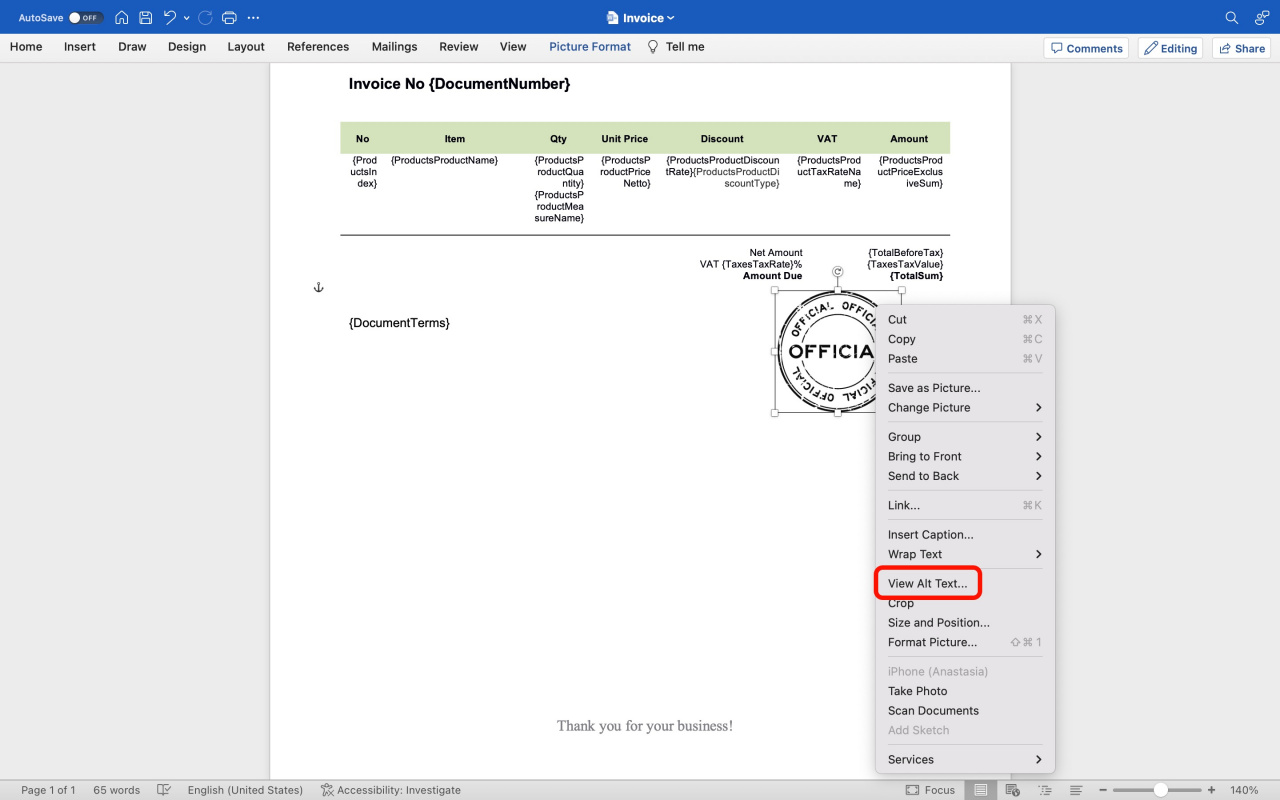
Microsoft Word. Insert an image that will be replaced by the stamp and set its size and position. Then right-click the image and select View Alt text from the drop-down list.

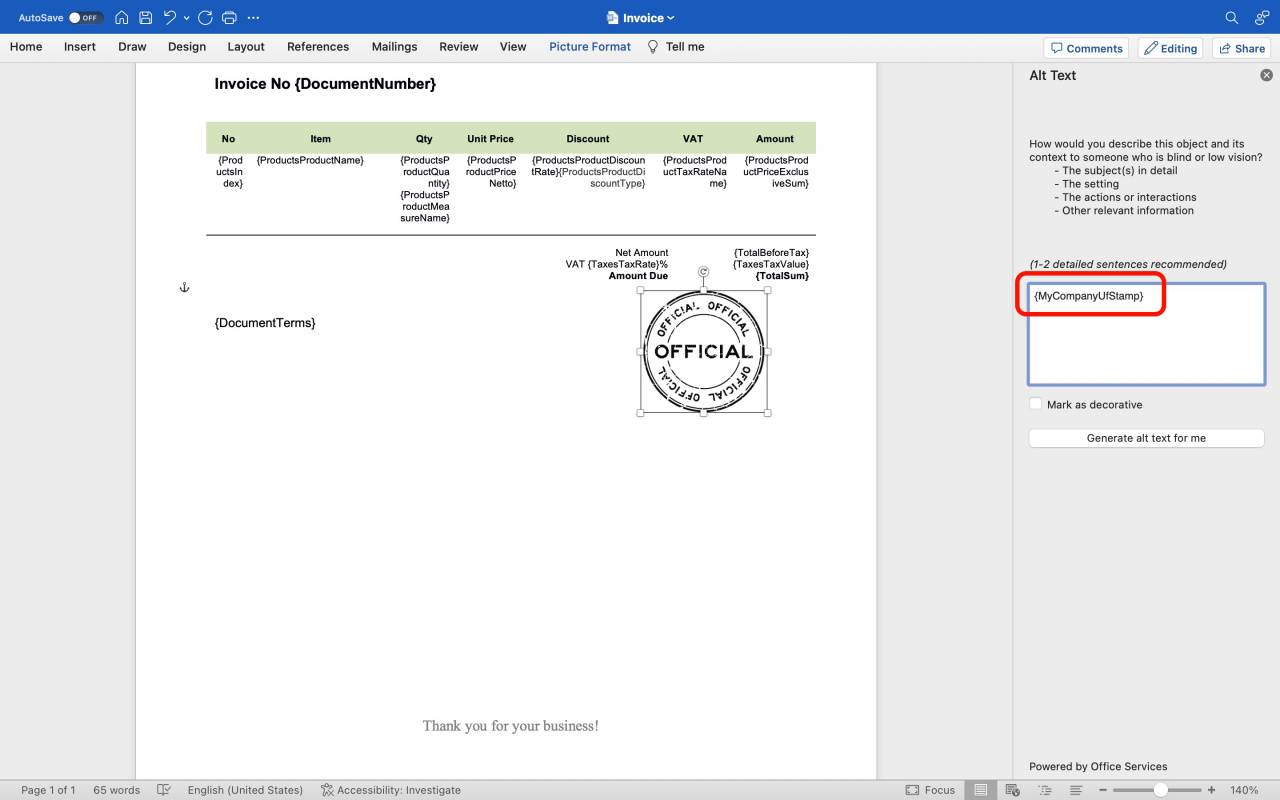
Paste the needed symbolic code into the field.


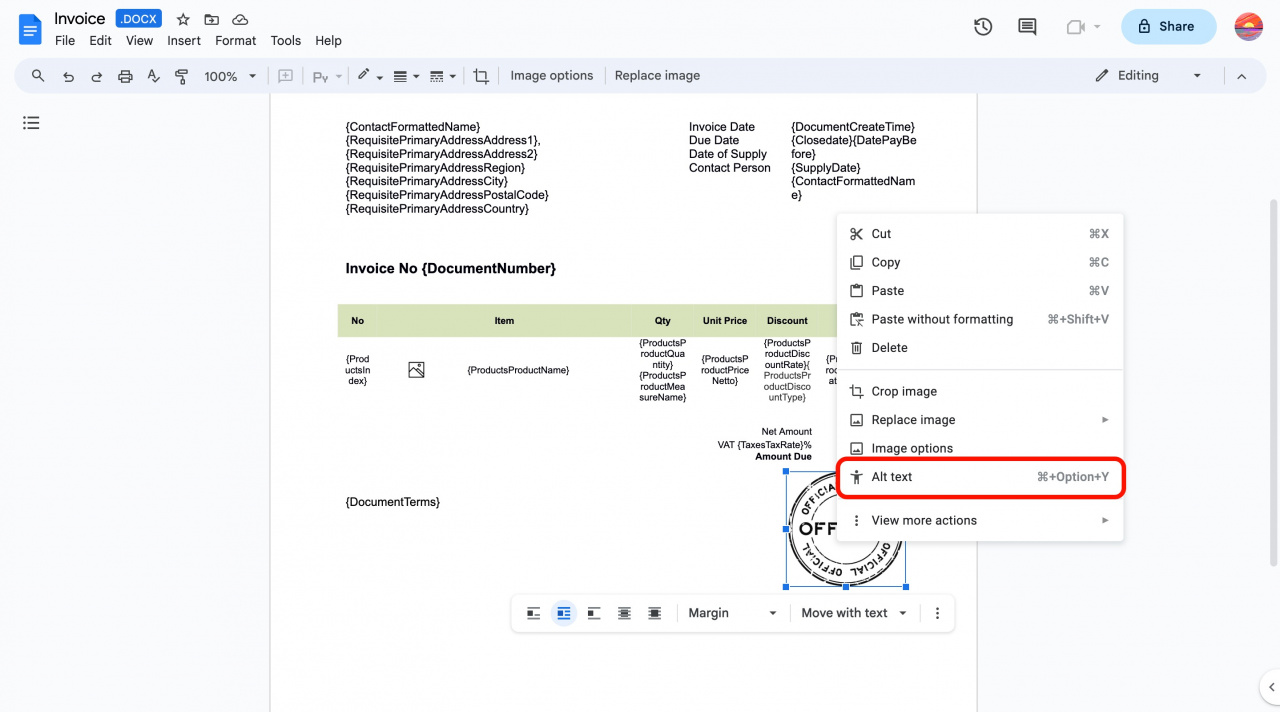
Google Docs. Insert an image that will be replaced by the stamp and set its size and position. Then right-click the image and select Alt text from the drop-down list.

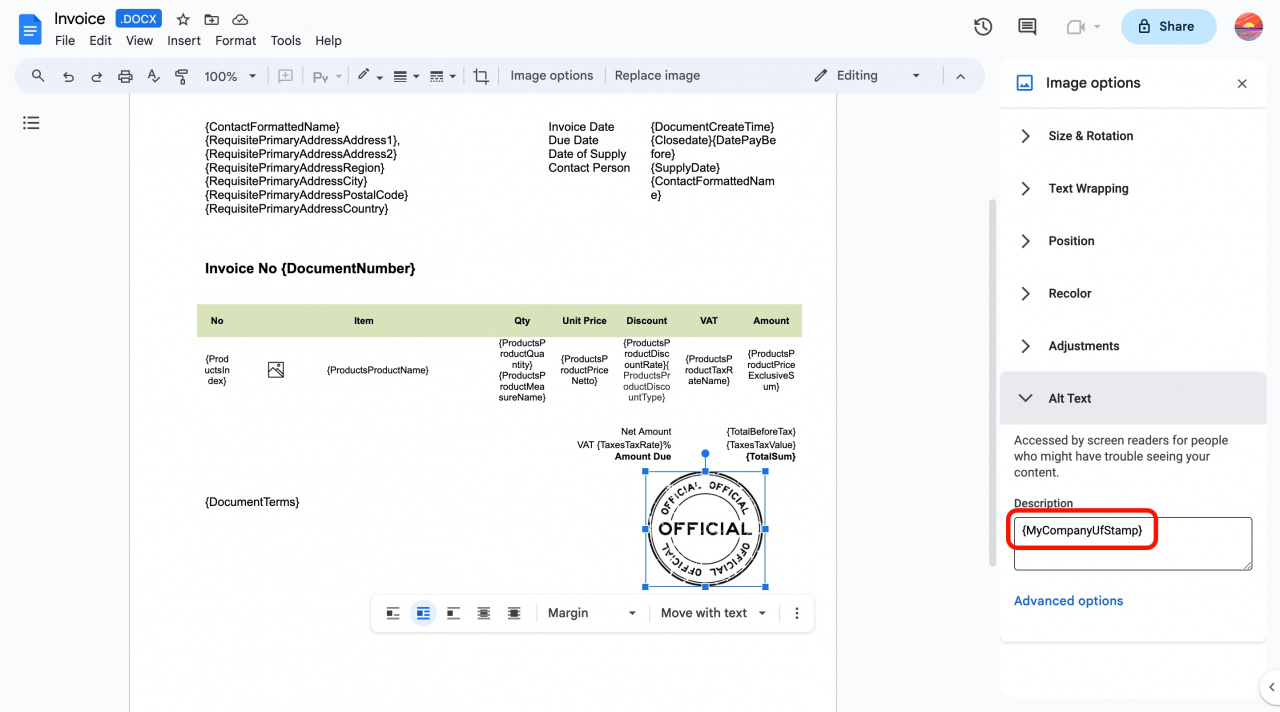
Paste the needed symbolic code into the Description field.


Was this information helpful?
Integration specialist assistance
That's not what I'm looking for
Complicated and incomprehensible text
The information is outdated
It's too short. I need more information
I don't like the way this tool works
Go to Bitrix24
Don't have an account? Create for free
Related articles
Item list in document templates Customize document templates in CRM Modify symbolic codes in document templates Rules for product fields in CRM documents Document templates for different countries Documents in CRM: Access permissions Edit document templates in CRM Custom fields in document templates Document auto numbering Documents in CRM
Recently viewed articles
Automation rules: Customer communication Absence app Free 15-day trial Work with Bitrix24 Drive documents Using Jinja Templates in BI Builder Online Documents: Getting Started Signature types Work with documents using Google Docs Customize ready BI Builder dashboards Desktop app settings