Connect your Facebook Lead Ads forms to Bitrix24 in a few steps. When your client fills out a form on Facebook, the data will automatically go in your CRM.
Step 1. Create a form in your Facebook account
To create a new form on Facebook, do the following:
-
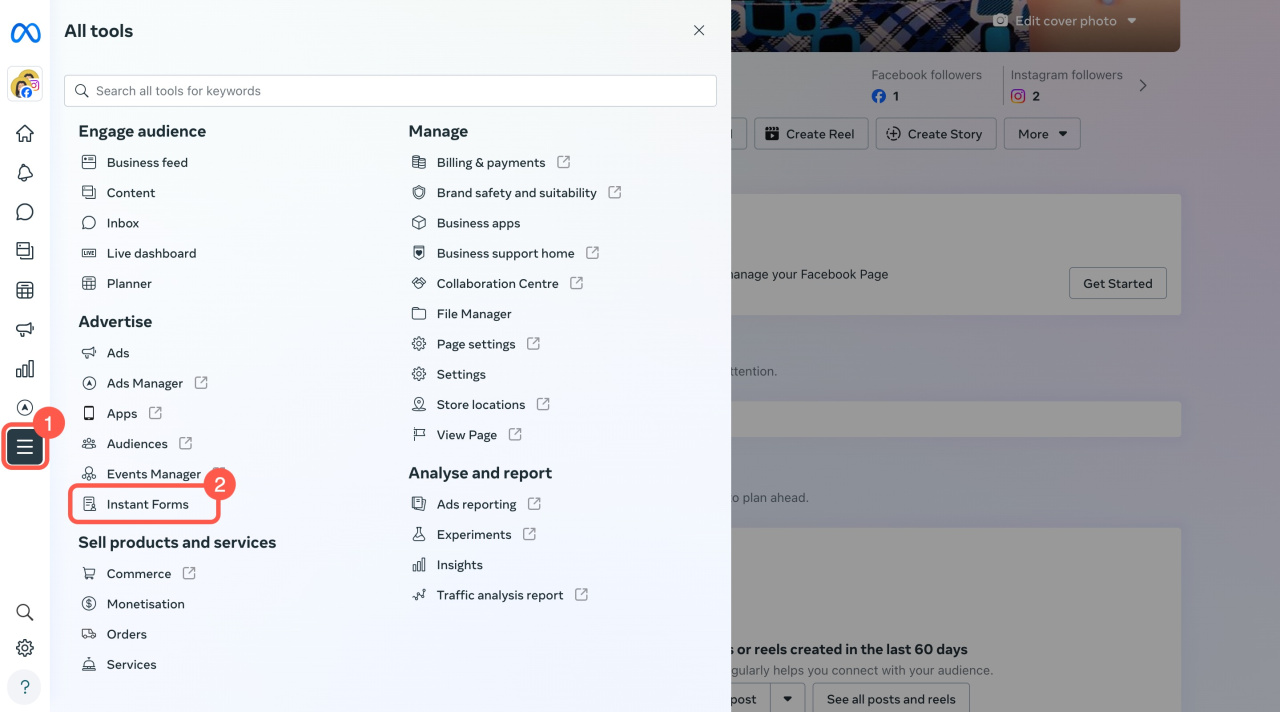
Open the Instant Forms section in the Facebook Business Suite.
-
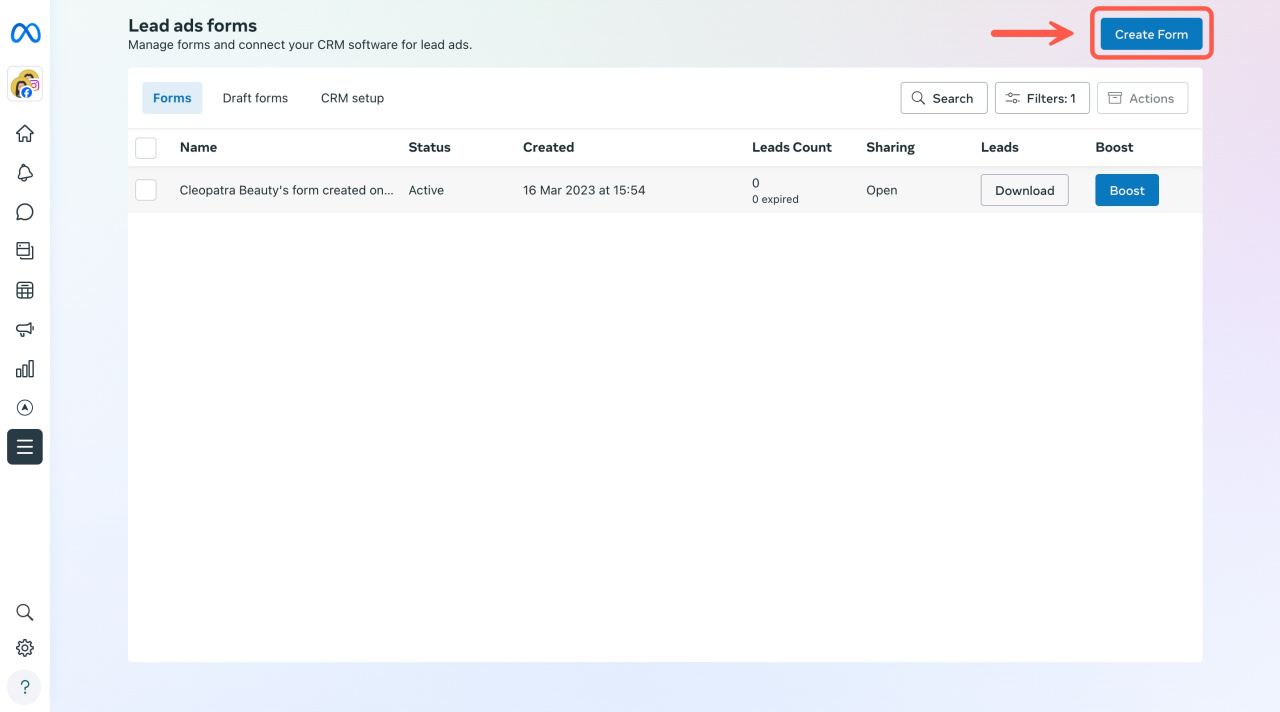
Click the Create form button in the top right corner.
-
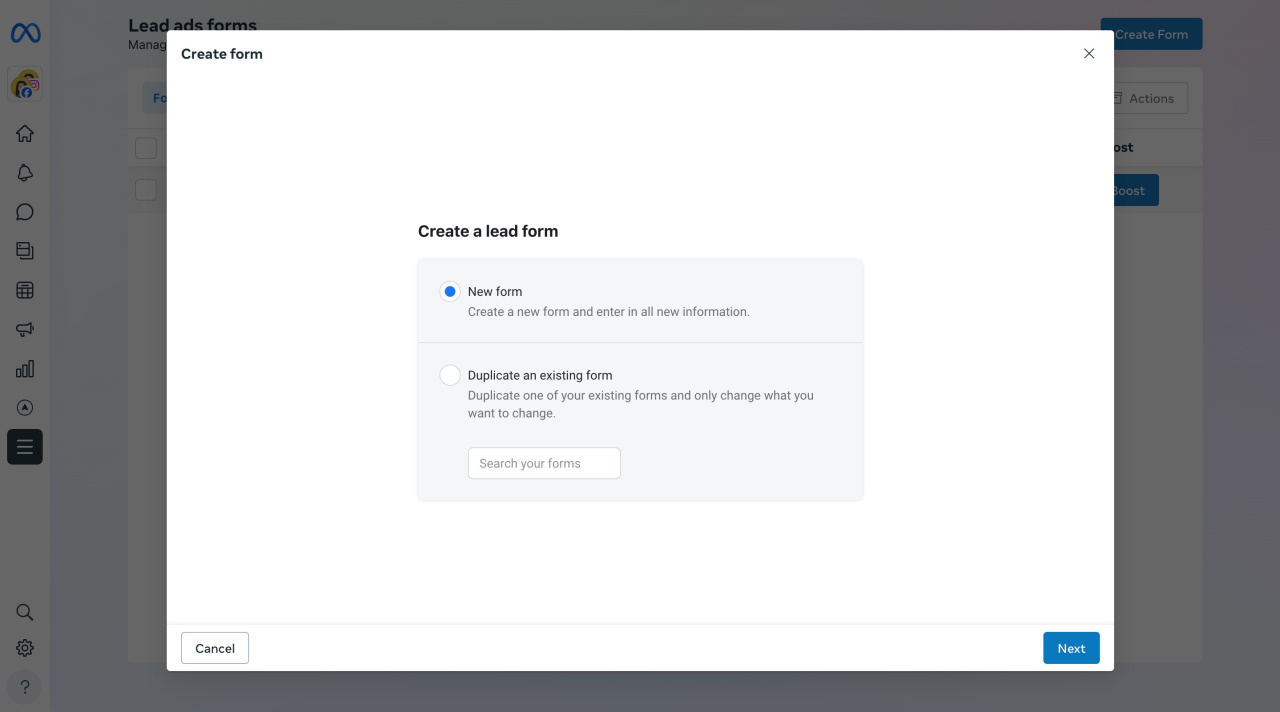
In the pop-up window, select New form and then click Next.
-
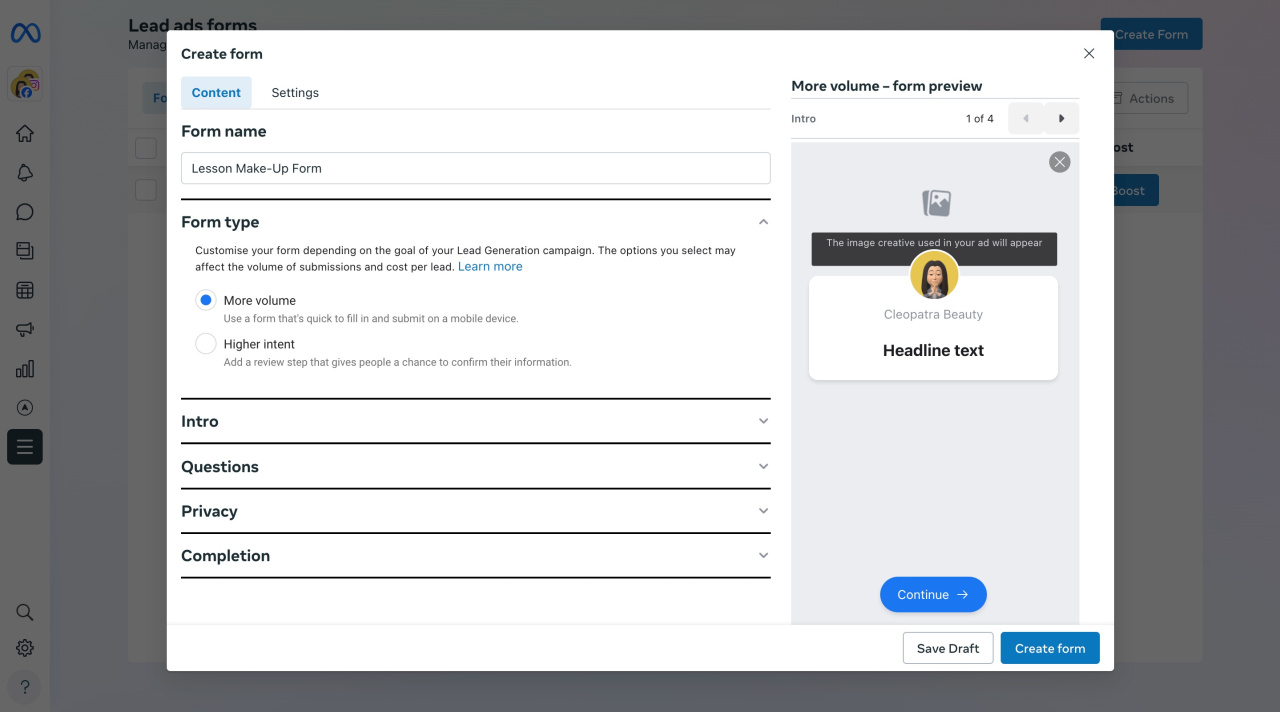
Set up your form by filling in all the necessary details.
-
Once done, click Create form in the bottom right corner.
See these topics to learn more:
Step 2. Connect a form in Bitrix24
To integrate the form with Bitrix24, you have two starting points:
-
Go to CRM > Add-ons > CRM forms and click Add.
-
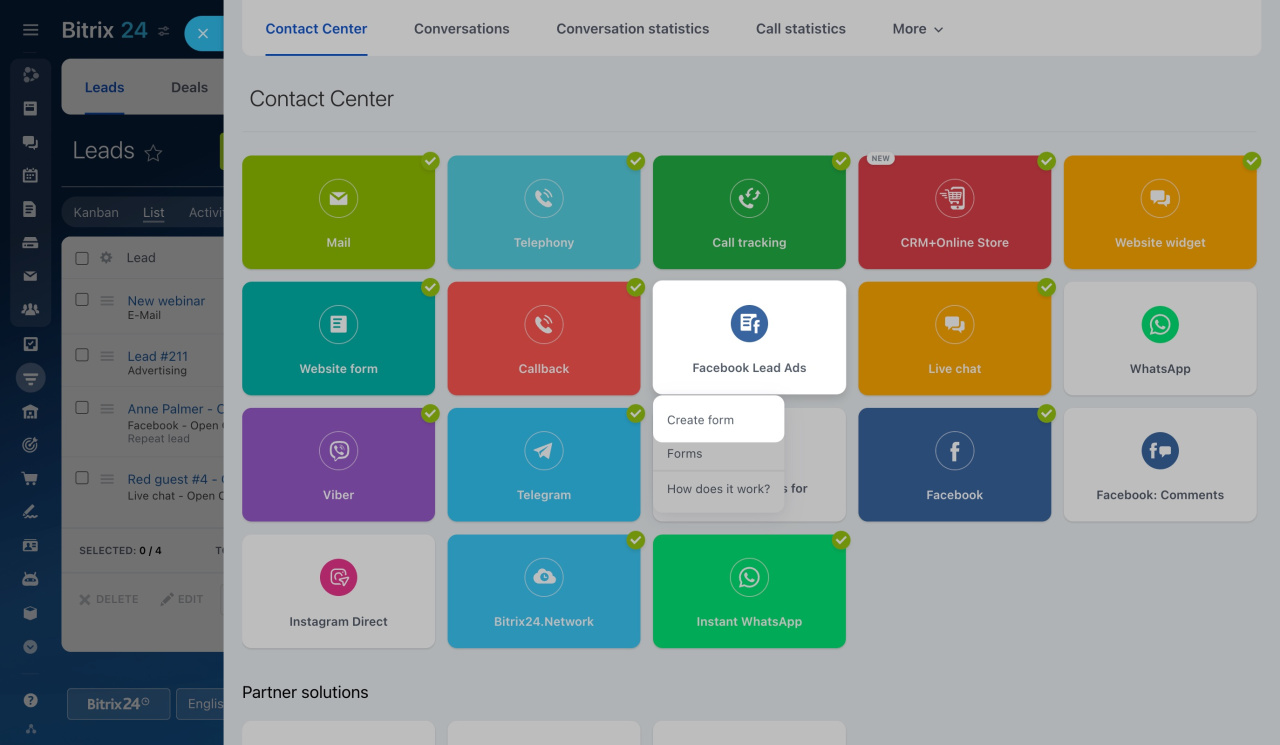
Or, go to CRM > Customers > Contact center. Click Facebook Lead Ads > Create form.
Follow these instructions next:
-
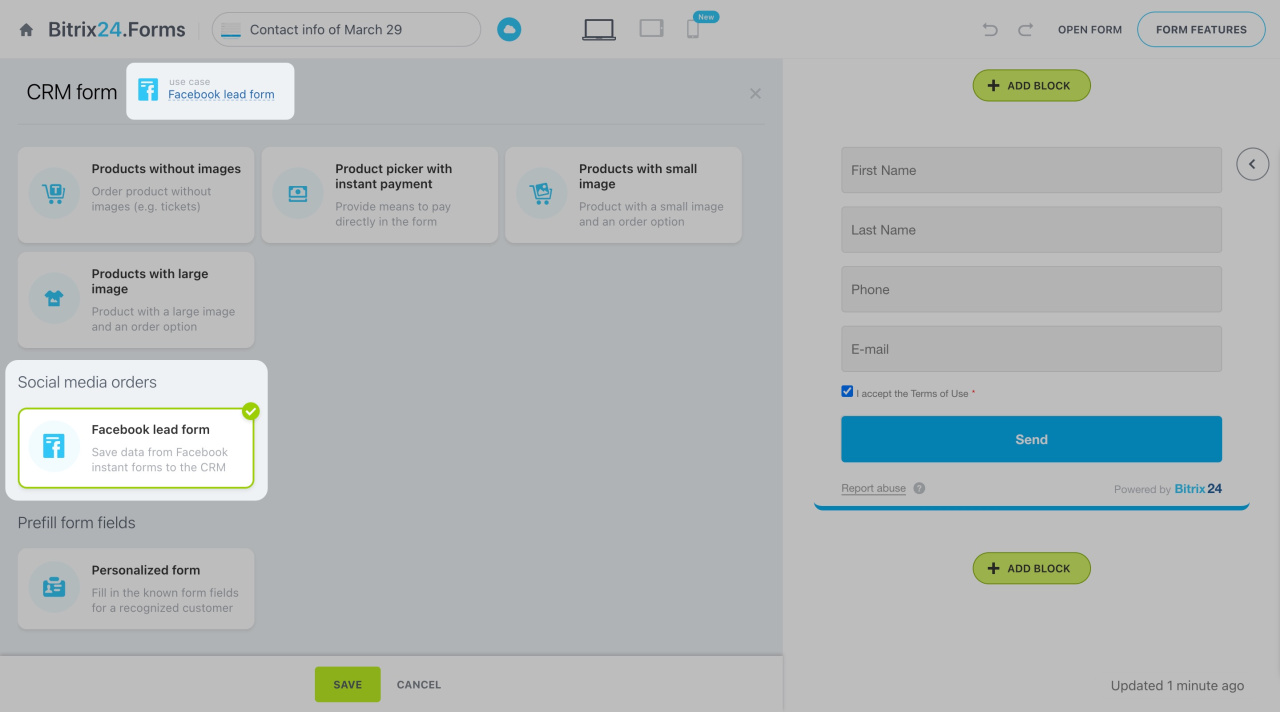
Select the Facebook lead form use case.
-
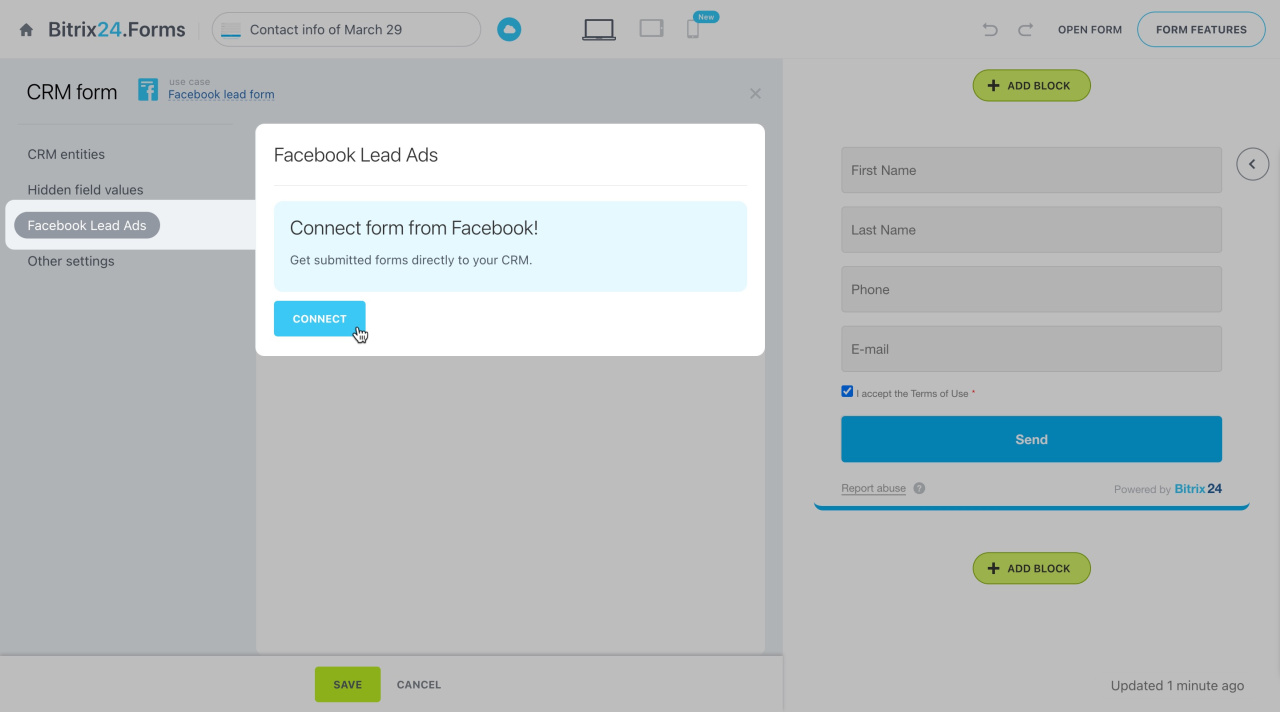
In the Facebook Lead Ads tab, click Connect to link your Facebook account.
-
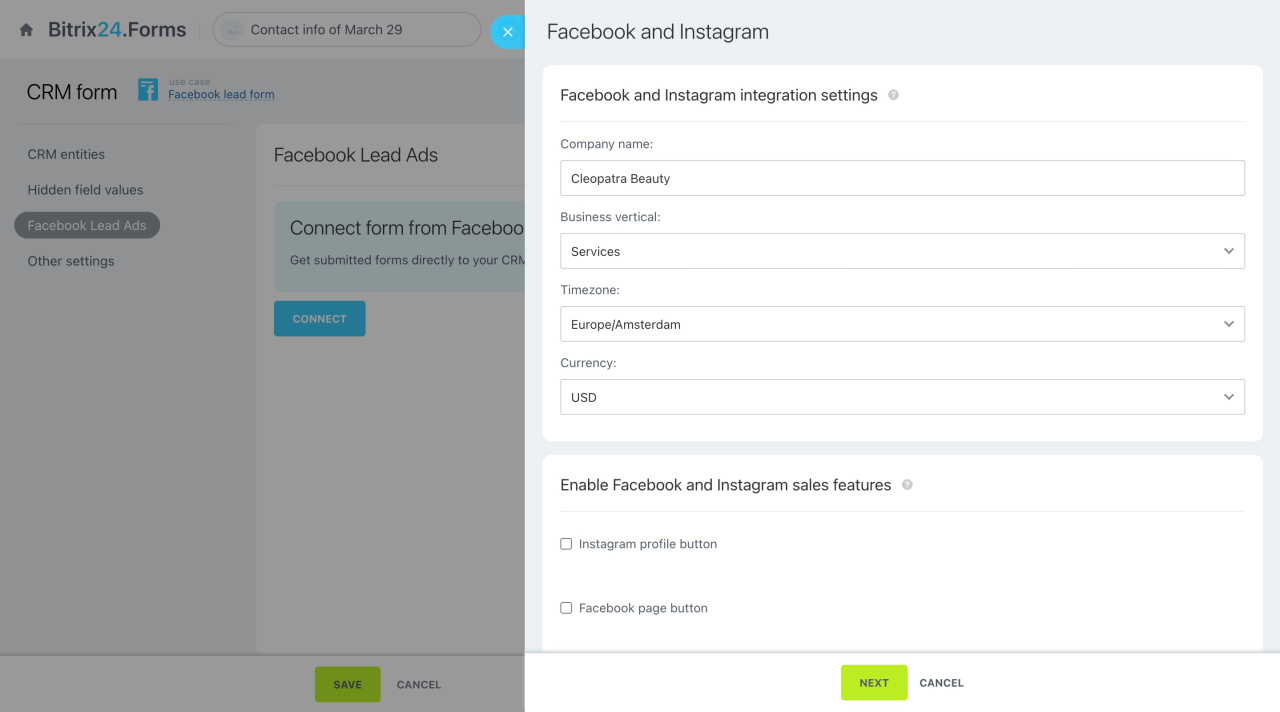
If needed, adjust the additional Facebook sales features.
Facebook and Instagram sales features -
Proceed by clicking Next at the bottom. In the pop-up window, log in to your Facebook account and grant Bitrix24 the requested permissions.
-
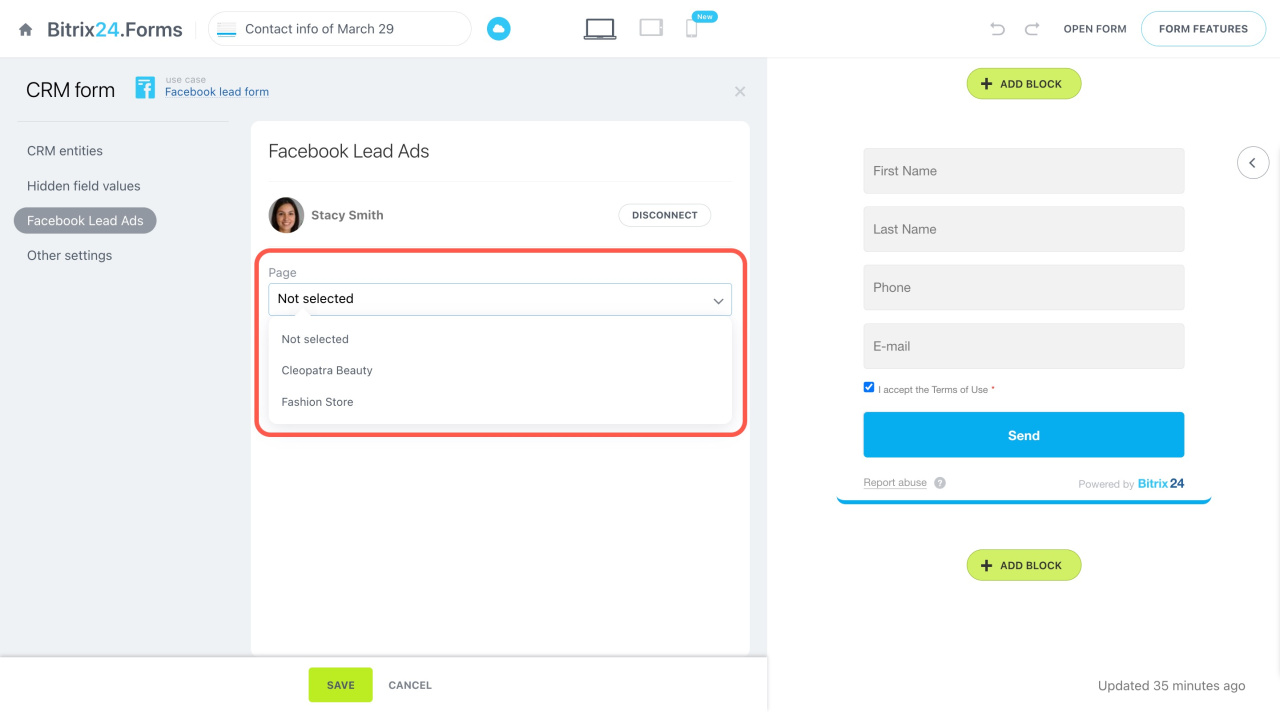
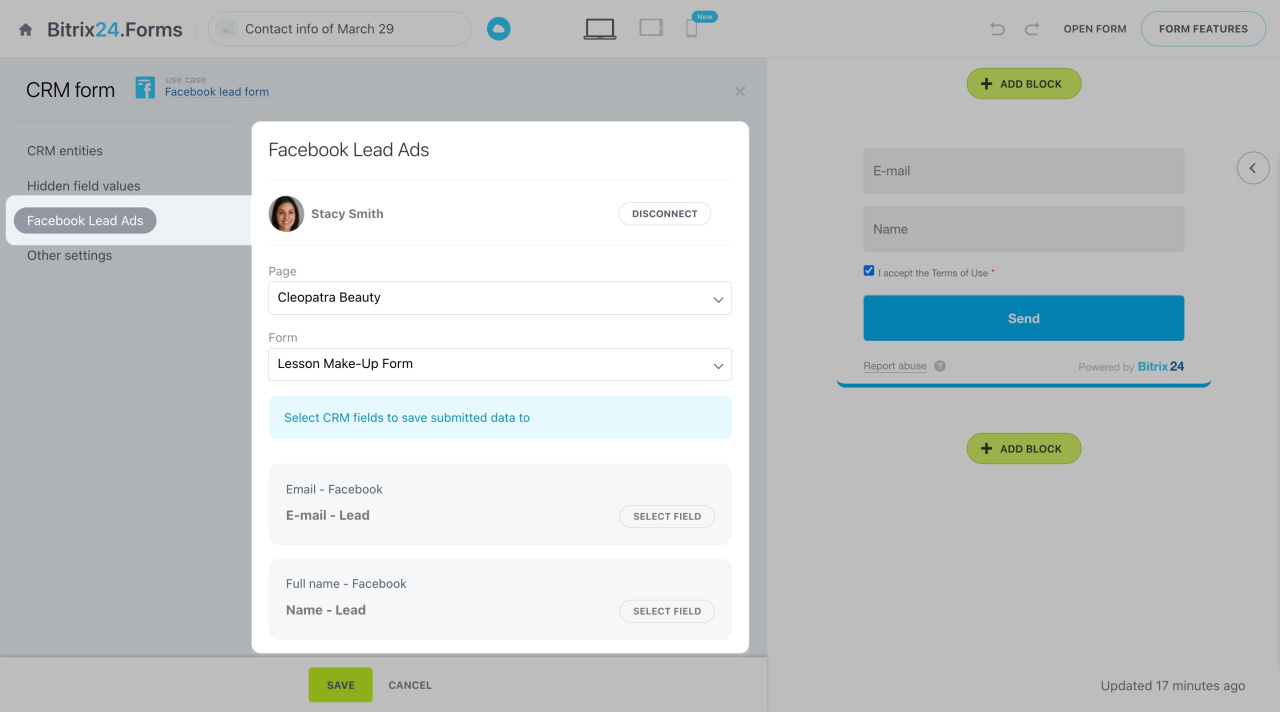
After connecting your Facebook account, select the needed page and form.
-
Fields from the form are matched automatically. If some fields are not set, you can configure them manually.
-
When you finish configuring the form, click Save at the bottom.
How to connect forms from other Facebook pages
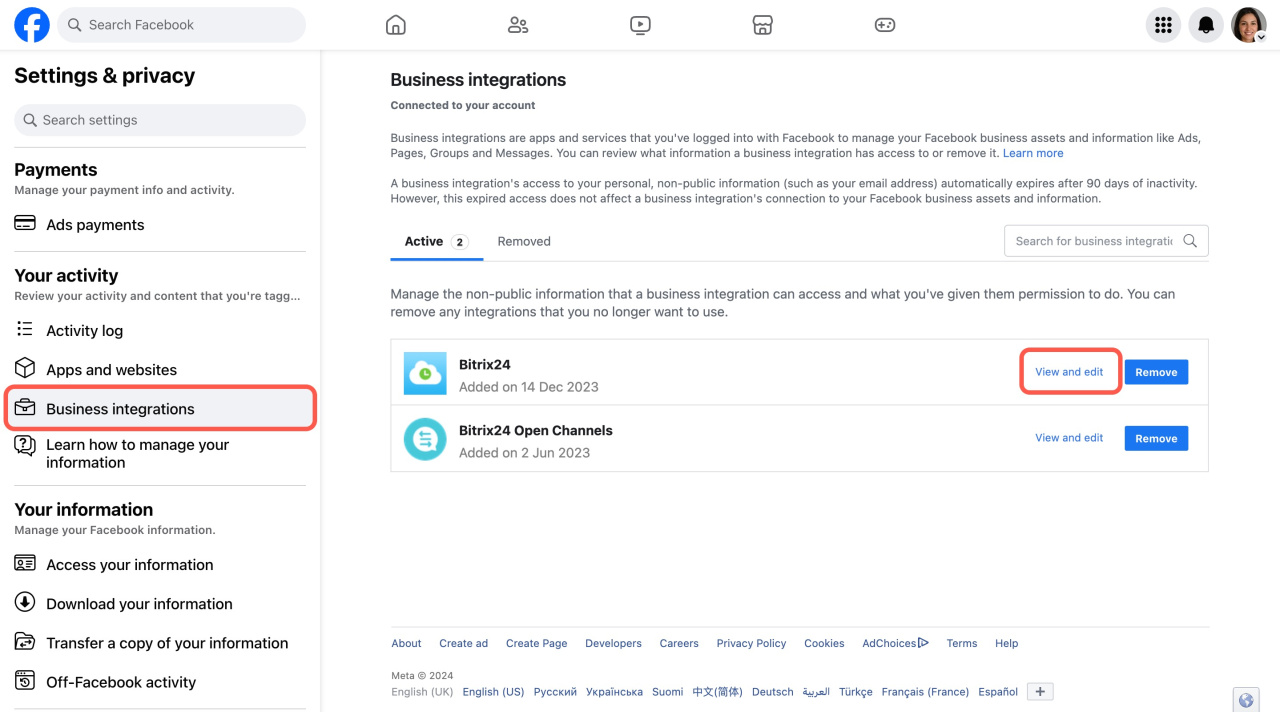
Open the Business Integrations section in your Facebook account settings. Find the Bitrix24 integration and click View and edit.
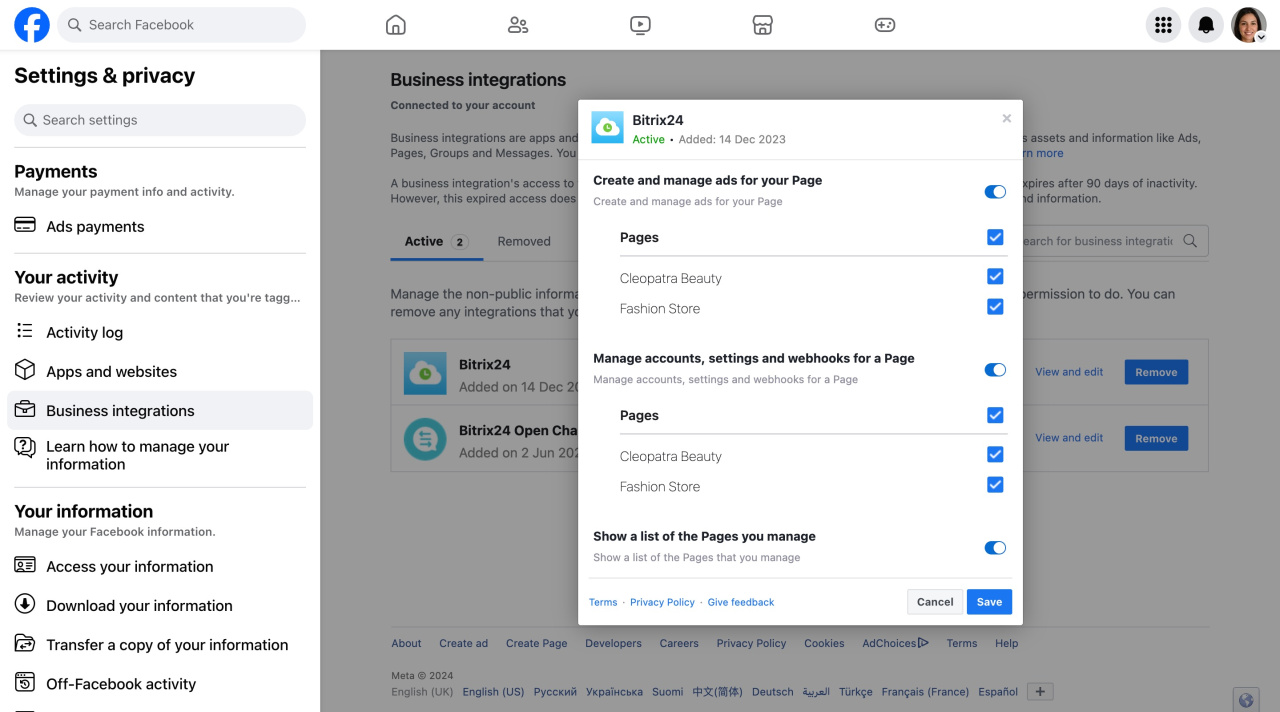
In the window that opens, adjust permissions for the pages you want and save.
After that, you can select forms from another Facebook page while connecting.
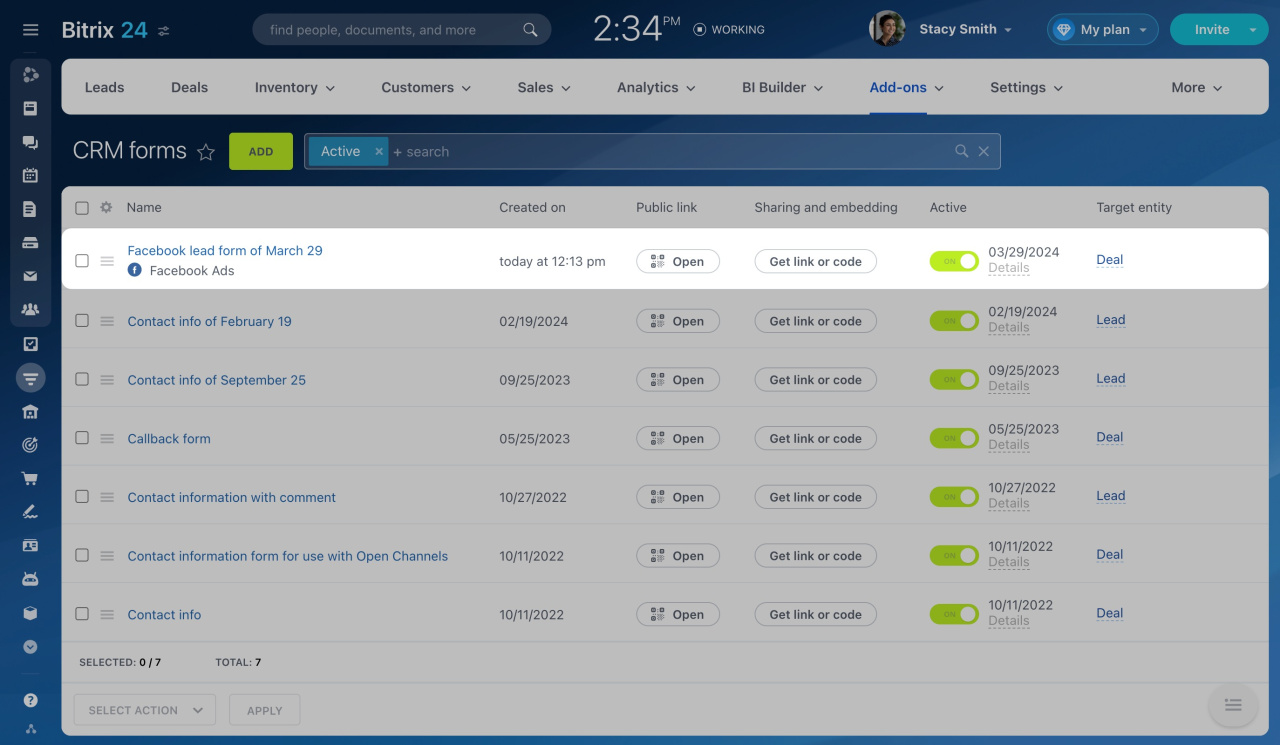
You can find the connected form in the CRM forms section.
CRM form list
Step 3. Check form integration with Facebook
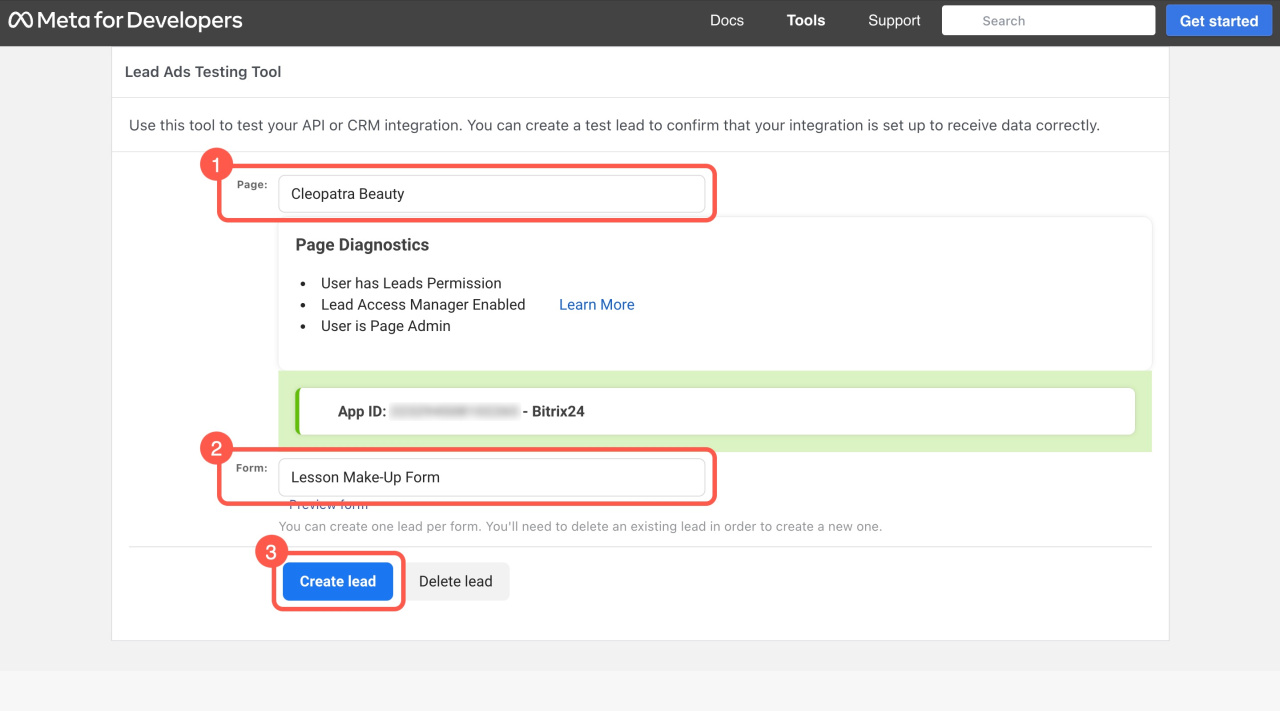
To make sure everything's working, use the Lead Ads Testing tool:
-
Select the page and form, then click the Create lead button.
-
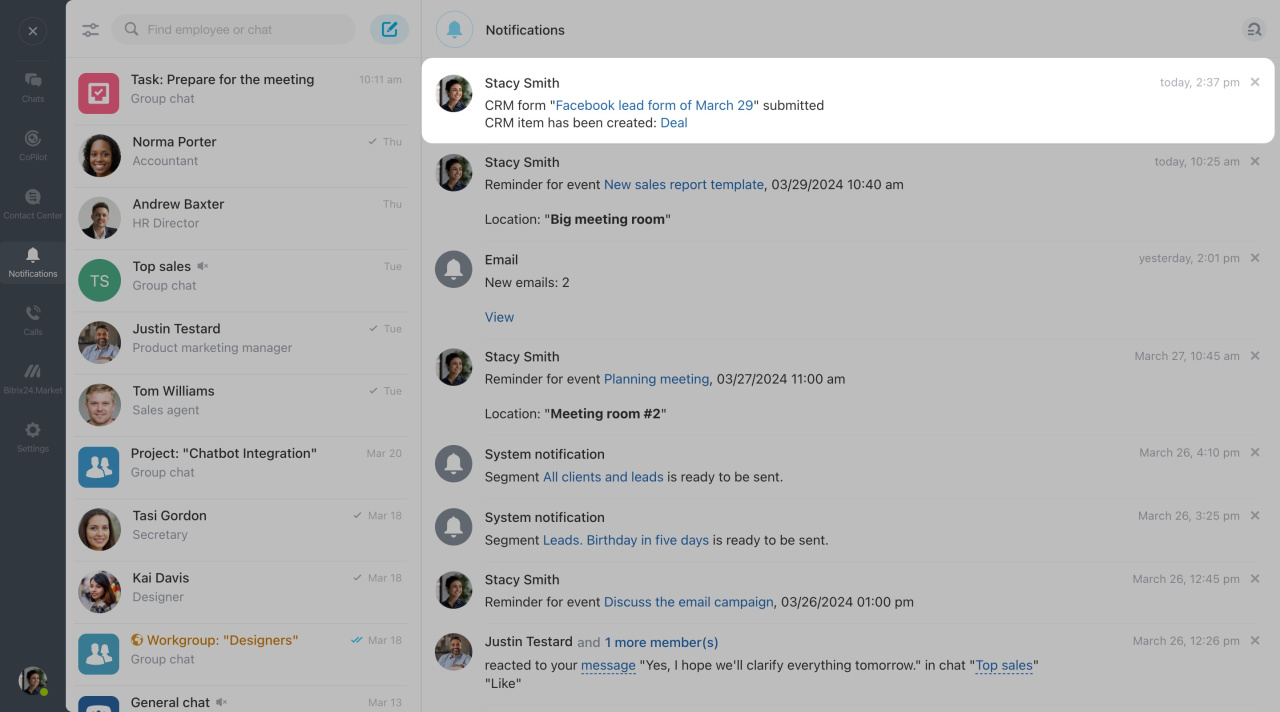
If all the settings are correct, you will get a notification in your Bitrix24 account.
In brief
To integrate Facebook lead ads with Bitrix24, just:
-
Create a new lead ad form in your Facebook account.
-
In Bitrix24, add a CRM form for the Facebook Lead Ads use case. Connect your Facebook account, pick the page and form, adjust field mapping, and save.
-
Check form integration with the Lead Ads Testing tool.

