Hidden fields in CRM forms are not visible to customers. They are filled in automatically and send technical details to CRM, such as traffic source, form ID, and more. You can set default values for hidden fields.
For example, if you are using a CRM form on your online store to collect contact details, hidden fields can track how a customer landed on the page. It could be from a specific product page or promotional campaign. This allows your sales team to understand what caught the customer's interest and respond effectively.
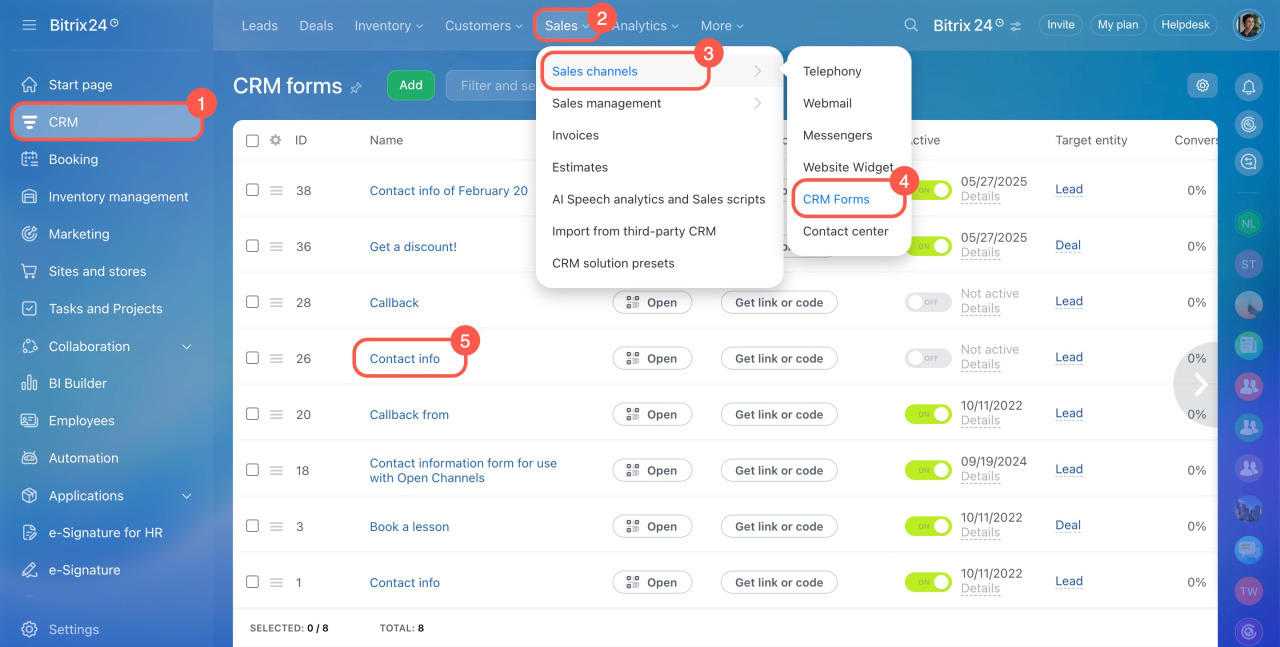
To open the CRM form editor:
- Go to CRM.
- Click Sales.
- Expand Sales channels.
- Select CRM Forms.
- Open the form you want to edit.
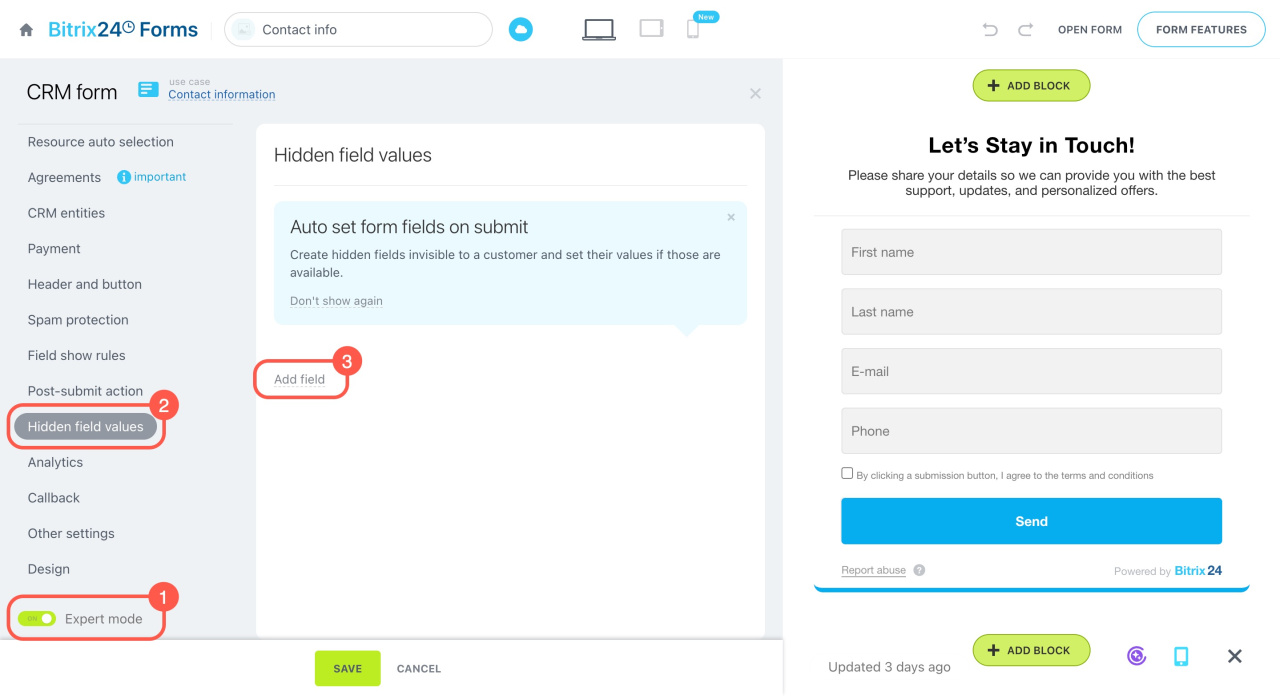
To set up the hidden values:
- Enable Expert mode.
- Open the Hidden field values tab.
- Click Add field.
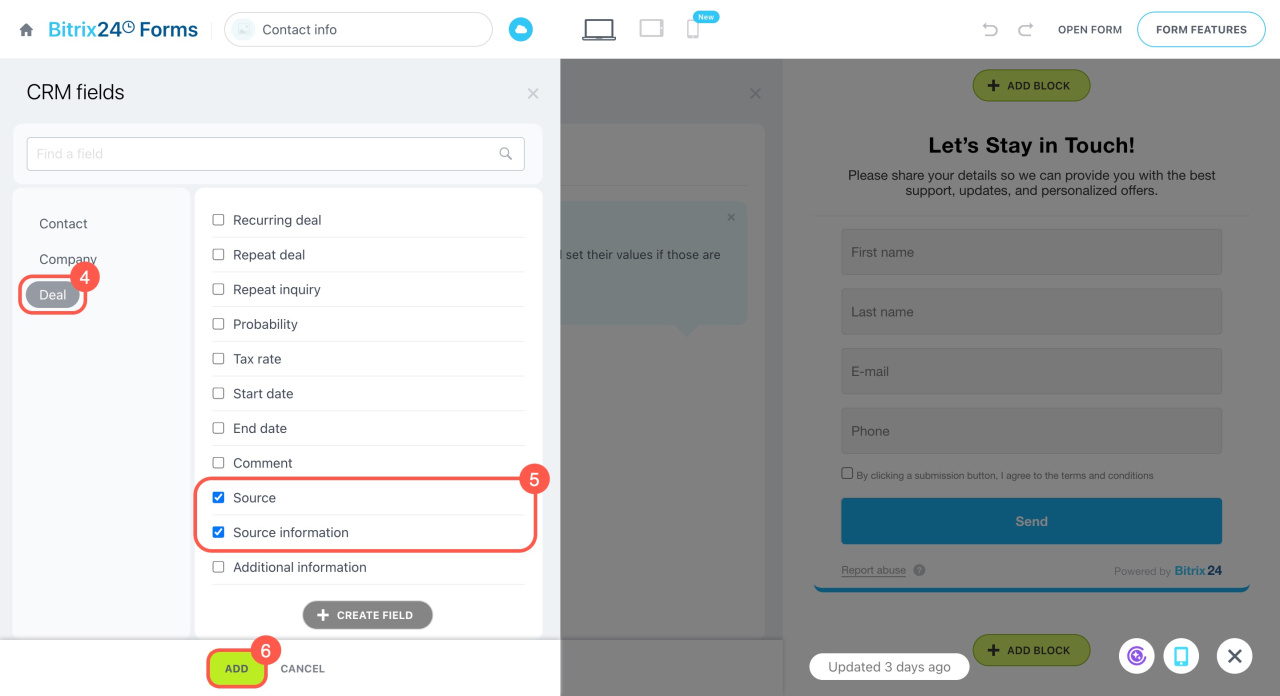
- Choose the CRM entity you want to add a field from, like deals.
- Select the fields you need and click Add.
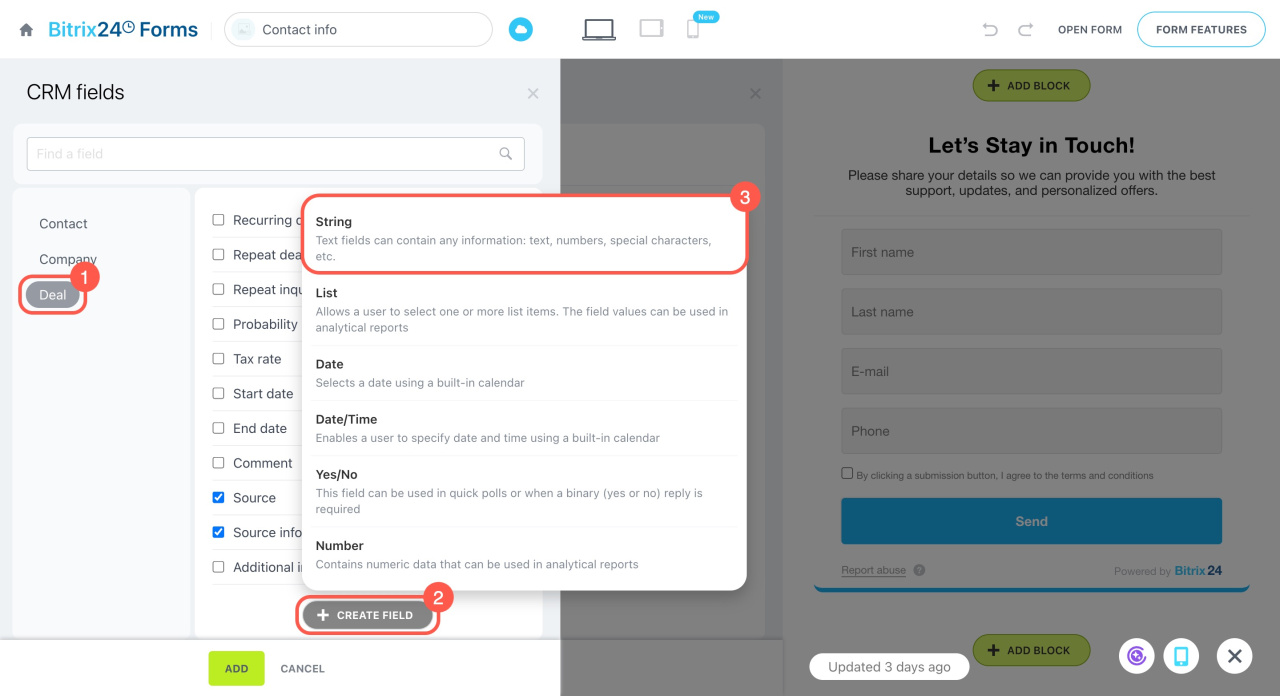
If you don’t find a suitable field in CRM, you can create one. Here’s how:
- Select the CRM entity where you want to add the field.
- Click Create field.
- Choose the field type.
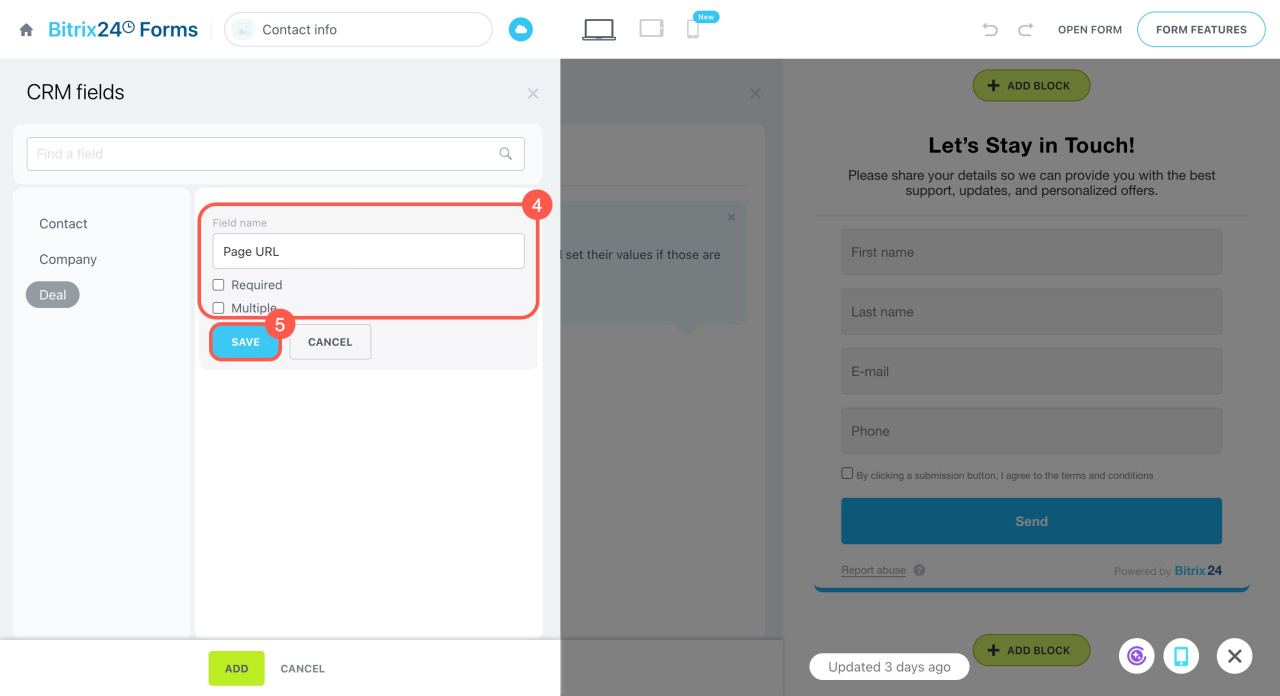
- Specify the field name and set its parameters, like required or multiple.
- Save the changes.
Once you create a custom field, it will automatically appear in the CRM item form.
Custom fields in CRM
To set values for hidden fields:
1. Click the pencil icon next to the field name.
2. For String fields, click the three-dot menu (...) next to the field value and select one or more values from the list. The data will automatically transfer to CRM.
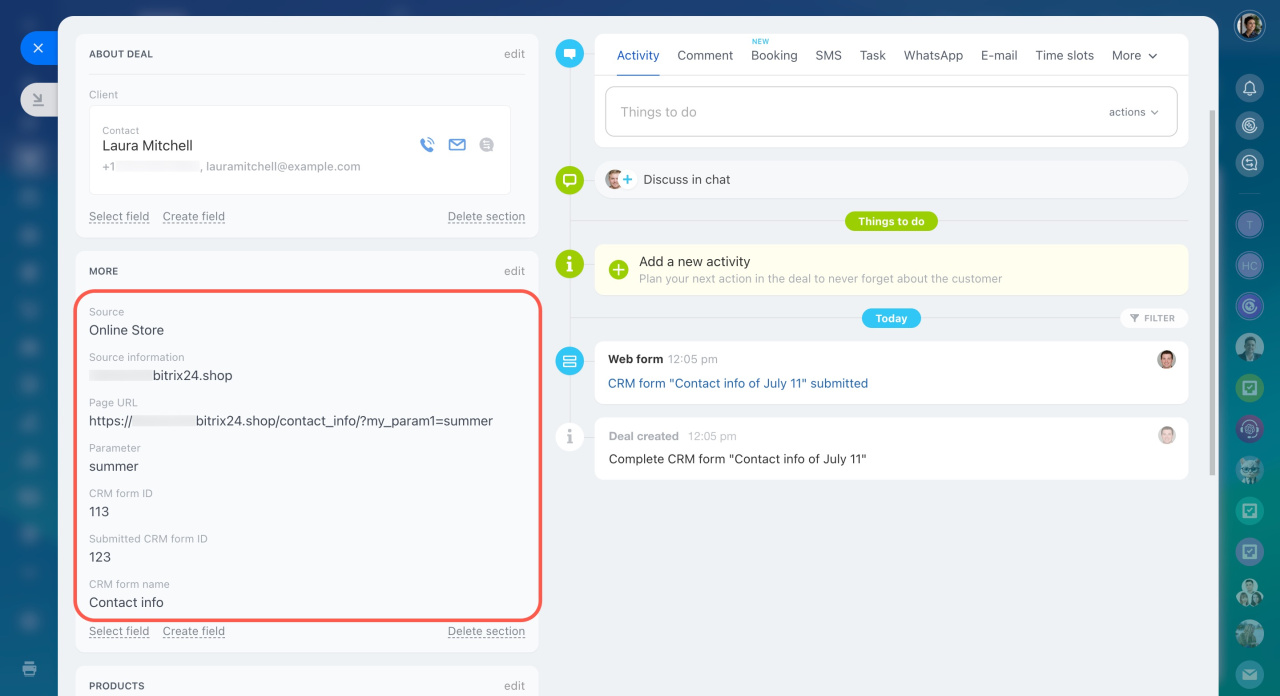
- Domain name — The website address where the CRM form is located.
- Page address — The specific page where the form is placed.
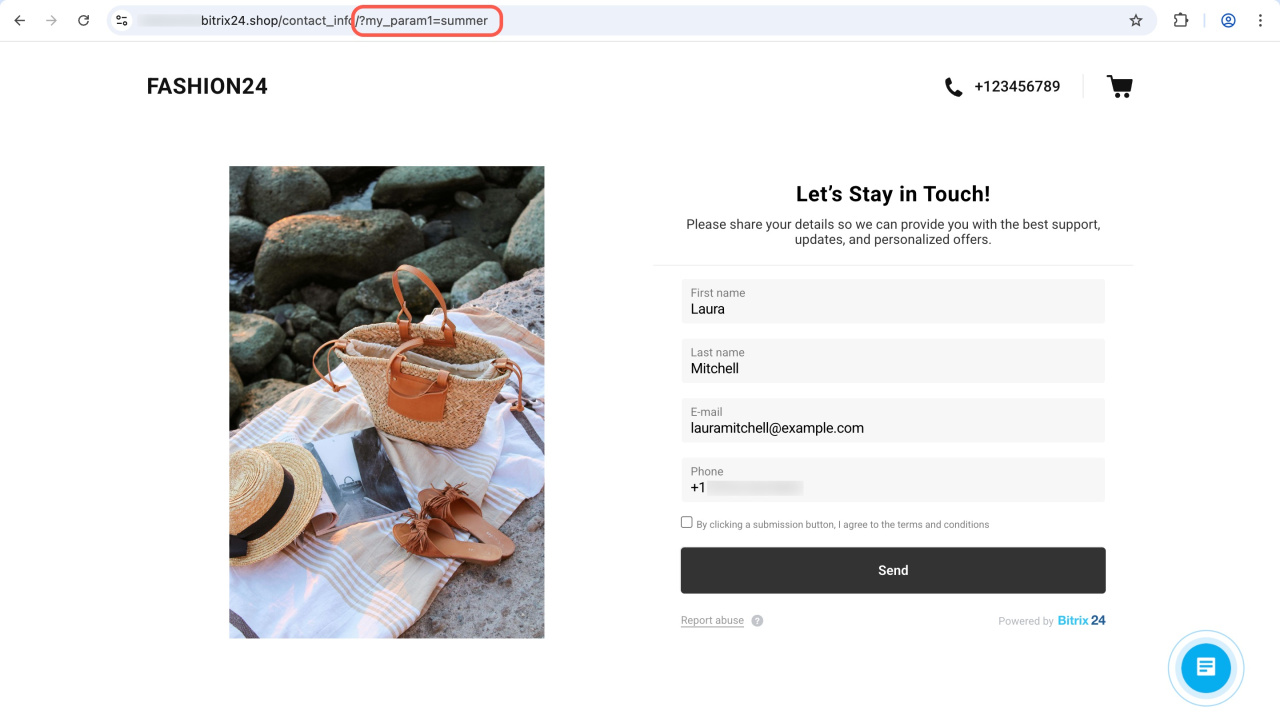
- Parameter — Use this to fill in the field even if it’s not in the form. Add a parameter to the form link, like
?my_param1=XXX, wheremy_param1is the field parameter andXXXis the data sent to CRM. For example:test.bitrix24.site/crm_form/?my_param1=summer - Result ID — The ID of the completed CRM form.
- Form ID — The unique number assigned to the CRM form when it’s created.
- Form name — The name of the CRM form.
3. For List fields, click the arrow icon and select a constant value from the list. For example, for the Source field, you might choose Advertising or Online Store.
4. Save the changes.
When a customer fills out the form, the data will automatically appear in CRM.
In brief
-
Hidden fields in CRM forms are not visible to customers. They are filled in automatically and send technical details to CRM, such as traffic source, form ID, and more.
-
You can set default values for hidden fields.
-
Enable Expert mode and open the Hidden field values tab. Add fields and set their values.
-
For String fields, insert values to transfer the site or page address, form ID, form name, or a custom parameter.
-
For List fields, select a constant value from the list.
-
The parameter value allows you to fill in the field even if it’s not in the form. Add a parameter to the form link, like
?my_param1=XXX. Share this link with your customer, and when they fill out the form, the data will be saved in CRM.

