Each Bitrix24 account has a set of standard document templates like invoices and quotes. You can use them to create documents with your company details and customer information from CRM.
In this article:
Find document templates
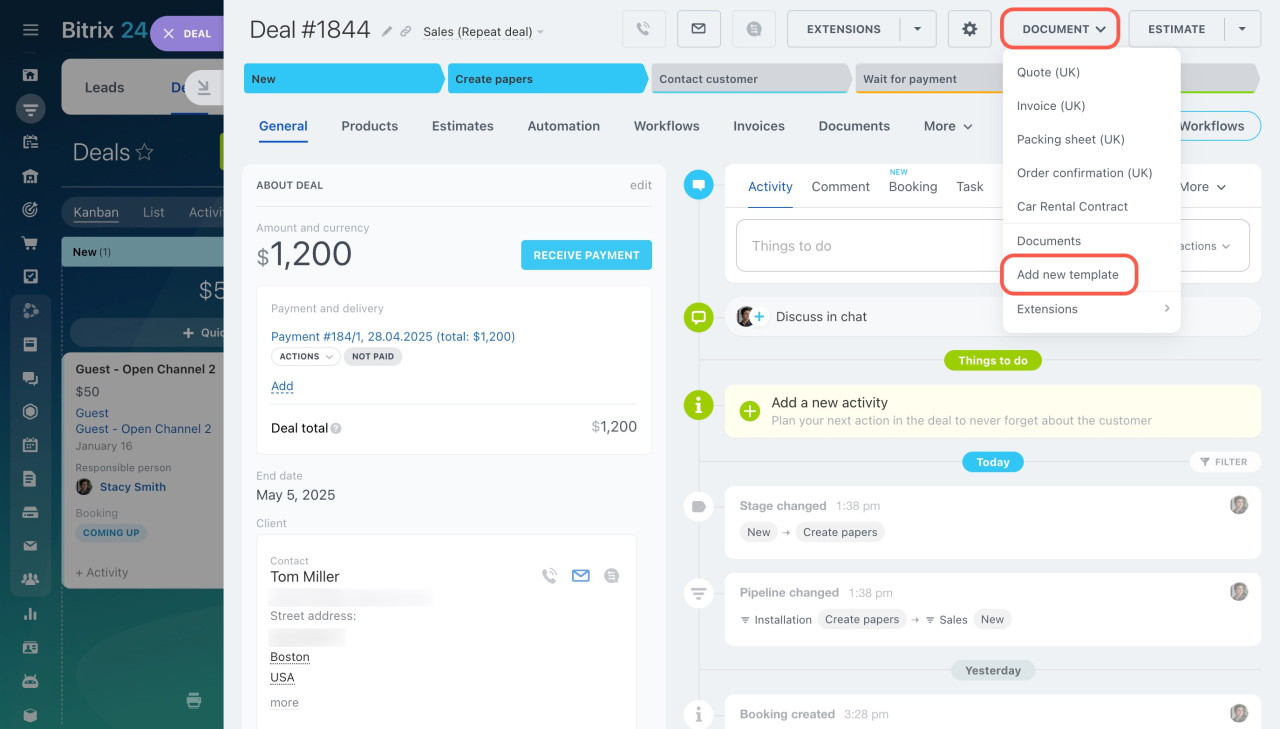
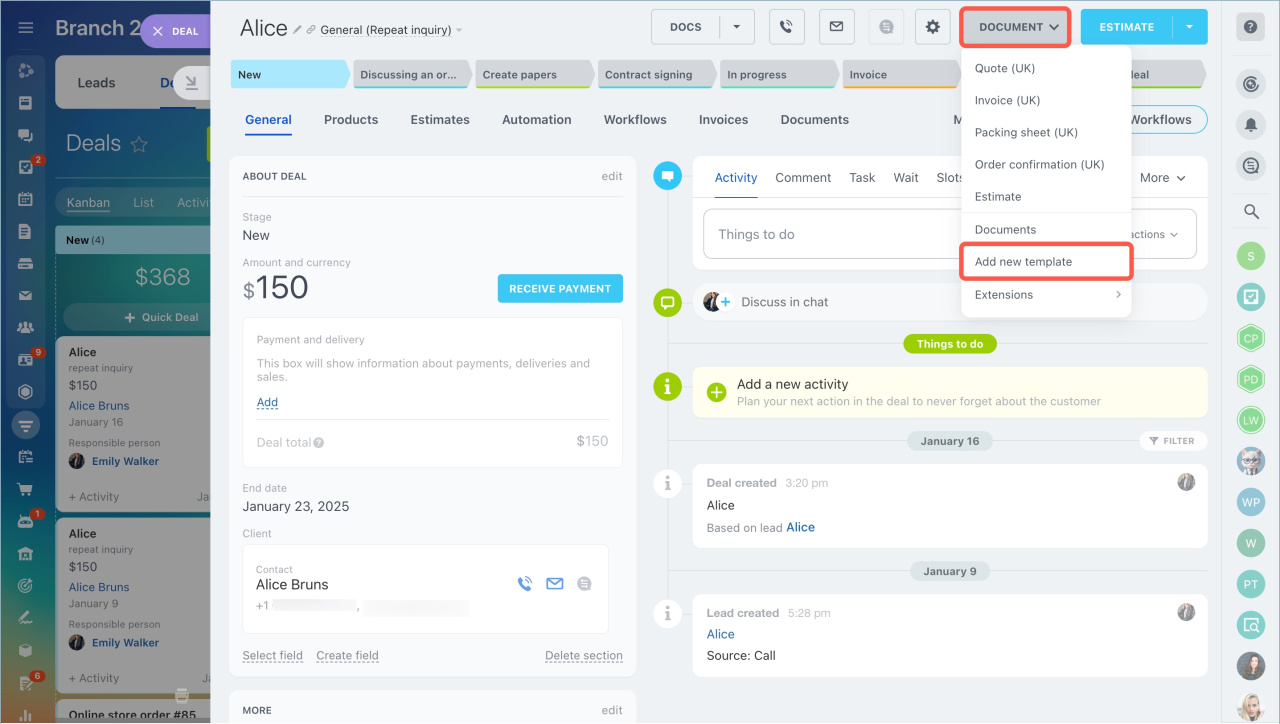
- Open any CRM item form.
- Click the Document button.
- Select Add new template.
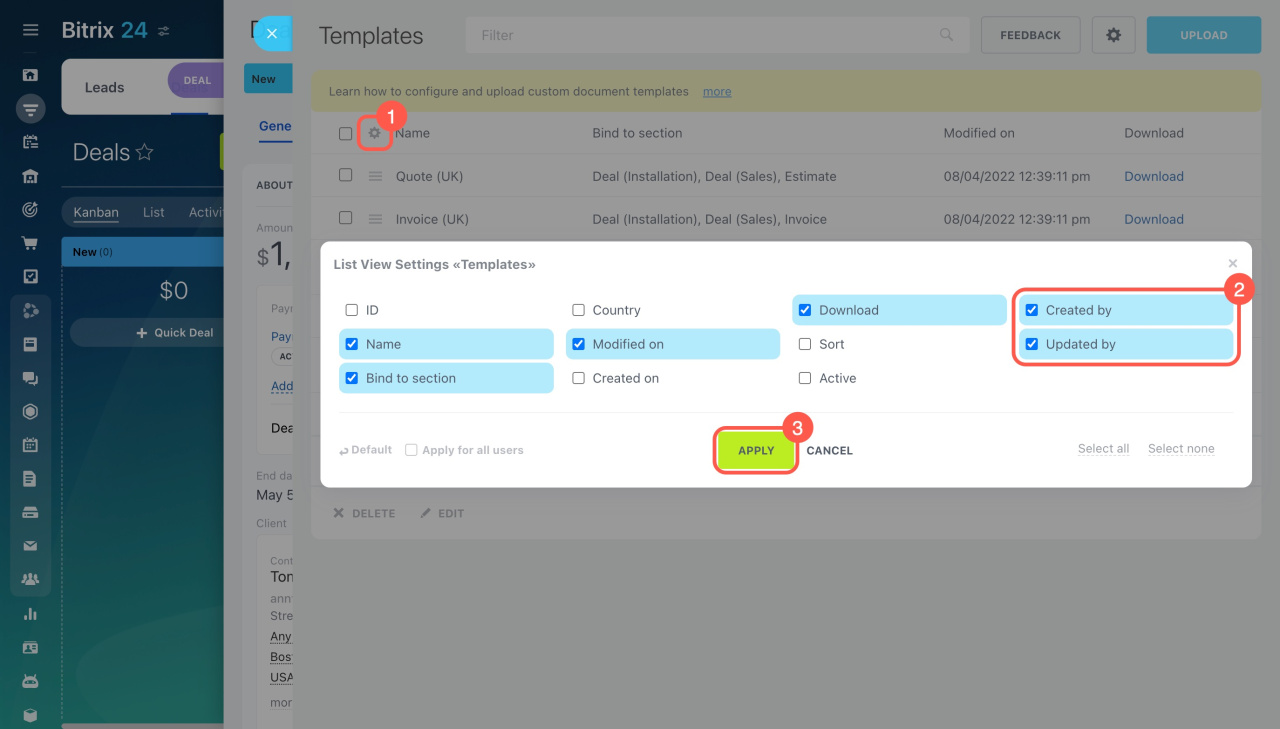
You will see a list of available templates, showing the template name, section binding, and modification date by default.
To customize the columns:
- Click the gear icon (⚙️) in the top left corner.
- Select the desired fields.
- Apply the changes.
Edit document template settings
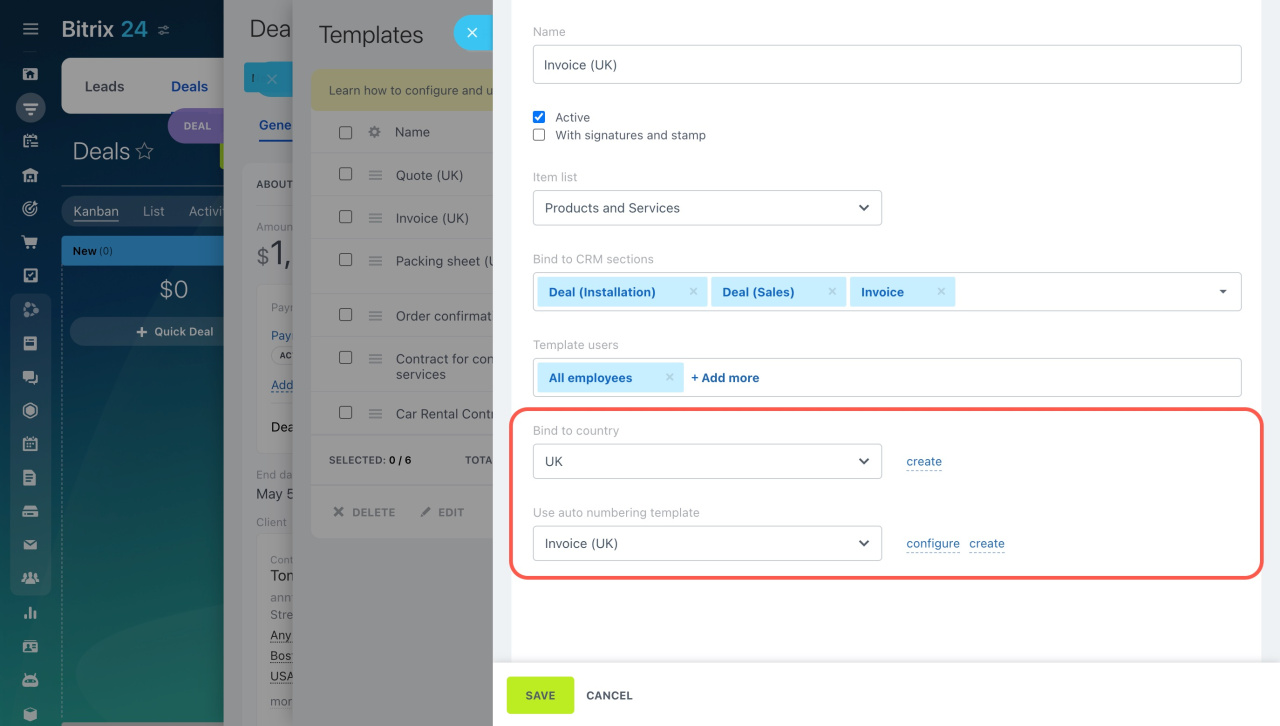
Before using a standard template, you can adjust its settings. To do this, click the menu button (☰) next to the template name and select Edit.
Name. Change the template name if needed.
Active. This option is enabled by default when you add a new template, allowing you to create documents from it. If you stop using it, disable this option.
With signatures and stamp. If you enable this, CRM will add your company's signature and stamp to the document. If not, the document will be created without them.
Add company details
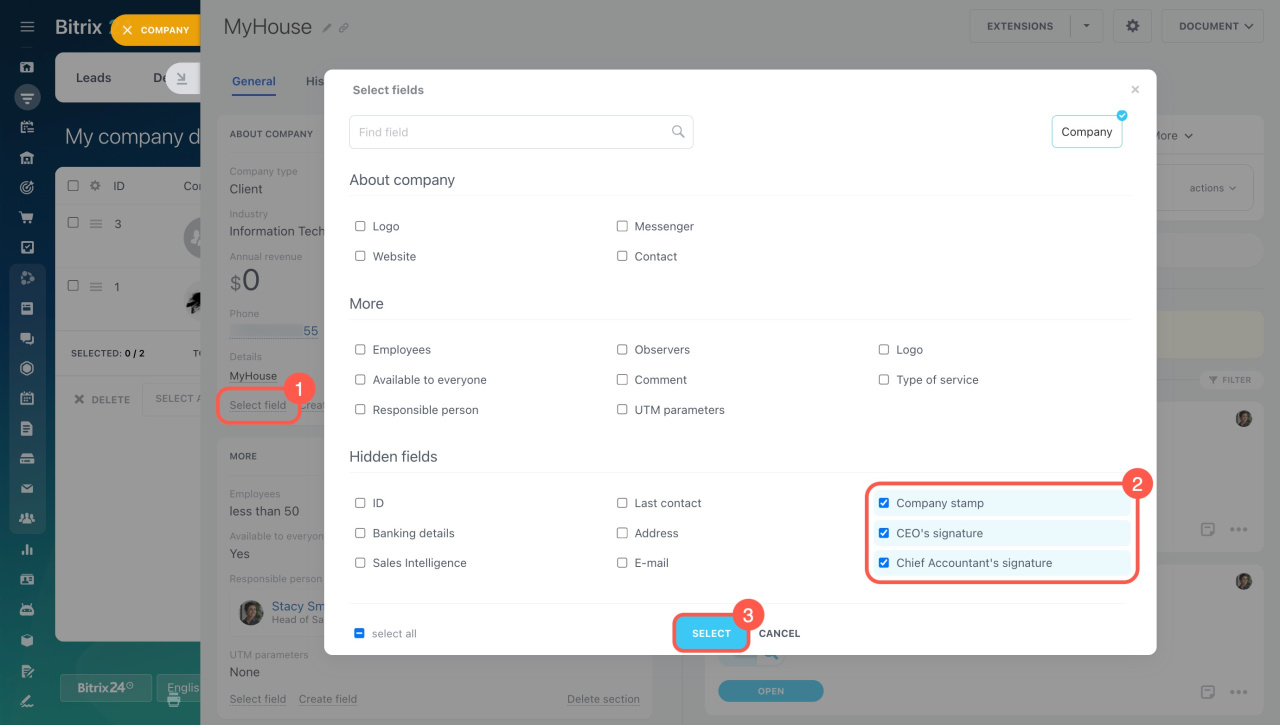
To add signature and stamp images to your company form:
- Click Select field.
- Check the boxes next to the fields.
- Click Select.
- Upload the images.
- Save the changes.
Item list. Choose whether the document should include only products, only services, or both.
Item list in document templates
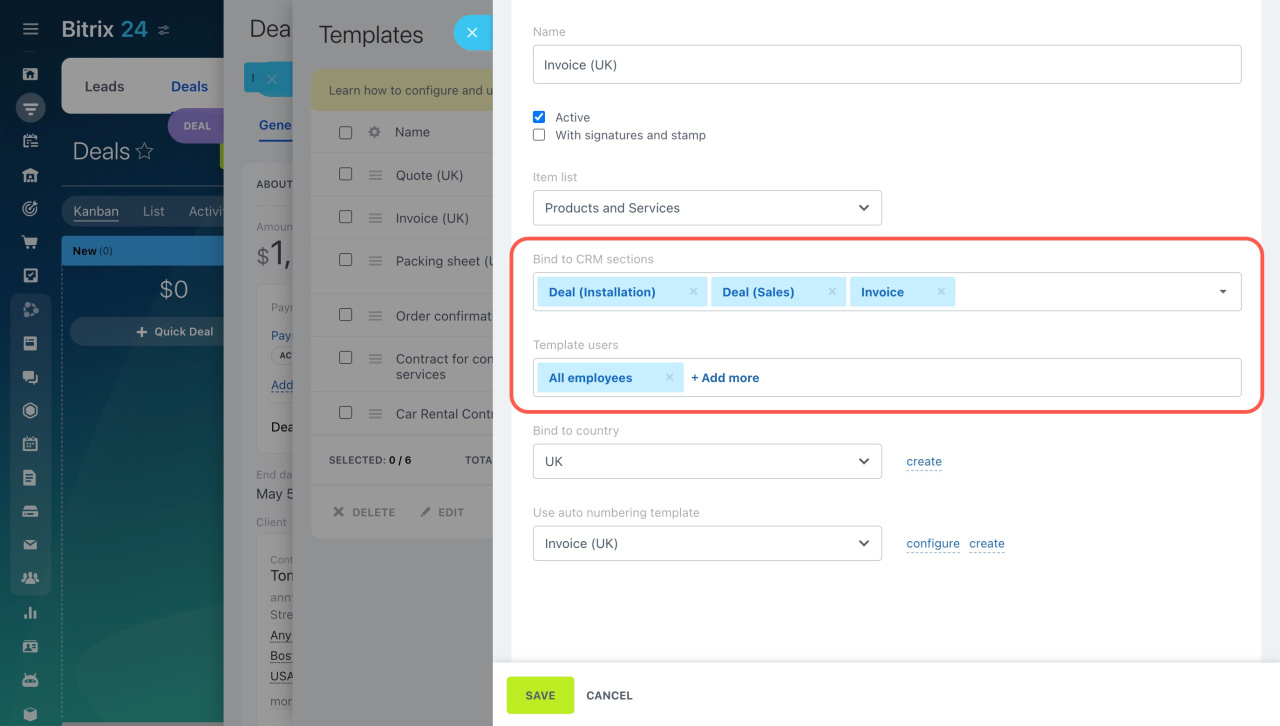
Bind to CRM sections. If you have different sales pipelines, you might need different templates for each. Choose the pipeline to bind the template to.
Sales pipelines
Template users. Set who can access the template. You can select specific employees or an entire department.
Bind to country. This affects the format of date, time, and name. If the country you need isn't listed, add it by clicking Create.
Use auto numbering template. Choose rules for Bitrix24 to create a unique number for the document, like a sequential number, date, or customer ID.
Document auto numbering
Save the settings, and your template is ready to use.
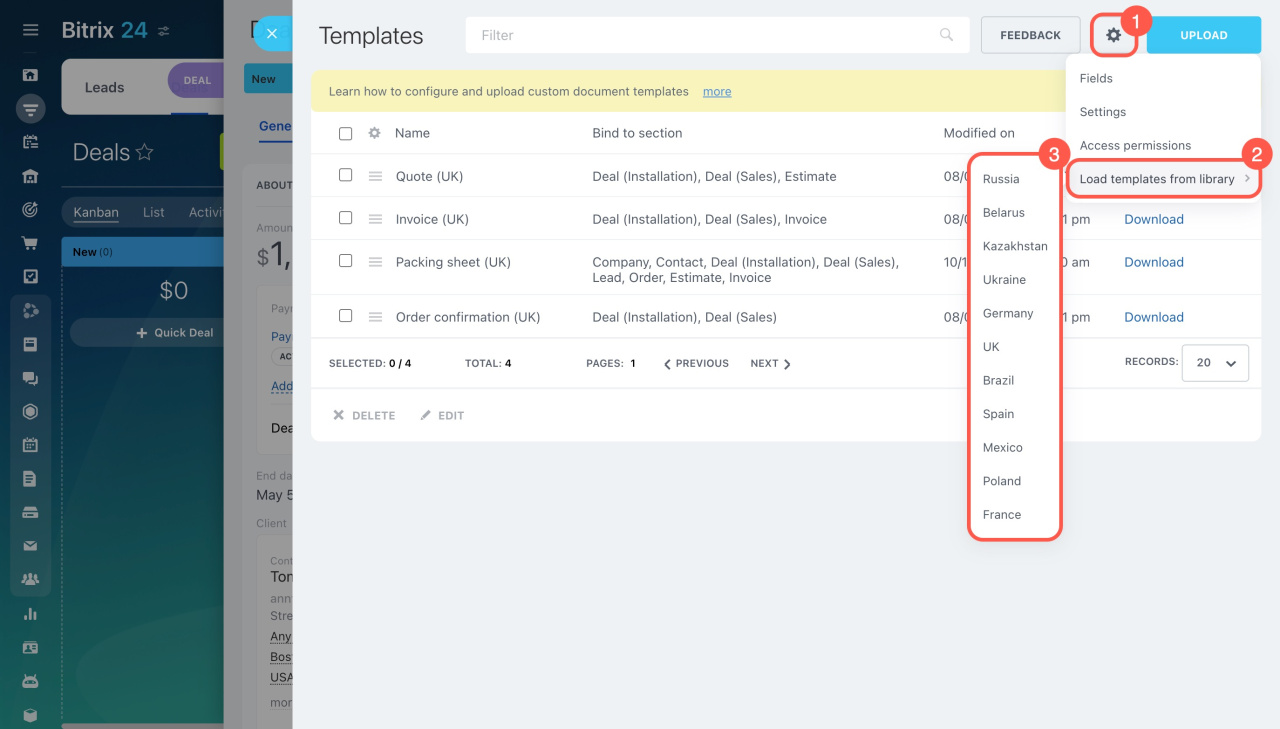
Install document templates for other countries
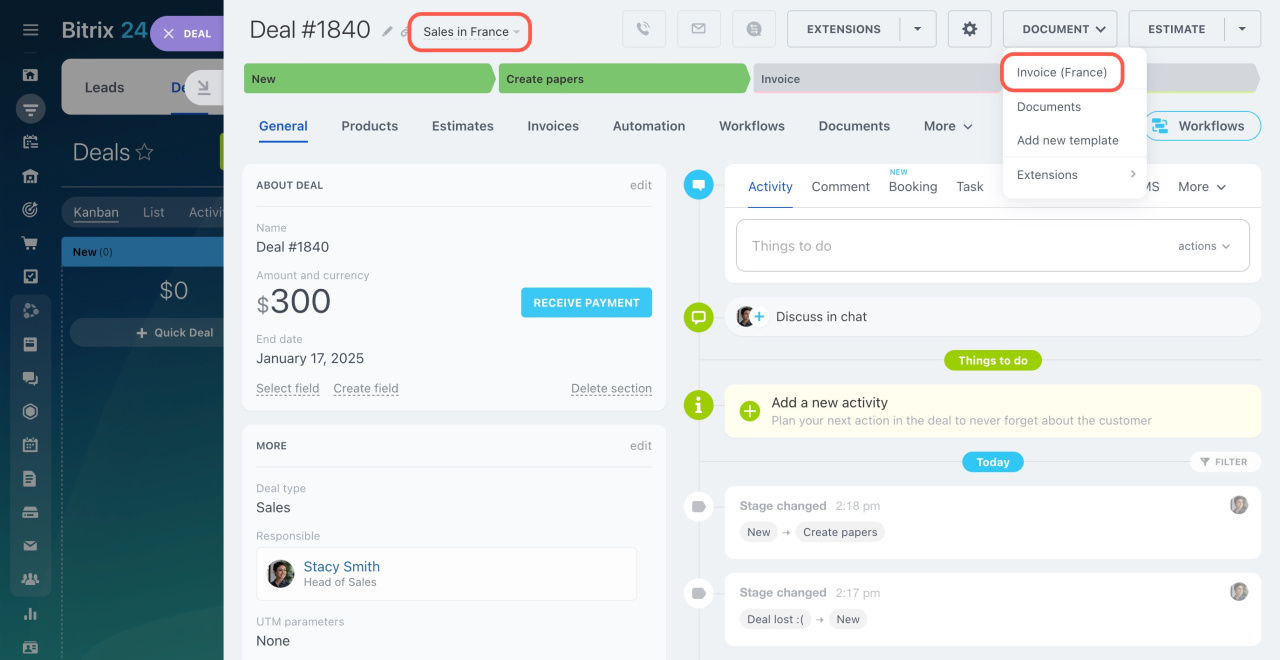
Document templates can vary by country, so templates for the UK and France will look different. To find templates for other countries:
- Click the gear icon (⚙️) in the top right corner.
- Select Load templates from library.
- Choose a country from the list.
- Click Install to add the template to your list.
After installing, check the template settings. If you want to use it in a specific deal pipeline, choose it under Bind to CRM sections.
Change the document template sorting
To sort and prioritize frequently used templates:
- Open a CRM item form.
- Click the Document button.
- Select Add new template.
- Place the cursor on a row, hold down the left mouse button, and drag it to reorder.
In brief
-
Each Bitrix24 account includes standard document templates, such as invoices and quotes, to create documents with company and customer details from CRM.
-
In the template settings, you can modify the name, deactivate it, set access permissions, and select CRM sections for document creation.
-
Besides standard templates, you can add templates for other countries.
-
You can rearrange the template list to prioritize frequently used templates.

