Absence Chart
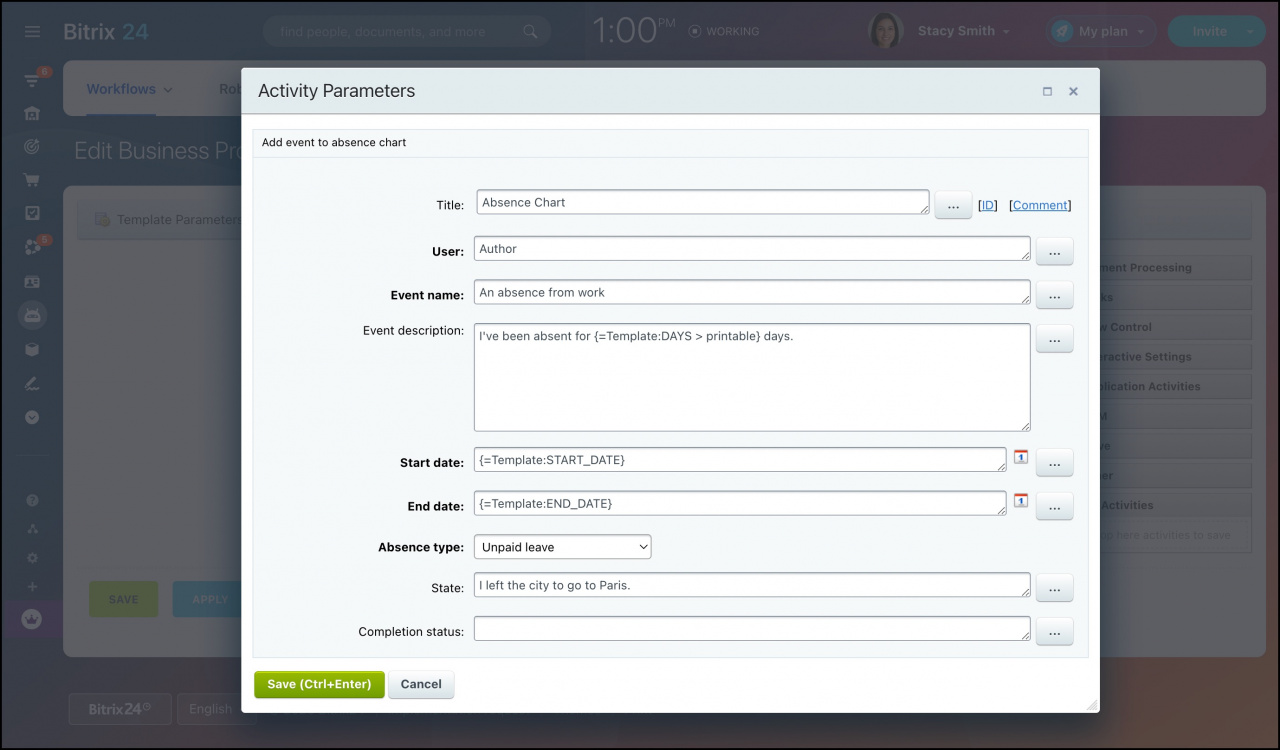
The activity adds an entry to the absence chart. The action parameters are the same as when an entry is added to the absence chart manually.
Absence chart
-
User: Specify the user for whom the event will be entered in the absence chart.
-
Event name: Specify the name of the event in the absence chart.
-
Event description: Add detailed description of the event for the absence chart.
-
Start date: Set date and time when the event starts.
-
End date: Set the date and time when the event ends.
-
Absence type: Select the type of absence from the list.
-
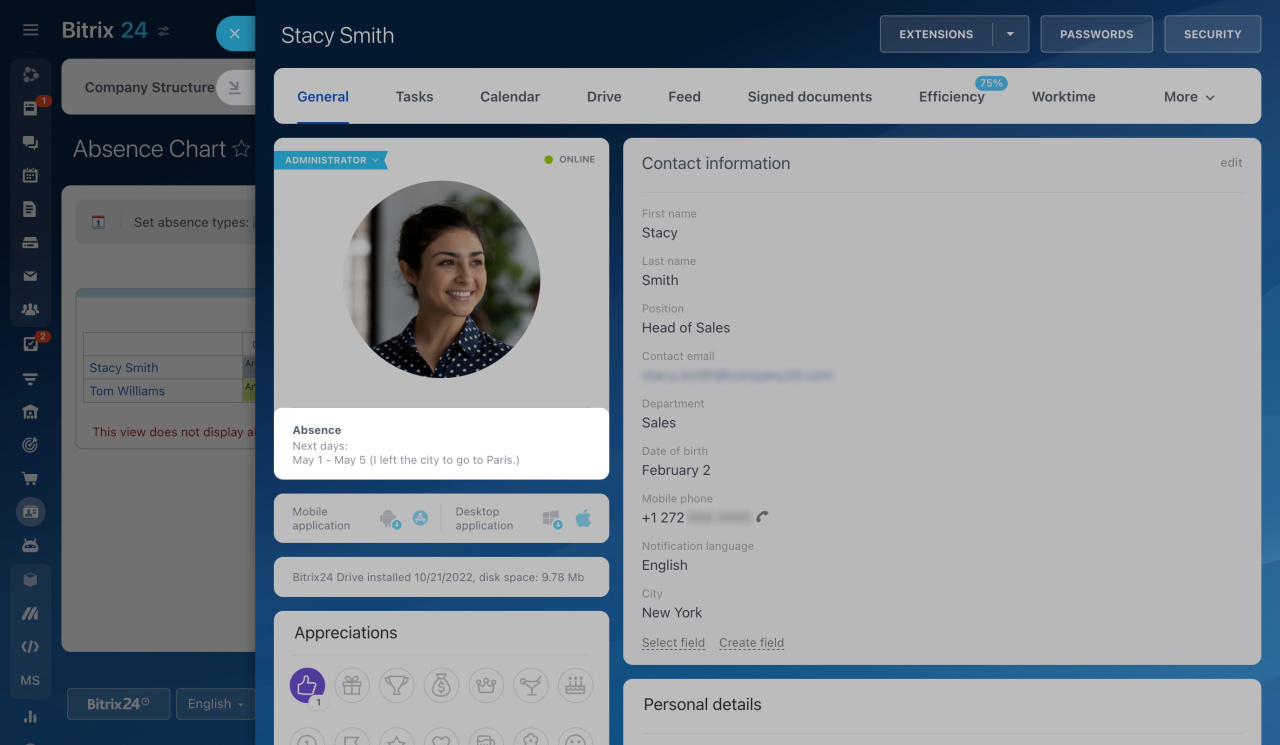
State: Specify the user's state for the period of absence. It will be displayed in the user's profile.
-
Completion status: Specify the user's state when the absence is over.
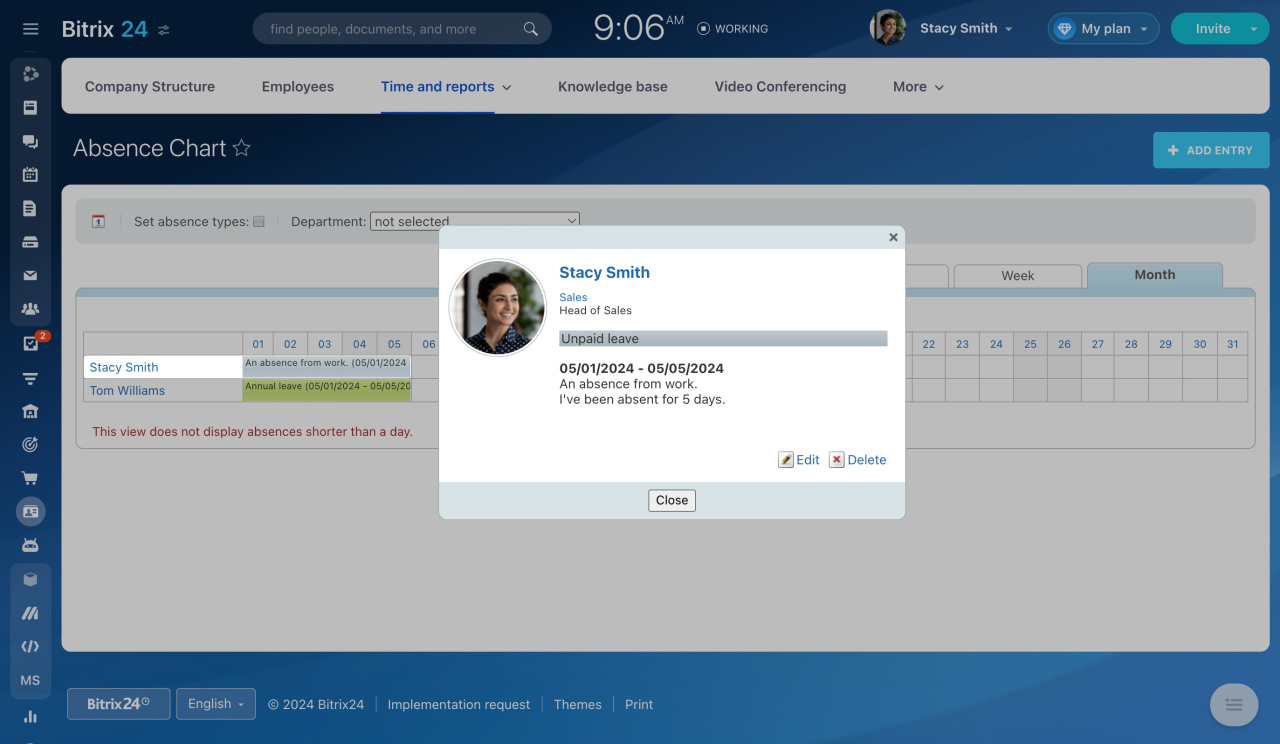
When a user launches a workflow, this activity will add an entry to the absence chart.
Also, the absence will be displayed in the user's profile.
Add post
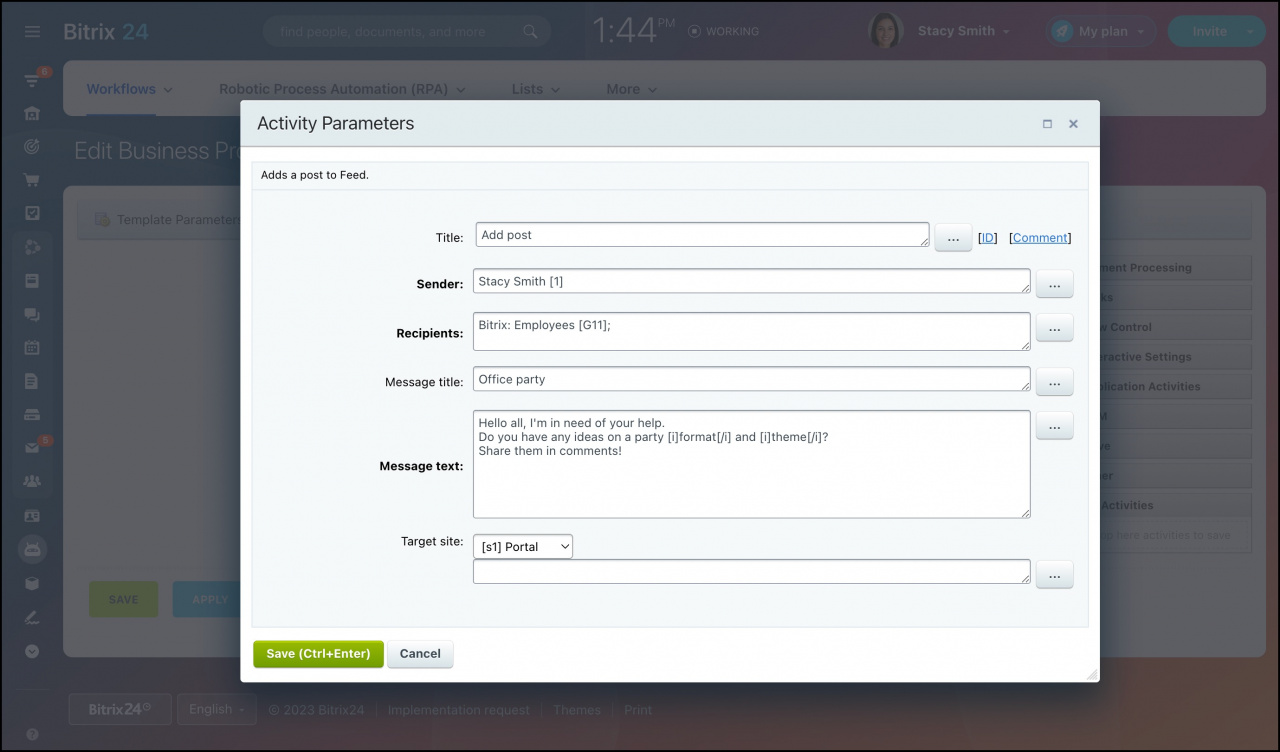
The activity sends a new message to Feed.
-
Sender: Select a user who will be displayed as the sender of the message.
If you specify several users in this field, the first user in the list will be displayed as the sender. -
Recipients: Specify users, groups of users, or departments that will receive the message to Feed.
-
Message title: Specify the message title.
-
Message text: Enter the message text. You can use BBCode tags.
How to use BBCode tags -
Target site: Select a site to which Feed the message will be sent.
When a user launches a workflow, this activity will add a new post to Feed.
Calendar event
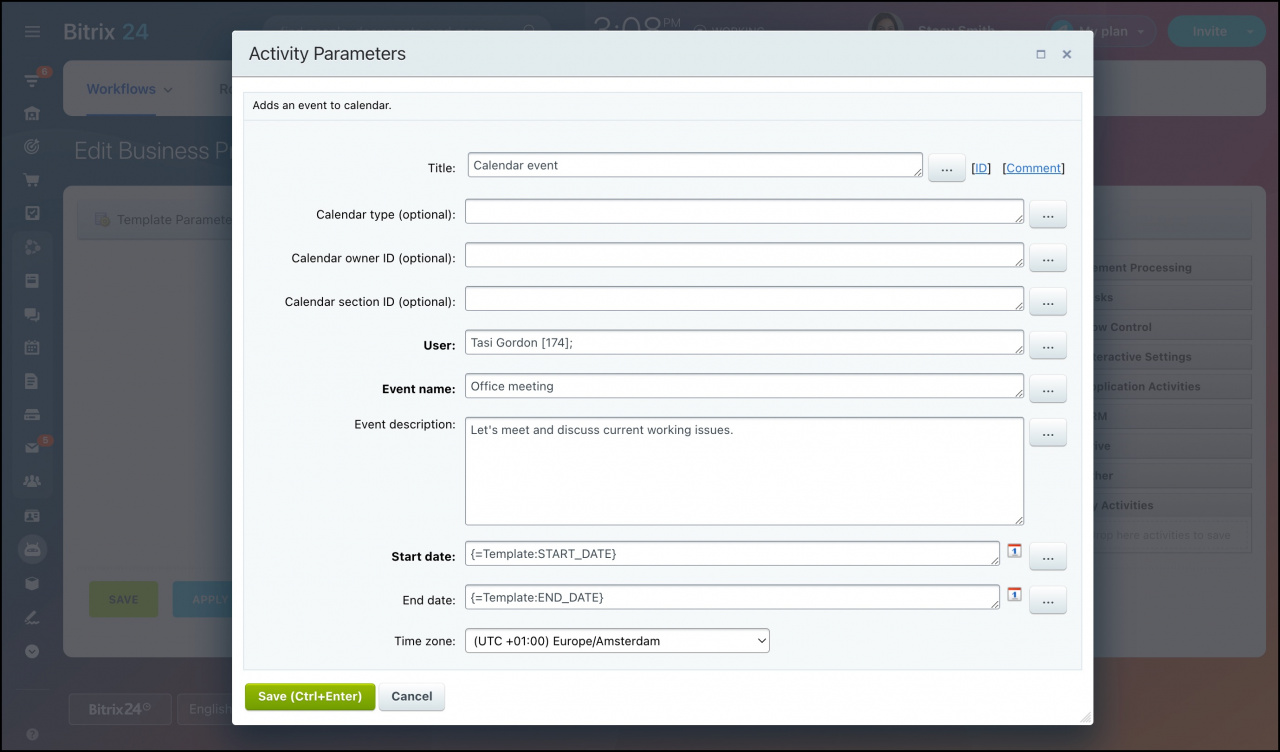
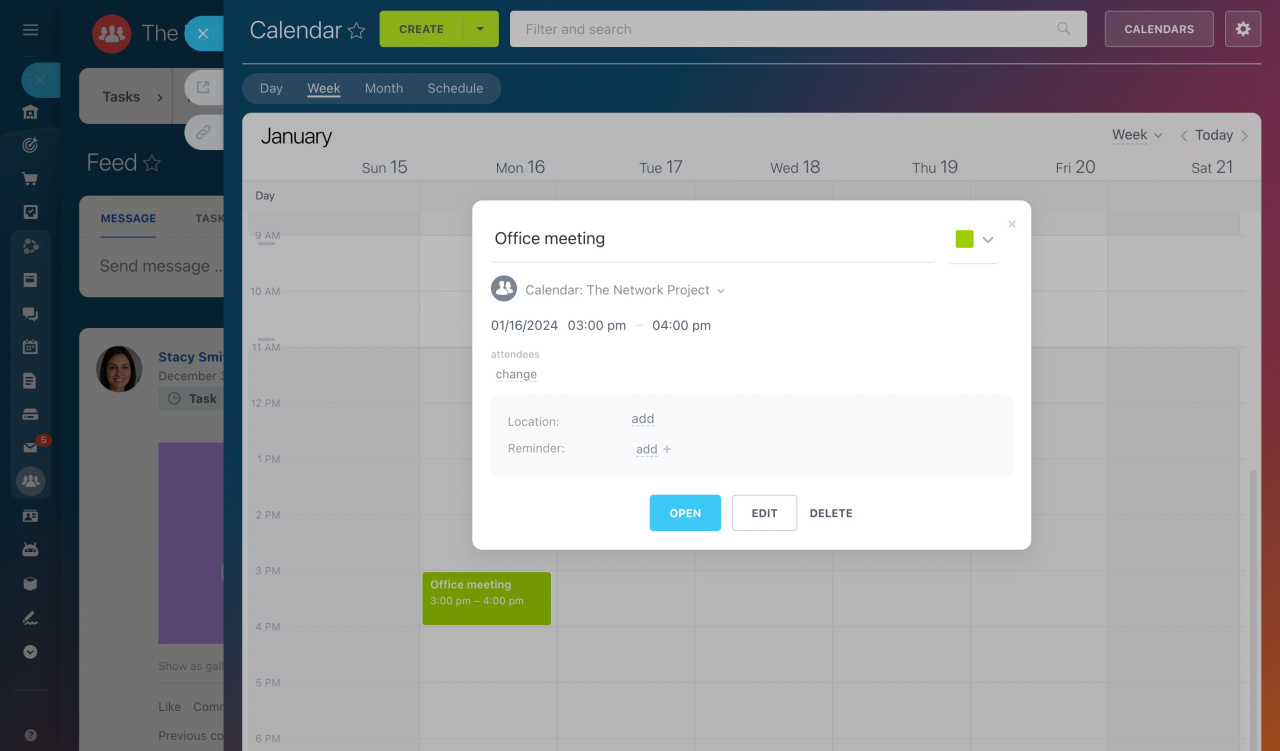
The activity adds an event to a calendar.
-
Calendar type (optional): To create an event in a user's personal calendar, you do not need to specify the user type. If the field is empty, the event will be created exactly in this calendar.
user. The event is added to the personal calendar of the user who started the workflow.group. The event is added to a workgroup calendar. In this case, you need to specify the group ID in the calendar owner ID field.company_calendar. The event is added to the company calendar. The User field does not affect where the event is created.
-
Calendar owner ID (optional): Specify the calendar owner ID. If an event is created in the group calendar, its identifier is displayed.
-
Calendar section ID (optional): Get the value of this field from the database, from the page source code, or the AJAX request analysis. Therefore, a developer should fill in this field.
-
User: Specify the user for whom the calendar event will be created.
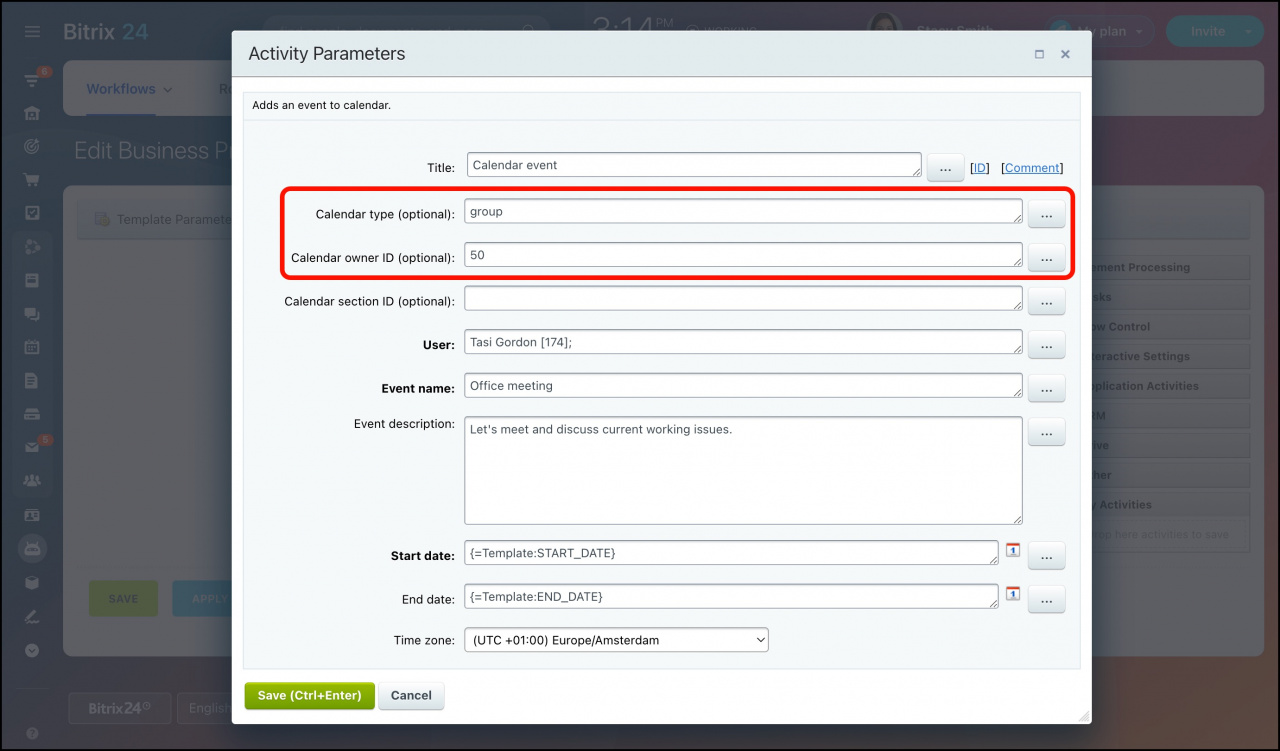
For example, to add an event to a workgroup calendar, complete the parameters as follows:
- Calendar type (optional):
group - Calendar owner ID (optional):
50
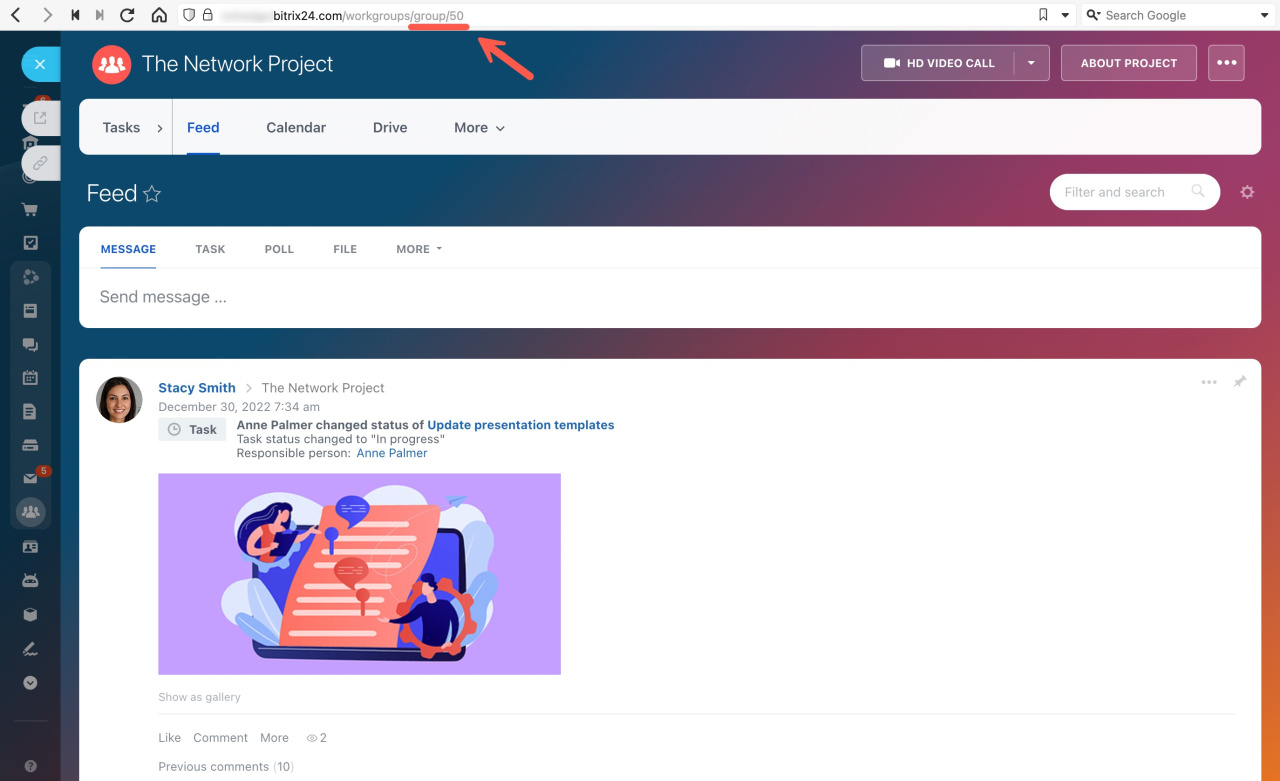
You can find the values for the Calendar type (optional) and Calendar owner ID (optional) parameters in the workgroup address link.
When a user launches a workflow, this activity will add a new event to the specified workgroup calendar.
Add a new event to a calendar
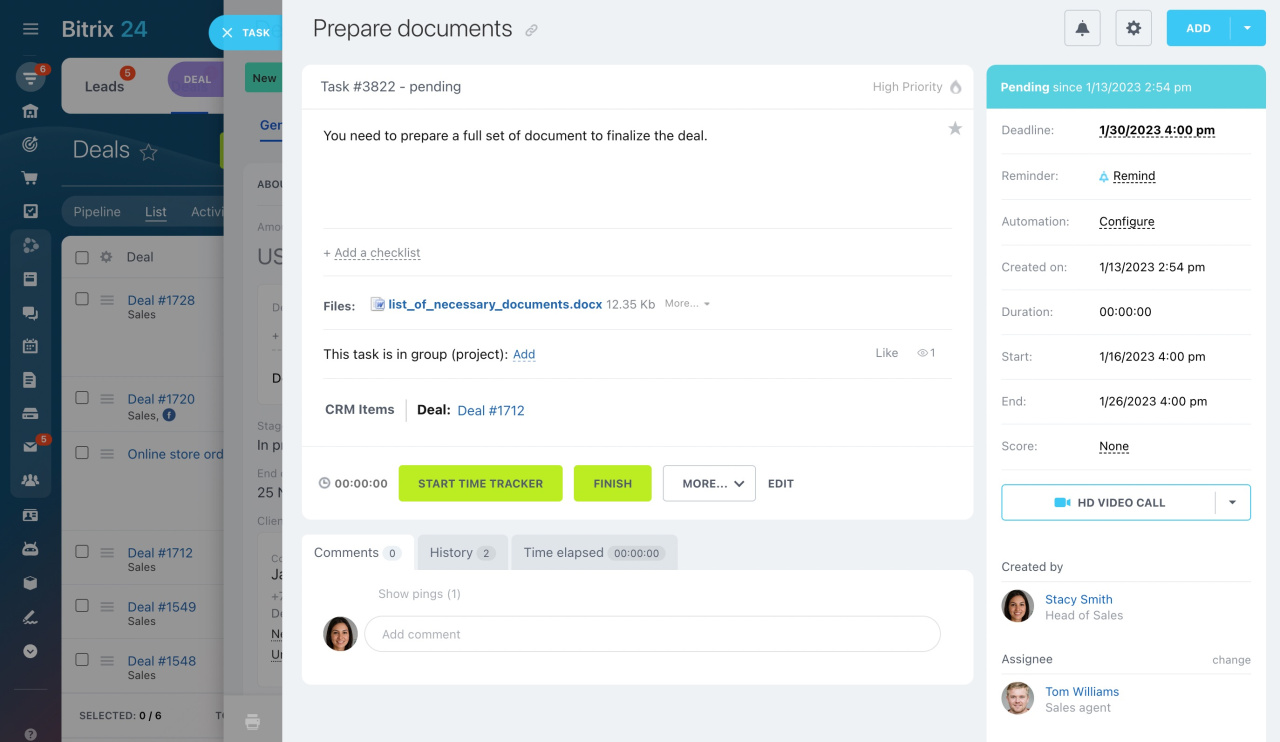
Create task
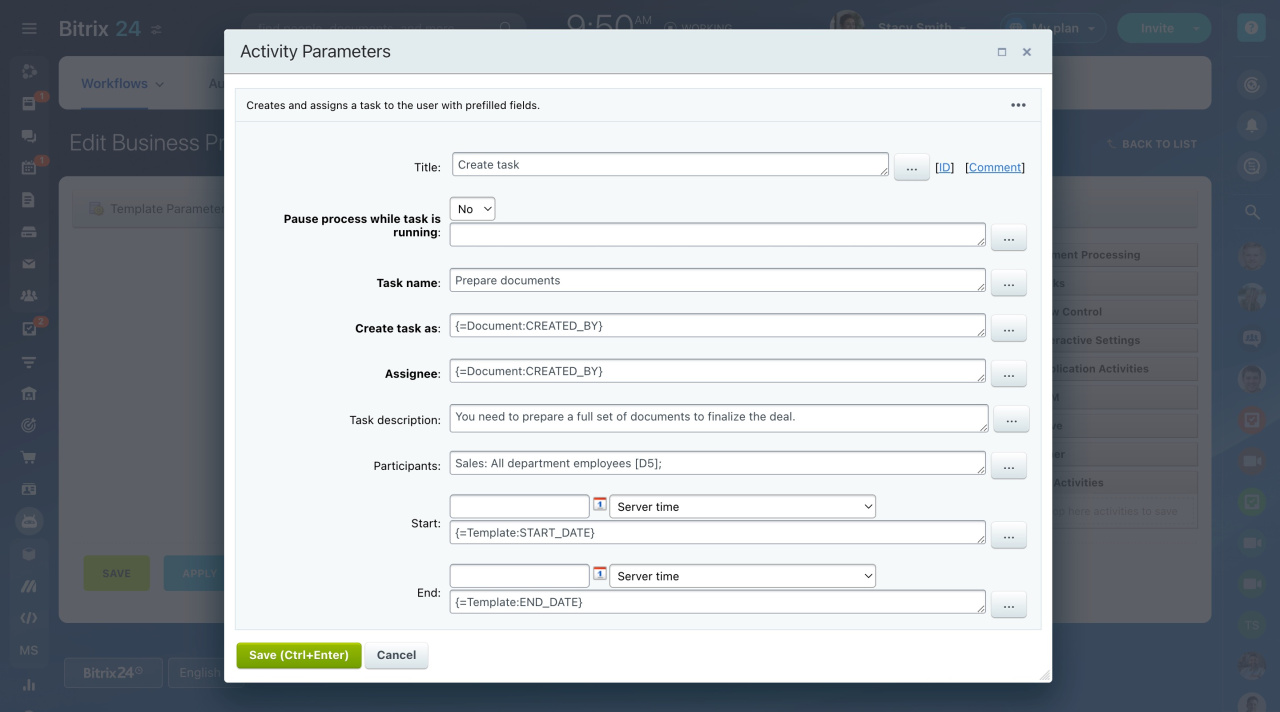
The activity creates a task. Most activity parameters are the same as when you create a task manually.
Create a task
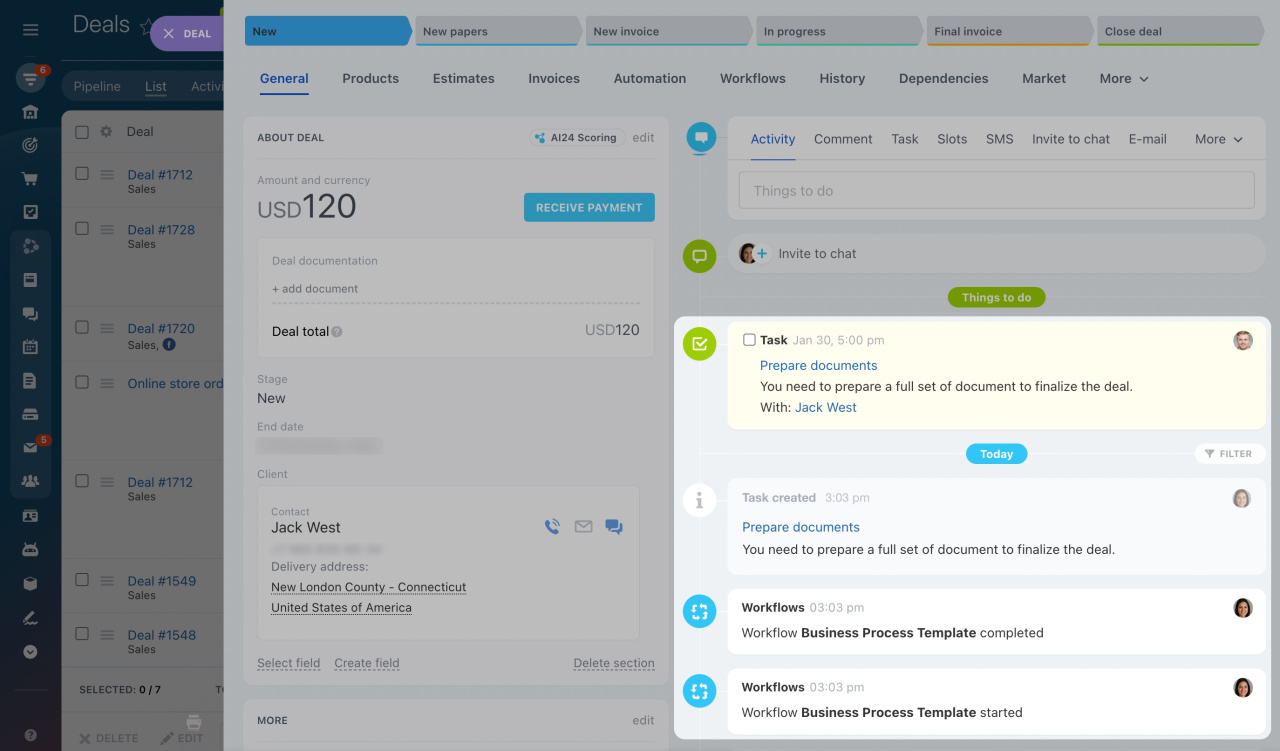
Consider an example of a workflow in CRM to see some particularities.
-
Pause process while task is running: If this option is selected, the workflow will be stopped until the created task gets to the Completed status.
-
Bind to current CRM entity: The task will be linked to the CRM entity for which the workflow is launched. For example, if you run a workflow in a deal, the task will be linked to the deal.
-
CRM Items: The parameter allows you to link the task to other CRM entities. You can select a specific CRM item from the list or substitute it through the Insert Value form.
To bind entities through the form, you should use the following syntax:
-
Contacts:
="C_"&{{ID}} -
Deals:
="D_"&{{ID}} -
Leads:
="L_"&{{ID}} -
Companies:
="CO_"&{{ID}} -
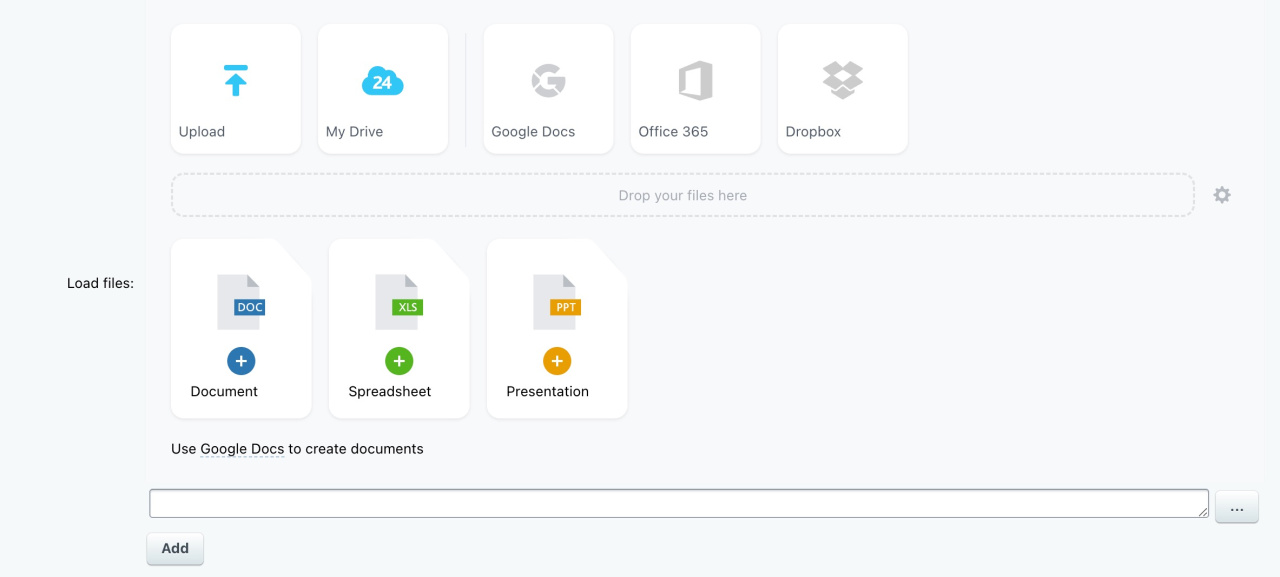
Load files: The parameter allows you to attach files to the task.
="C_"&{{ID}}, ="D_"&{{ID}}, ="L_"&{{ID}}, ="CO_"&{{ID}}.When a user launches a workflow, this activity will create a new task with all the specified parameters.
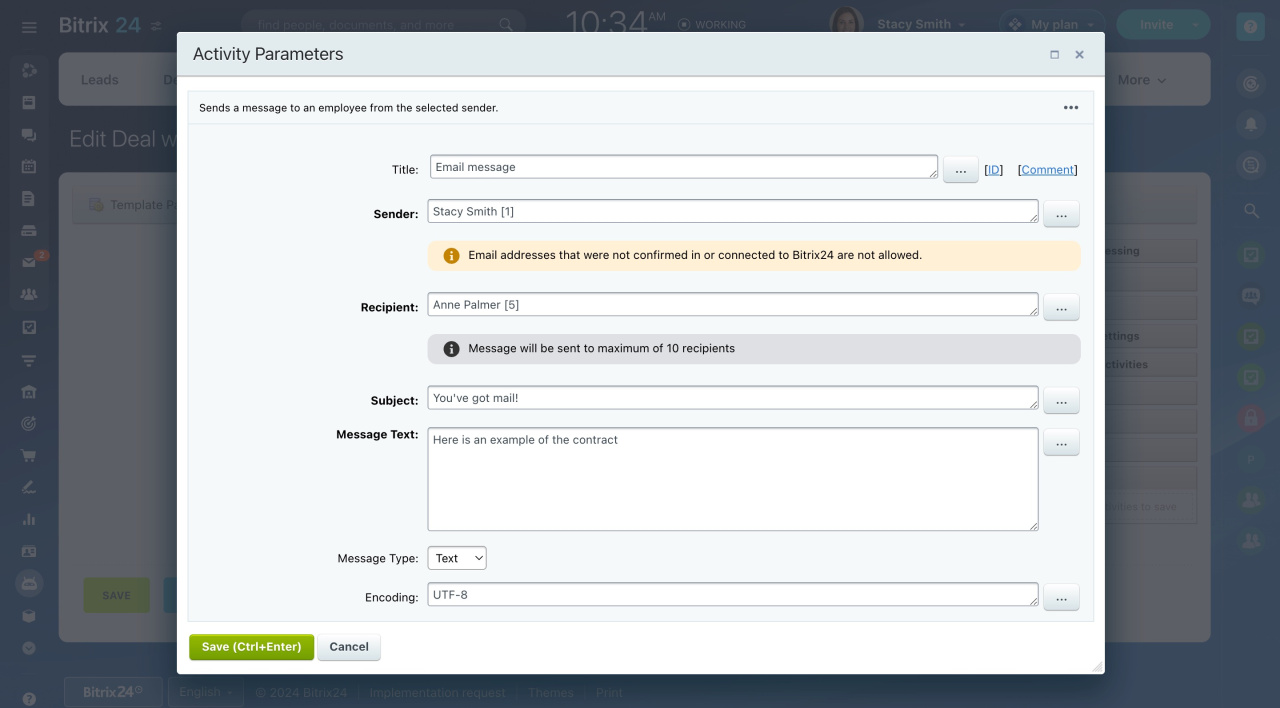
Email message
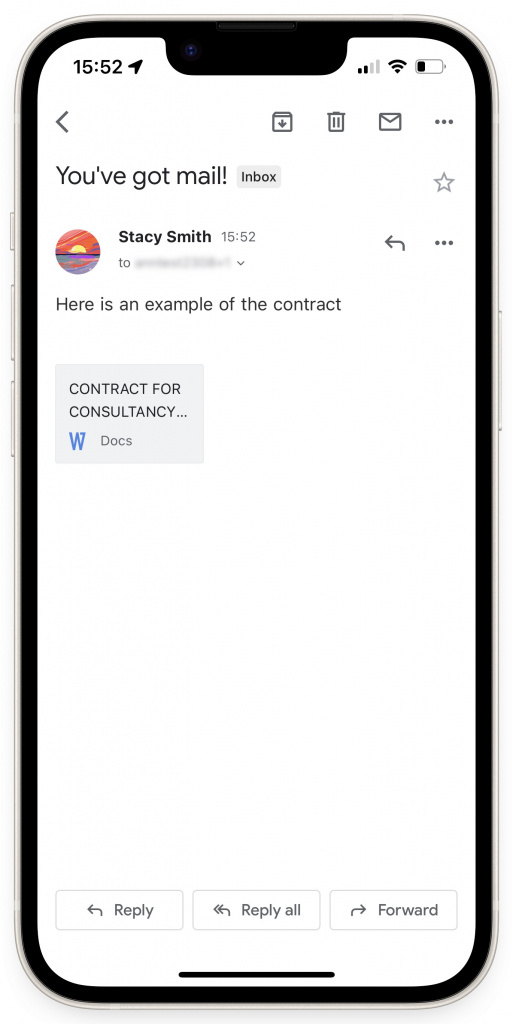
The activity sends an email message to an employee from the sender indicated in the activity settings.
-
Message Type: Indicate how the message will be sent, whether as a text or using HTML.
- Encoding: Set the encoding of the message to be sent.
-
Message send mode: Set the way of sending the message:
-
Direct sending: The message will be sent immediately. It is a preferable option for companies that do not send a large number of emails.
-
Send using Mail Subsystem: The message will be sent using the embedded mail system. The sending can be postponed. If you often send emails and bulk email campaigns, this option will be more suitable for you.
-
Message template website: Indicate the message template site to send the message through the embedded mail system. Different sites can have different templates of mail messages.
-
Attachments: You can attach files to a message or select a drive file (Bitrix24 Drive).
-
Email address separator: Select a symbol that will be used for separating email addresses if you're going to send messages to several emails.
When a user launches a workflow, this activity will send an email to the selected employees.
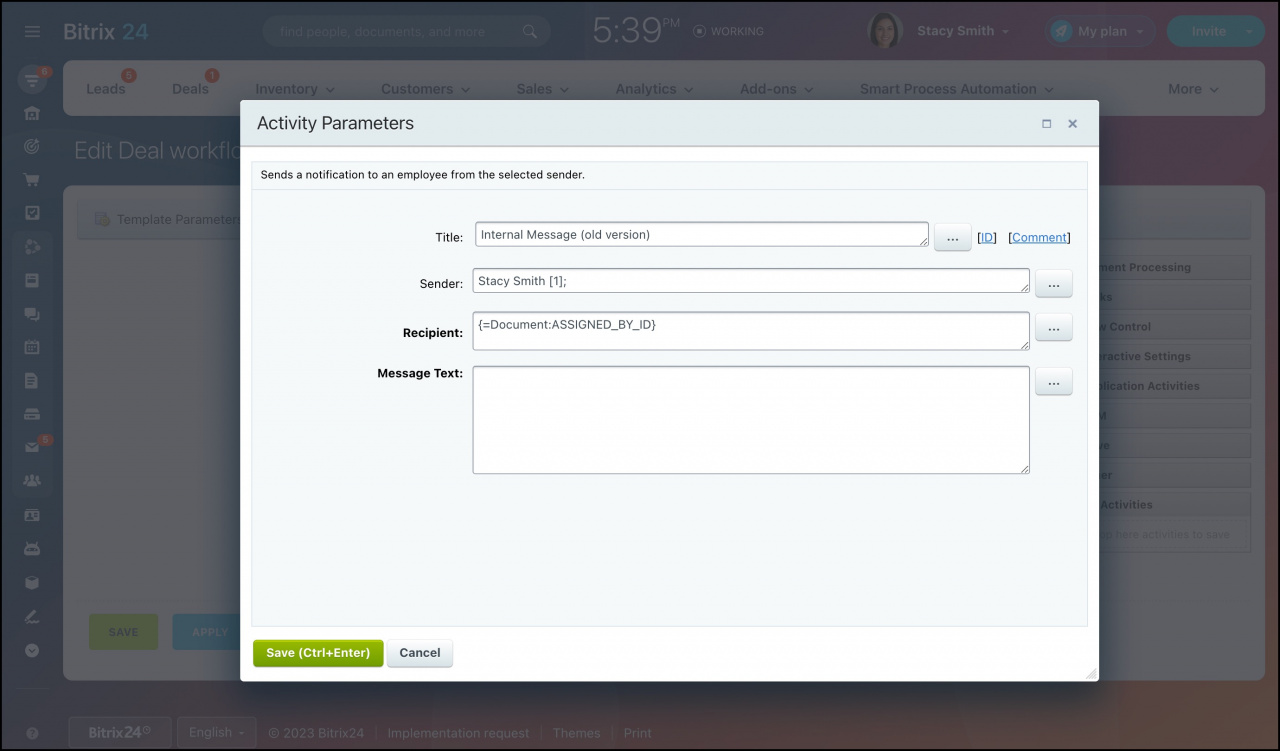
Internal Message (old version)
Make a call
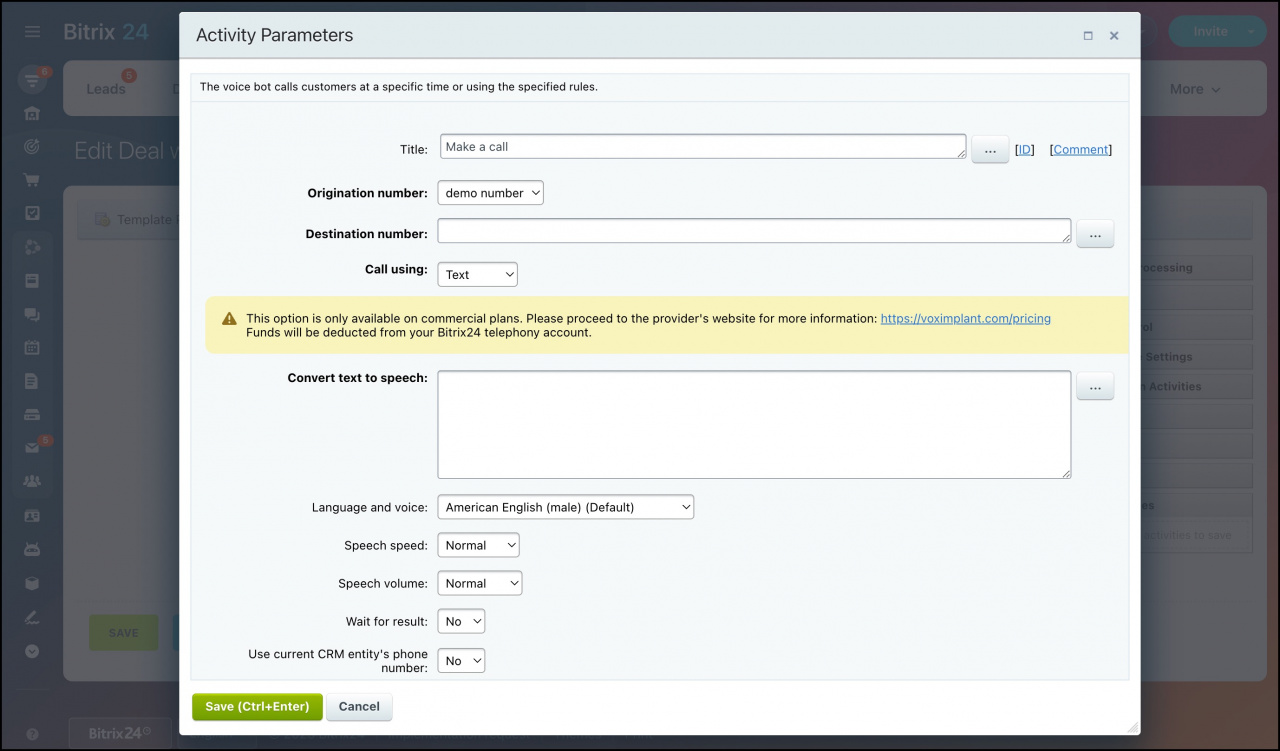
The activity performs pre-recorded or text-based robocalls to a specified number.
-
Destination number: Enter a phone number or the string field of the element where you specify a phone number.
-
Wait for result: Indicate if you want to stop the workflow execution before the voice bot finishes calling customers.
Voximplant pricing
Convert Text to Speech in Bitrix24
Notify supervisor
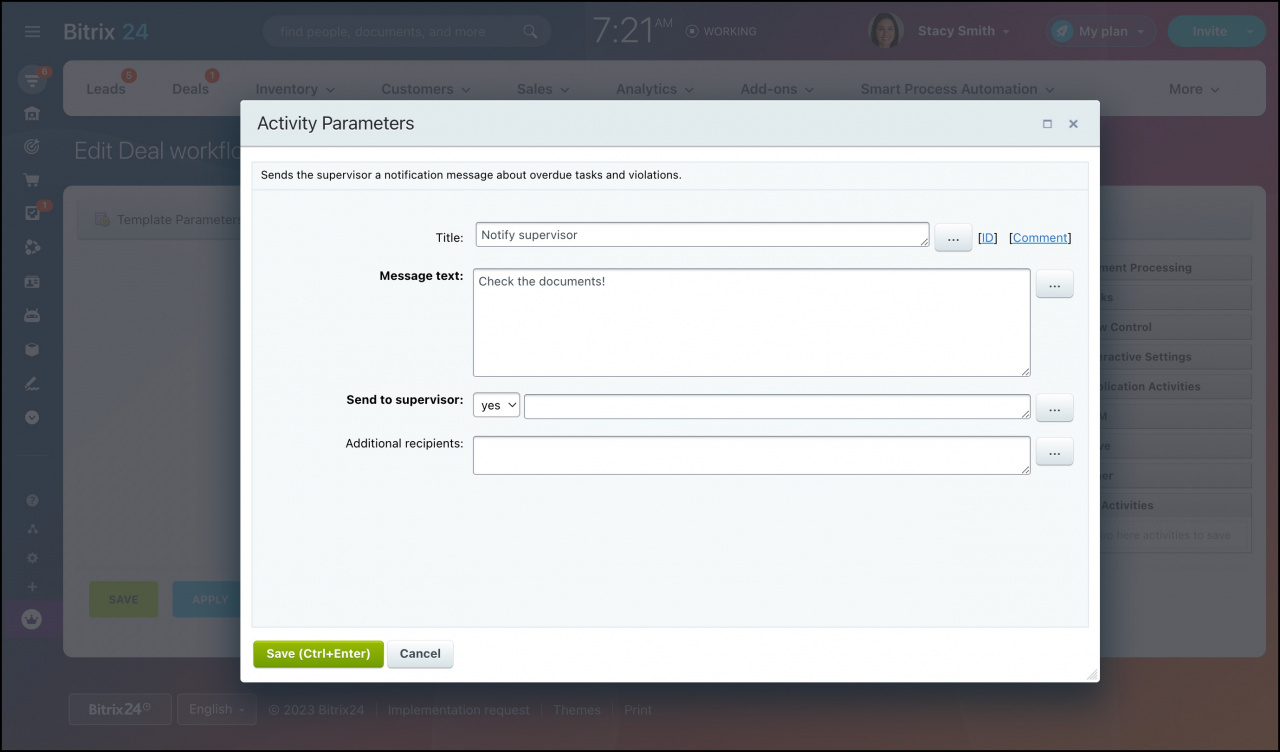
The activity sends the supervisor a notification message about overdue tasks and violations.
-
Message text: Specify the text of the notification.
-
Send to supervisor: Decide whether to select the direct employee's supervisor according to your company structure or insert another value.
-
Additional recipients: Specify other users you need to notify. If you select no in the previous parameter, you should add notification recipients there.
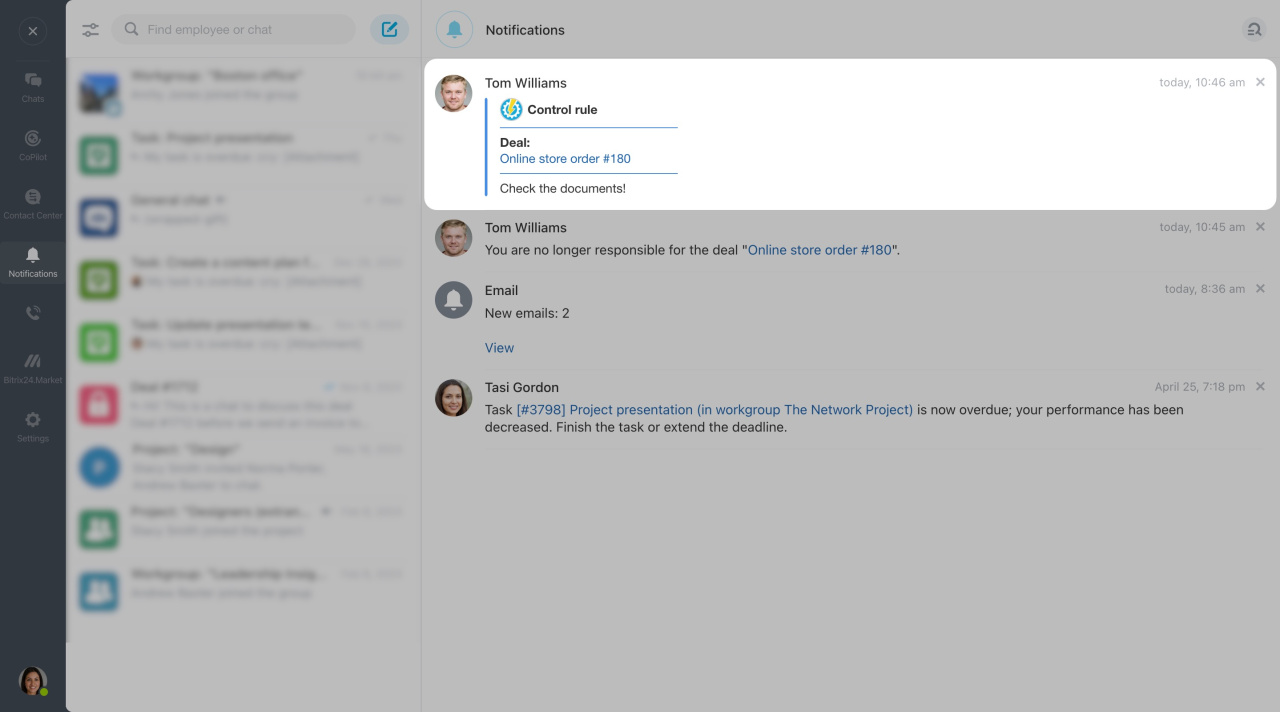
When a user launches a workflow, this activity will send a notification to the responsible person's supervisor.
Send message to direct chat
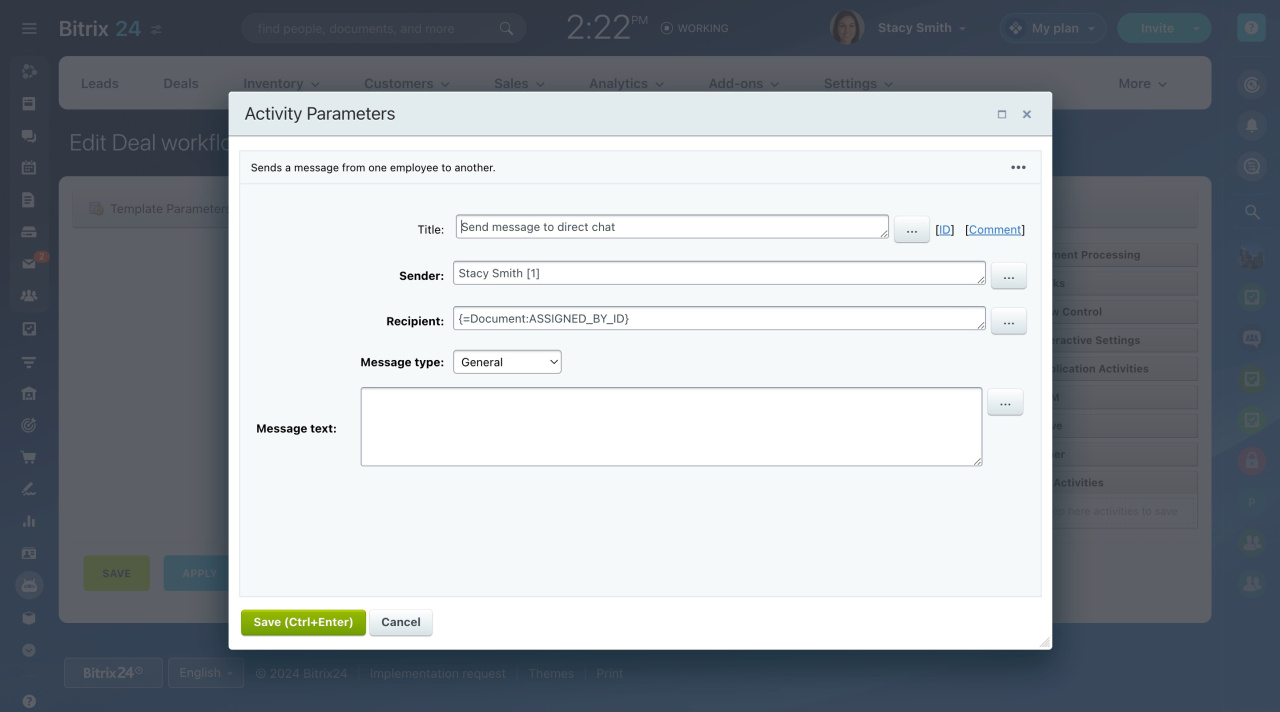
This activity helps you inform colleagues about changes and achievements. It can send a template message to the chat or notify all employees about a new deal. To send a message, just write a text and select chat in the special field.
-
Sender: Specify the user on whose behalf the message will be sent. You can select a specific user or their role in the CRM entity or task.
-
Recipient: Select a user who will receive a message. Or you can specify their role in the CRM entity or task.
-
Message type: Select the type of message according to its importance.
-
Message text: Enter the text that will be included in your message.
Send message to group chat
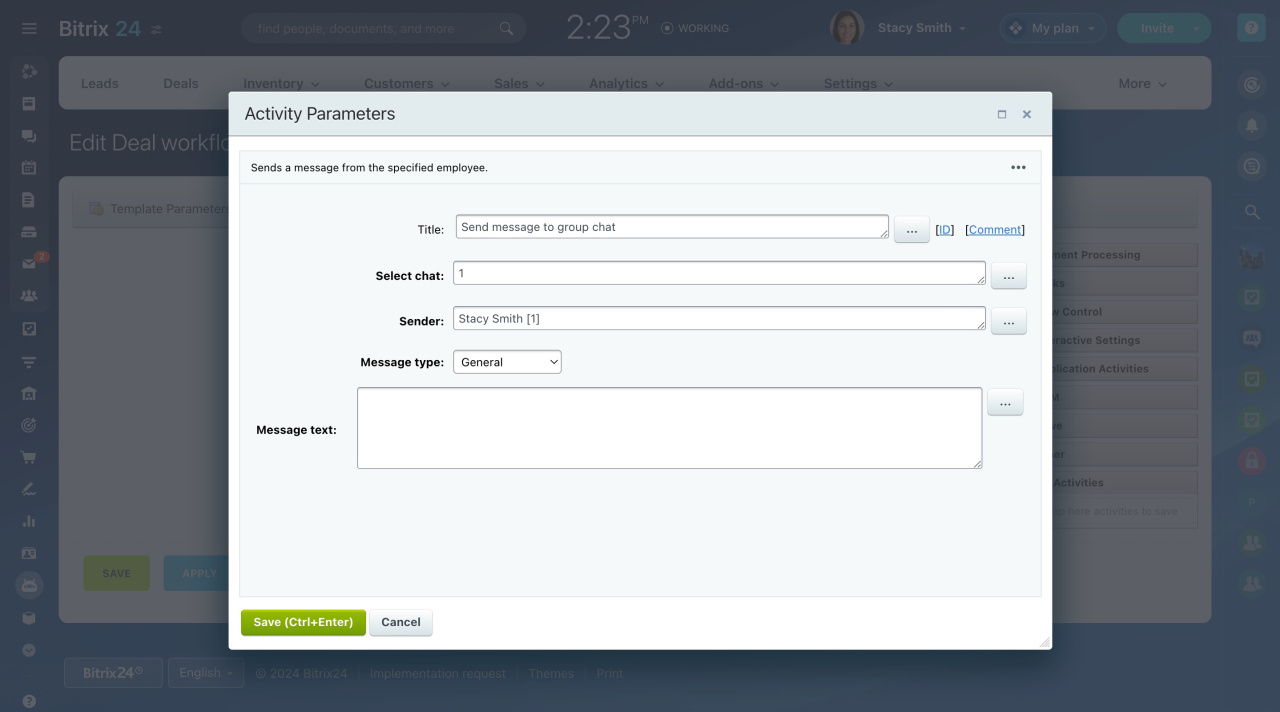
The activity helps you inform colleagues about changes and achievements. It can send a template message to the chat or notify all employees about a new deal. To send a message, just write a text and select chat in the special field.
-
Select chat: Click on this field and select a group chat from the drop-down list. Or, you can specify the chat ID.
-
Sender: Specify the user on whose behalf the message will be sent.
-
Message type: Select the type of message according to its importance.
-
Message text: Enter the text that will be included in your message.
Send message to the chat
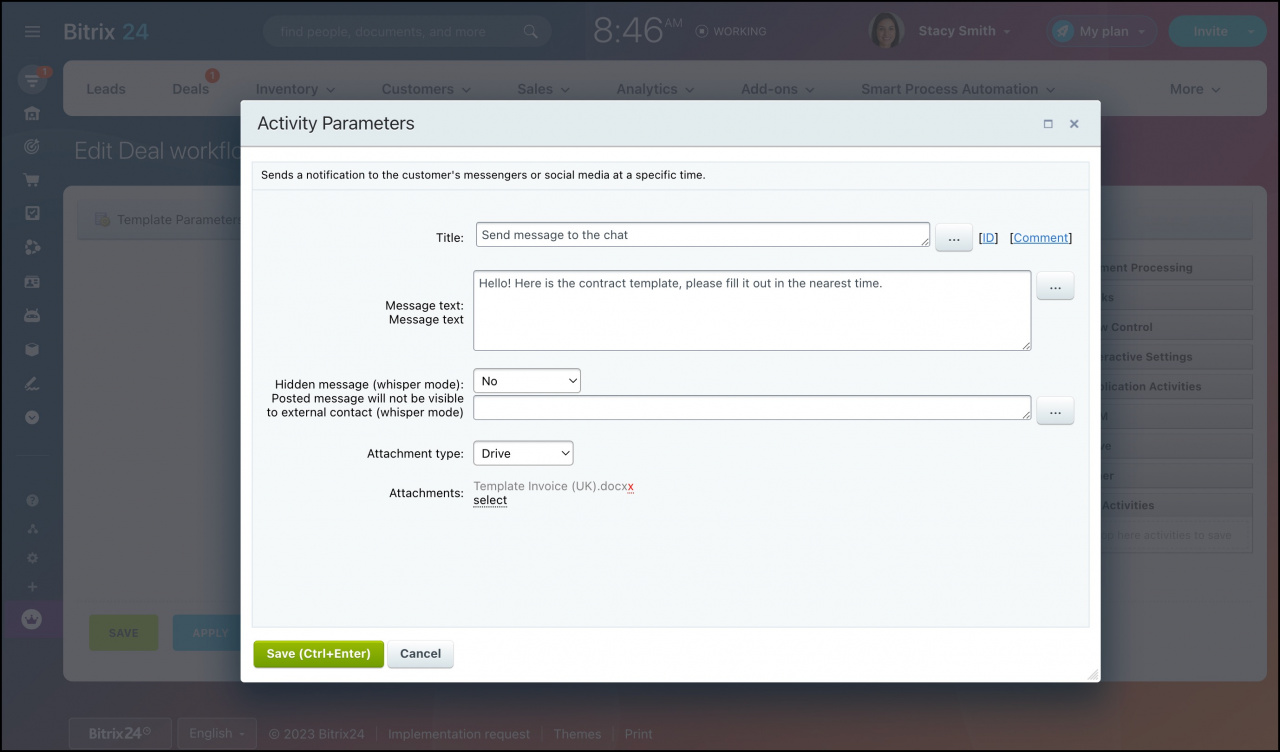
The activity sends a message to the open channel that the customer last contacted.
-
Message text: Specify the text of the message.
-
Hidden message (whisper mode): Select this option if you want only the employees who are present in the chat with the client to see the messages.
-
Attachment type: Select the attachment type: Element Files or Drive.
-
Attachments: You can attach files to a message via Insert Value form (if you select Element Files) or from Bitrix24 Drive (if you select Drive).
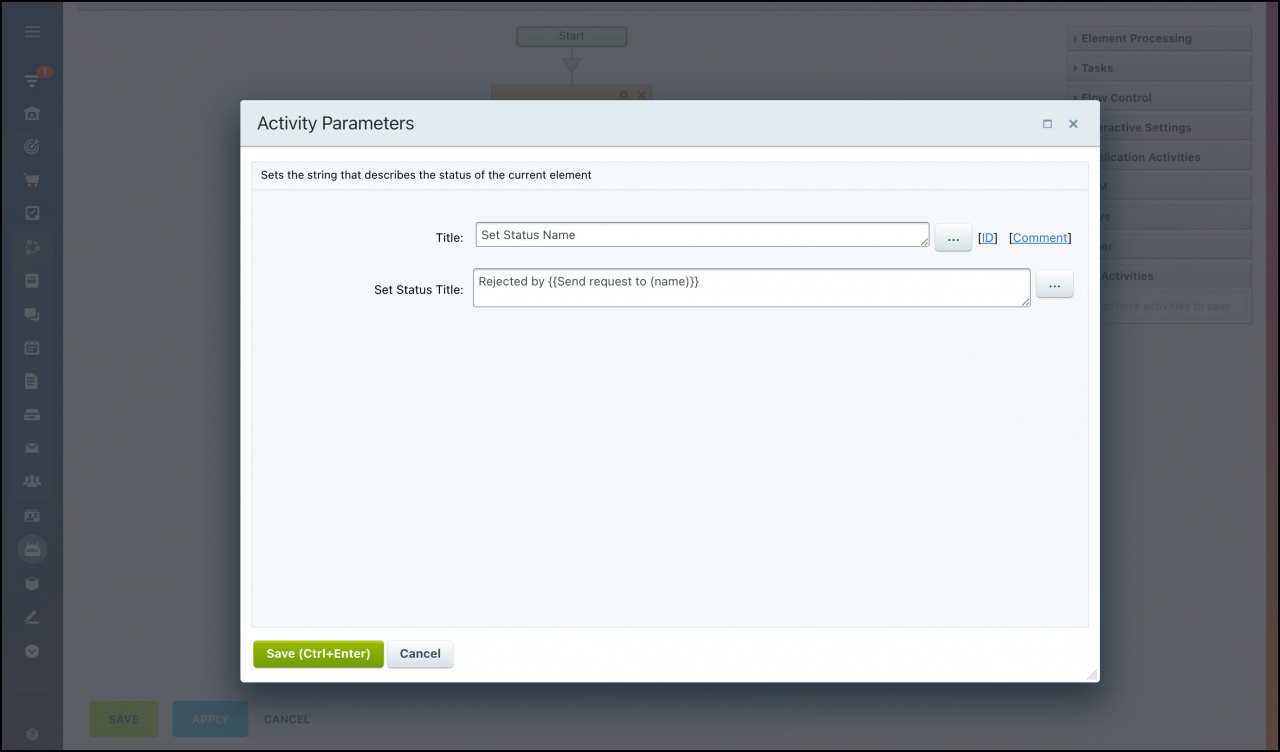
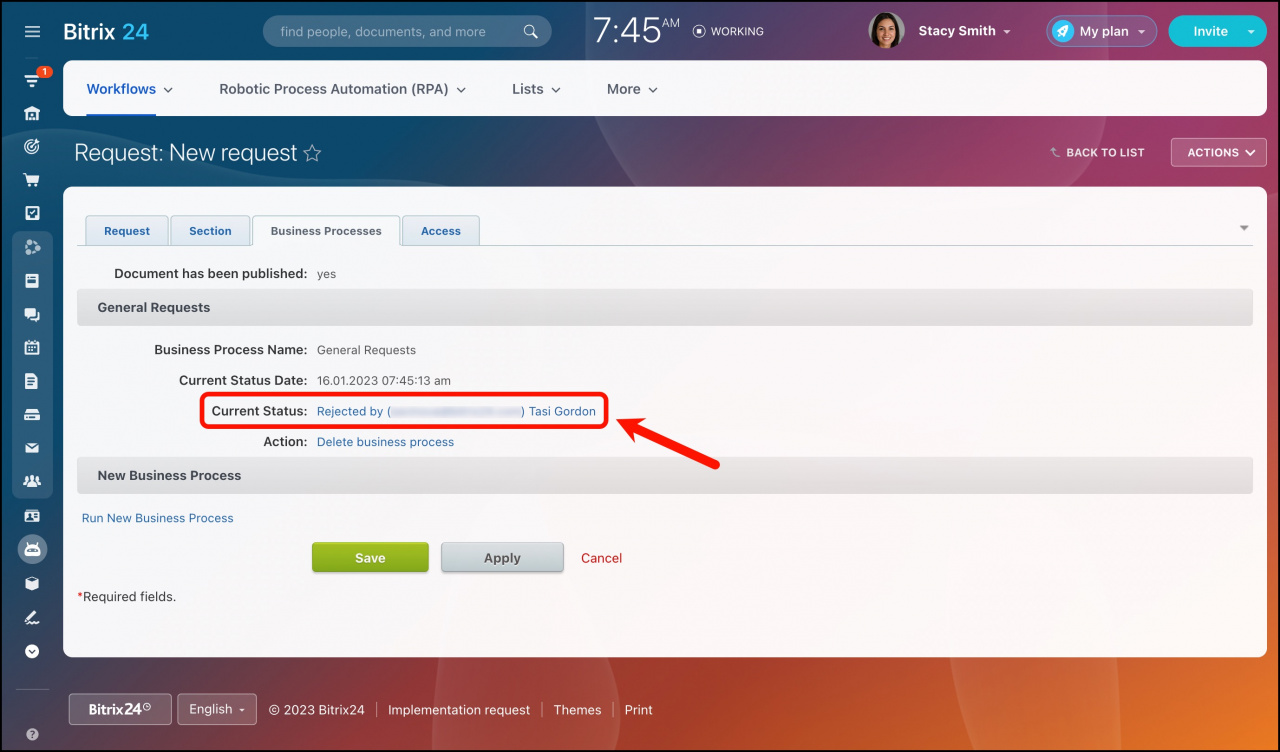
Set Status Name
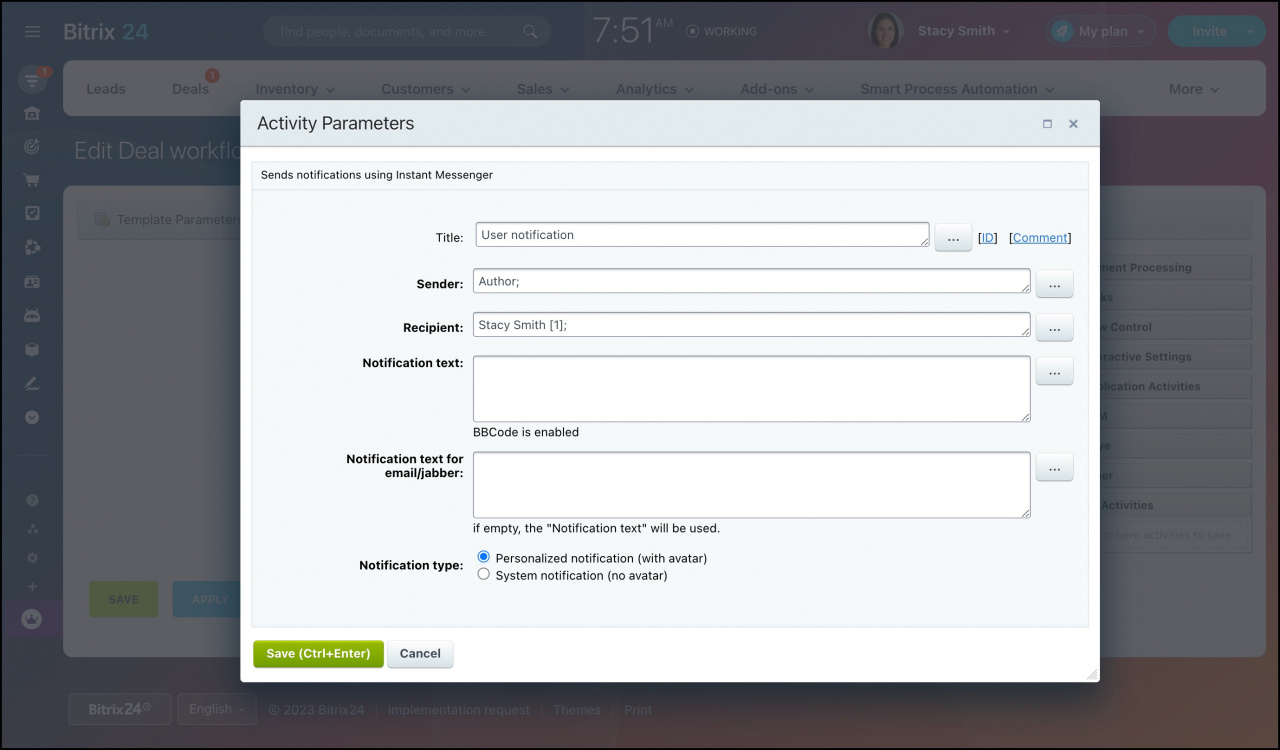
User notification
The activity sends notifications to a user. If the user is not authorized on the site, the message will be additionally sent by email.
-
Notification text: Specify the text of the notification. You can also use these BBCode tags:
[b],[i],[s],[u], and[url].
How to use BBCode tags -
Notification text for email/jabber: Set the message text for email notification to be sent if the user is not authorized on the site. If you leave this field empty, the Notification text will be used.
-
Notification type: Choose between showing the notification as a user-sent message or as a system notification.

