You can create custom fields in the warehouse detailed form. Provide additional information about your warehouses according to the needs of your business.
Create custom fields
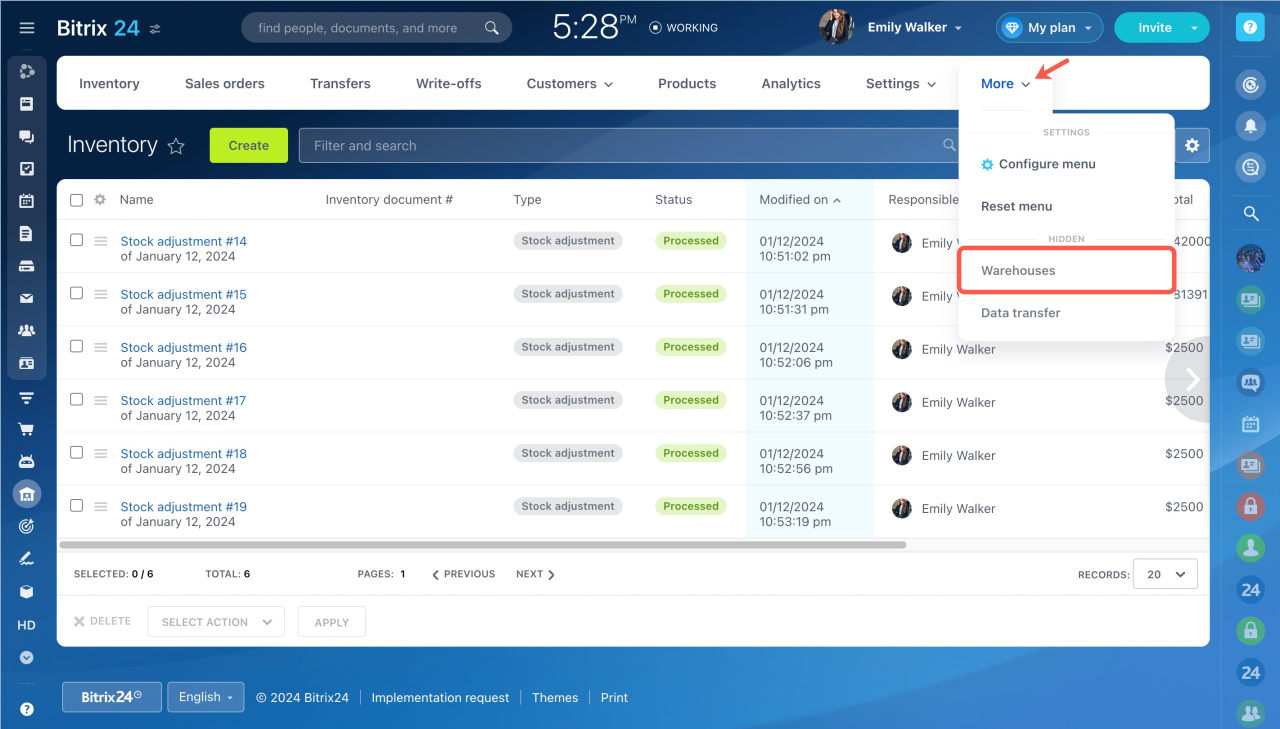
Go to Inventory management section, click More and select Warehouses.
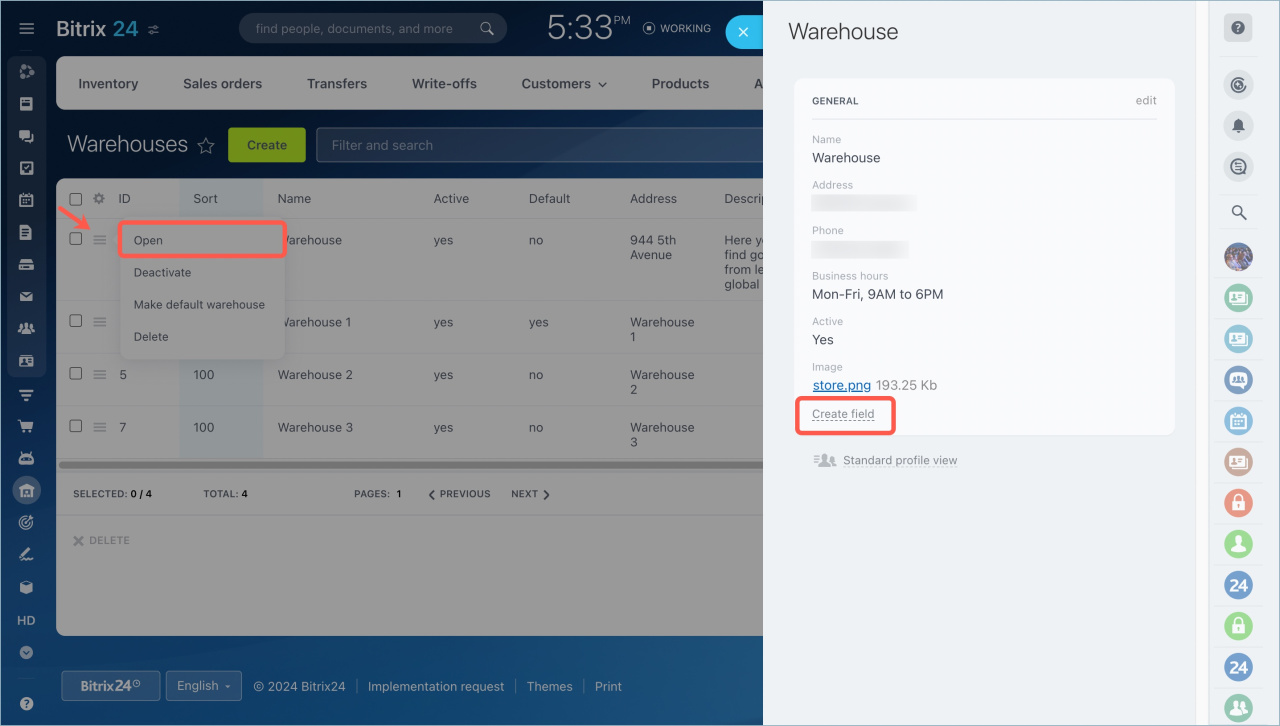
Click on the menu next to the warehouse name, open the detailed form and click Create field.
This process is no different from creating fields in deals, contacts, invoices, and smart processes.
Custom fields of invoices and smart processes
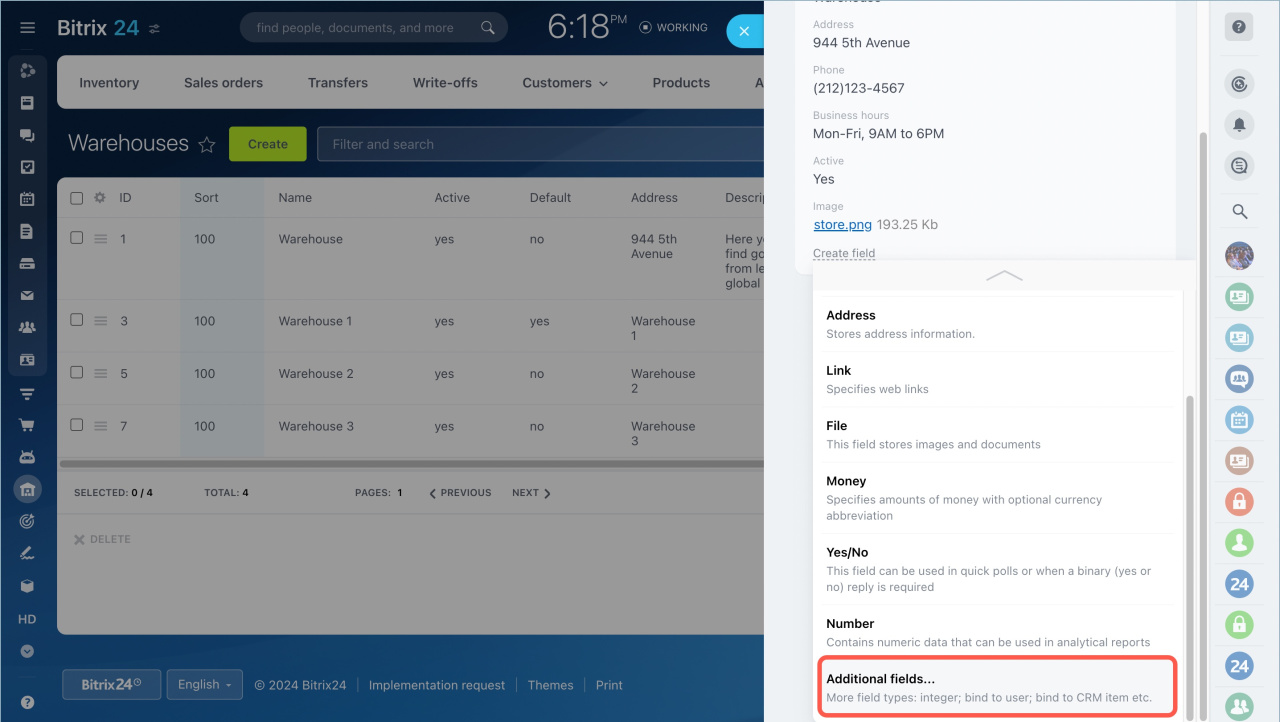
1. First, select the data type you want to write to the field:
- String - it is a regular text field.
- List - it is a list of multiple values.
- Date or Date/Time - you can specify the date and time of stock receipt.
- True/False - you can specify, for example, whether you provide the delivery of goods from the warehouse to stores.
- Address - you can specify the address of the warehouse.
- Link - give a link, for example, to the supplier's site.
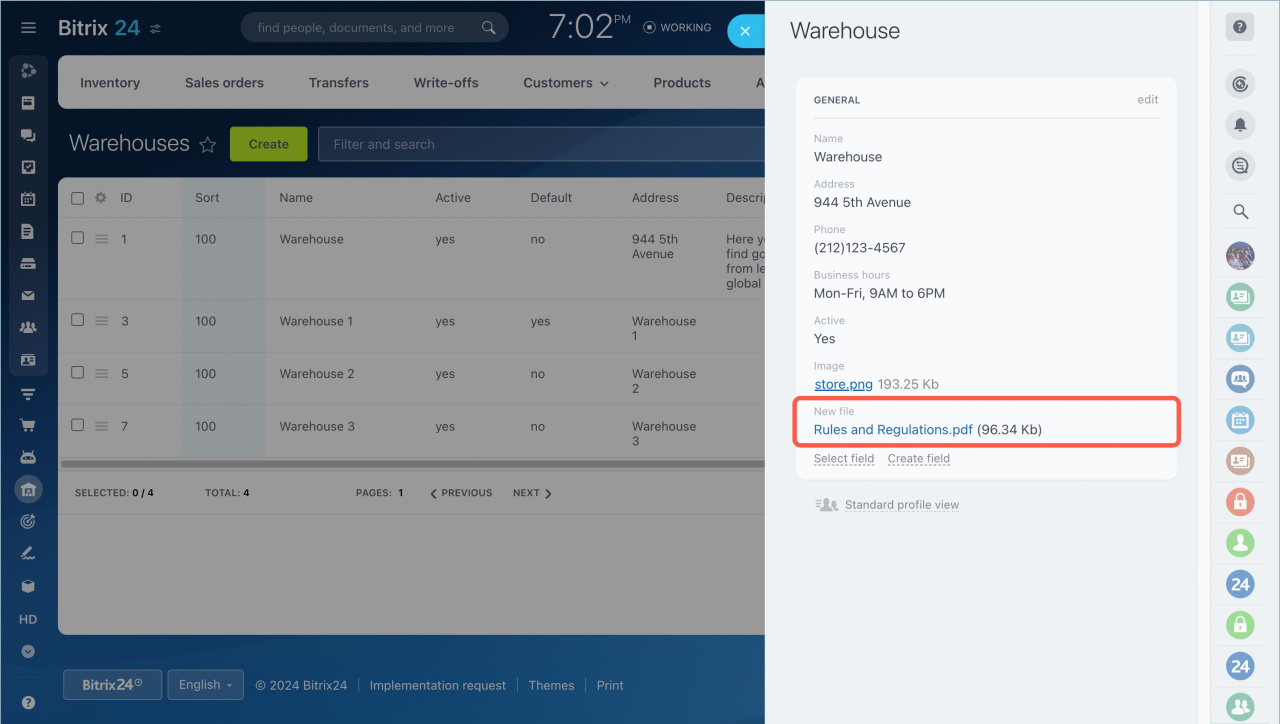
- File - you can upload any file, for example, an instruction that explains how the warehouse works.
- Money - specify a number and currency in this field.
- Yes/No - specify, for example, whether you provide the delivery of goods from the warehouse to stores.
- Integer/Number - the type of fields for numbers.
- Bind to employee - you can select an employee of your company.
- Bind to CRM items - specify a company or a contact from CRM.
- Bind to information block sections/elements - you can link the element, for example, to a specific workflow.
Click Additional fields to open the full creation form.
2. Then configure the other options in the field form:
- Name - It is displayed in the document form and in the list of fields.
- Sort - It determines the field position in the list. The smaller the number, the closer the field is to the top of the list.
- Multiple - This option means that several values can be written in the field at once. For example, phone numbers or addresses.
- Required - This option means that employees will not be able to save the warehouse detailed form if this field is empty.
- Show in filter - This option means that you can filter items by value in this field, or just display it in a list.
- Searchable - This option means that the field will be indexed for general search.
3. You can configure the language and additional settings, like input field size, default field values in the All Languages and More tabs.
When everything is done, save the settings. New field will appear in the form.
Edit and delete custom fields
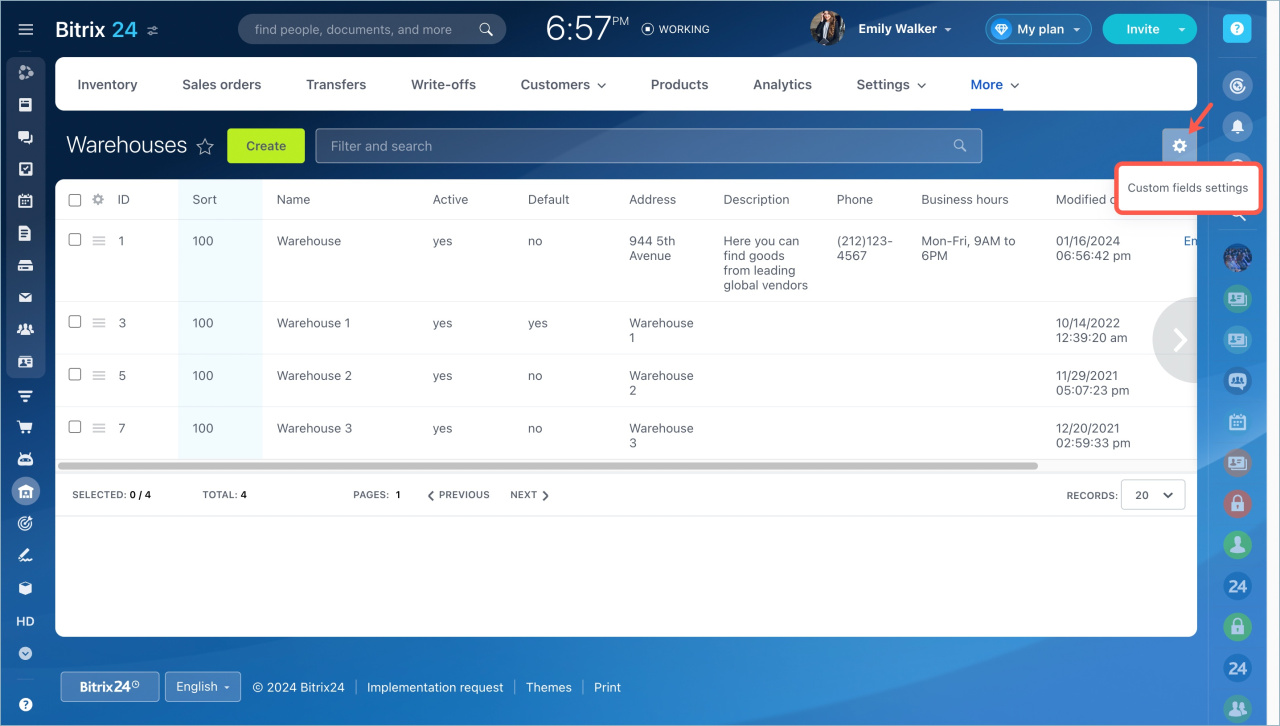
Click the gear icon on the Warehouses page and select Custom fields settings.
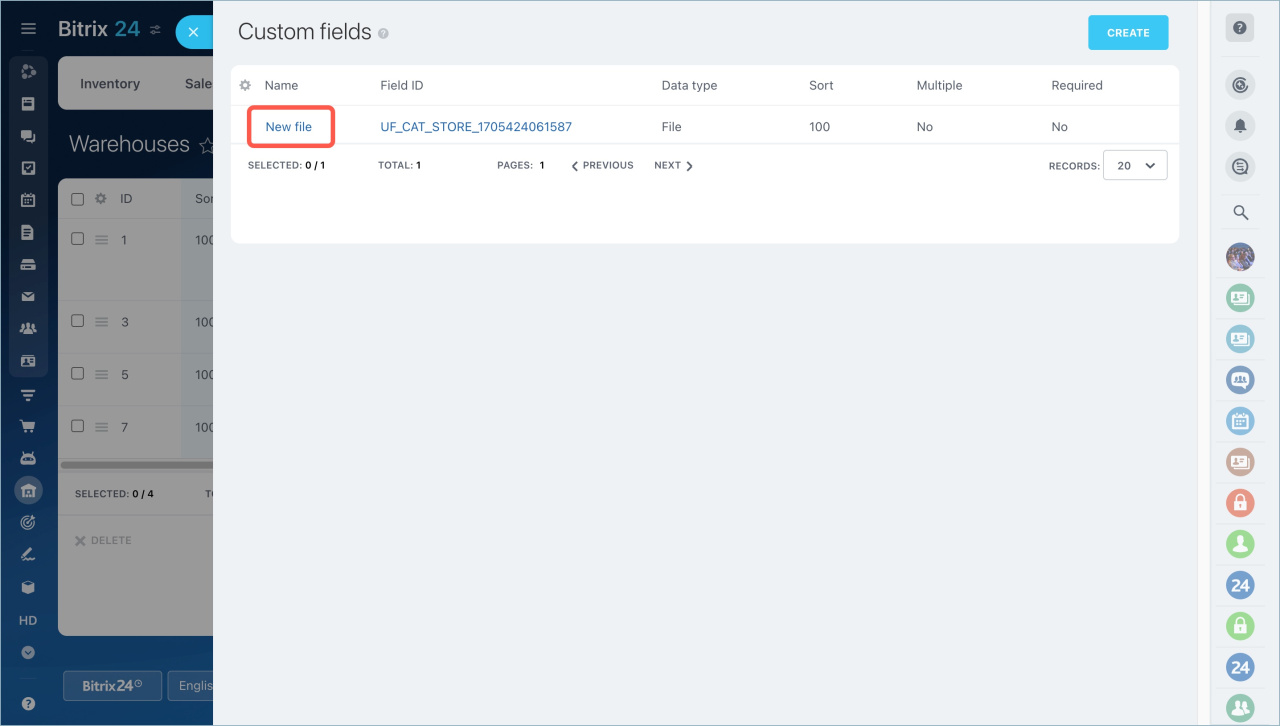
To open the field settings, click on its name.
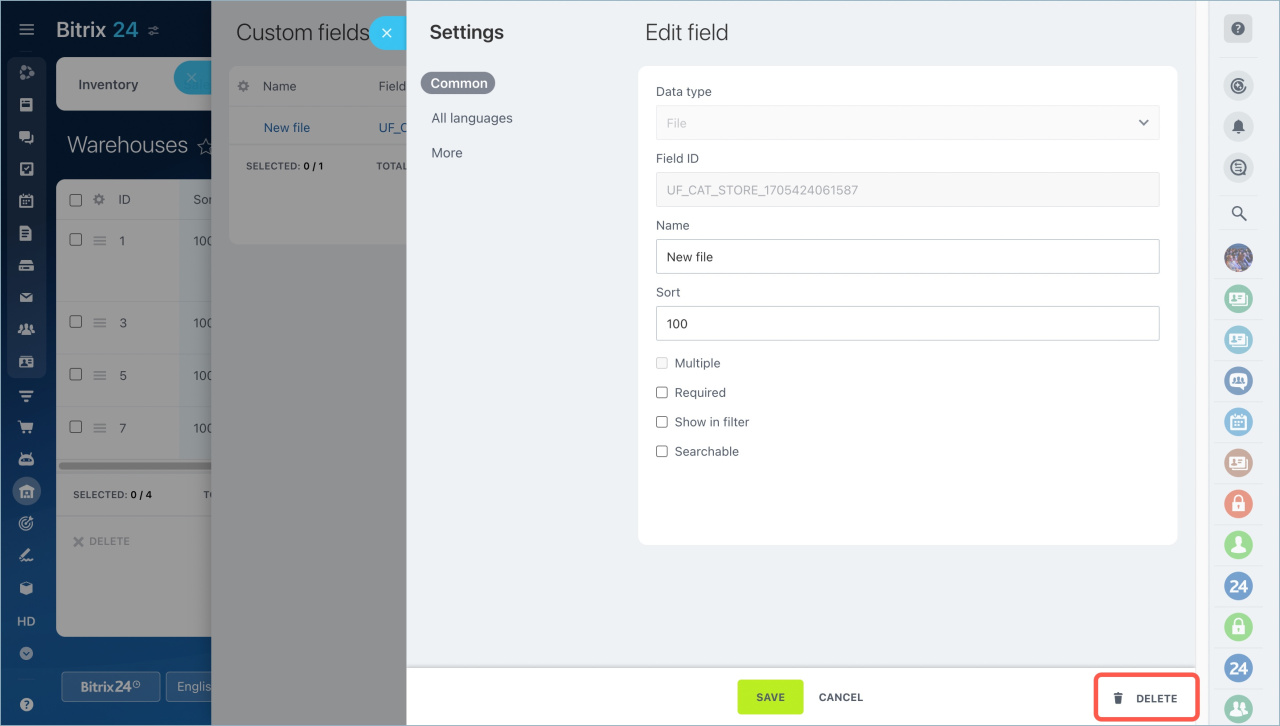
Here you can also delete the field if necessary. Just click the Delete button in the lower right corner of the page.

