Smart Process Automation is a tool that allows you to set up and automate any working scenario in CRM. For example, it can help you manage purchases or client complaints.
After you've created an SPA, set it up according to your scenario and needs.
This article describes how to customize the following areas:
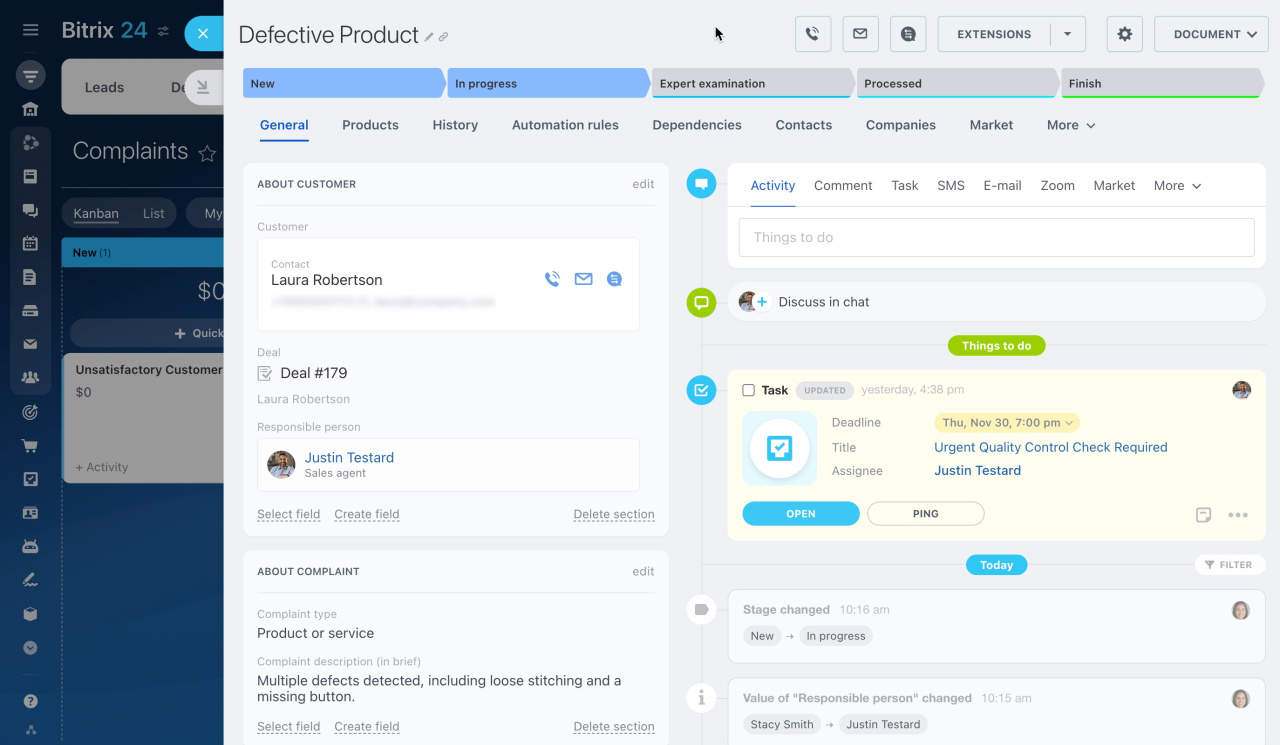
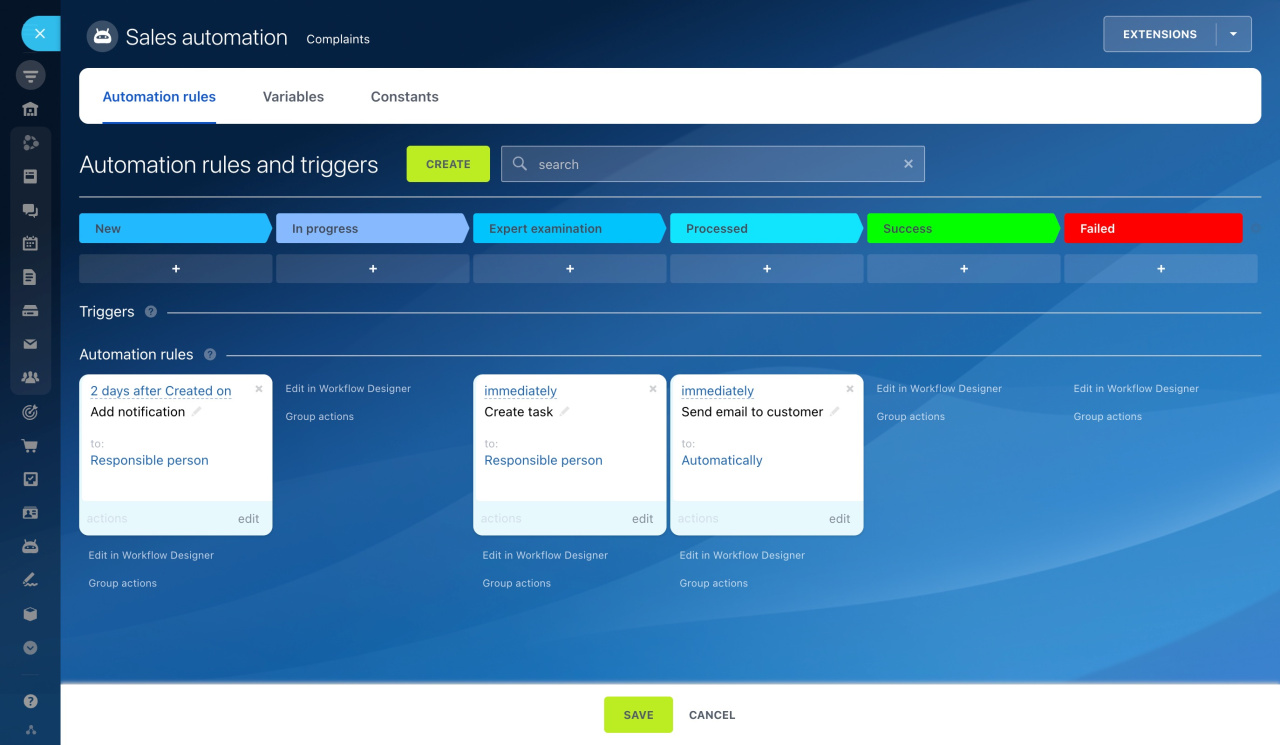
Let's look at the configuration on an example of a Smart Process Automation designed to handle complaints. It is used to process client complaints, from submission to decision. Automation rules make it easy to remind employees to contact customers and assign additional tasks.
Configure the SPA item form
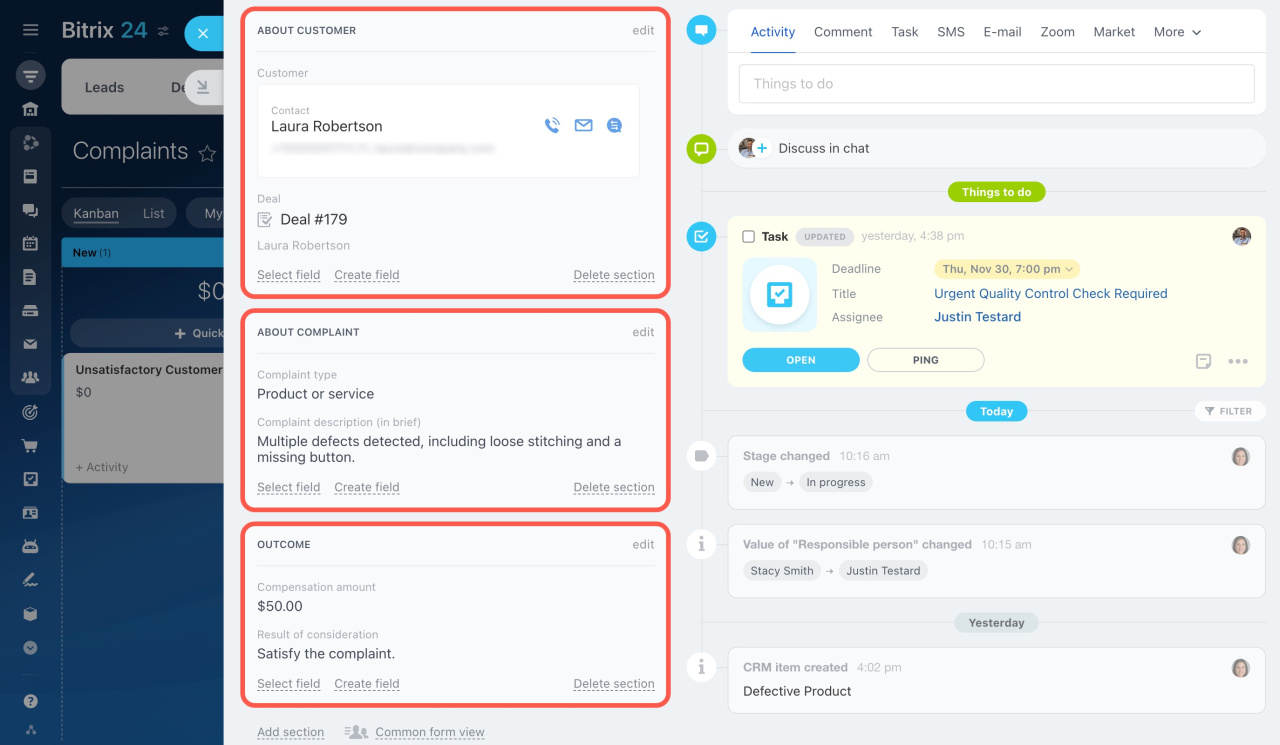
Make sure employees can easily find all the needed information by setting up the fields and sections in the SPA item form. In our example, it provides details on the customer and the complaint they left.
To create or edit fields in your Smart Process Automation,
-
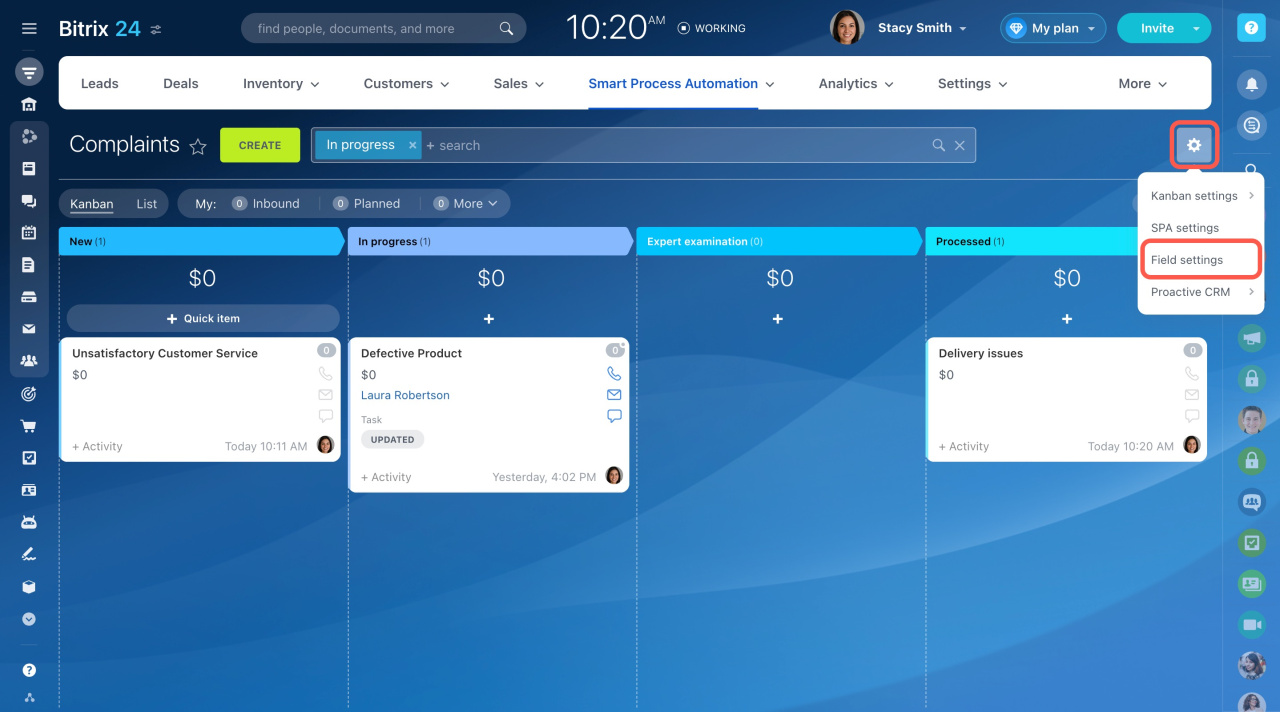
Click on the gear button (⚙️) in the Kanban or List view and select Field settings.
-
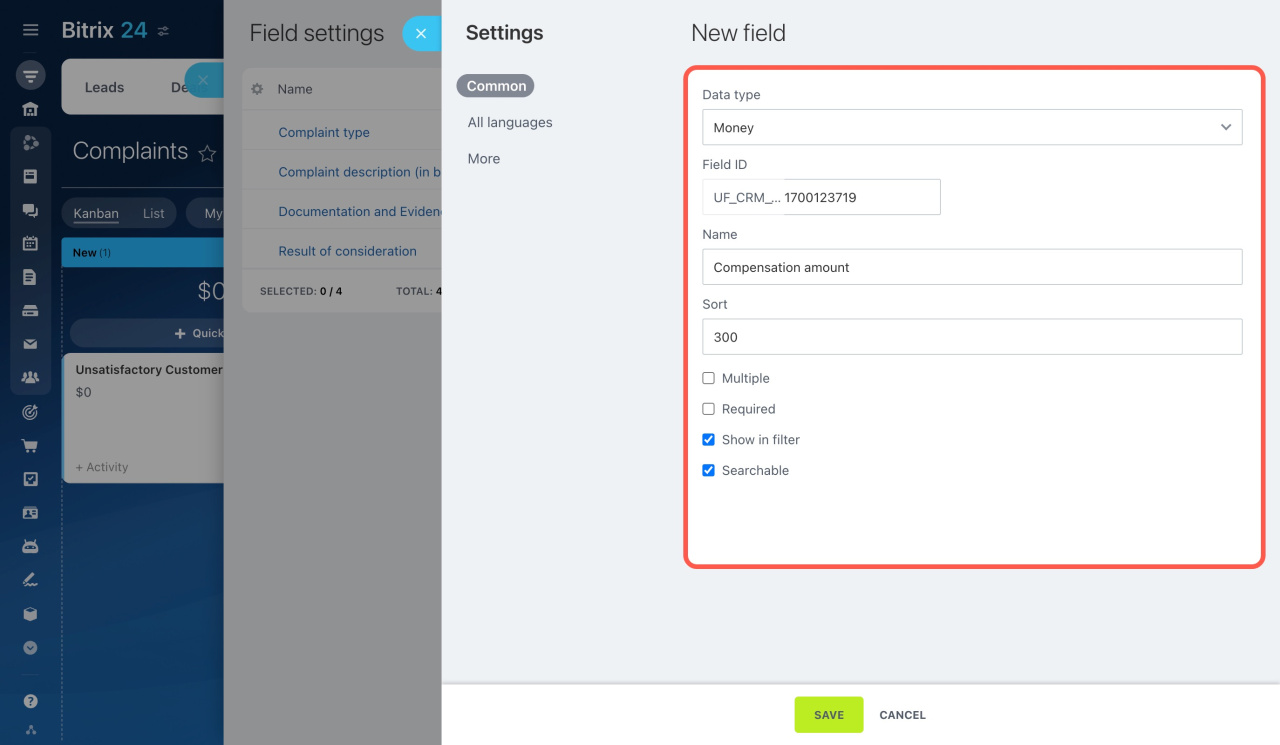
Create the fields you need to implement your scenario. To edit a field, open it from the list and make changes.
-
Select the field type, enter the name, and configure the additional parameters.
Learn more about custom fields of invoices and smart processes
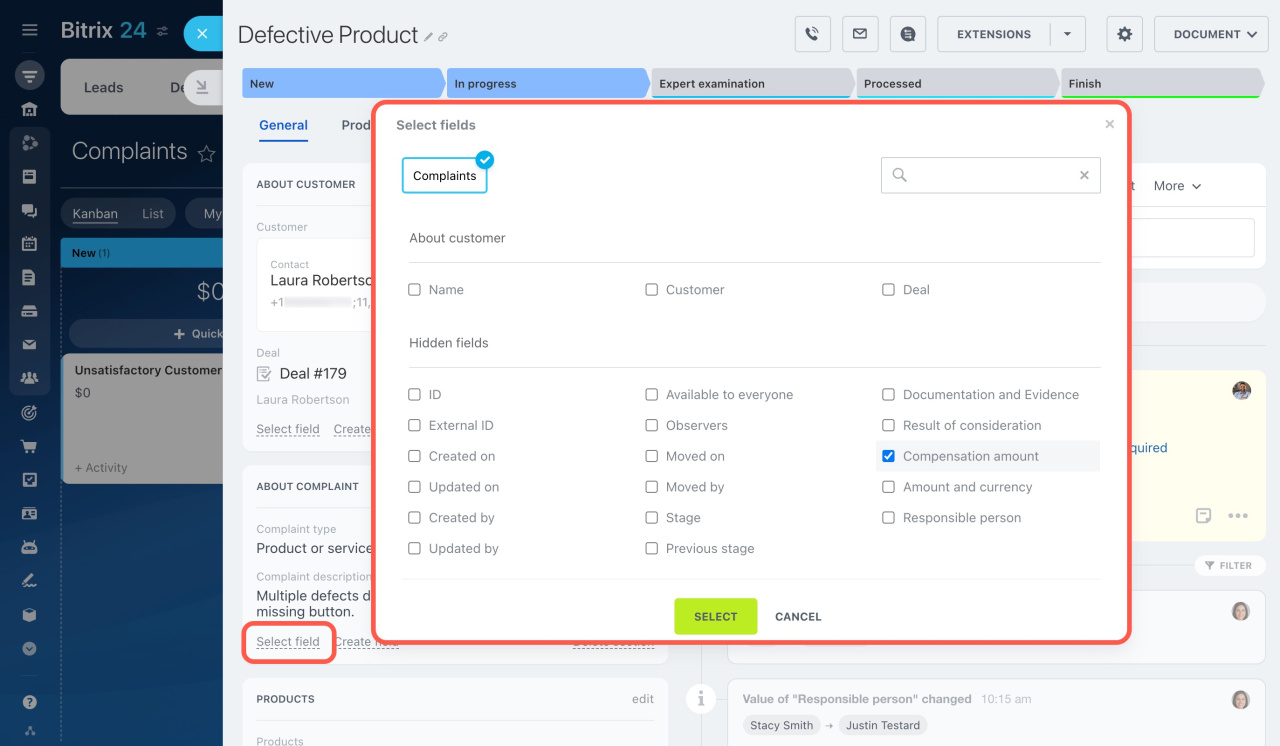
Once you've created the needed fields, add them to the SPA item form.
- Open an item form and click Select field.
- Tick the needed fields.
- Click Select at the bottom.
Learn more about an item form settings
Arrange the fields for employees to fill them out when adding a new item. In addition, you can create multiple sections to group the fields.
Configure the Kanban and List views
There are two views available when working with SPA items: Kanban and List. Discover the settings for each view by switching between the tabs below.
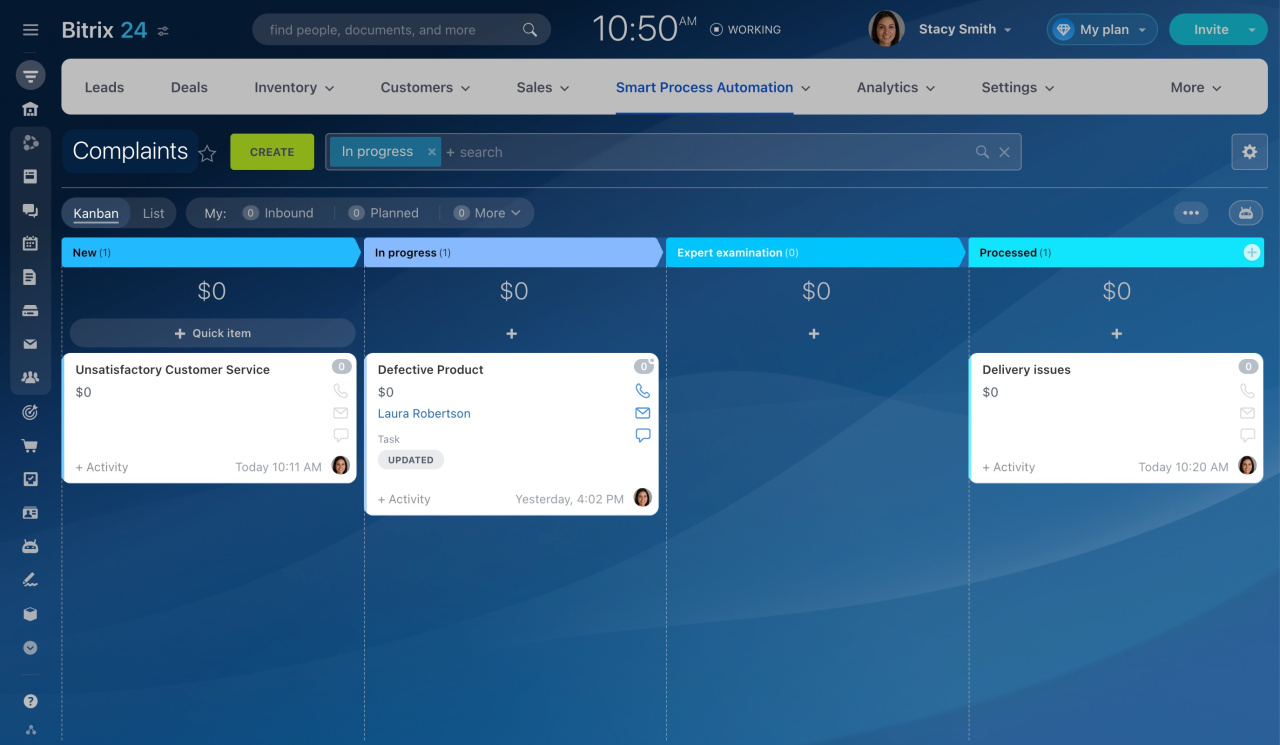
Use custom stages in your SPA to control items traveling across them in the kanban. This also helps you evaluate the workload as you see the number of items at each stage.
Set up the automation
Add automation rules and triggers to any stage to create tasks, send notifications and emails, and so on.
Learn how to create automation rules and triggers
Configure the view form
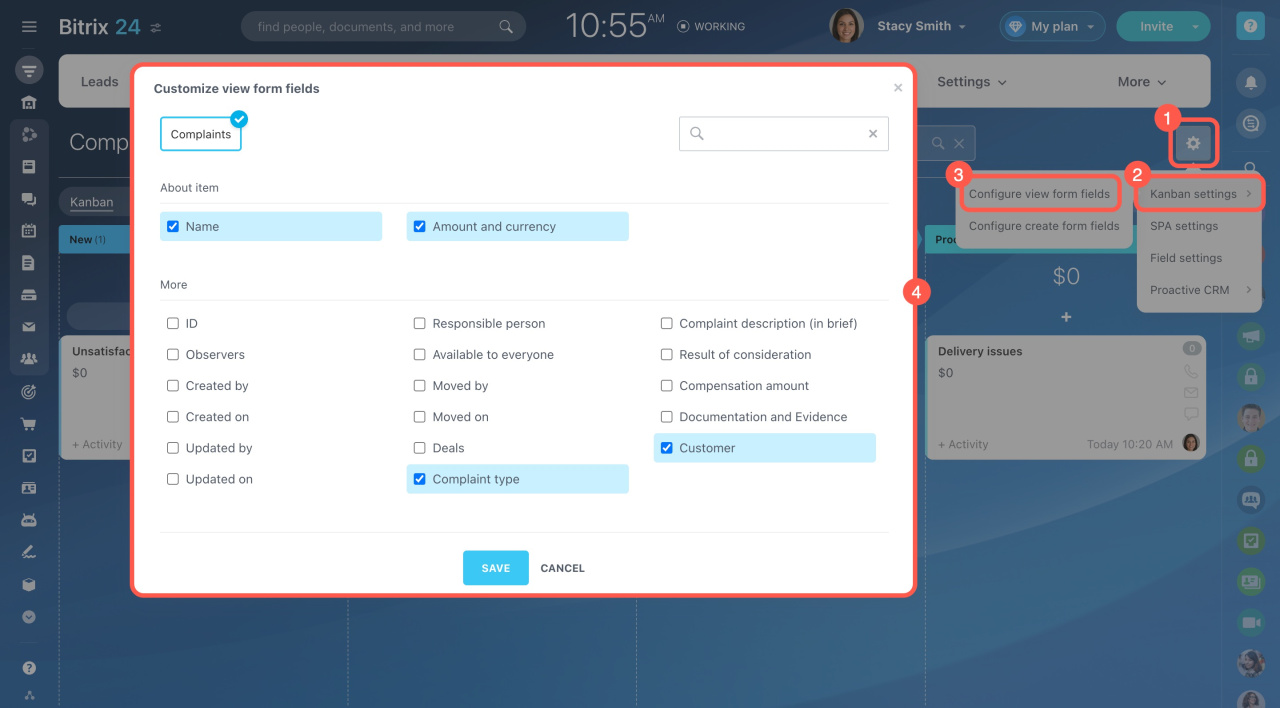
Select which fields to display in the kanban and keep track of the important information by editing the view form. Each employee can set it up on their own.
- Click the gear button (⚙️) in the top right corner.
- Open Kanban settings.
- Select Configure view form fields.
- Tick the needed fields and save the changes.
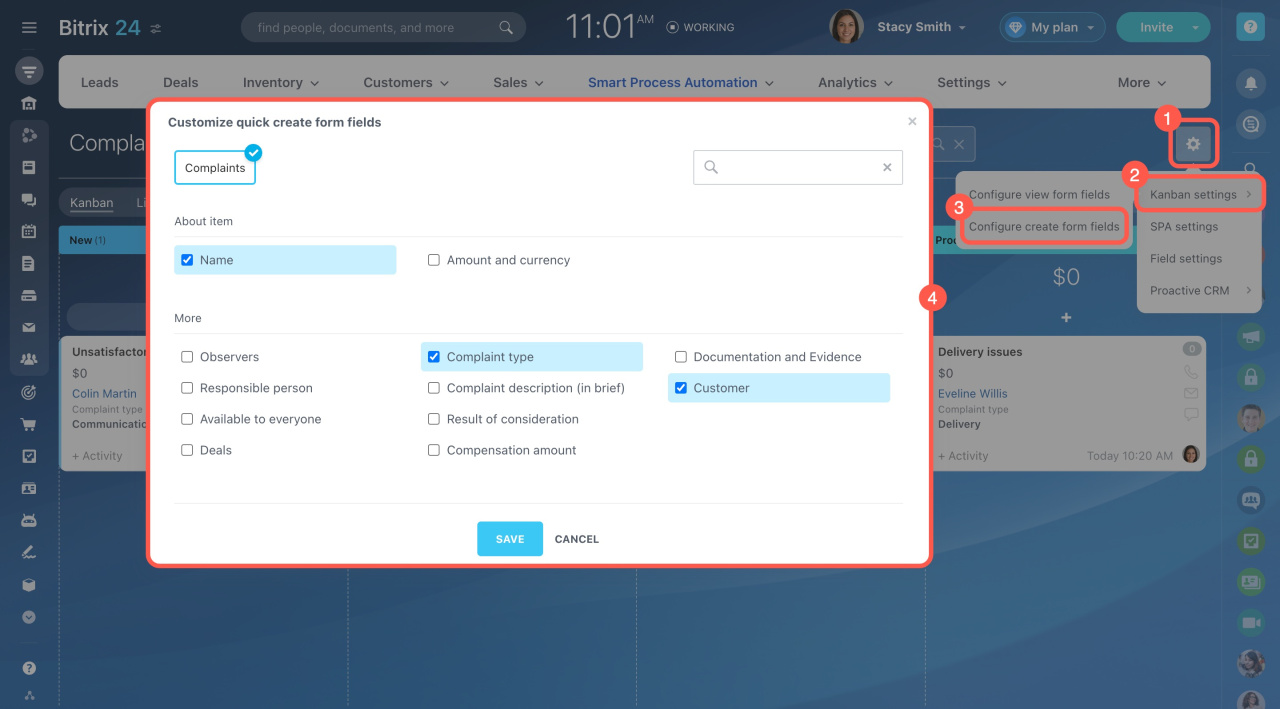
Configure the quick create form
You can create SPA items directly in the kanban. Choose which fields should be filled in immediately when creating, and which ones later.
- Click the gear button (⚙️) in the top right corner.
- Open Kanban settings.
- Select Configure create form fields.
- Tick the needed fields and save the changes.
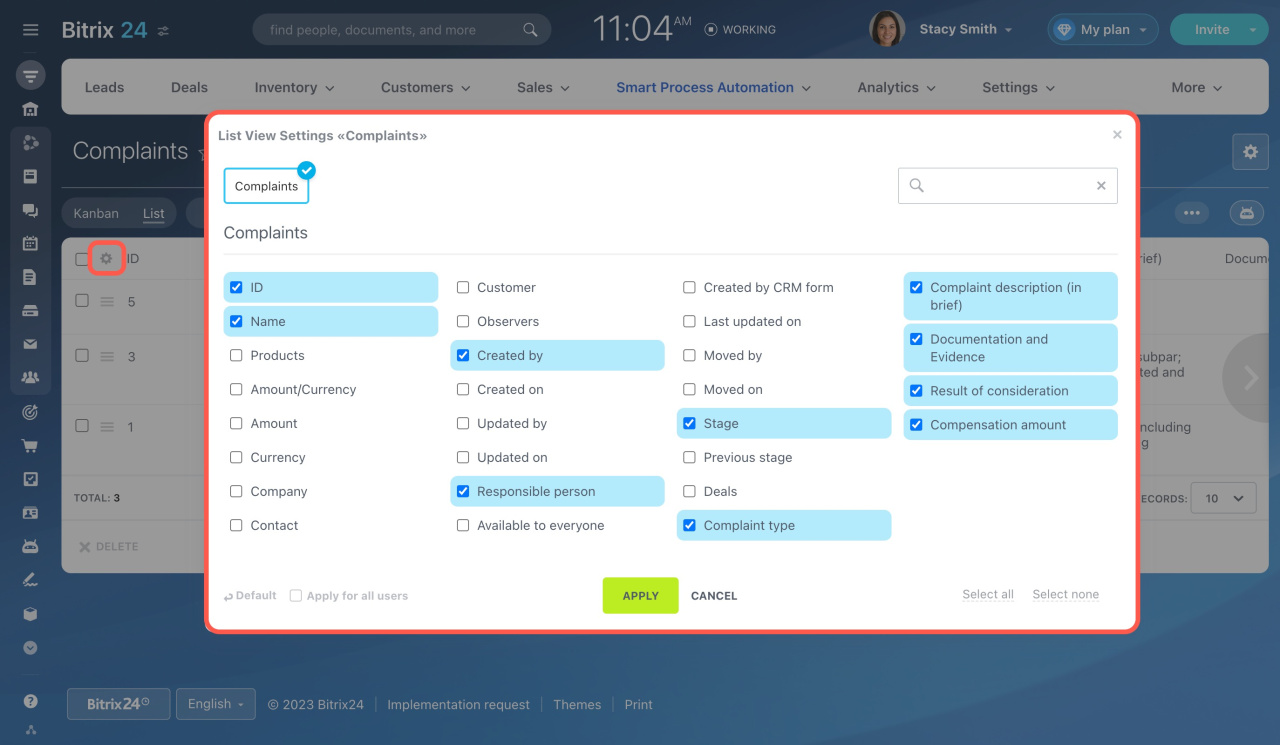
Decide which columns to display in the List view and adjust the settings.
- Click the gear button (⚙️) in the top left corner.
- Tick the needed fields from the list.
- Click Apply at the bottom.
Rearrange columns effortlessly by clicking on a column title and dragging it to the desired location.
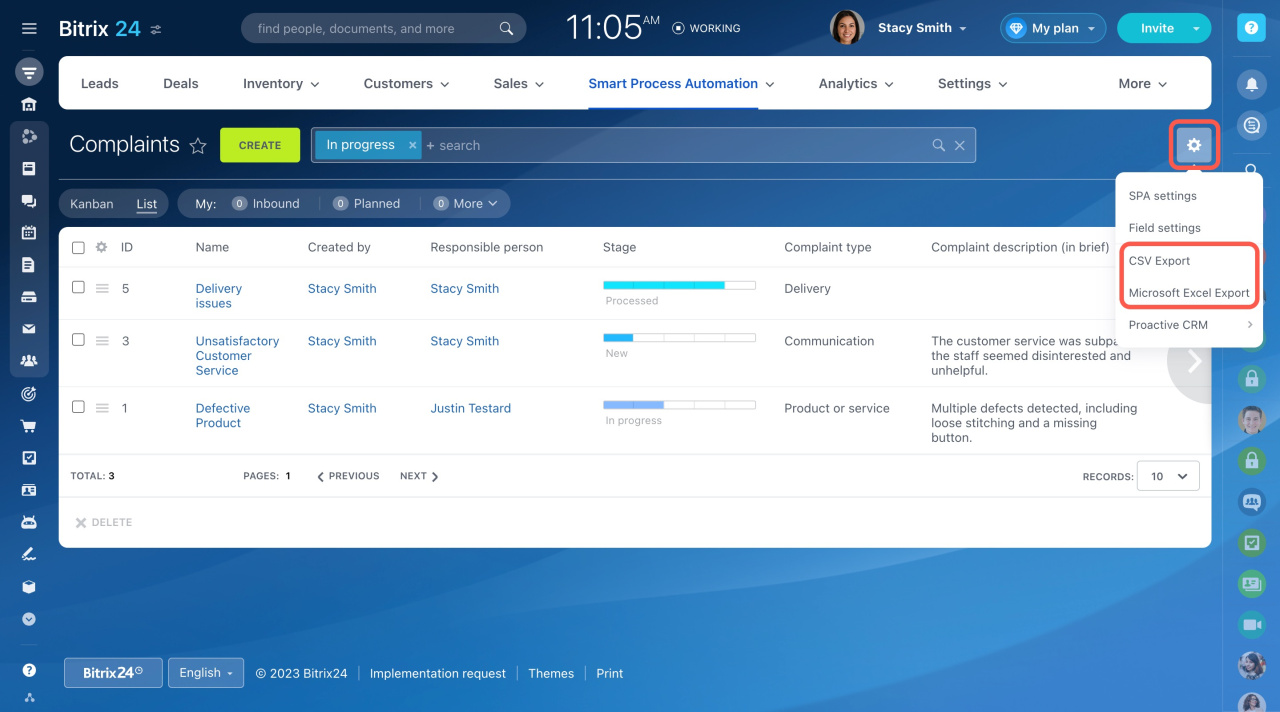
To export a list of your SPA items, click the gear button (⚙️) in the top right corner and select CSV Export or Microsoft Excel Export.
Configure SPA access permissions
Grant access to your SPA for selected employees by editing access permissions in CRM.
- Go to CRM > Settings > Access permissions > CRM.
- Select a role on the right to adjust the settings.
- Specify which actions will be available for users with this role.
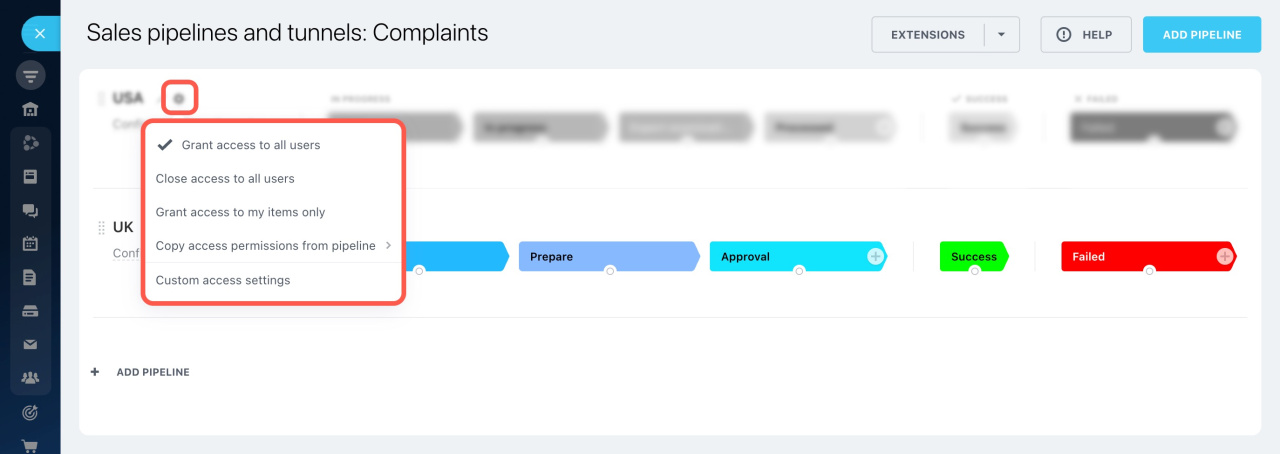
If you use custom pipelines and sales funnels in your Smart Process Automation, manage access to them under the pipeline settings.
In brief
-
After you've created an SPA, set it up according to your scenario and needs.
-
Make sure employees can easily find all the needed information by setting up the fields and sections in the SPA item form.
-
Create custom stages in your SPA to control items traveling across them in the kanban. Configure the quick creation and view forms for your convenience.
-
Add automation rules and triggers to any stage to create tasks, send notifications, copy an item to another SPA, and so on.
-
Grant access to your SPA for selected employees by configuring access permissions in CRM.

