In brief
-
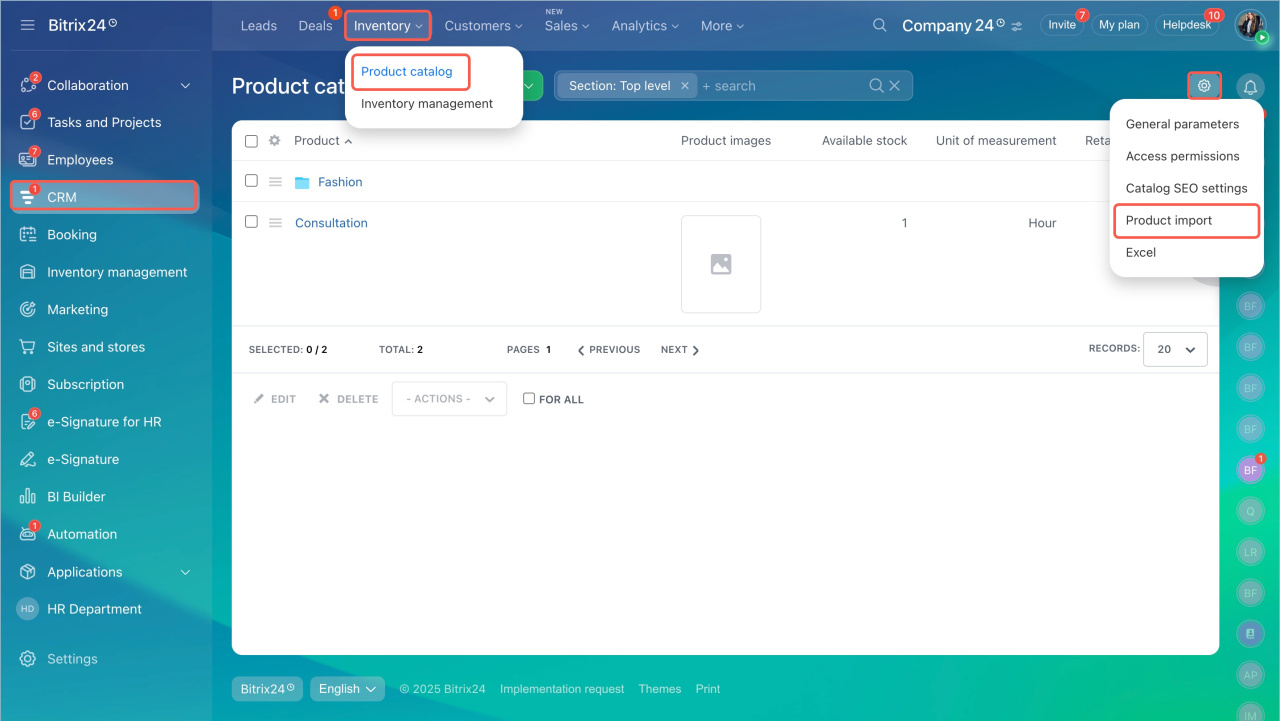
Go to CRM > Inventory > Product catalog.
-
Open Settings (⚙️) and select Import products.
-
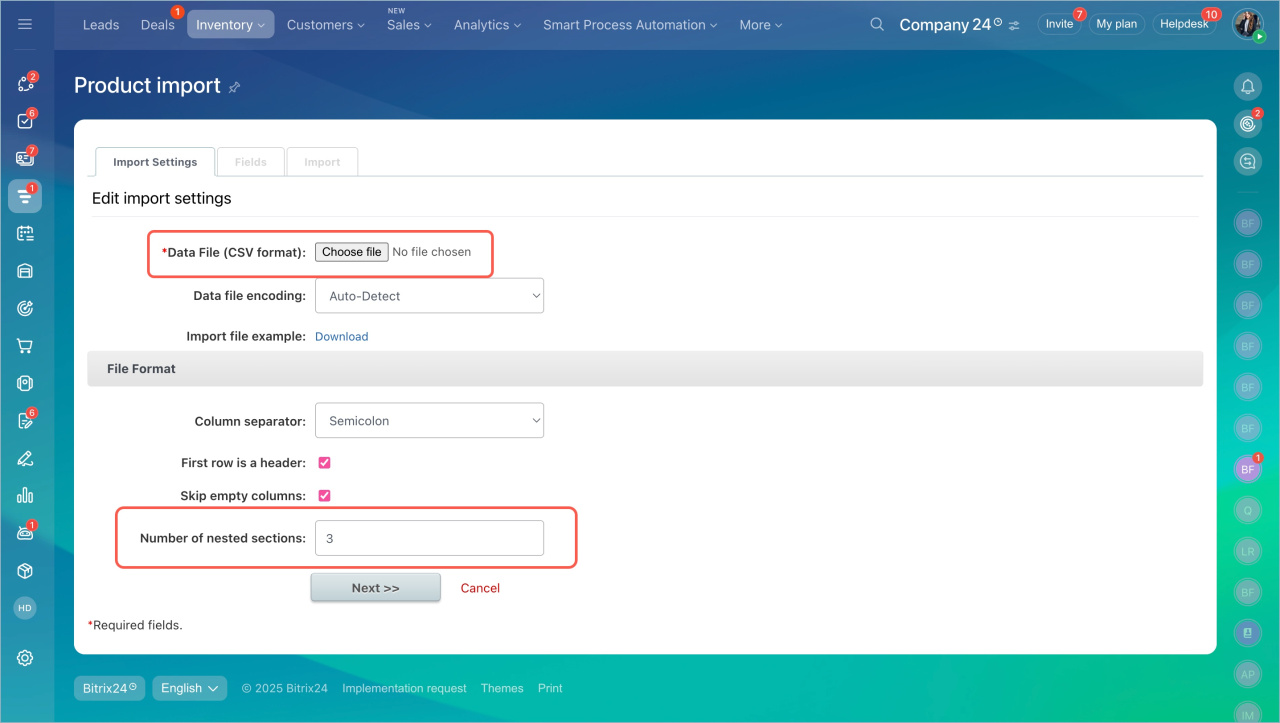
In the Edit import settings section, download the import file template and fill it in.
-
Upload your CSV file to Bitrix24.
-
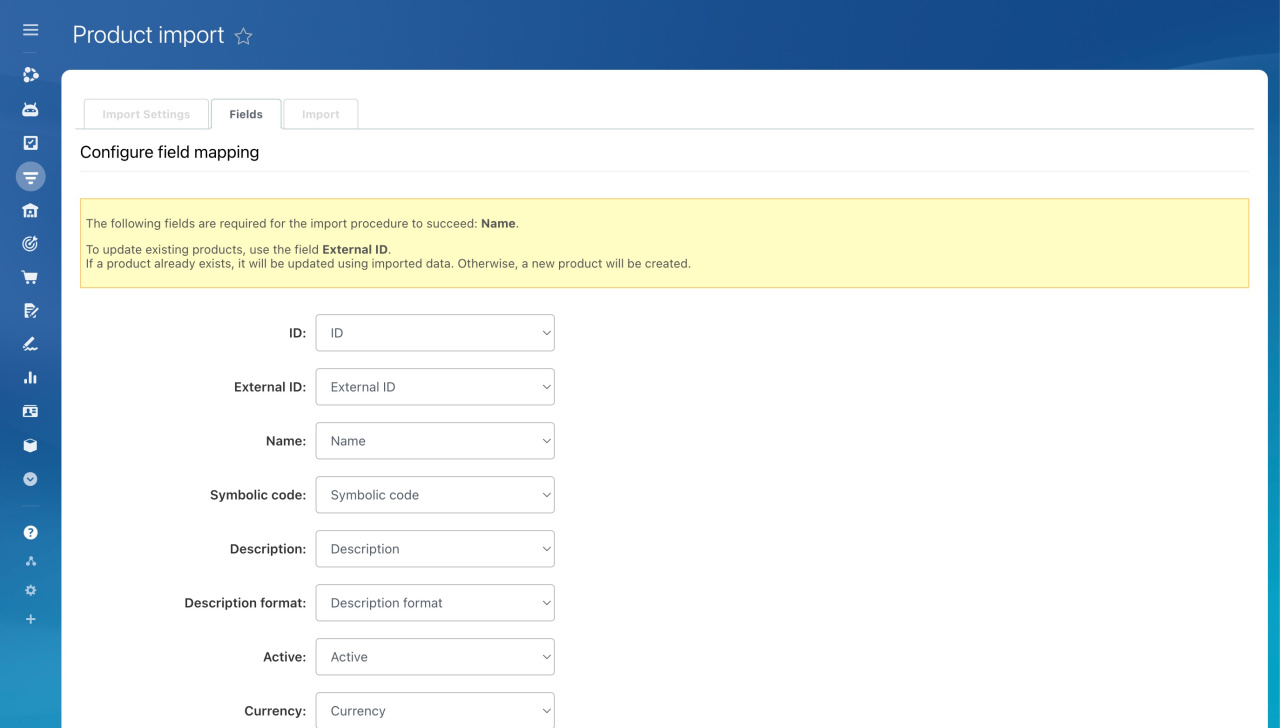
Ensure fields from the import file match the fields in Bitrix24. For example, the Name field in the import file should map to the same field in the product form.
-
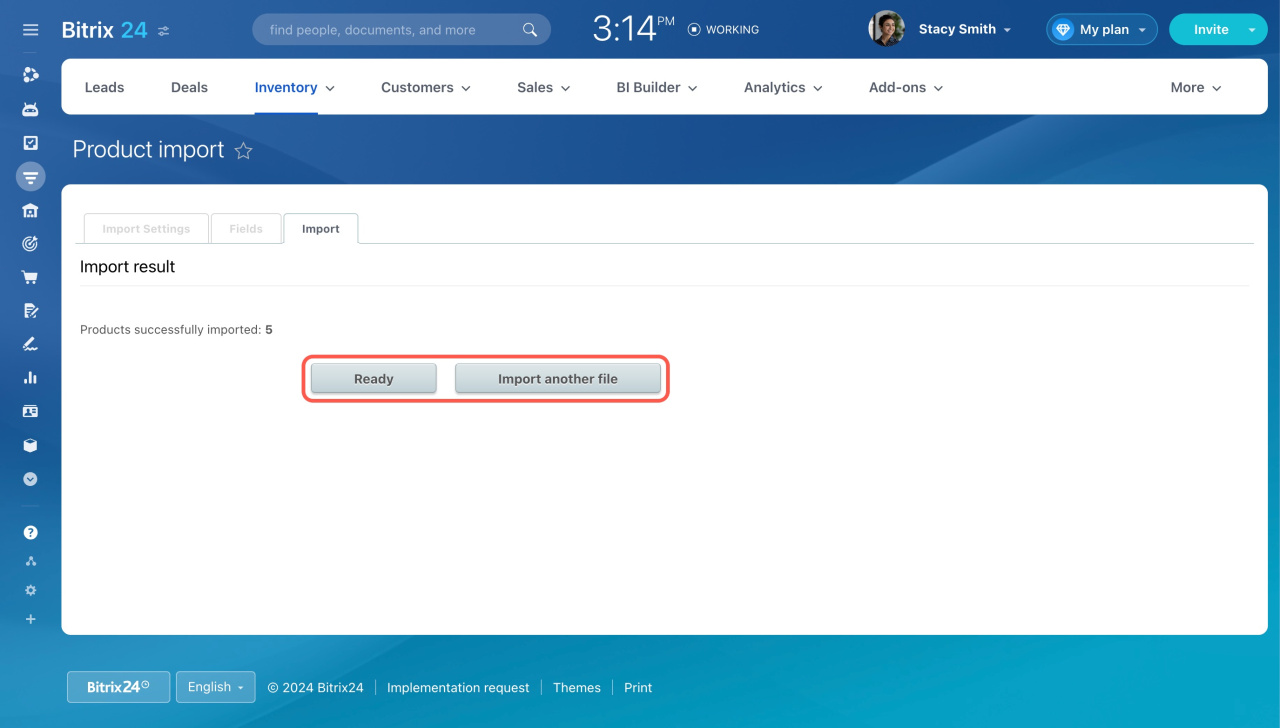
To finish the import, click Ready. To upload another file, click Import another file.
In detail
Product import involves uploading a list of products to Bitrix24. With import, you can:
-
Fill out the product catalog: Ideal for when you're just starting with Bitrix24 or introducing a new product line.
-
Update product information: Useful for when products are already in the catalog, but you need to update details like price, description, or manufacturer.
Update products by importing CSV file
Access permissions to import products
You can only import products without variants.
Working with the product variants
Go to CRM > Inventory > Product catalog > Settings (⚙️) > Import products.
The import process involves several steps:
1. Download the import file template. This is a CSV file containing all the fields from the product form.
How to add product properties
2. Fill in the import file. Enter the information you want to import.
For multiple values in one product field, list each value on a separate line with the same product ID.
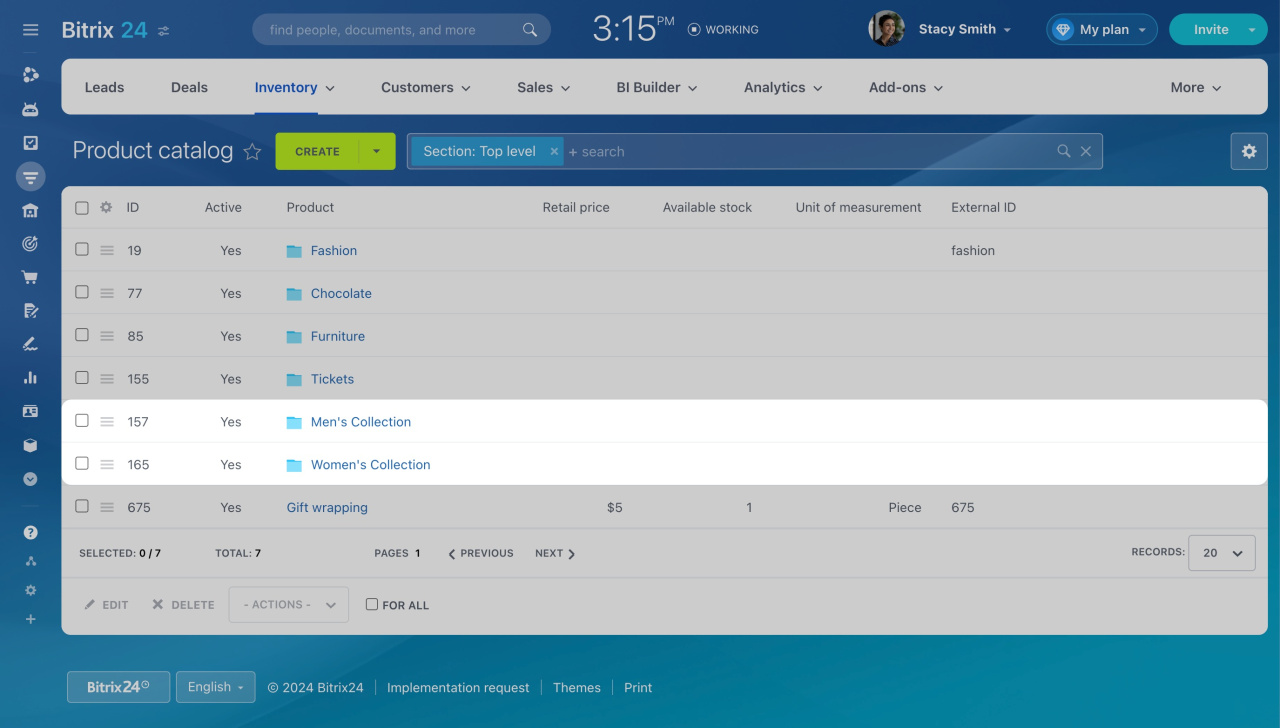
You can organize product imports by sections, grouping them in the catalog. For example, in a clothing store, top-level sections might be men's and women's clothing, with additional sections like outerwear, shoes, or accessories.
Fill in the Section columns in the import file to create any number of section levels.
For custom fields of the Money type, use the format 100|USD, where 100 is the amount and USD is the currency.
3. Upload the import file to Bitrix24. The file must be in CSV format.
If importing with sections, specify the number of section levels.
4. Check the field mapping. Ensure fields from the import file match the fields in Bitrix24. For example, the Name field in the import file should map to the same field in the product form.
5. Wait for the data to load. The more products you import, the longer this process may take.
To finish the import, click Ready. To upload another file, click Import another file.
After importing, you'll see new sections with the imported products in the catalog.
Read also:

