Triggers are tools that simplify customer interactions and automate routine tasks. They track customer actions and changes in CRM, like email link clicks, incoming calls, invoice payments, and more. When a specific action occurs, the trigger moves a CRM item to its designated stage.
Bitrix24 pricing and plans
You can set up triggers in:
- Leads
- Deals
- Estimates
- Invoices
- SPAs
Add a trigger
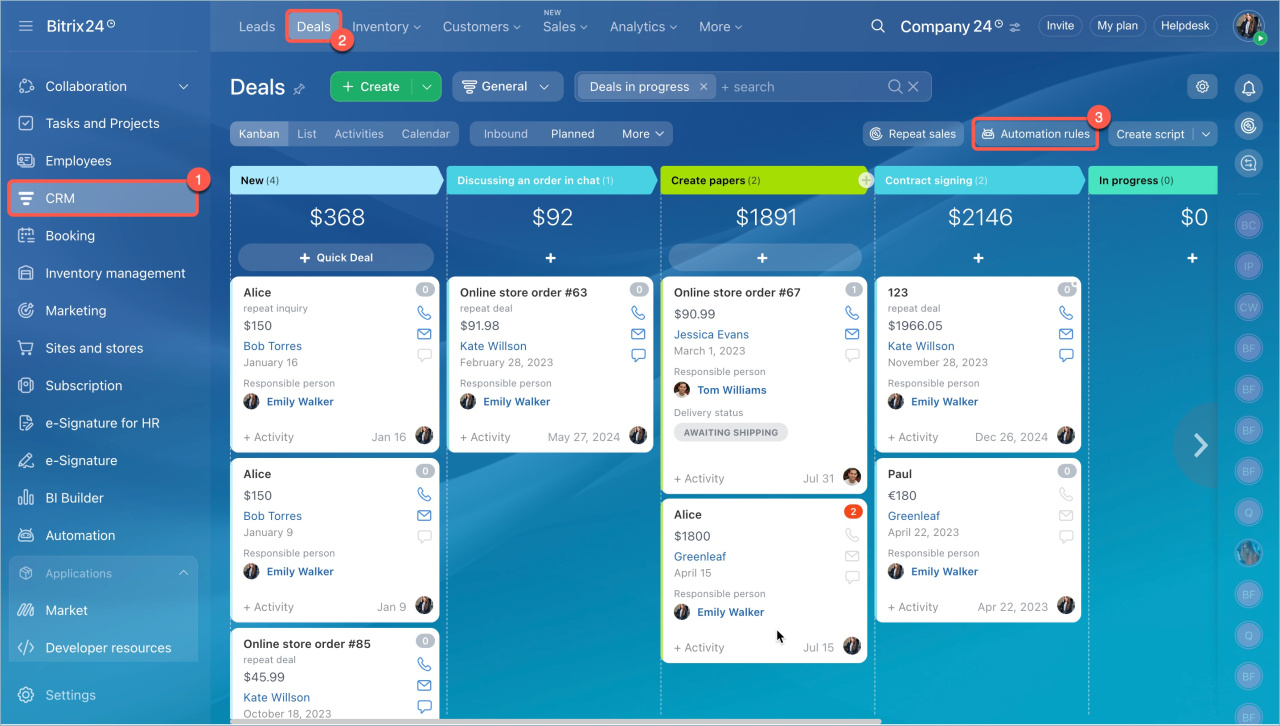
- Go to CRM.
- Select the item type, like Leads or Deals.
- Open the Automation rules section.
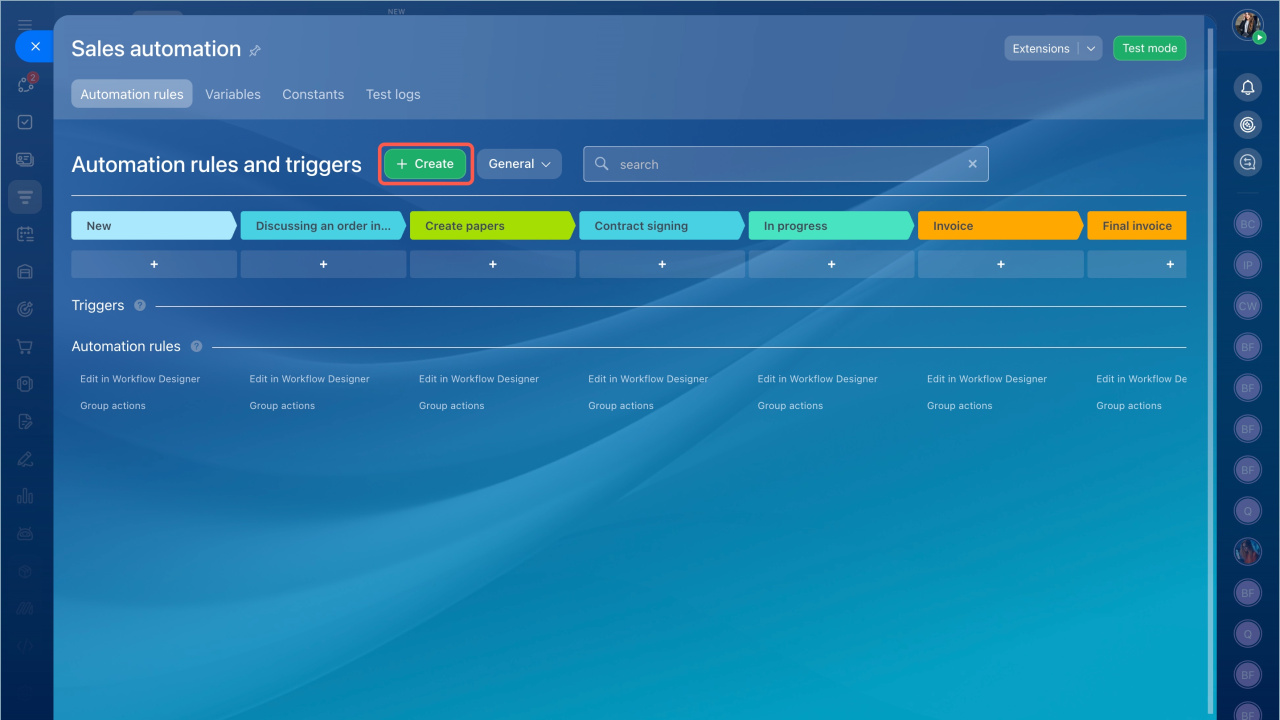
- Click Create.
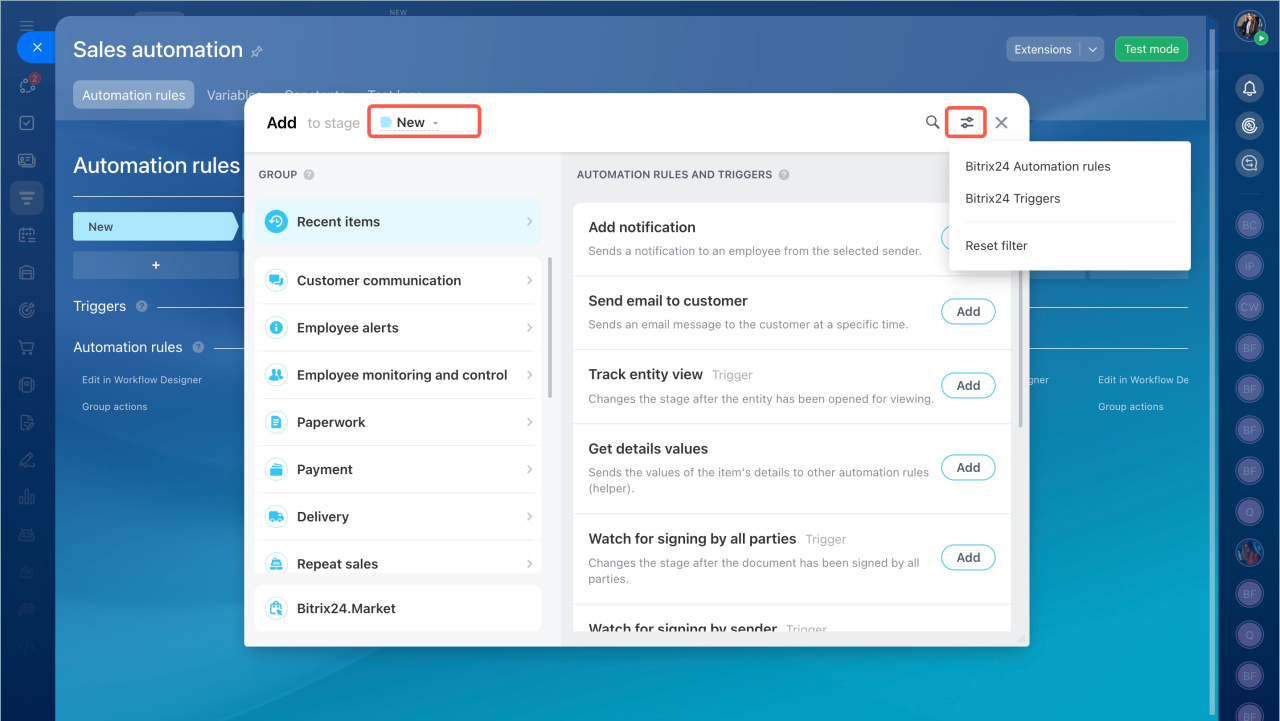
- Choose the stage where you want a trigger to appear.
- Click the Filter icon.
- Select Bitrix24 Triggers to show only triggers. They're grouped by the task they solve, like customer communication, paperwork, and more.
- Click Add next to the trigger. To add multiple triggers at once, hold the Ctrl (Cmd on Mac) key and select the ones you need.
Configure a trigger
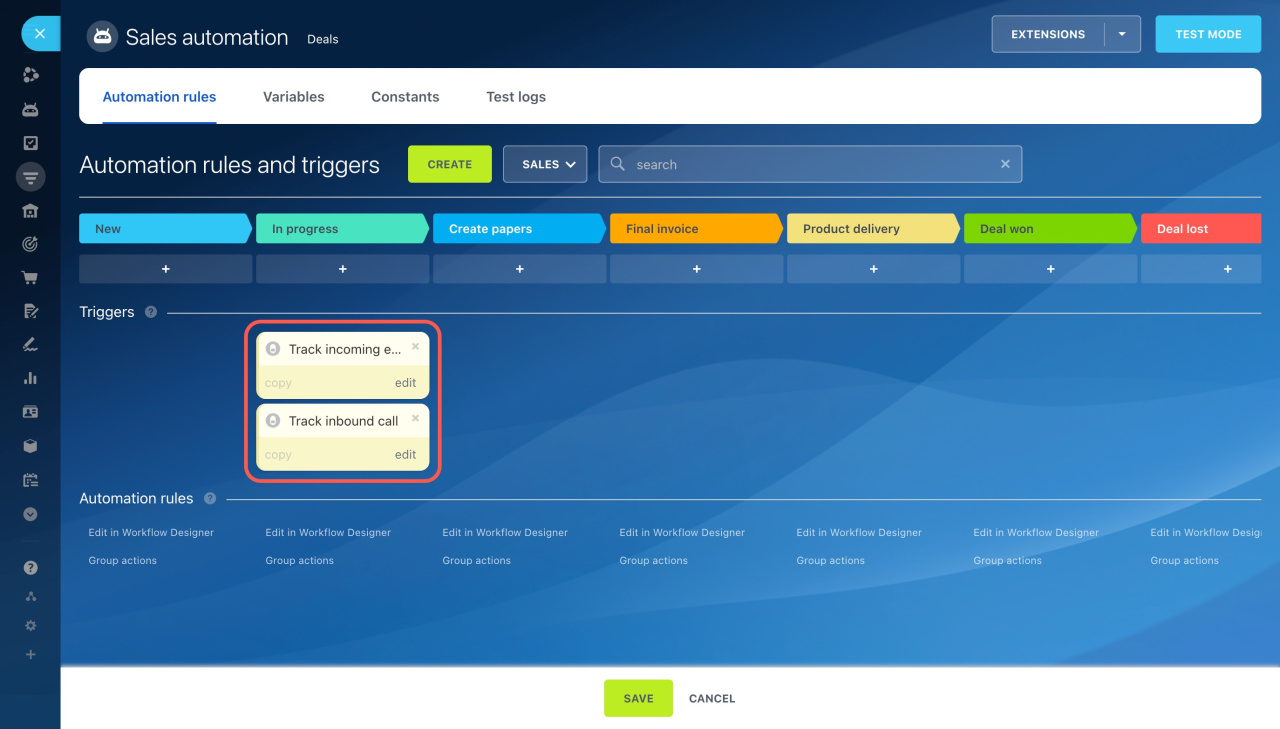
After adding a trigger, you'll need to configure it. If you've added multiple triggers, they'll be highlighted in yellow. Configure each trigger individually.
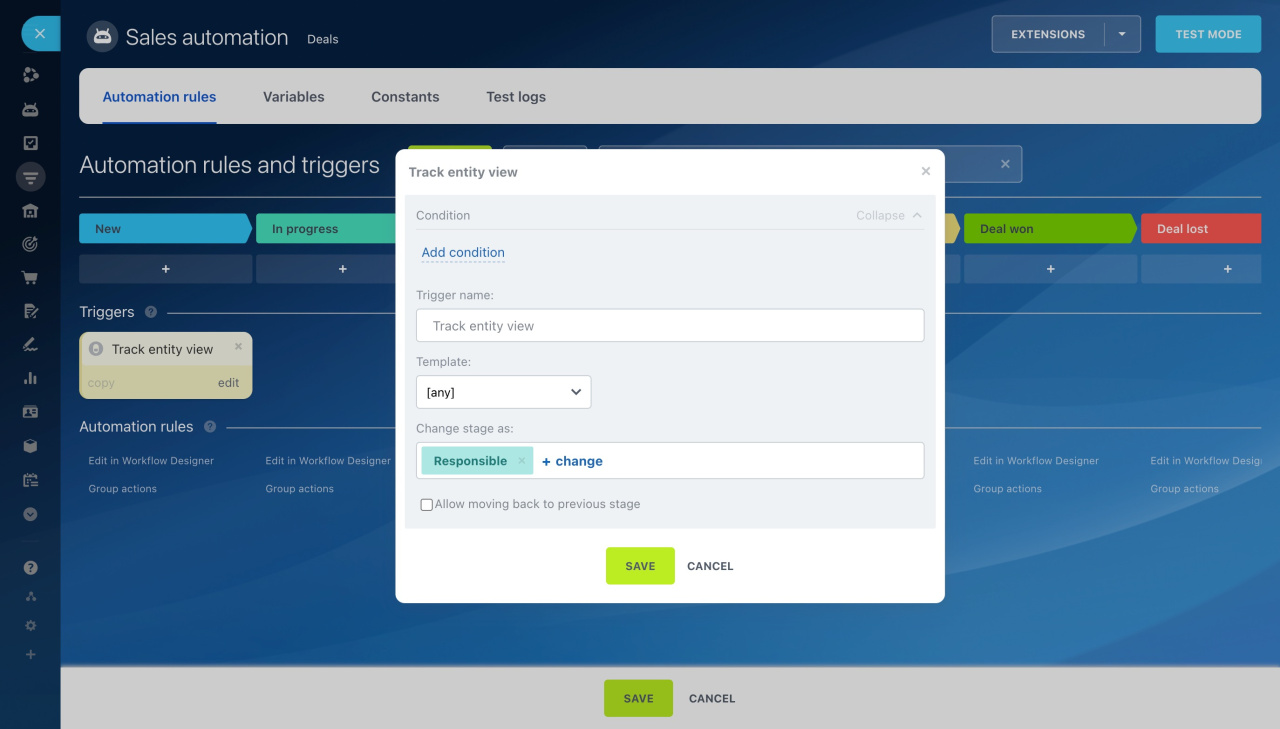
All triggers have standard settings:
-
Condition: Set a condition for the trigger to work only for certain items. For example, only for repeat deals.
-
Trigger name: Change the default name if you need to set up multiple triggers. This helps quickly find the required trigger on the Sales automation page.
-
By default, the trigger updates the stage on behalf of the employee responsible for the CRM item. You can select a different user, and the stage change will be shown under that user's name in the CRM item timeline and history.
-
Allow moving back to previous stage: Decide whether you want the trigger to move the item to a previous stage. For example, move a deal from the last stage to the first.
Other settings are unique for each trigger. For example, in the Track field value change trigger, you need to select which fields in the CRM form to monitor for changes.
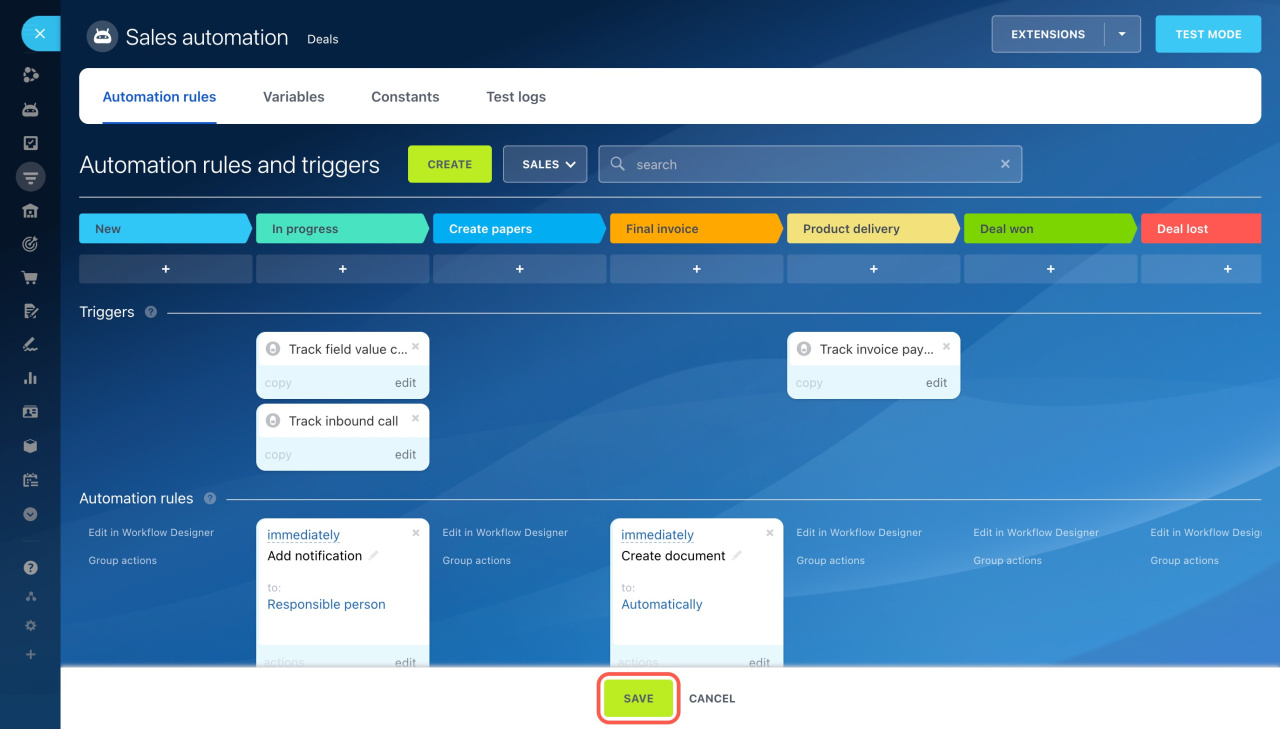
Once set up, click Save in the settings window, then save changes on the Sales automation page.
Modify or delete a trigger
- Go to the required CRM section, such as Leads or Deals.
- Open the Automation rules tab.
- Choose an action to perform.
Delete (x): Remove the trigger if it's no longer needed.
Edit: Modify the trigger settings. For example, add a new condition or change the responsible person.
Copy: Duplicate the trigger with its settings. This is useful if you want to use the same trigger at another stage.
Once you've made all changes to the triggers, click Save.
In brief
-
Triggers track customer actions and changes in CRM, like email link clicks, incoming calls, invoice payments, and more. When a specific action occurs, the trigger moves a CRM item to its designated stage.
-
In CRM, triggers are available in leads, deals, estimates, invoices, and SPAs.
-
Triggers are grouped by the tasks they solve: customer communication, paperwork, and more.
-
To add a trigger, go to CRM, select the needed item, and open the Automation rules section.
-
All triggers come with standard settings, such as the execution conditions, name, responsible for stage change, and option to move to the previous stage. Each trigger also has its own unique settings.

