Now you can use Squareup to let your customers pay for Bitrix24-generated invoices and more! Squareup Integration app lets you connect your merchant account to Bitrix24 in a few simple steps with as little as possible additional setup.
No limits or hassle: create and pay an invoice within 10 minutes. Free of charge on any of Bitrix24 commercial plans.
Card payment acceptance with the Square app is currently available in the US (except for Puerto Rico, Guam, the U.S. Virgin Islands, American Samoa, and Northern Mariana Islands), Canada, Australia, Japan, the United Kingdom, Republic of Ireland, France and Spain.
Installation is simple: just follow these steps to install the app from the Market. As for additional setup, your following steps are not complicated.
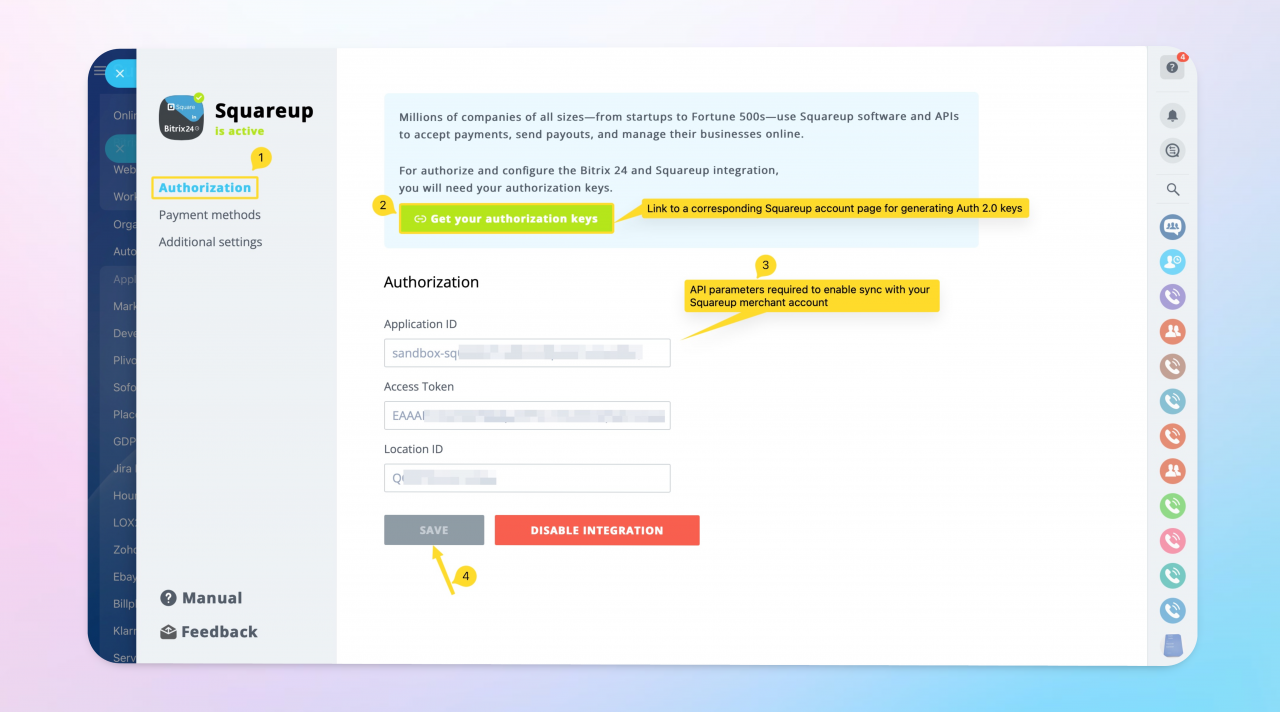
Once the app is installed, you'll be able to access its configuration app from the left menu. First thing to do is getting required API keys to enable sync with your merchant account.
To do so, you would need to set up a developer dashboard bound to your merchant one using the corresponding button at the first configuration page (Authorization).
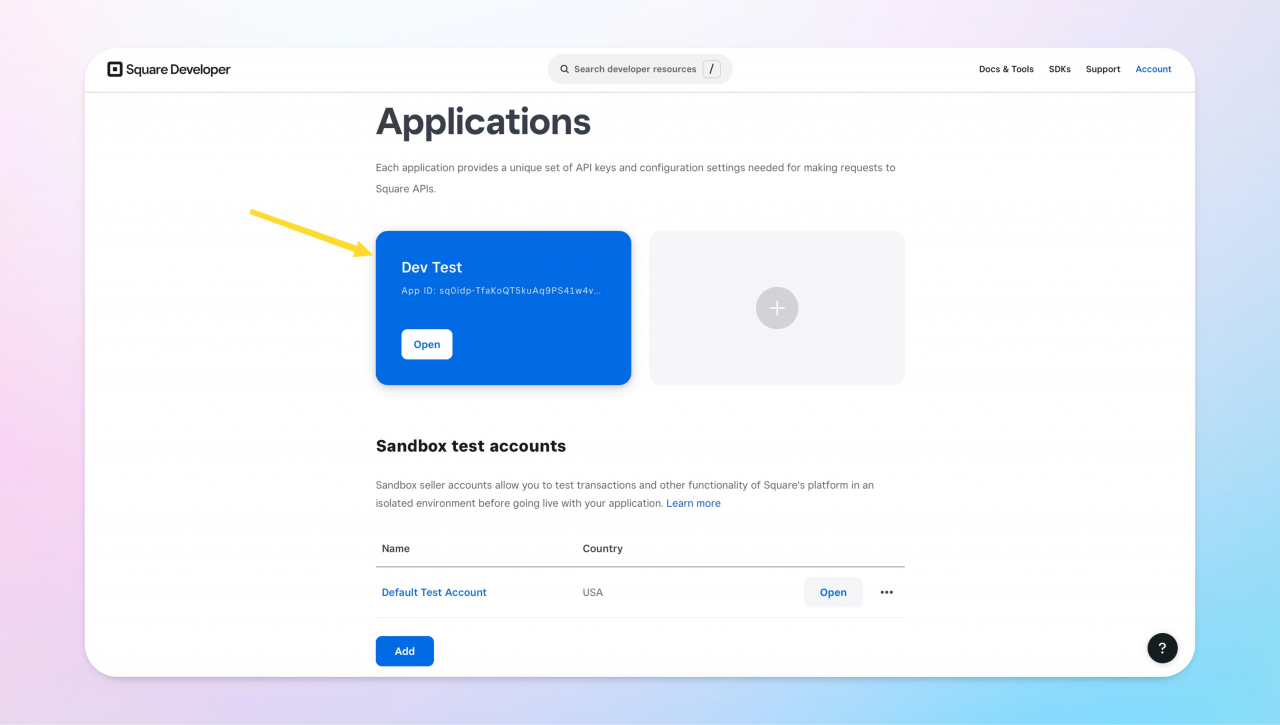
Once you have registered a new developer dashboard, select a widget for the app you had been asked to create while registering the dashboard.
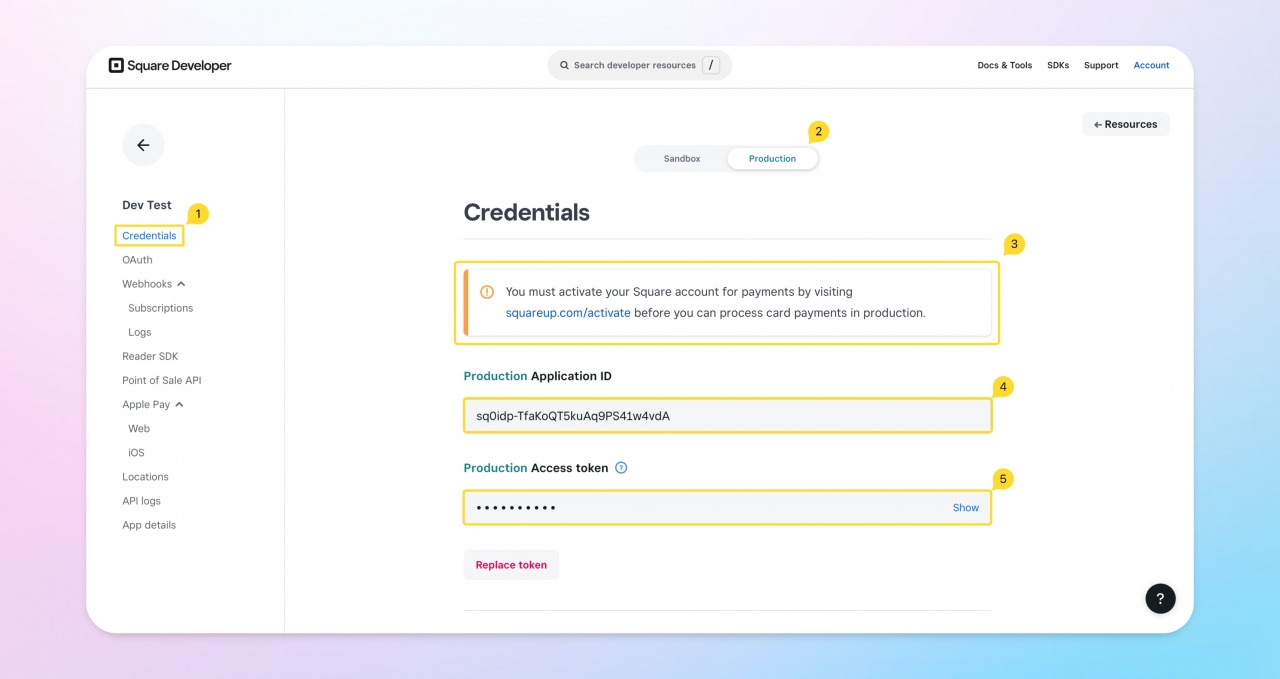
Application ID as well as Access token are located in the Credentials section.
Please note that Square lets you generate these keys both as sandbox keys and as production ones. We highly recommend using sandbox keys at the start to test the integration app functionalities.
Once you are ready to accept real-time payments, feel free to change the keys within the app to the production ones.
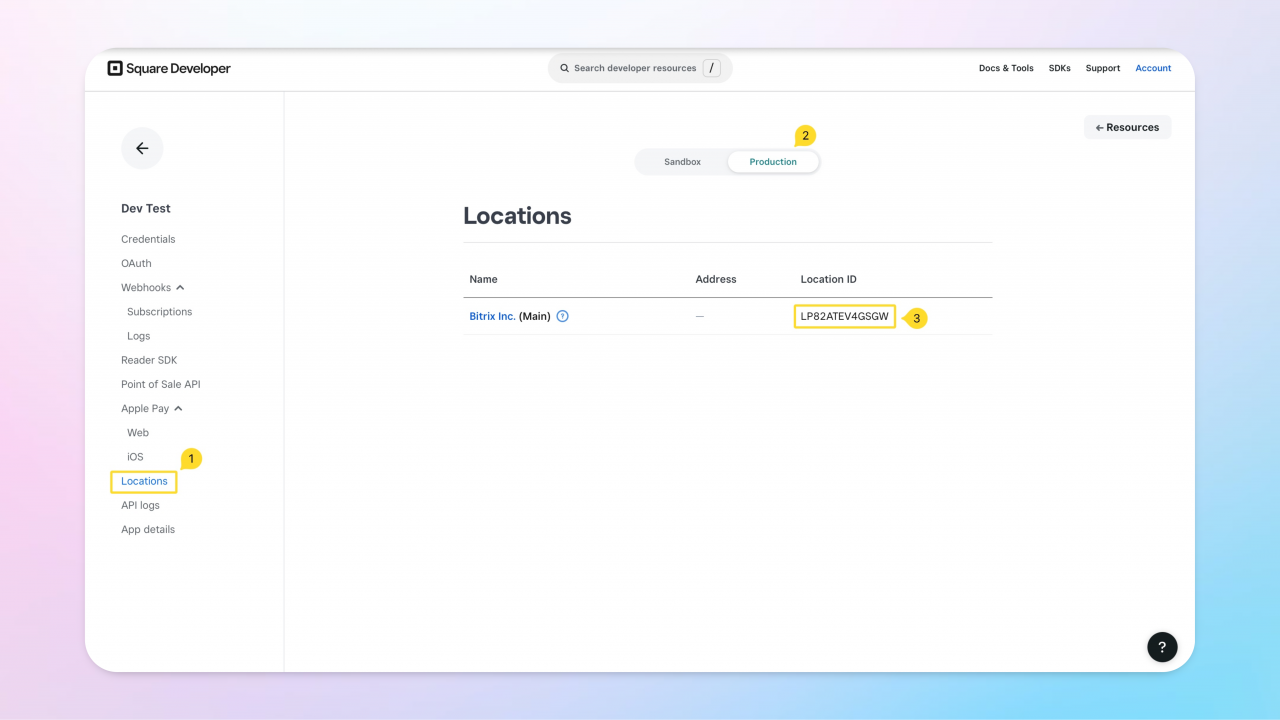
The third parameter (Location ID) is set up automatically by Square in accordance with your business location specified in the registration form. To extract it, go to the Locations section.
If you are uncertain about how to extract the required API keys, kindly check our detailed guide at this link or from within the app (Manual button).
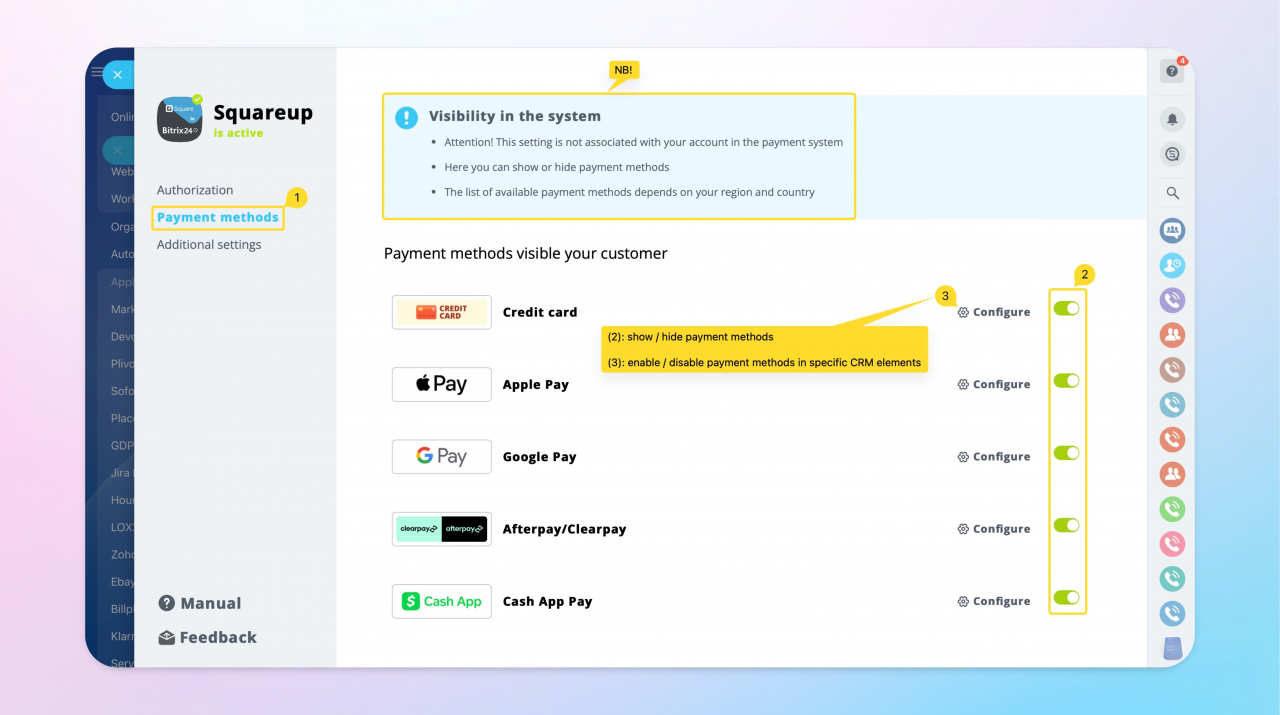
All available payment methods are enabled by default once you enter and save your API keys. However, you may disable and enable particular methods as you like, depending on which payment methods are the most relevant for you and your clients. Disabled methods will be hidden regardless of the payment option used (invoices, forms, etc.).
If you click unto Configure button, you'll be able to enable or disable specific payment options for the selected method.
Contact (Order) and Company (Order) will be used in contacts and companies, respectively, for the new invoice types (issued from deals) as well as for online orders at your online stores.
At this page, you can also edit the Title and Description for all four payment method subtypes. Click the Save button to save your changes or Cancel button otherwise.
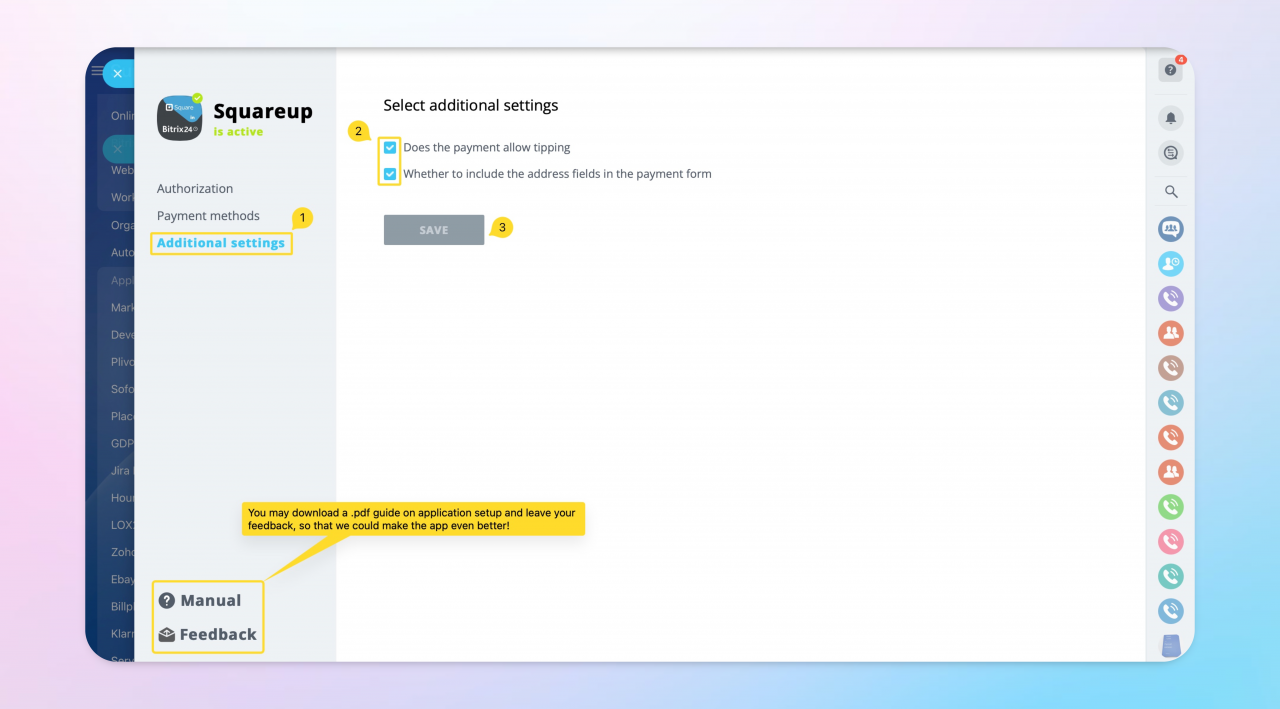
Additional options are quite intuitive: you may enable tipping option in case you would like to let your customers tip you in addition to paying for the order.
The second option is used to display address fields in the payment form your customers fill out. That might be helpful if your sales process includes delivery, for example.
See also
- Troubleshooting common issues with Bitrix24 integration apps
- Payment system integrations in Bitrix24

