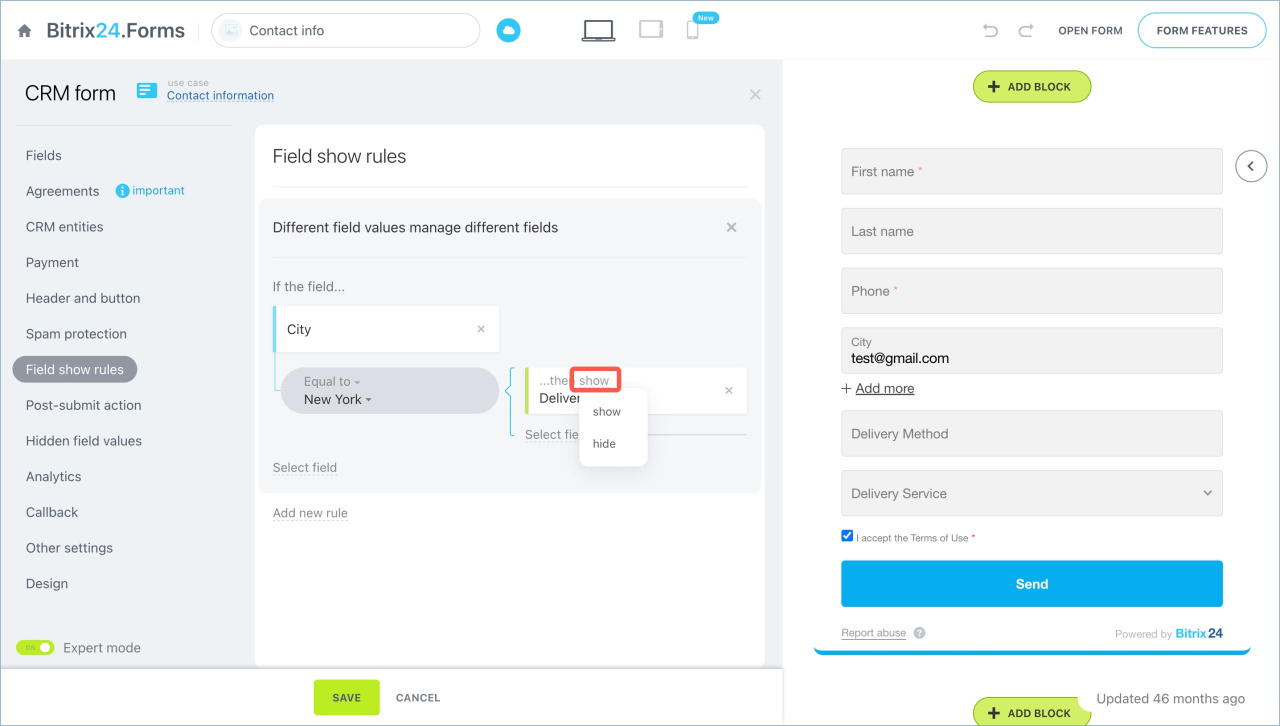
In CRM forms, you can customize the rules for showing fields to adapt the form to different customers. You can hide or show fields depending on the responses.
Select the field show rules
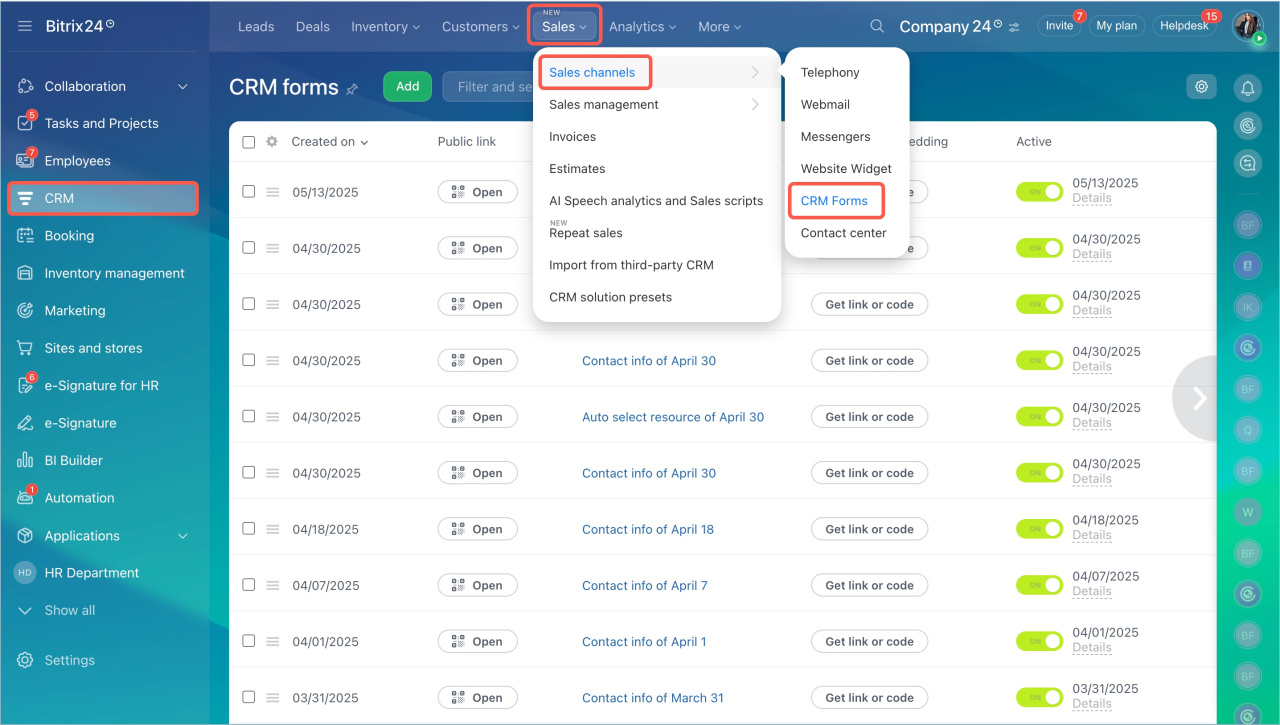
- Go to CRM > Sales > Sales channels > CRM Forms.
- Select a CRM form.
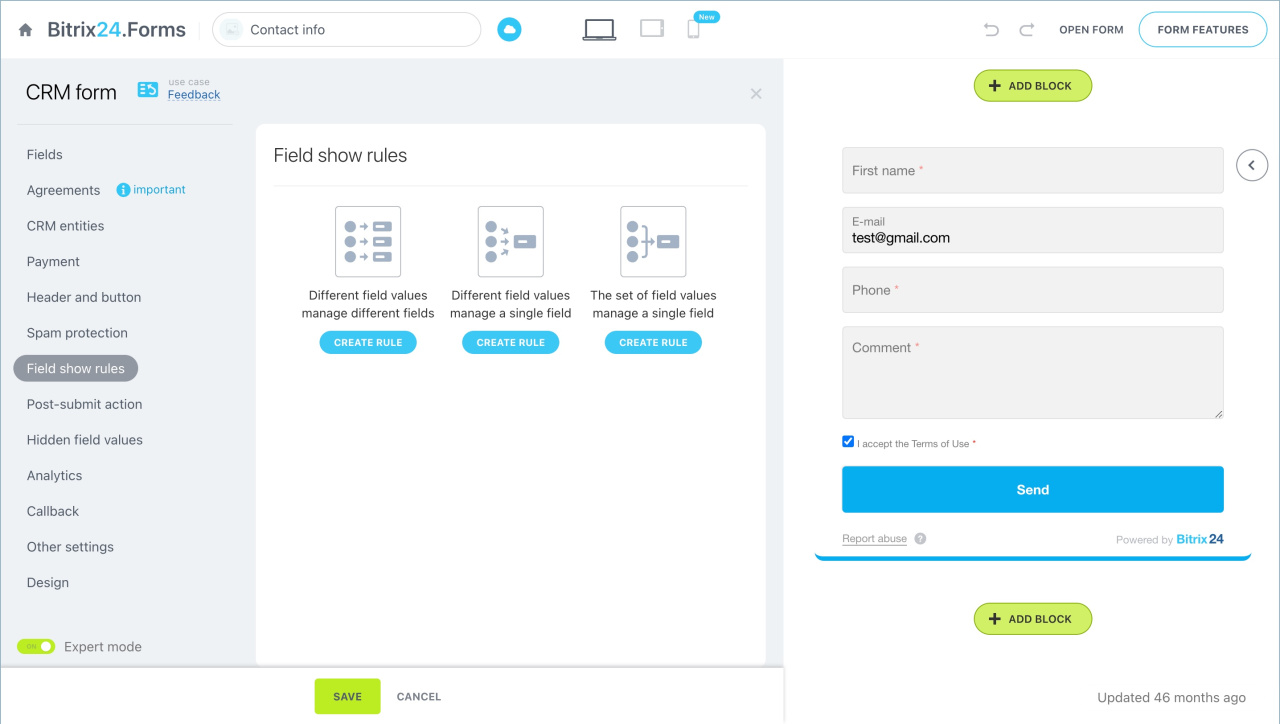
- Click the field show rules tab. Enable the Expert mode.
- Select the rule and click Create. You can select several rules.
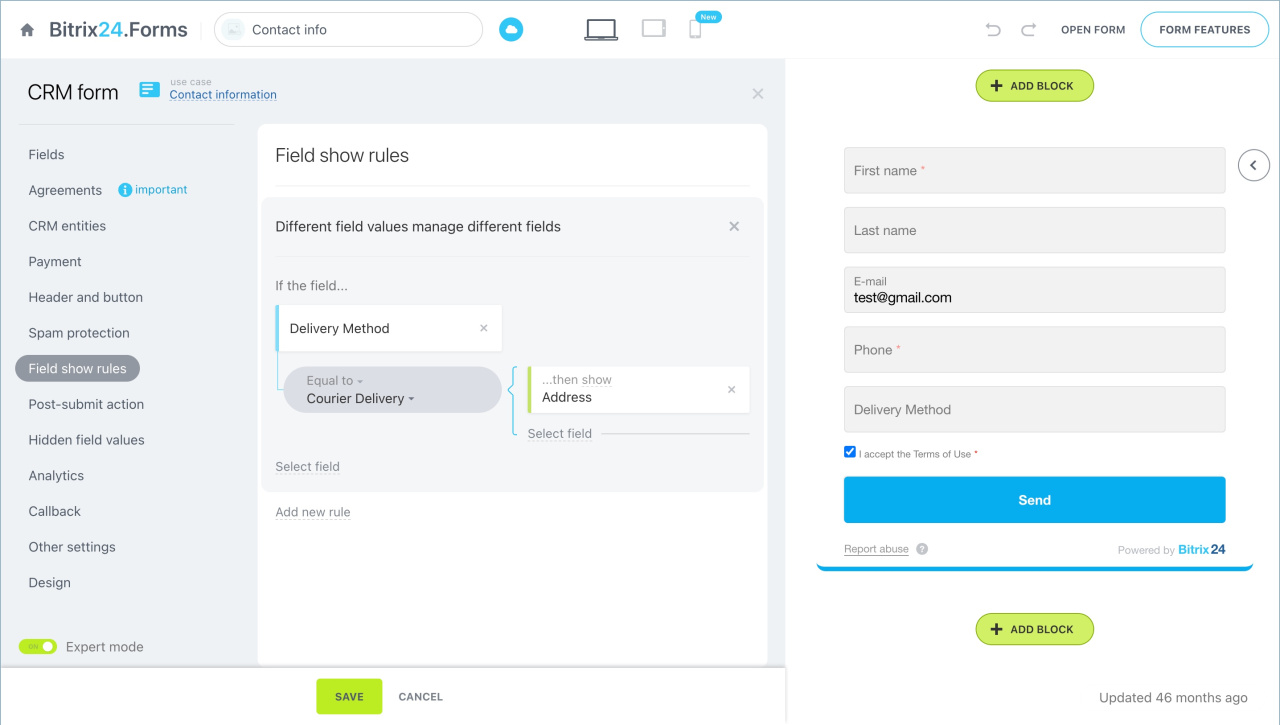
Different field values manage different fields. When a customer specifies a certain value in a field, the CRM form automatically hides or displays another field.
For example, if you select "Courier Delivery" in the "Delivery Method" field, the "Delivery Address" field appears.
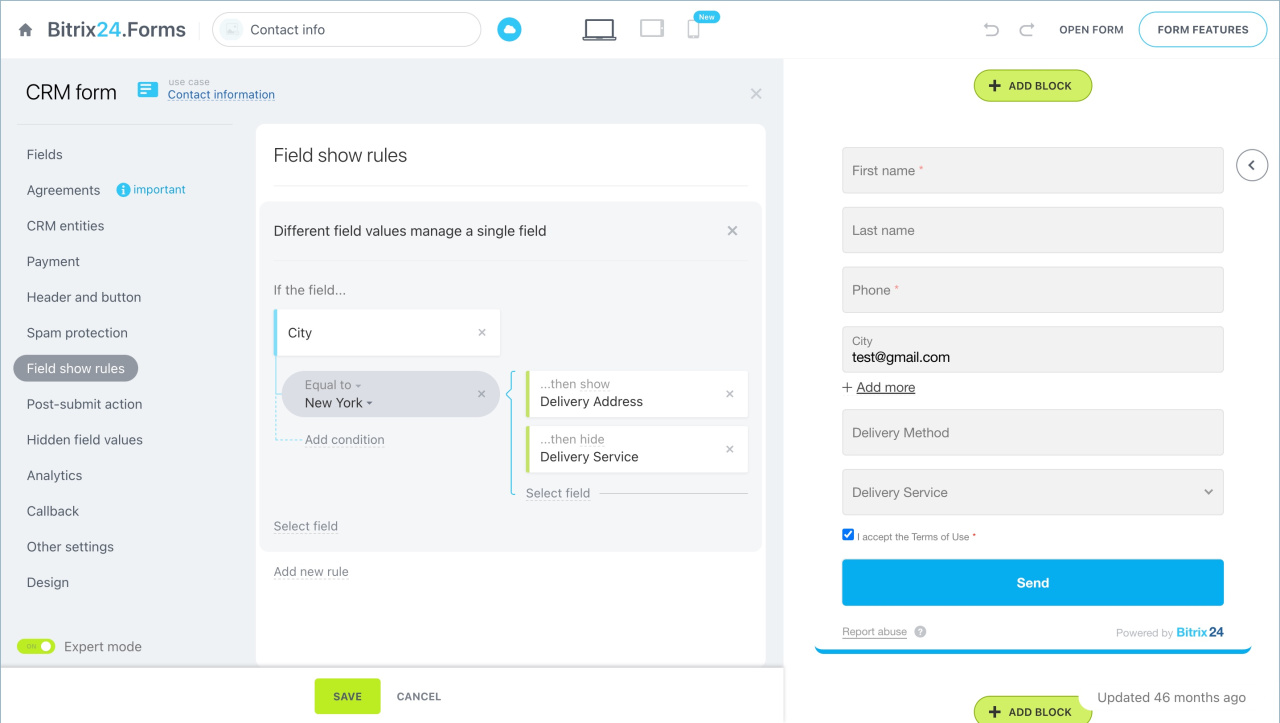
Different field values manage a single field. When a customer specifies one of the values in a field, the CRM form automatically hides or displays the other field. The customer can choose any of the values you specified in the condition.
If you select New York in the City field, then Delivery address field will be shown and Delivery service field will be hidden.
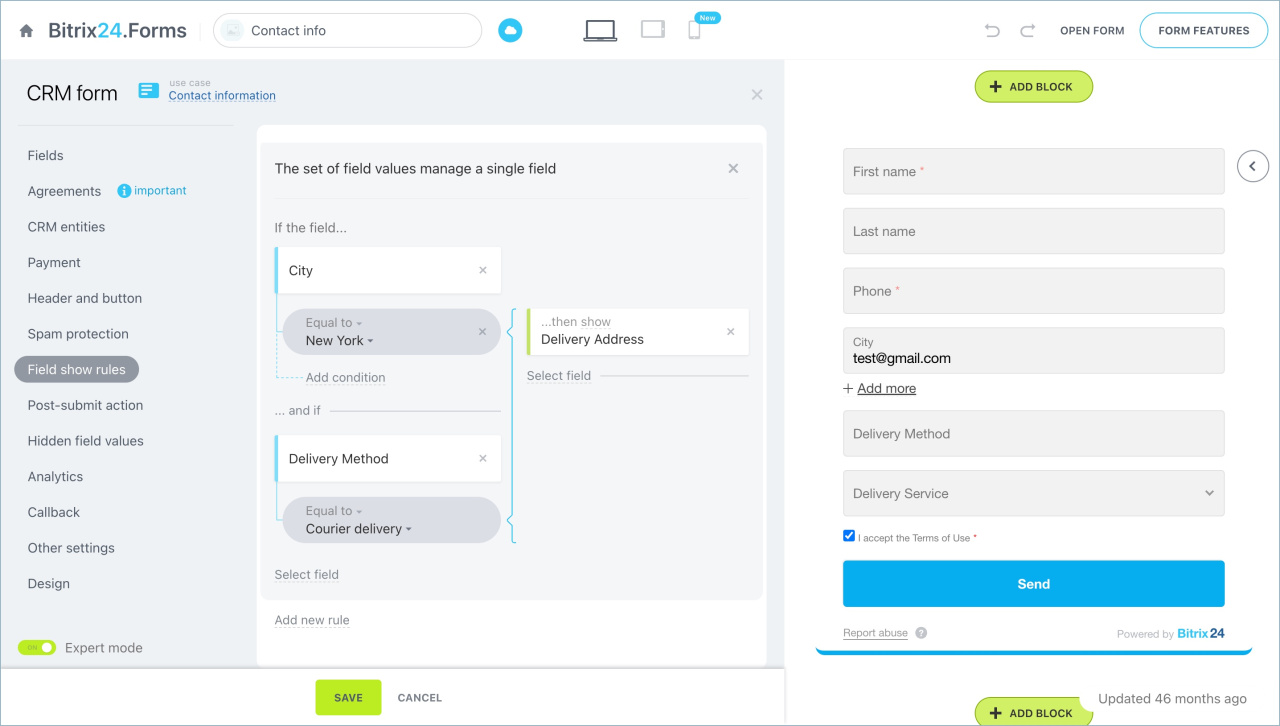
The set of field values manage a single field. When the customer specifies all the required values in the fields, the CRM form automatically hides or displays another field. The client needs to select all the values you specified in the condition.
For example, if the value of the "City" field is New York and "Delivery method" is "Courier delivery", the "Delivery address" field will appear. If the client specifies a different value in one of the fields, the "Delivery address" field will be hidden.
Configure field show rules
Select which fields the rule will work for and configure the conditions.
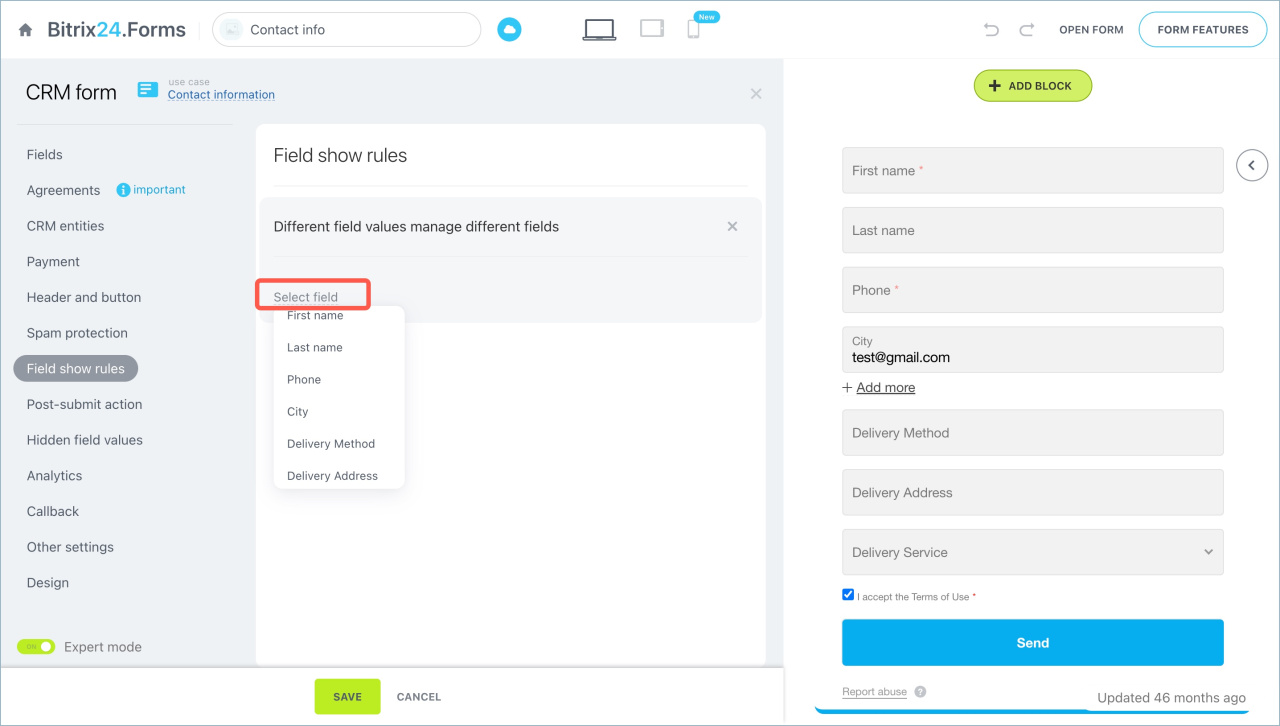
Select fields. Add fields to the form for which the rule will work. Click Select Field and select the desired field. You can add multiple fields.
Add a CRM form
Select condition. This determines when to show or hide fields.
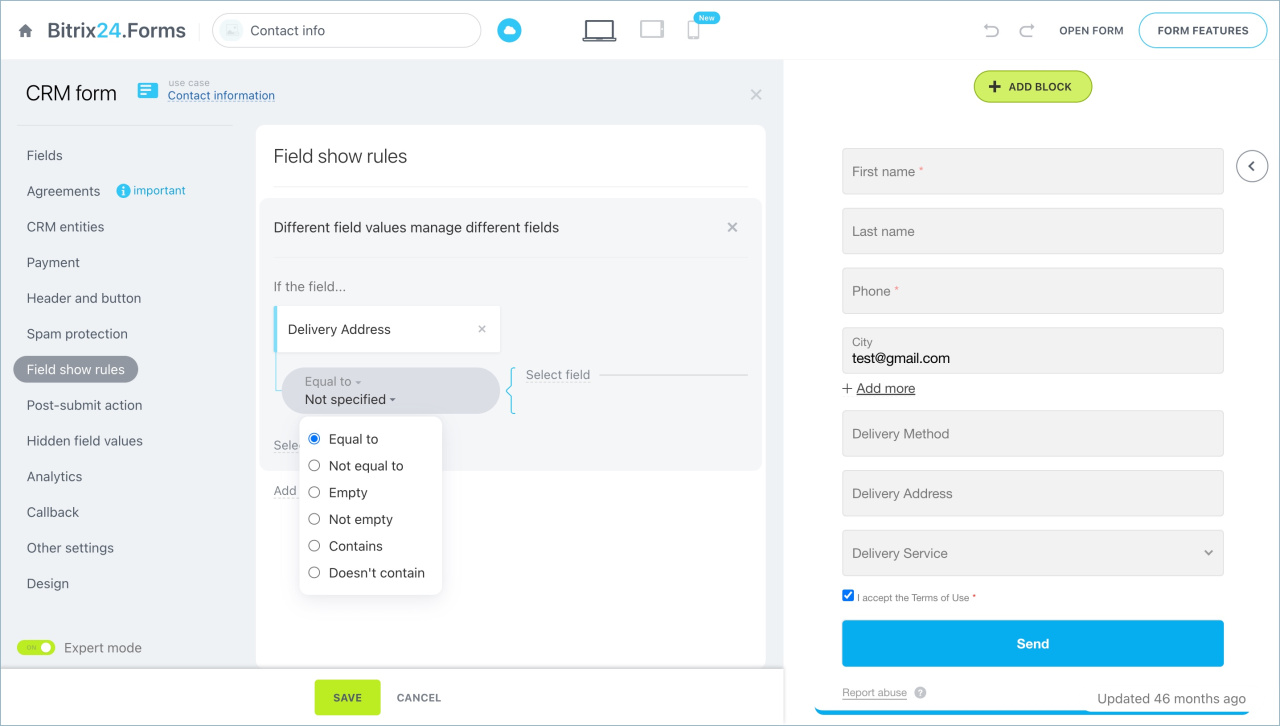
Click Equal to under the field name and select the desired condition:
- Equal to — the value that the customer specified in the CRM form is equal to the value of the field in the condition. You can select the value from the list for a field of the List type. The value should be entered manually for fields of the String and Number types.
- Not equal to — the value specified by the client in the CRM form is not equal to the value of the field in the condition.
- Not empty — the client has not filled the field in the CRM form.
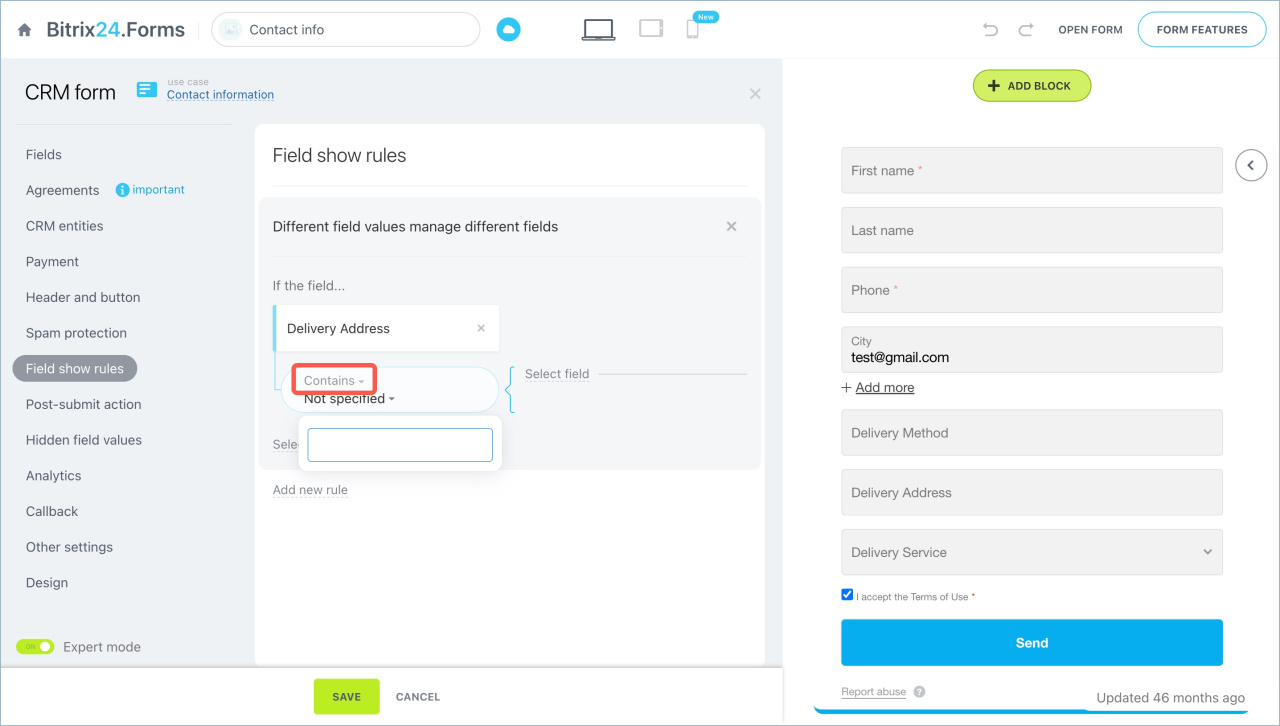
- Contains— the value specified by the client in the CRM form contains the value of the field in the condition.
- Doesn't contain — the value that the customer specified in the CRM form does not contain the field value in the condition.
Select action. Choose what to do with the field when the condition is met: show or hide it in the CRM form.
In this way, you can configure several rules for showing fields in a CRM form.
In brief
- Customize the rules for showing fields to adapt the form to different customers in CRM forms.
- There are three types of the field show rules.
- Different field values manage different fields — when a customer specifies a certain value in a field, the CRM form automatically hides or displays another field.
- Different field values manage a single field — when a customer specifies one of the values in a field, the CRM form automatically hides or displays the other field.
- The set of field values manage a single field — when the customer specifies all the required values in the fields, the CRM form automatically hides or displays another field. The client needs to select all the values you specified in the condition.
- Choose what to do with the field when the condition is met: show or hide it in the CRM form.

