Bitrix24 has a set of document templates. You can create your own template or edit an existing one.
Create a document
Open the document you want to make into a template or an empty file in a text editor.
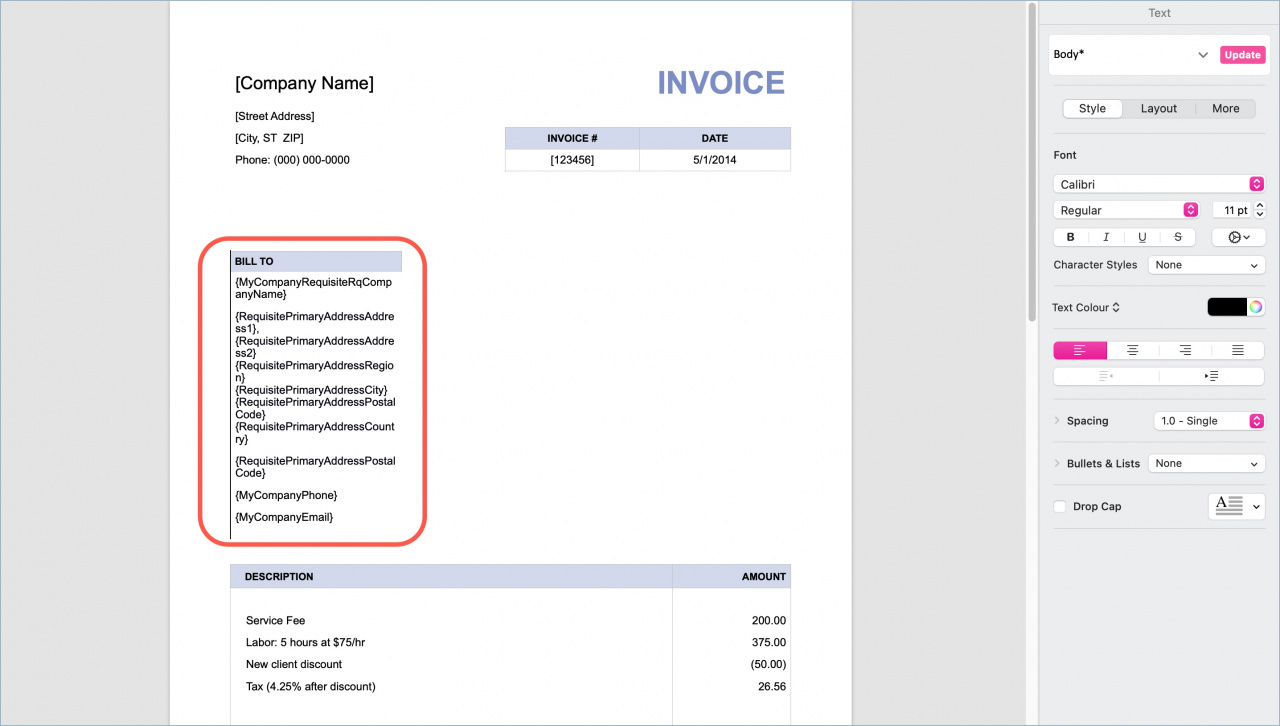
If you have an invoice that you use in your work, you can make it a template for your colleagues to use it in CRM. Insert symbolic codes into the document.
To view a list of the symbolic codes:
- Click Document - Add new template.
- Click Settings - Fields.
Edit document templates in CRM
When the template is ready, save it in DOCX format. The size of the template should be no more than 2 MB. This template can be uploaded to Bitrix24.
Add a product list
There are two options for adding a list to the template.
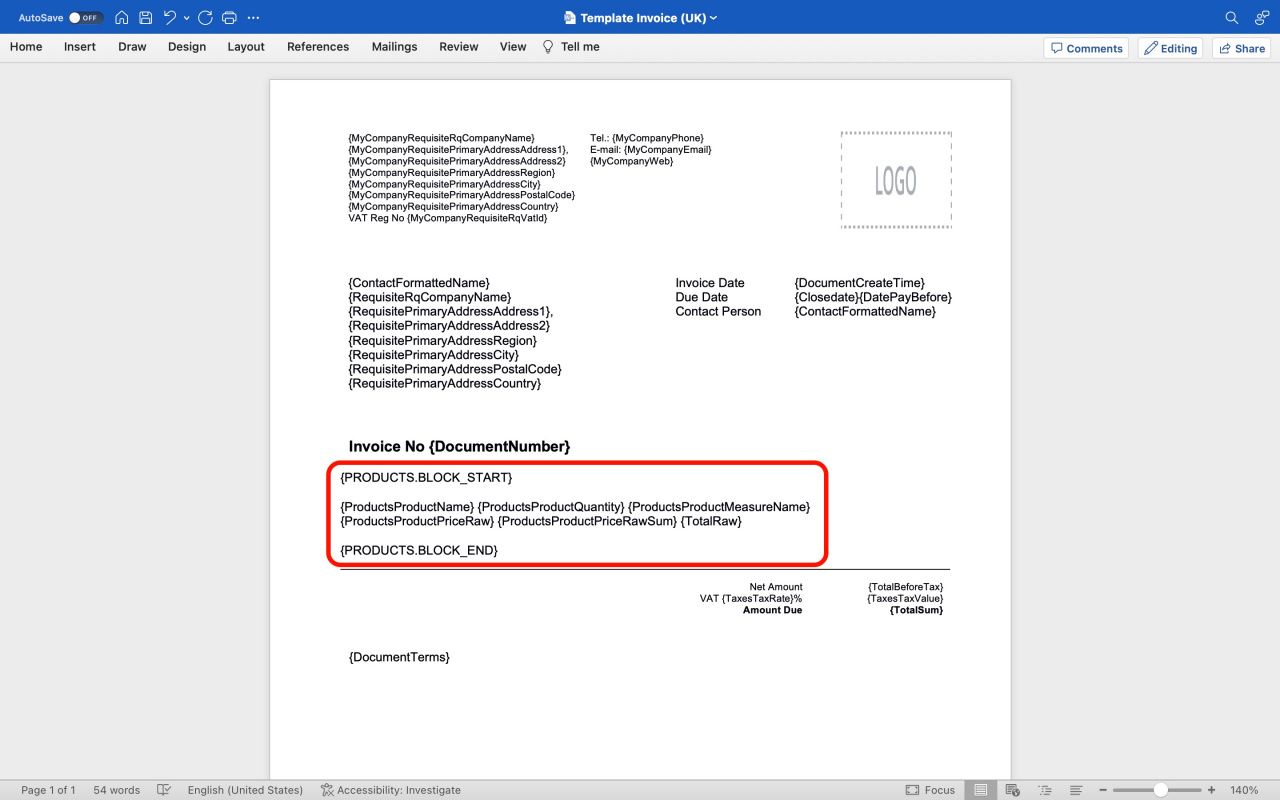
Create a list. Mark the beginning and end of the block using {PRODUCTS.BLOCK_START} and {PRODUCTS.BLOCK_END} symbolic codes. Add the parameters of products like name, quantity, unit of measurement, and price inside the block.
{PRODUCTS.BLOCK_START}
{ProductsProductName} {ProductsProductQuantity} {ProductsProductMeasureName} {ProductsProductPriceRaw} {ProductsProductPriceRawSum} {TotalRaw}
{PRODUCTS.BLOCK_END}
Bitrix24 will duplicate this block automatically for each product.
These symbolic codes correspond to the following fields in Bitrix24:
- {ProductsProductName} - Product name.
- {ProductsProductQuantity} - Product quantity.
- {ProductsProductMeasureName} - Unit of measurement.
- {ProductsProductPriceRaw} - Original price.
- {ProductsProductPriceRawSum} - Product total original price.
- {TotalRaw} - Total original price.
- {TaxesTaxValue} - Tax amount.
- {TaxesTaxRate} - Tax rate.
- {TotalSum} - Total amount.
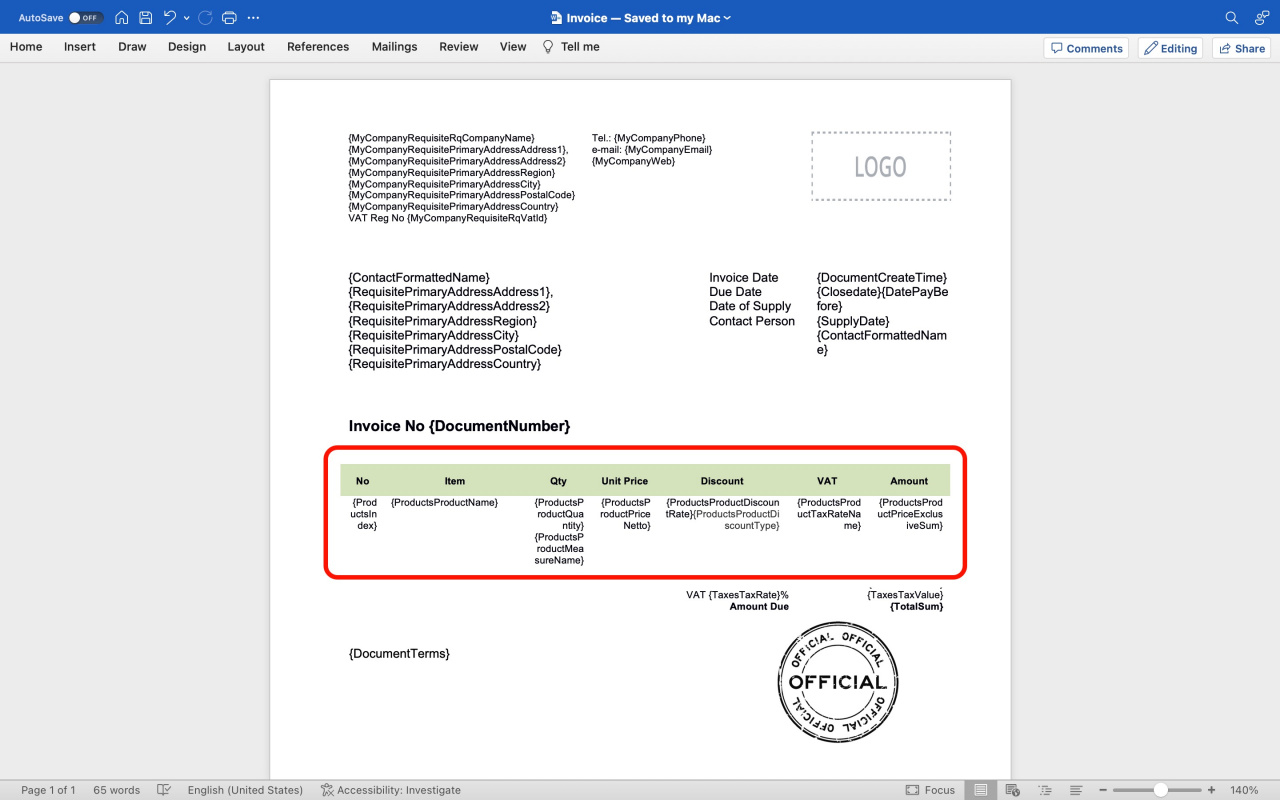
Create a table with a list of products. Insert the symbolic codes of the fields you want to see in the document into the table. If you have several products, Bitrix24 will automatically create a line for each of them with the information from the template.
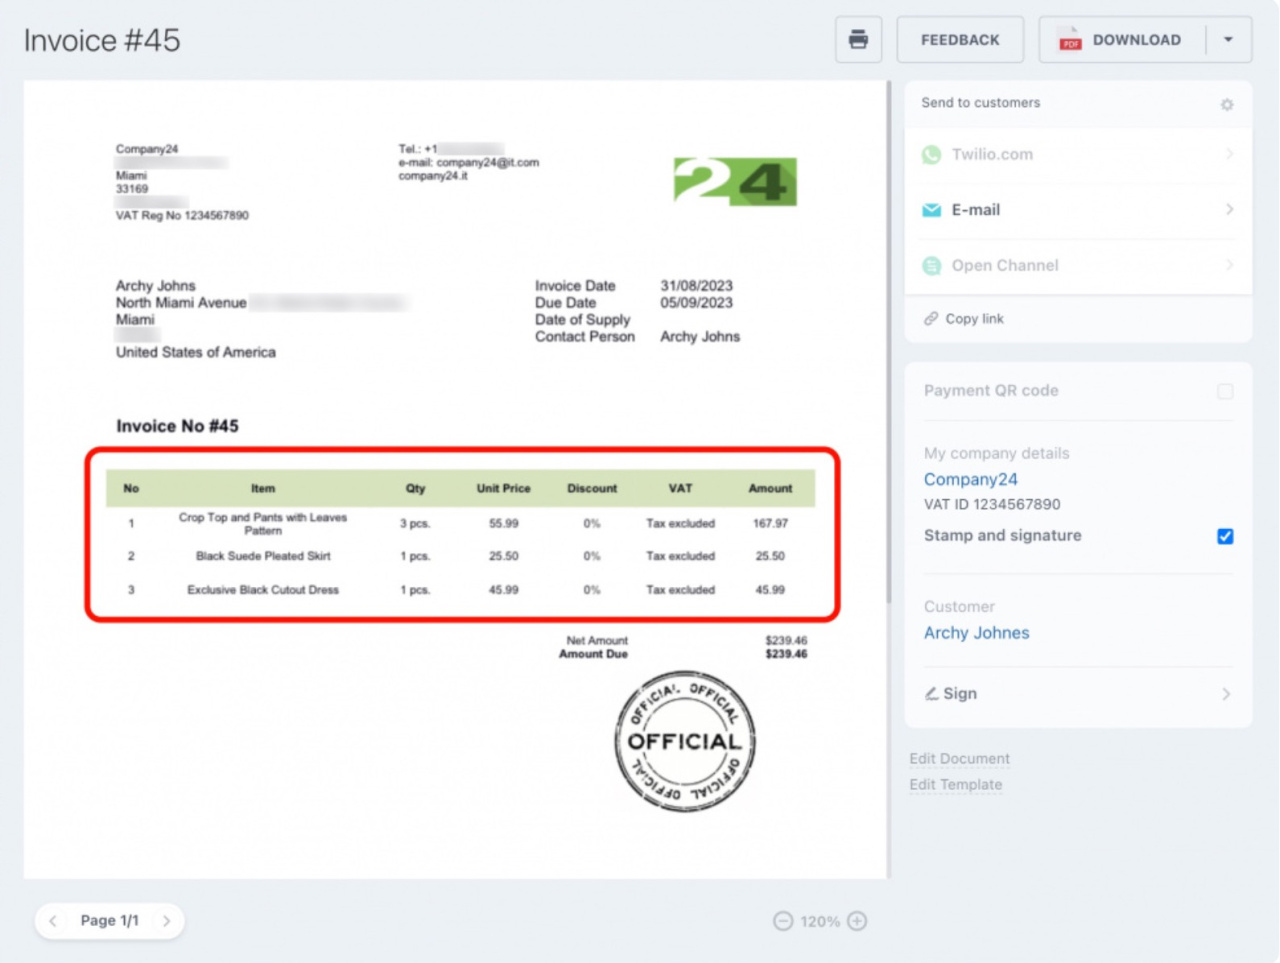
The generated document looks like this:
Add a product image to the table with a list of products
To add a product picture to the table, follow the same steps as when adding the logo, stamp, and signatures to your document.
Add an image, stamp, or signature to document templates
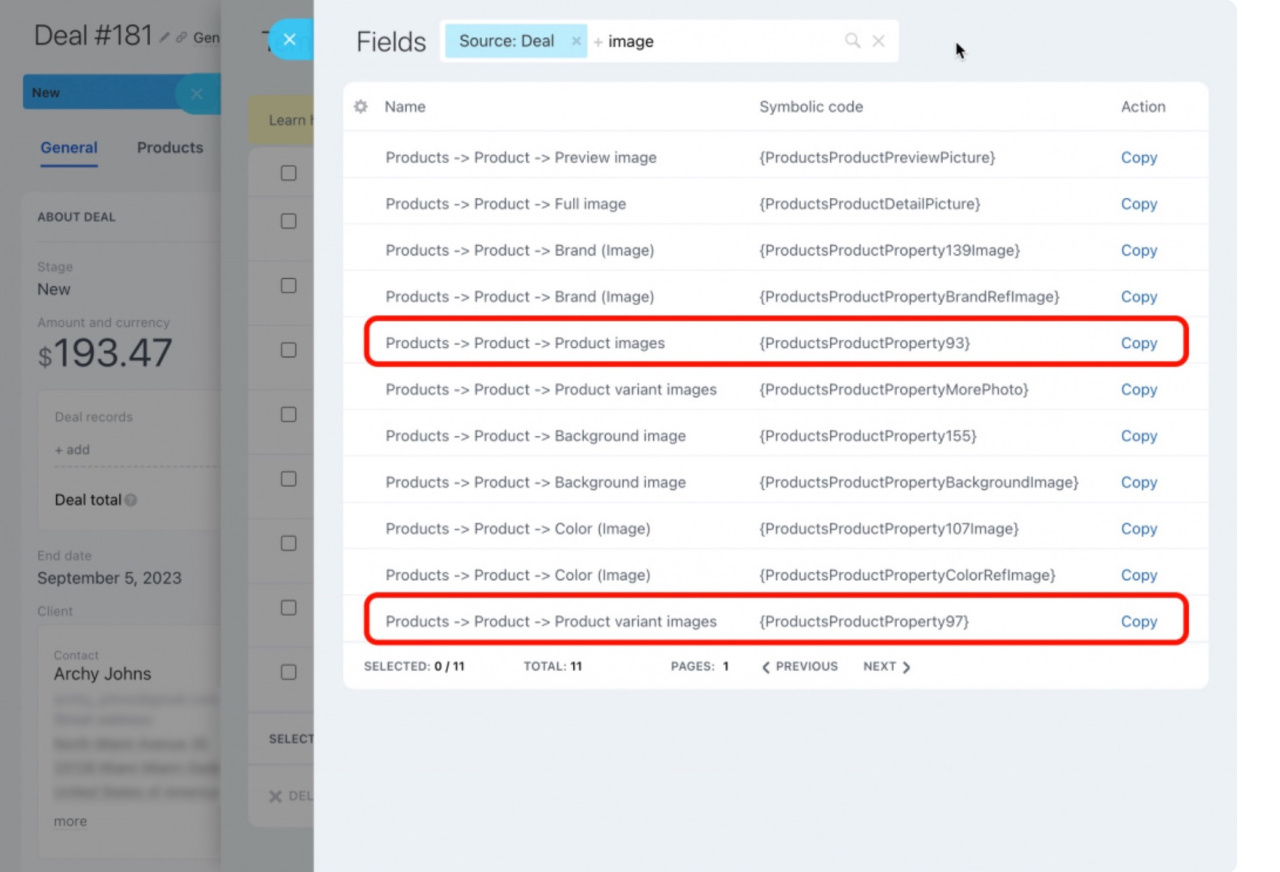
If you use an old product form, the following symbolic codes will allow you to display a product image:
-
{ProductsProductPreviewPicture} -
{ProductsProductDetailPicture}
If you use a new product form, use these symbolic codes for product images:
-
{ProductsProductPropertyMorePhoto}: This code stands for product variant images. -
{ProductsProductPropertyXX}: This code is used for product images and product variant images. It generated individually in each Bitrix24 account. There is a specific field ID insteadXX. You can check it on the Fields page in your account.
The generated document looks like this:
Upload a template to Bitrix24
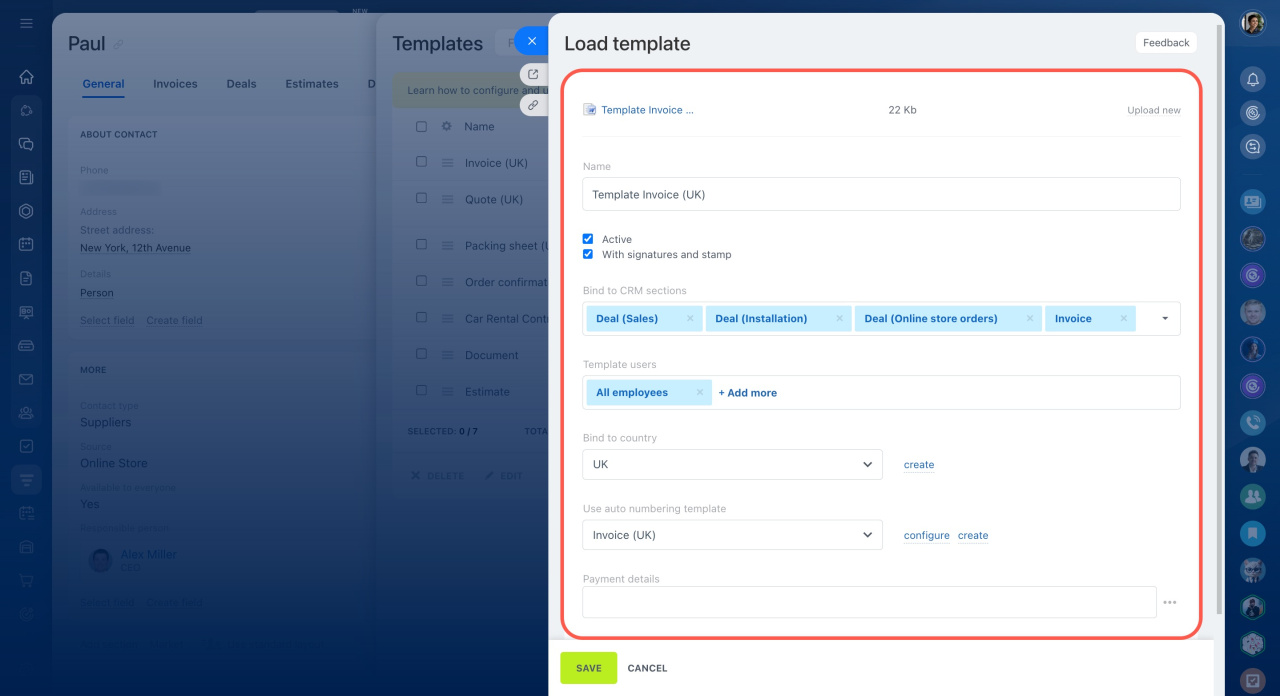
Once you have created your template, you can upload it to CRM.
When the template is loaded, you can change the template settings: name, access permissions, and binding to the CRM sections.
Customize document templates in CRM
Check if the template is configured correctly. Select the required template in the Document tab. The document will be created based on your template.
In brief
- Bitrix24 has a set of standard templates for documents. You can customize the template to automatically insert the necessary information.
- To customize a template, use symbolic codes. Each field has its own code.
- Symbolic codes can be added to a document that your company usually uses.
- Upload your template into Bitrix24. It should be in DOCX format and the size should not exceed 2 MB.

