We have added the ability to create custom fields in the inventory management documents of stock receipt, stock adjustment, transfers and write-offs. The fields will help you save additional information in the document.
Create custom fields
You can create fields in two ways: in the document form and in its section.
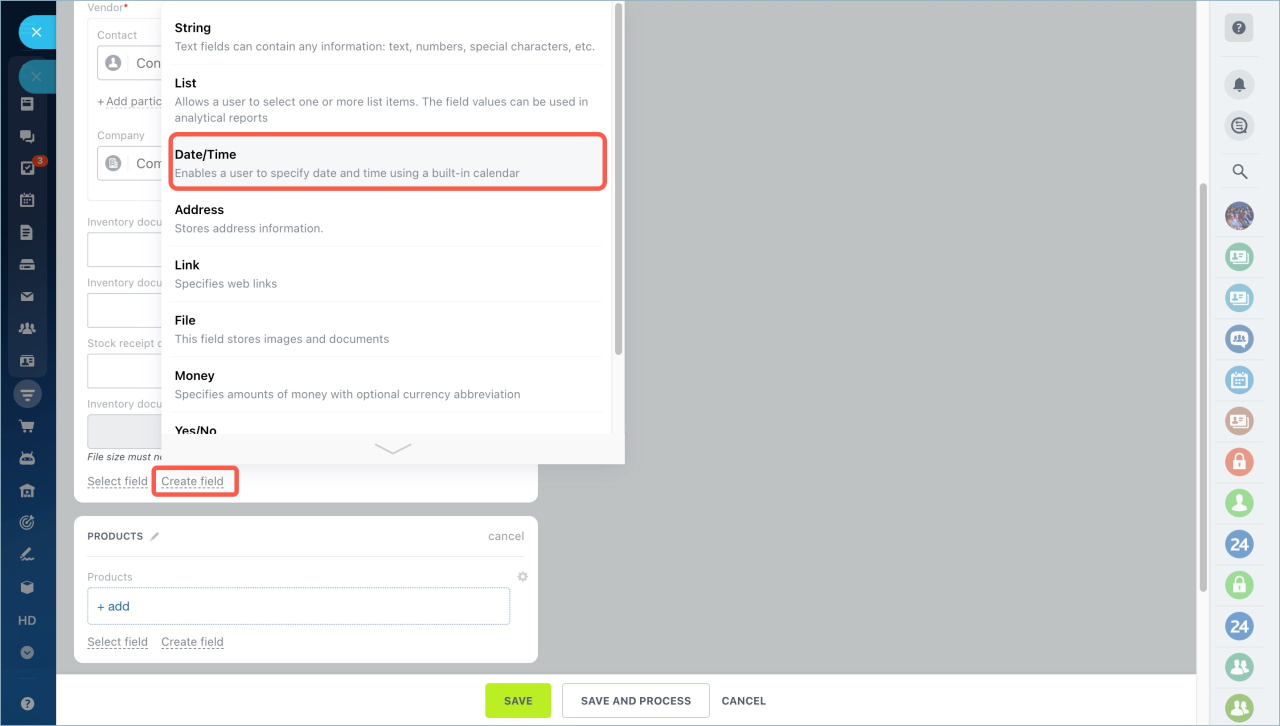
In the document form. Go to the Inventory management section, open the document and click Create field. For example, to create a Shipment receipt date field, select the Date and Time type, specify a title, and save your changes.
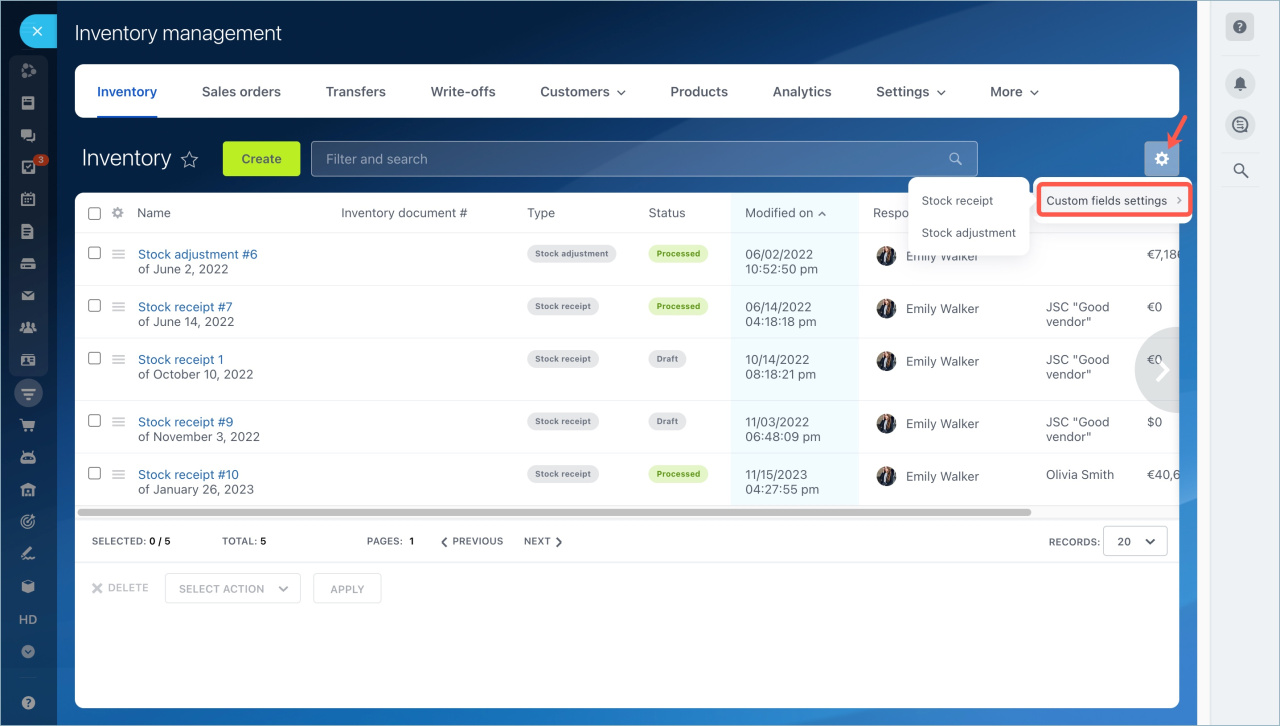
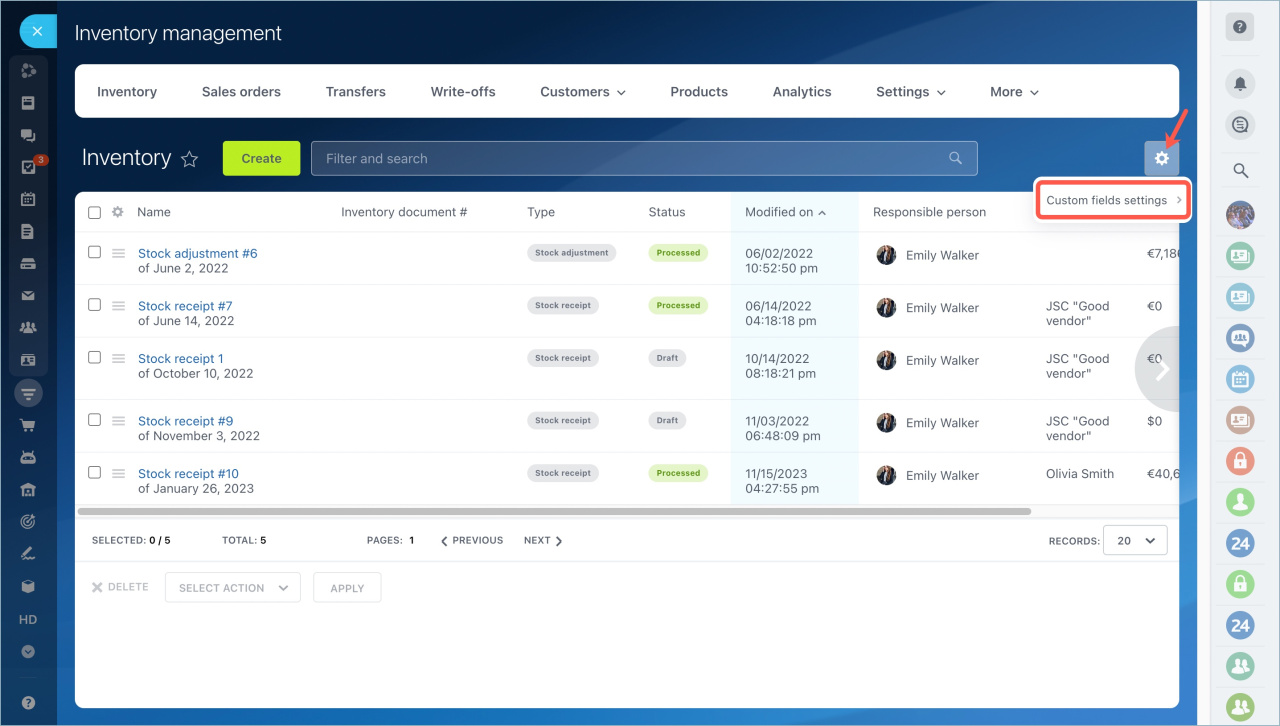
In the Inventory management document section. Go to the Inventory management section, open the section with the document for which you create a field and click Custom fields settings.
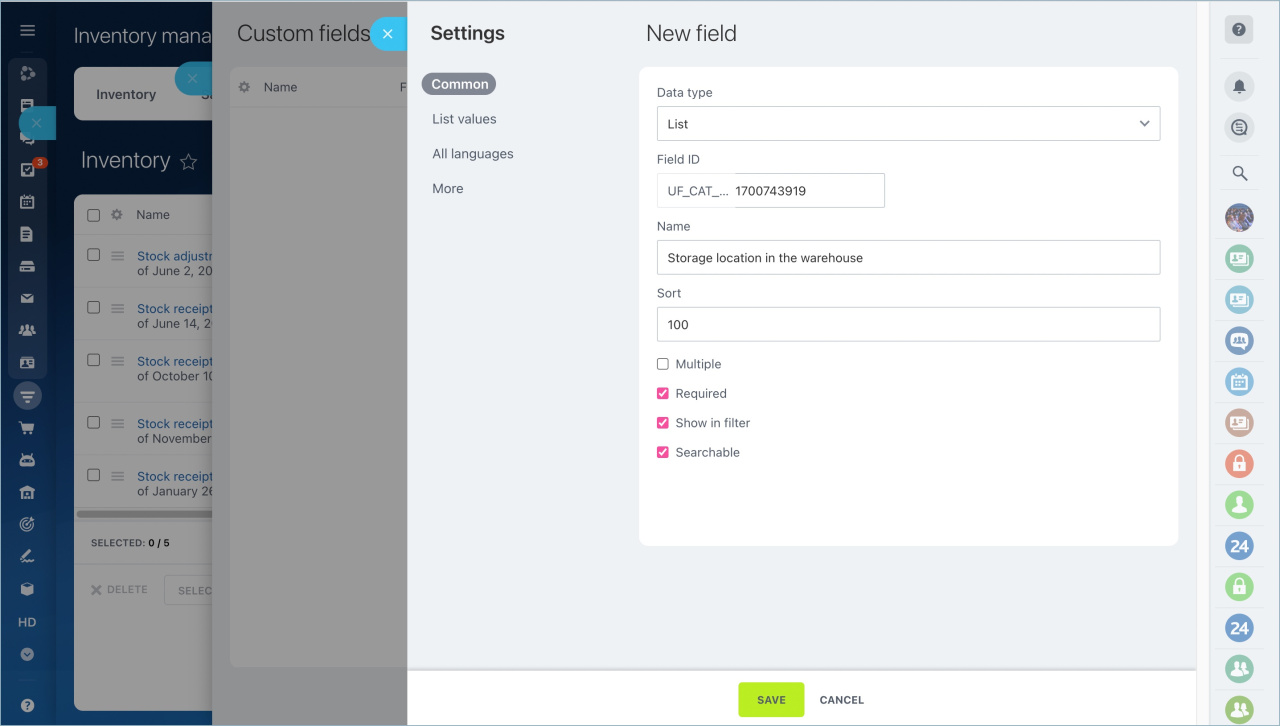
Let's create a field for a stock receipt, where you can specify the exact location where goods are stored in the warehouse. Click Create and select the list data type.
Data types in custom fields
- String — it is a text field.
- List — it is a regular list for storing multiple values.
- Date/Time — it is a field where you can specify the date and the time. For example, to mark the time of goods receipt.
- Address — it is a field for entering an address, such as a warehouse location or supplier contacts.
- Link — you can give a link to the supplier website in a field of this type.
- File — you can give a link to the supplier website in a field of this type.
- Money — you can specify the amount and the currency in this field.
- Yes/No — you can specify whether the goods have arrived in full or not in the field of this type.
- Number — it is a field type for numbers.
Customize the other parameters in the field form. Enter a name and make the field required so that employees cannot create a document without it.
- Field ID — it will be used in documents, automation rules and workflows.
- Name — it is displayed in the document form and in the field list.
- Sort — the field position in the list depends on sorting. The smaller the number, the closer the field is to the beginning of the list.
- Multiple — it means that several values can be written to the field at once.
- Required — employees will not be able to save the item form if the field is empty.
- Show in filter — you will be able to filter items by the value in this field or just display it in a list.
- Searchable — this field will be indexed for searching in stock documents.
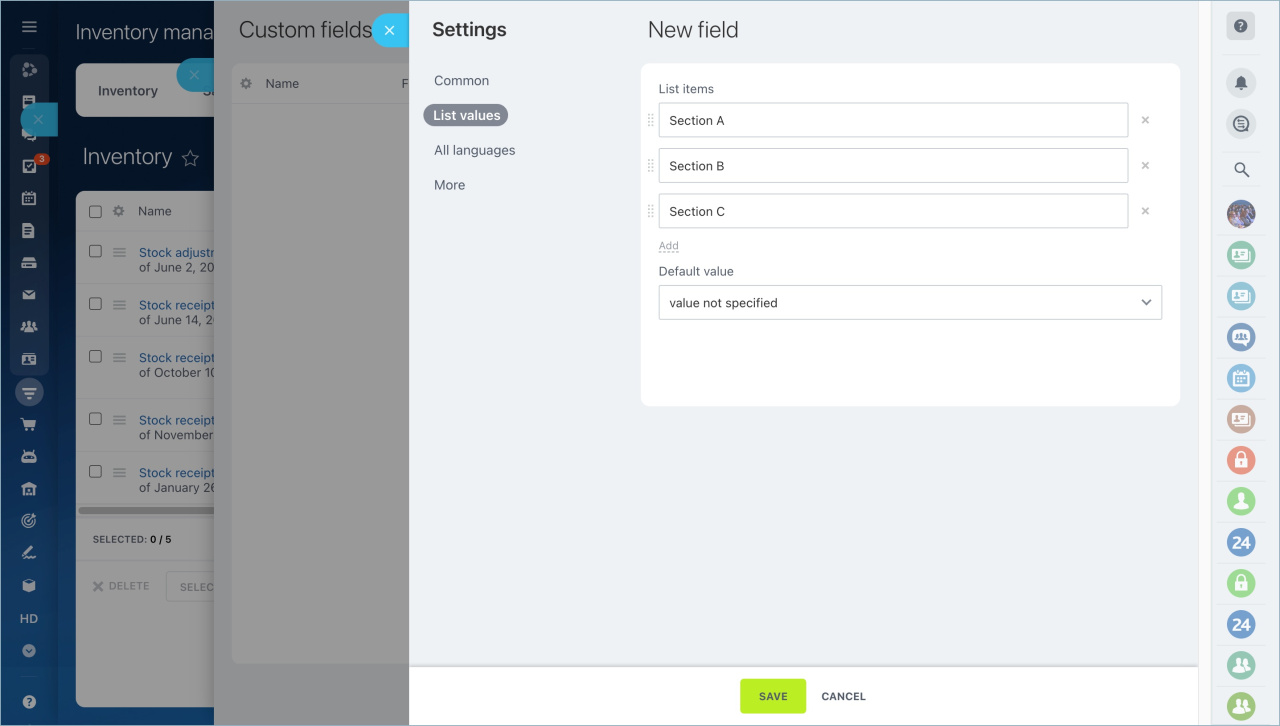
Specify warehouse sections in which goods are located in the List Values tab. We have only three sections in our example, but there can be more sections. Click Add to specify the desired quantity.
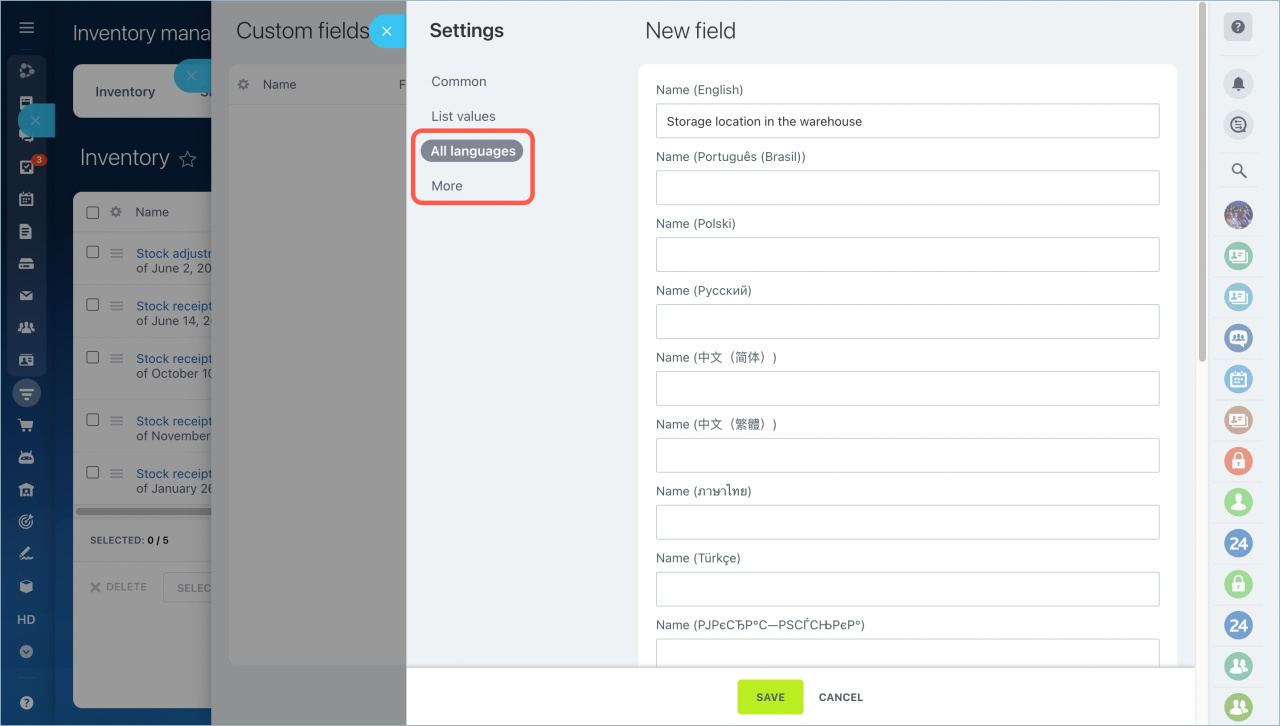
You can specify additional parameters in the All Languages and More tabs: field names in other languages, default field values, number of lines in the field, etc.
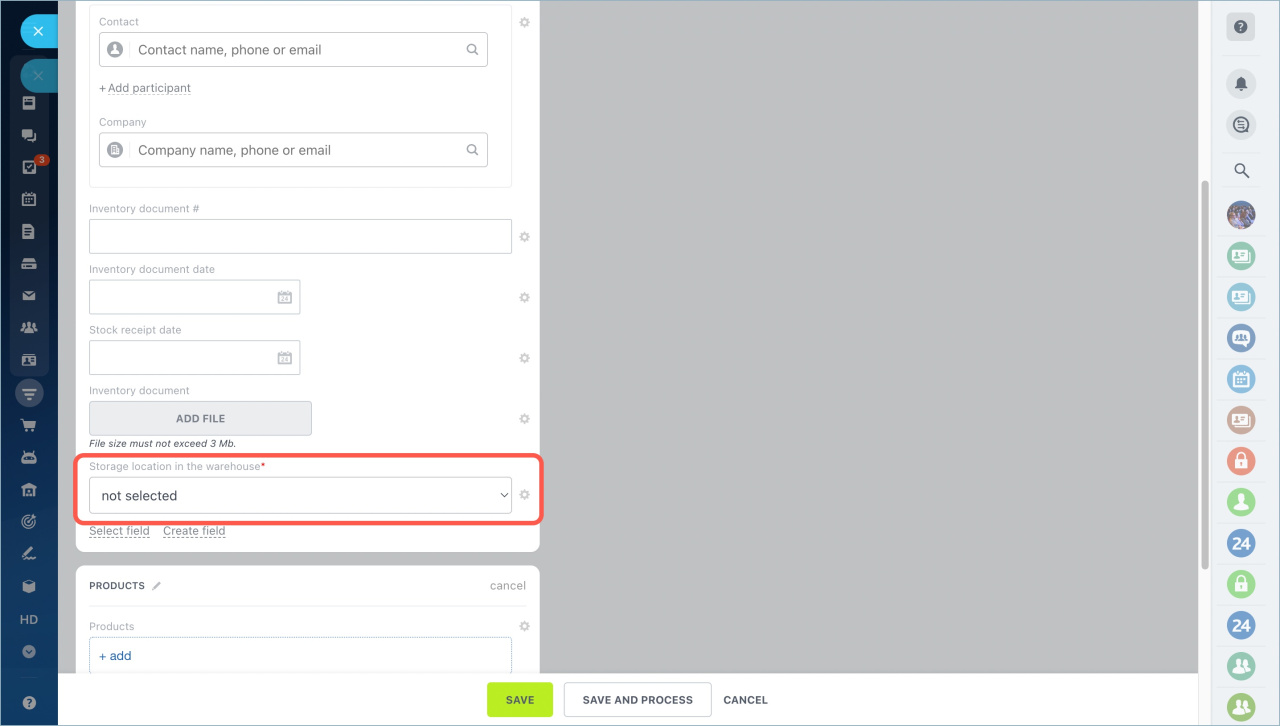
When you save the settings, the field will appear in all receipt documents and employees will be able to specify where the item is stored.
Edit and delete custom fields
Open the warehouse document section - Settings - Custom fields settings.
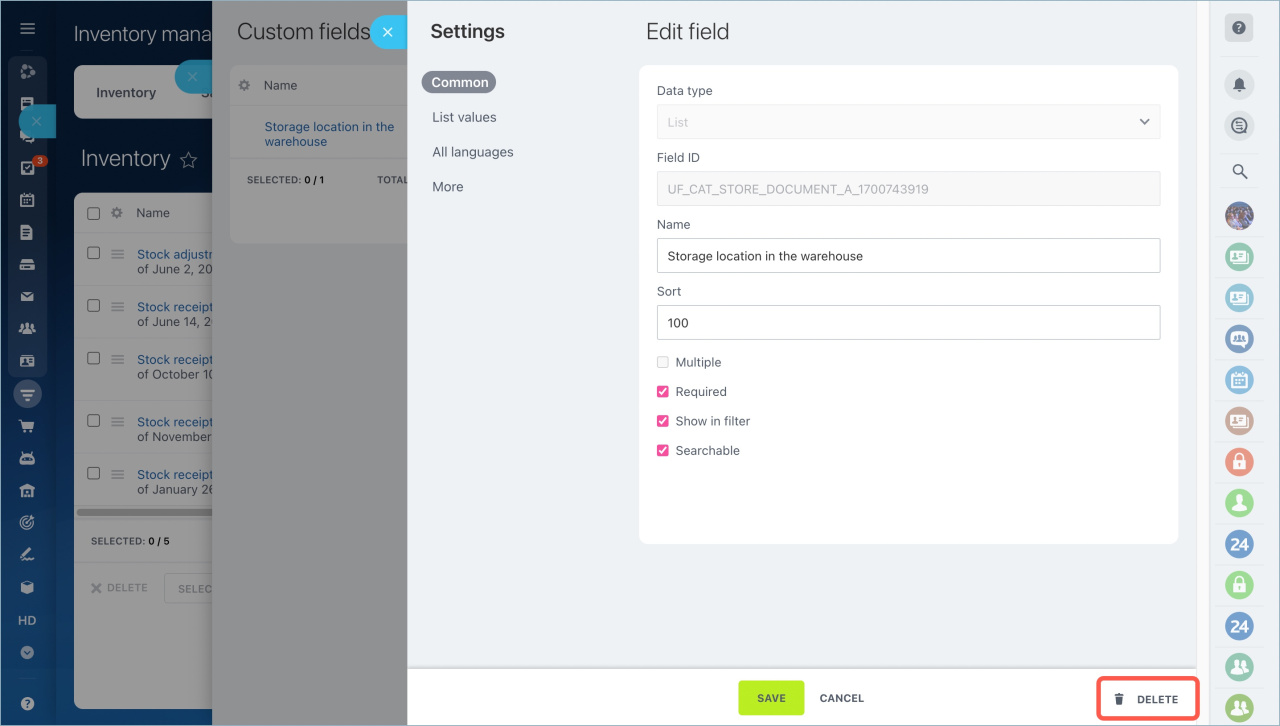
To change the field settings, click on its name. Please note that you will not be able to change the data type and field ID. If you need to delete a field, click the button in the lower right corner.
In brief:
- We have added the ability to create custom fields in the inventory management documents of stock receipt, stock adjustment, transfers and write-offs.The fields will help you save additional information in the document.
- You can create fields in two ways: in the document form and in its section.
- Each field is linked to a specific document type and it is not available from other types. If you have created a field for write-off documents, it will not be available for other document types.
- You can delete or edit fields in the inventory management settings section.
Read also:

