In Bitrix24, you can always add custom CSS to your website to customize the look of the elements.
Change element color
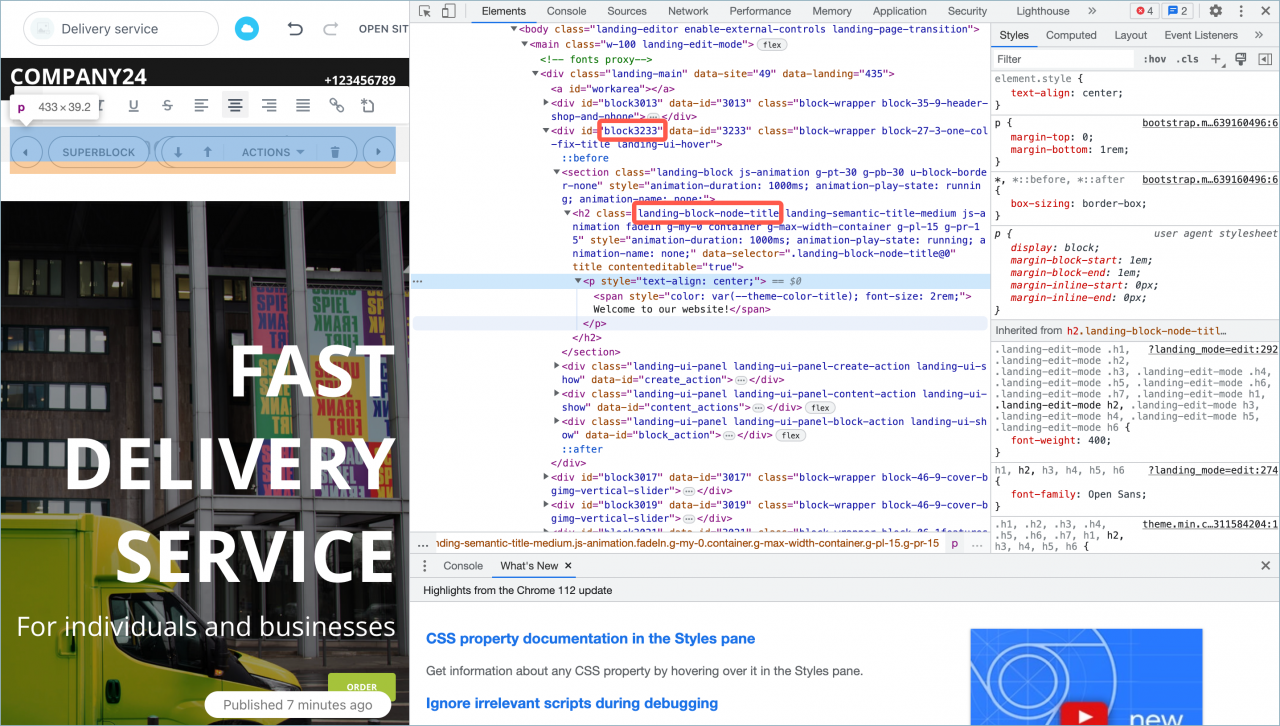
Select a block you need to customize, right-click on it and select Inspect.
To change the font color, you need to use the block ID and class.
 #block3233 .landing-block-node-title

 {

 color: #FF6347 ;

 }
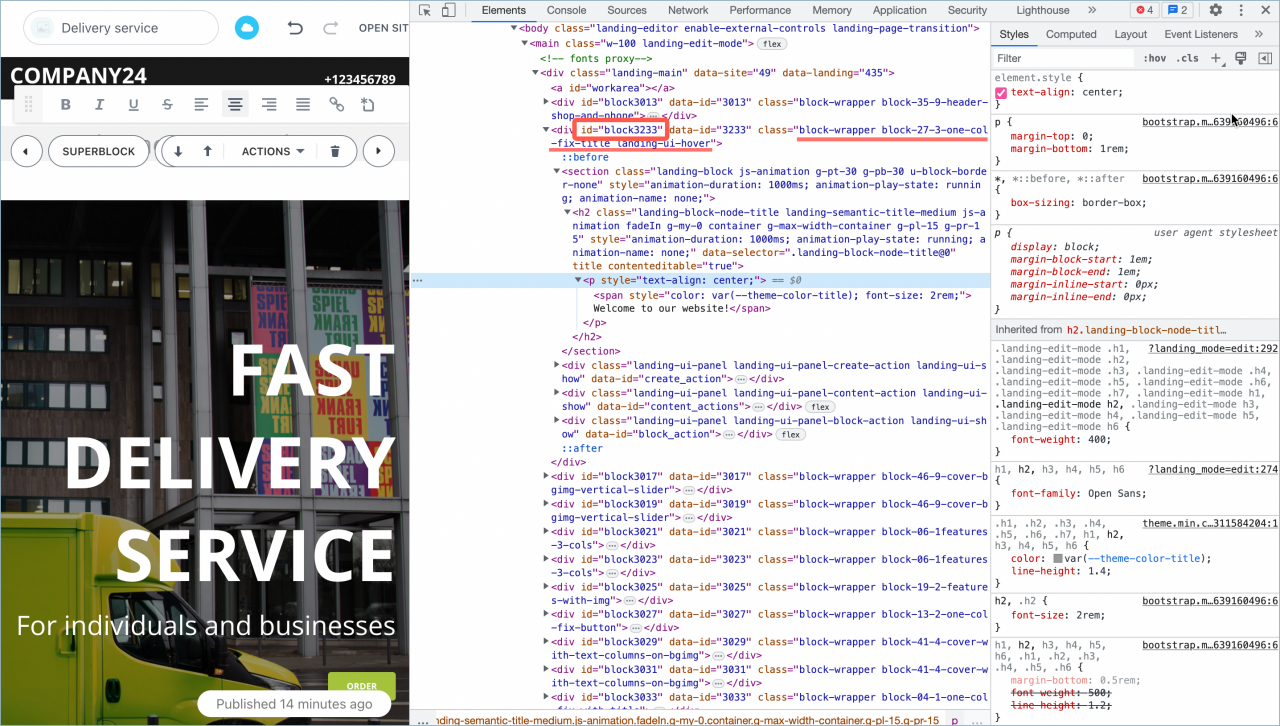
To change the background color, you need to select this block, use block ID and class of the whole block. Specify that you need the section tag.
 #block3233.block-27-3-one-col-fix-title section

 {

 background-color: #00FFFF;

 }
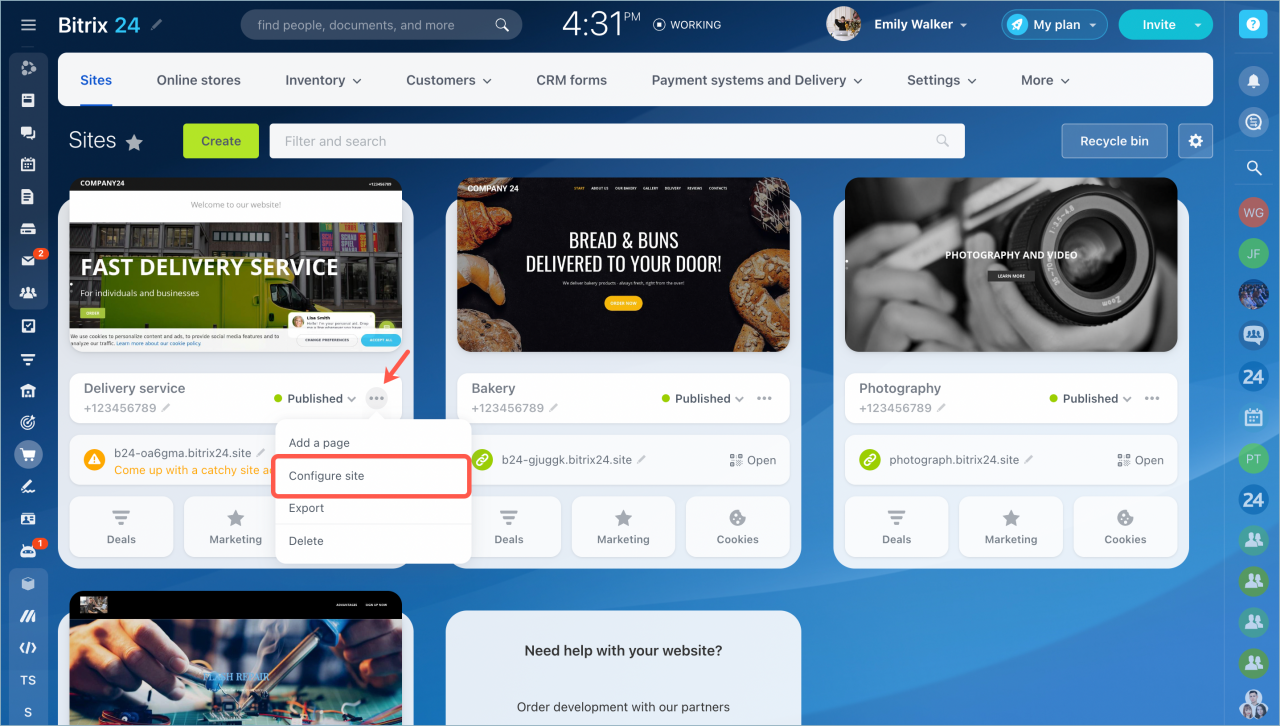
Select the Configure site option in the action menu.
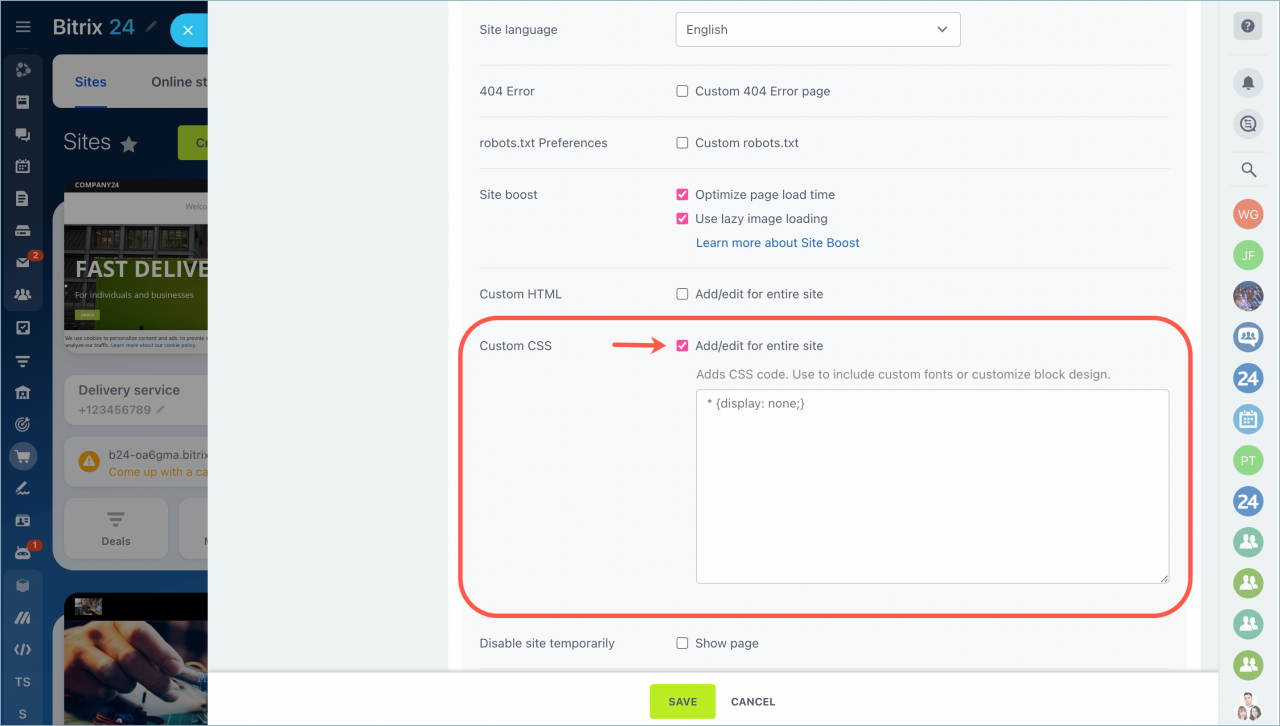
Find the Custom CSS section on the Site settings page.
Enable this option and paste the codes to the text box. Click Save.
You do not need to publish your website again, just refresh the page. Font color and background color will be changed in the block.
Hiding block elements
If you want to hide some elements of the block, you can also use custom CSS.
To do that, you need to get the block class.
Then add the code to the CSS code text box on the site settings page.
.landing-block-node-price-button

 {

 display: none;

 }
Save changes and refresh the page.


