CRM forms in Bitrix24 help collect requests, contacts, and feedback. Clients schedule appointments, book services, and place orders on the site, with data from the form automatically saved in the CRM.
In this article:
Create a CRM form
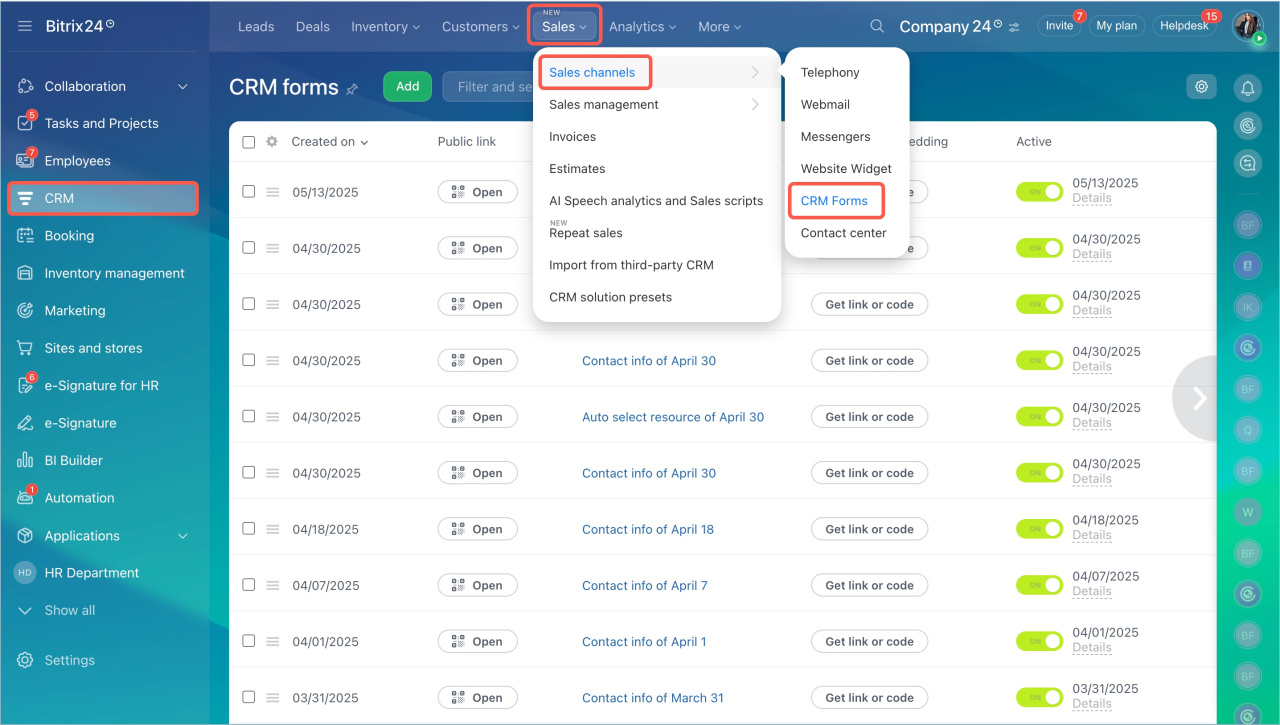
- Go to the CRM > Sales > Sales channels > CRM forms.
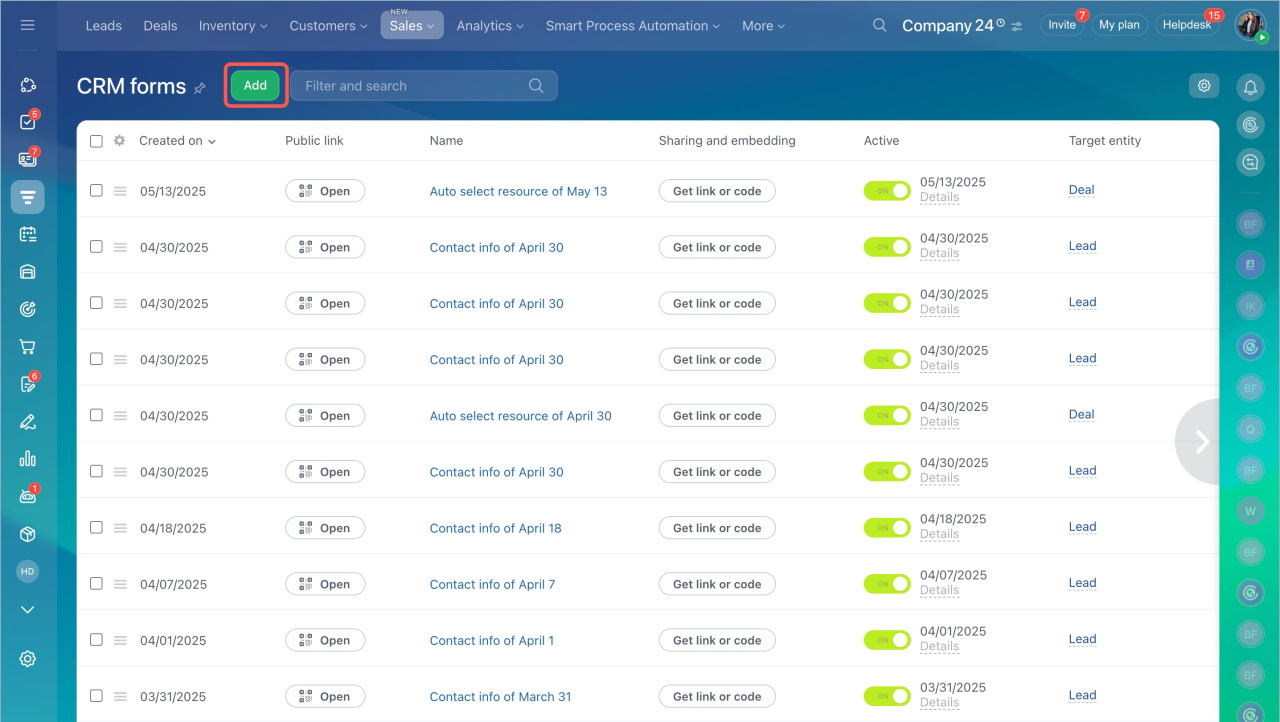
- Click Add.
- Choose a CRM form template for a specific task.
- Click Close editor to return to the list of CRM forms.
Configure a CRM form
Let's consider form settings using the Custom preferences scenario as an example.
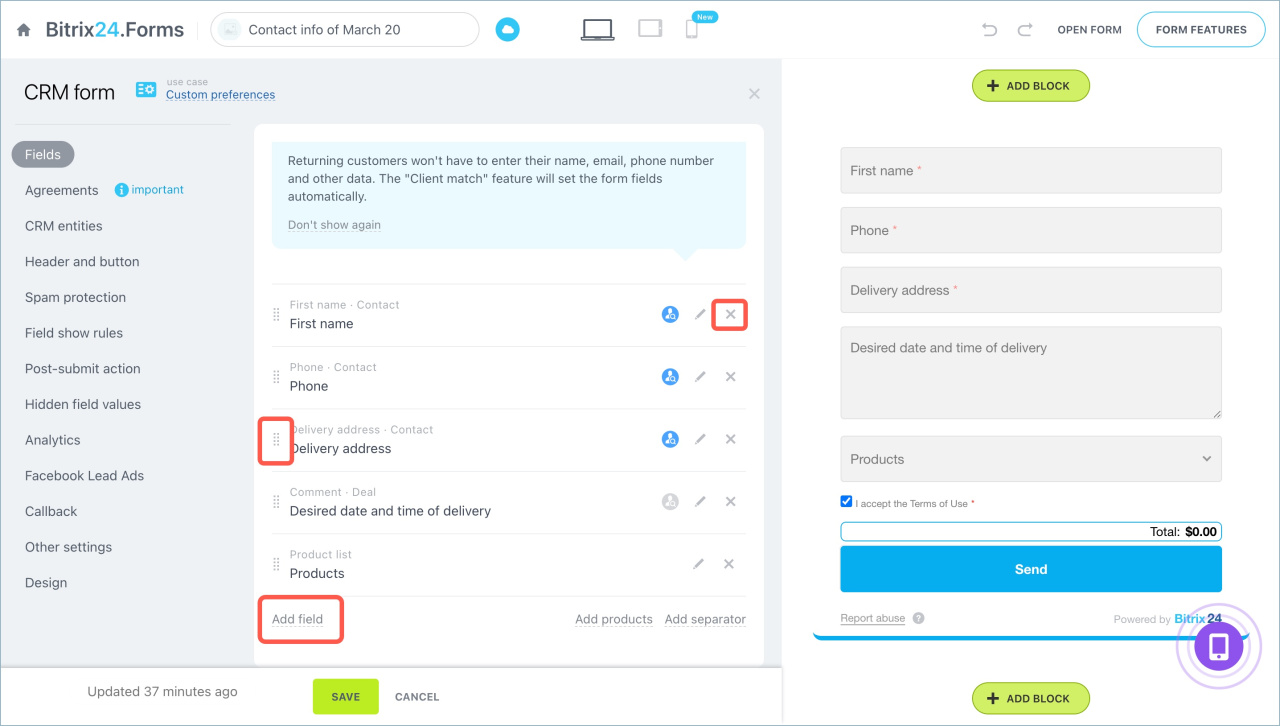
When you select a template, the CRM form editing page opens. The list of settings is on the left. The form preview is on the right. Click the icons at the top of the screen to check how the form displays on different devices.
Fields. Specify the data the user will enter, like name, email, and phone number. Each scenario has a preset fields, but you can edit them.
- Click the cross to remove a field from the CRM form.
- Drag the icon next to the field name to change the field order.
- Select Add field to include additional fields.
- Choose which CRM item to add a field from, like a contact or a company.
- Check the desired fields and click Add.
To edit a field, click the pencil icon and set the parameters:
-
Name: If the form has several similar fields, give them clear names. For example, Legal address and Delivery address.
-
Required field: Customers cannot submit the form until this field is completed.
-
Multiple: Customers can enter several values in this field. For example, they can add two phone numbers or select multiple products from a list.
-
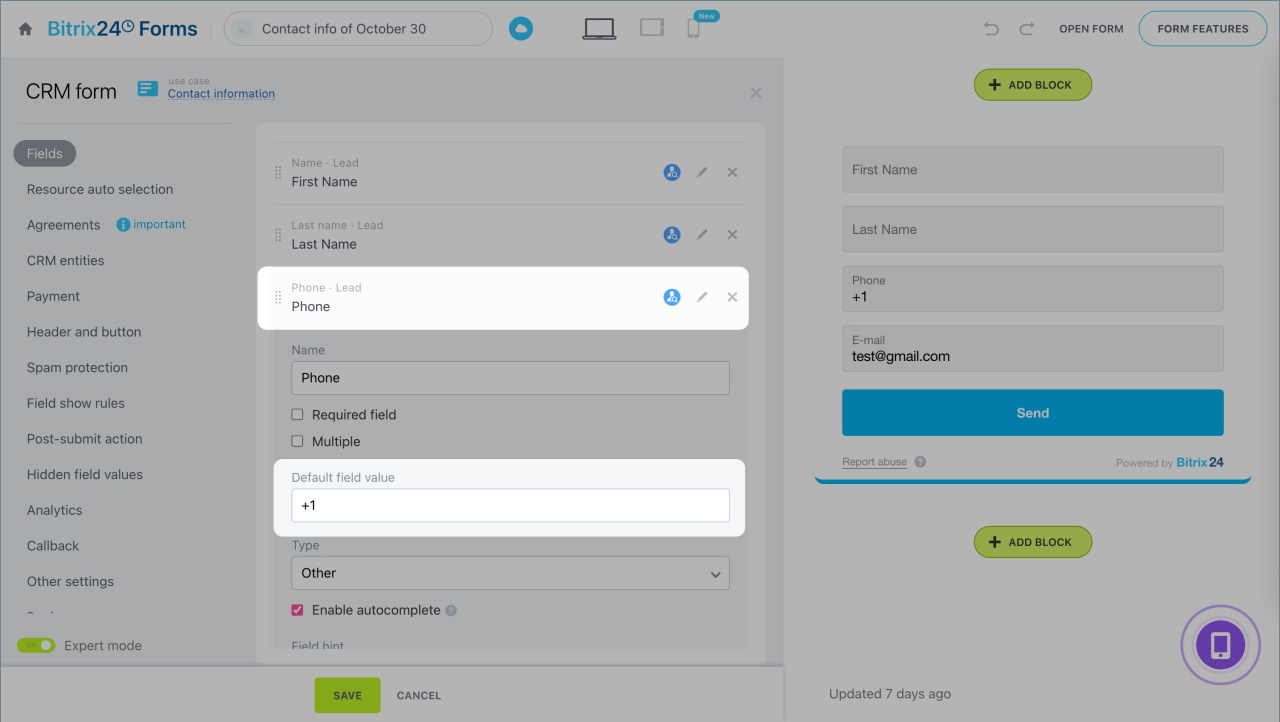
Default field value: Data that is automatically pre-filled in the form. Customers can change it manually if needed. For example, in the Phone field, you can set a country code to make it easier for customers to enter their number correctly. The system remembers the last code entered and will suggest it when creating new forms.
-
Enable autocomplete: The field is filled with the most recently saved data from the browser.
Autocomplete fields in CRM forms -
Field hint: A short note to guide the customer. For example, you can mention that a valid email address is required for communication.
-
Enable hint on focus: Choose whether the hint is always visible or only appears when the customer hovers over the field.
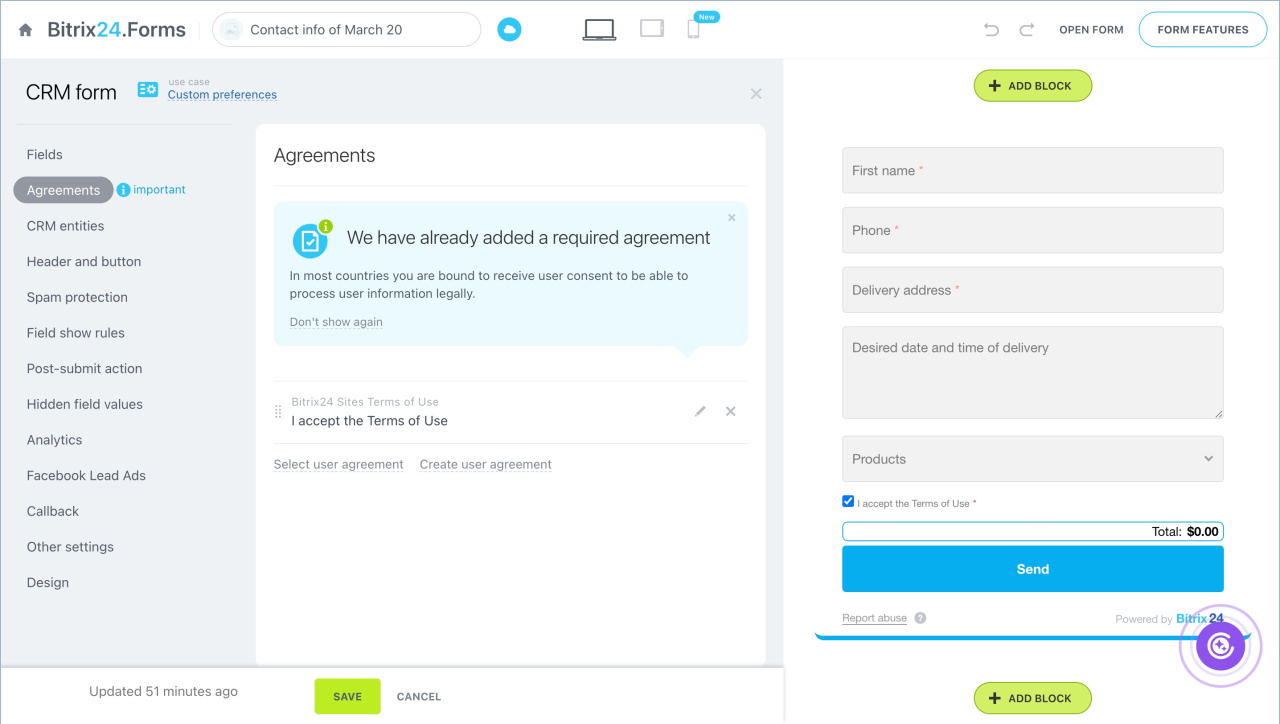
Agreements. Choose a ready-made agreement or create a new one.
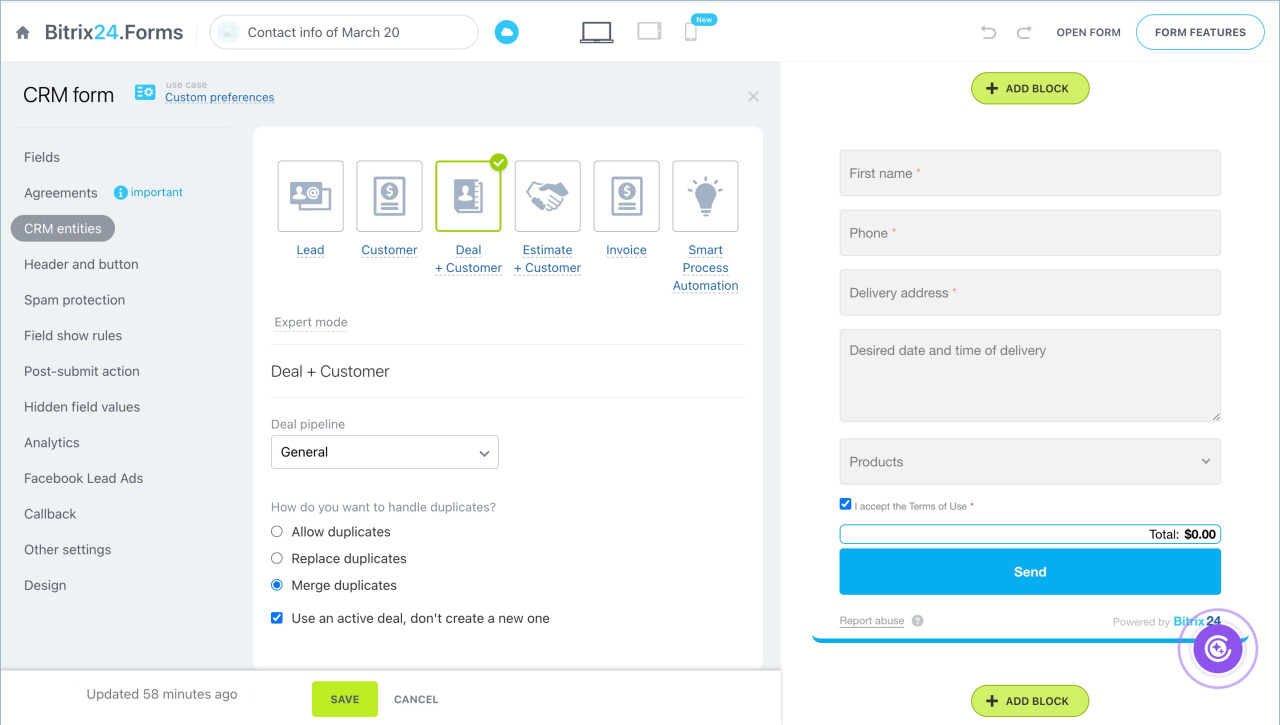
CRM entities. Select which items will appear in the CRM when a customer fills out the form.
To set duplicate processing rules, click Expert mode.
If a form creates a lead but includes fields from a contact, the data will be saved in the contact form. At the same time, a duplicate lead linked to this contact will be created in the CRM. To ensure the form data is saved in the lead, use only lead form fields.
If a form creates a deal, select the pipeline and specify how to handle duplicate contacts and companies. A record is considered a duplicate if any two of the following three parameters match: full name or company name, phone number, or email.
Allow duplicates: A new contact or company is always created after the form is submitted.
Replace duplicates: If the data in the item form and the CRM form don’t match, the phone number and email are added as additional entries, while other fields are updated with the information from the submitted form. For example, if the phone number and email in the CRM form match the contact form but the full name is different, the name will be updated with the new one.
Merge duplicates: If the data in the item form and the CRM form don’t match, the phone number and email are added as additional entries, empty fields are filled with information from the submitted form, and completed fields remain unchanged. For example, if the phone number and email in the CRM form match the contact form but the full name is different, the name will stay the same, and the form submission details will appear in the timeline.
By default, a new deal is created whenever a form is submitted. To use the current deal instead of creating a new one, enable the Use an active deal, don't create a new one option. This setting is available for both the Replace duplicates and Merge duplicates options. Information from the submitted form will be added to the most recently created active deal.
For a smart process, a new item will be created each time the form is filled out.
Header and button. Make the form clearer and more appealing to the customer: create a title and a subtitle, and change the text on the submit button.
Use personalization tags—special symbols that insert client data into the subtitle text when they open the form via a personal link, like the customer's name or a company name.
Difference between the form header, the form name and the page name
Personalization tags in CRM forms
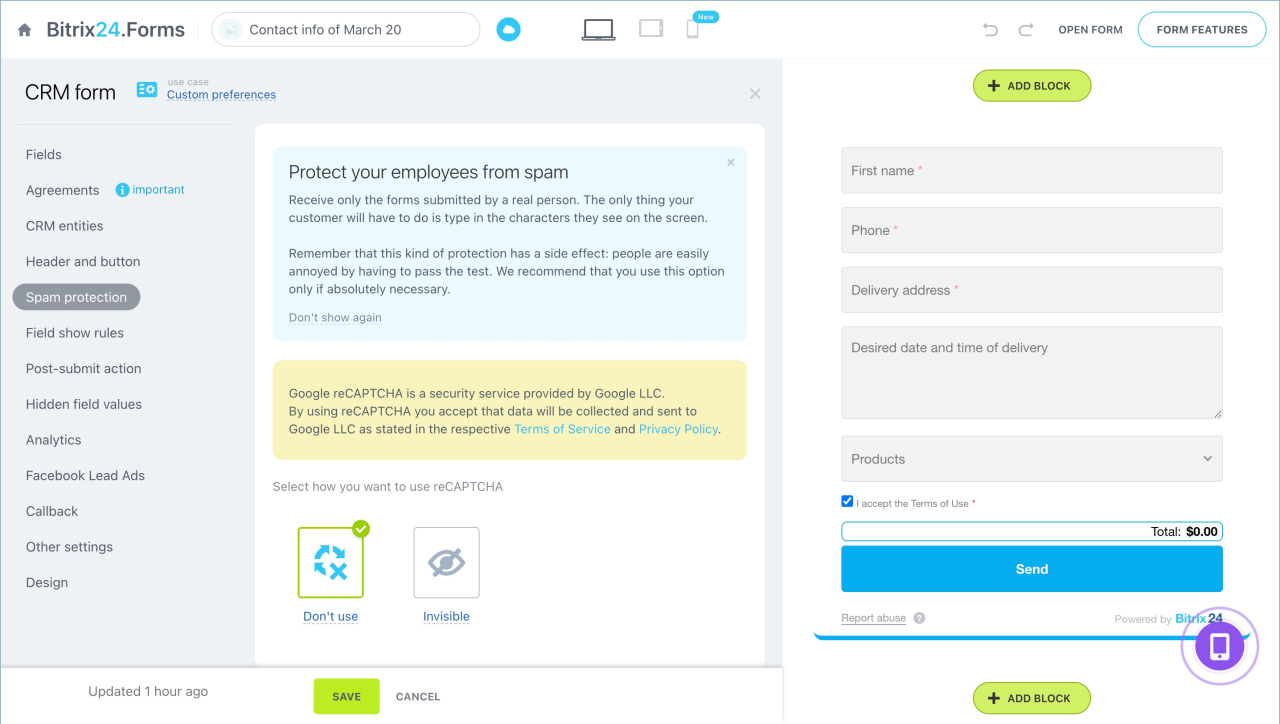
Spam protection. The reCAPTCHA V2 module verifies that a human, not a bot, is filling out the form and blocks suspicious submissions.
Select the reCAPTCHA V2 usage option and, if necessary, specify your keys in the settings.
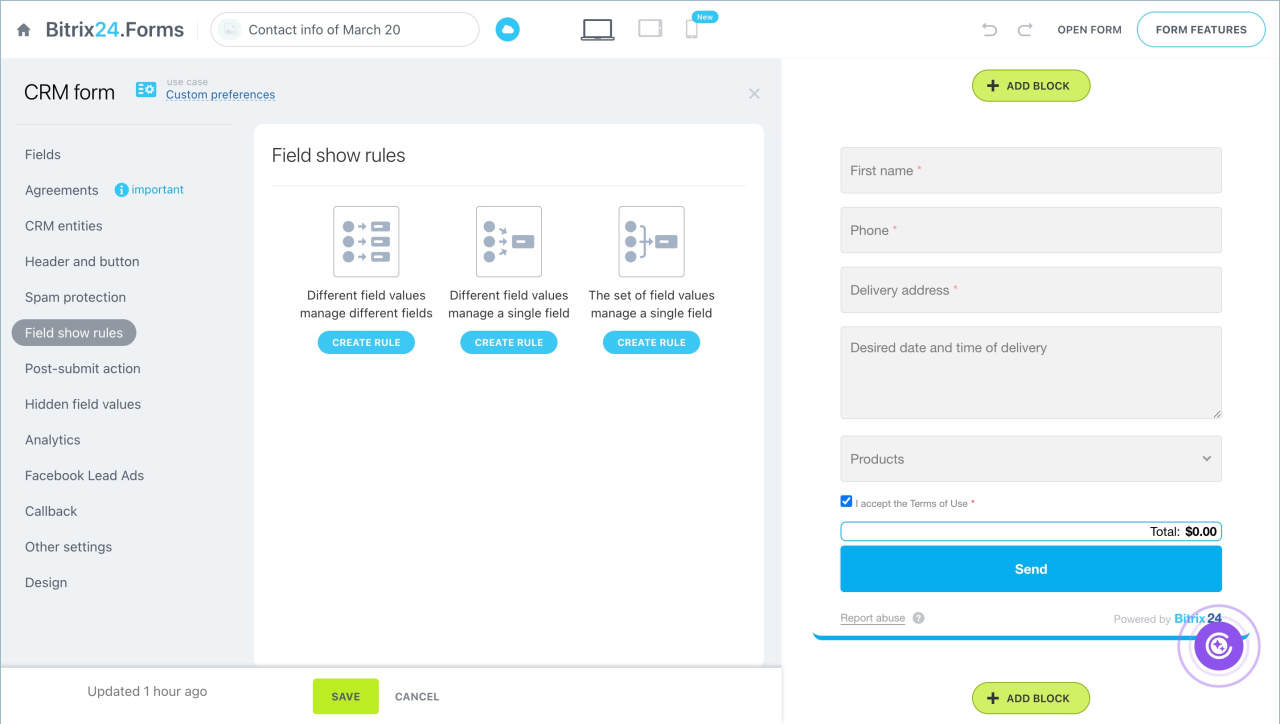
Field show rules. You can hide or show form fields based on client responses.
Configure field show rules in CRM forms
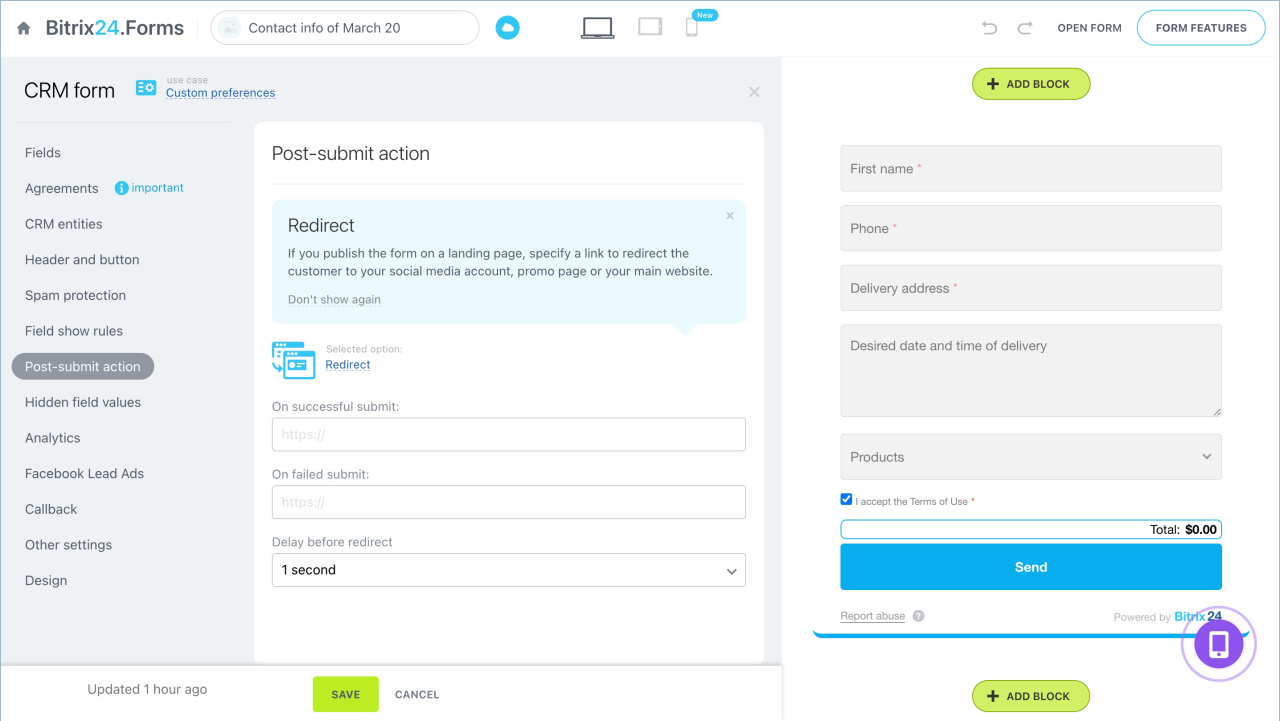
Post-submit action. Choose what happens after the CRM form is submitted. Three options are available.
Message. Use this scenario to thank the client or explain order processing rules. Set up messages for successful and unsuccessful submissions. To view or edit the text, click the corresponding buttons.
Redirect. Set up a redirect to another site if you need to direct the client to a social media group or a page with delivery information. Specify the redirect links and the pause time.
Submit again. Use this option if several people fill out the form. When a customer submits the form, the data is automatically cleared from the fields. The next customer can fill out the form immediately without reloading the page.
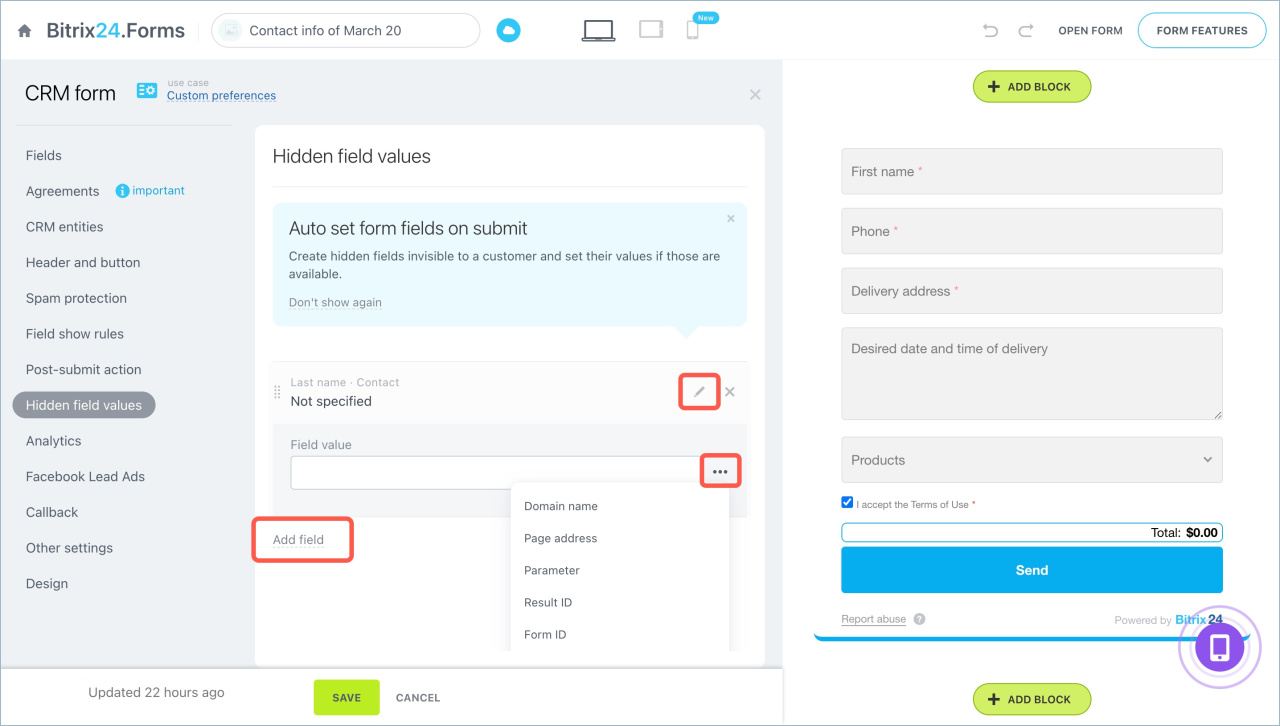
Hidden field values. This setting allows fields to be automatically filled with data not visible to the user. This is necessary to transmit technical information to the CRM, like traffic source.
Default field values in CRM forms
Analytics. Integrate the CRM form with Google Analytics to track its effectiveness: number of submissions, conversions, and other metrics.
Connect Google Analytics to Bitrix24
Facebook Lead Ads. Connect your Facebook Lead Ads forms to Bitrix24 in a few steps. When your client fills out a form on Facebook, the data will automatically go in your CRM.
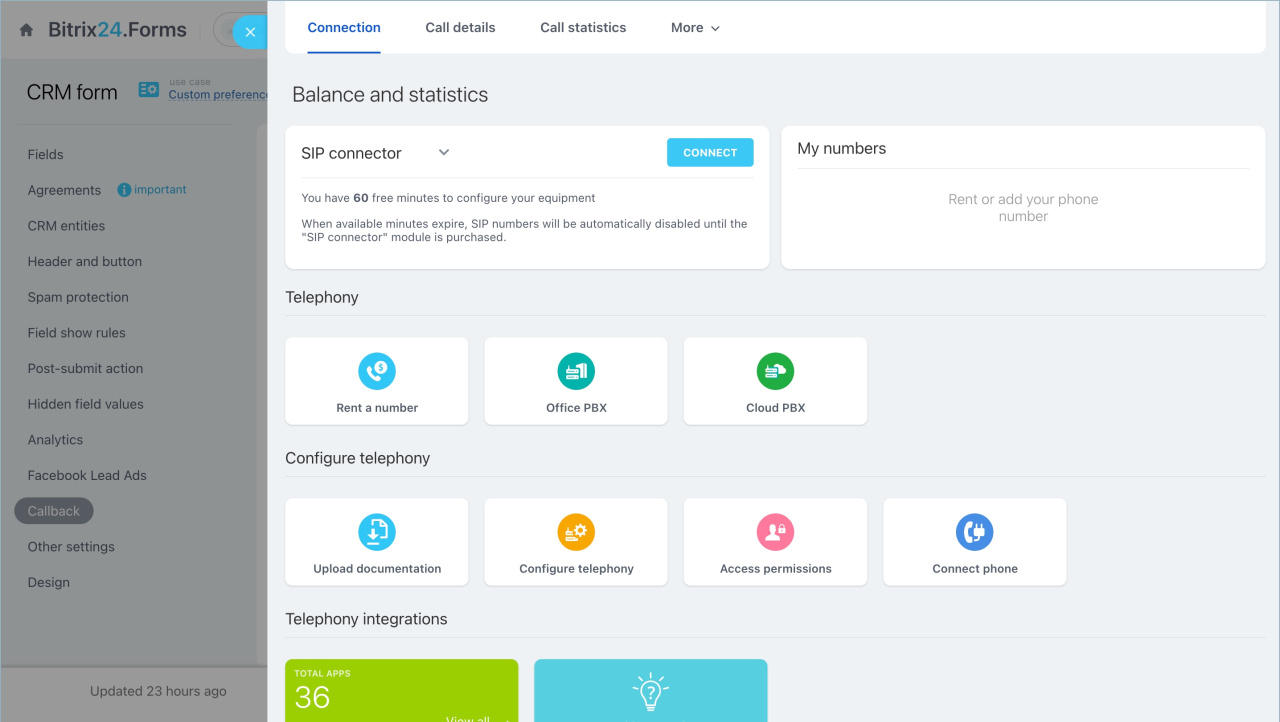
Callback. This option requires Telephony connection in Bitrix24.
Telephony connection options overview
The client enters their phone number in the form. The manager receives a call with a recorded message, like "New request received." Then The manager is automatically connected to the client.
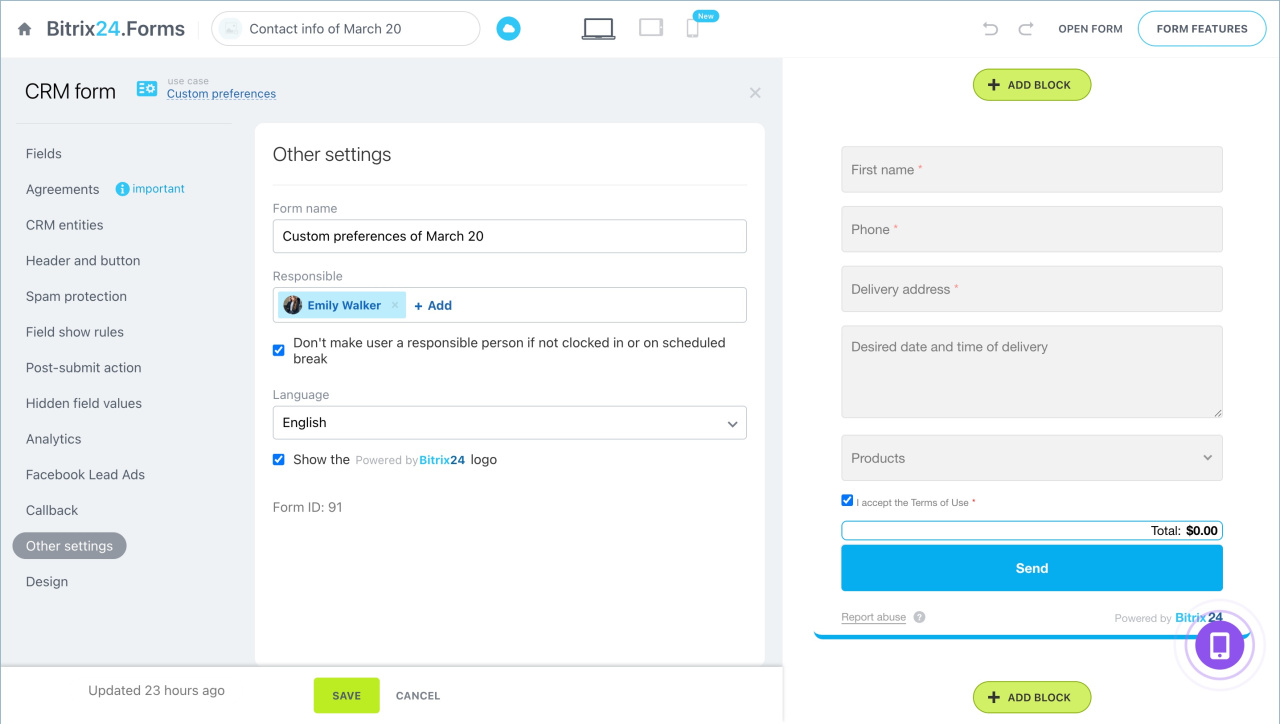
Other settings
- Form name. By default, it consists of the form scenario and creation date.
- Responsible. Select employees from the list. Items created in the CRM after form submission are distributed among the responsible people in turn. If quick customer response is important, check Don't make user a responsible person if not clocked in or on scheduled break. If all responsible parties are unavailable or your plan does not include time tracking, requests will be distributed in turn.
- Language. Select the form language to adapt it for foreign customers.
- "Powered by Bitrix24" logo. You can enable or disable this option.
Design. Change the appearance of the CRM form: theme, font, element colors, etc.
CRM form design
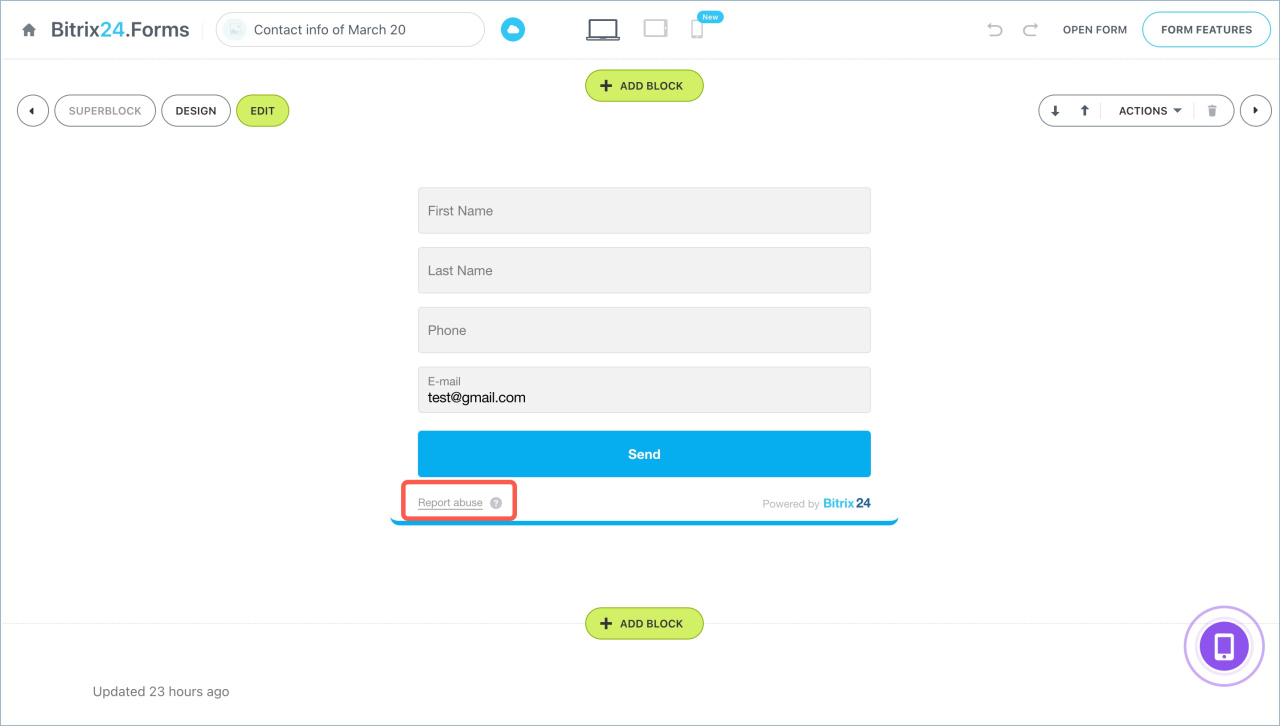
Check the CRM form before publishing: Bitrix24 is not responsible for its content. If we receive mass violation reports, we will review complaints and take action.
Report a violation in CRM forms
Fix errors when a CRM form isn’t working
If you see the message "Unfortunately, the message has not been sent, please try again later" when submitting a form, you can usually fix it by updating your form.
- In your browser’s address bar, enter:
https://your_Bitrix24_address/crm/webform/?rebuildAll=y. - Replace
your_Bitrix24_addresswith your actual Bitrix24 URL. For example,https://for_example.bitrix24.com/crm/webform/?rebuildAll=y. - Press Enter.
Your forms will reload, and the issue should be resolved. All CRM form settings will stay the same.
In brief
- CRM forms in Bitrix24 help collect requests, contacts, and feedback. When a client fills out a form, the data is automatically saved in the CRM.
- To create a form, go to the CRM section > Sales > Sales channels > CRM forms. The scenario list includes templates for various tasks.
- Forms can be edited: add fields, customize design, set post-submission actions.
- The Callback scenario works only with Telephony connected to Bitrix24.
- CRM forms can be integrated with third-party services, like Google reCAPTCHA and Google Analytics.
- If your CRM form isn’t working, update it to resolve it. In your browser’s address bar, enter
https://your_Bitrix24_address/crm/webform/?rebuildAll=yand press Enter.

